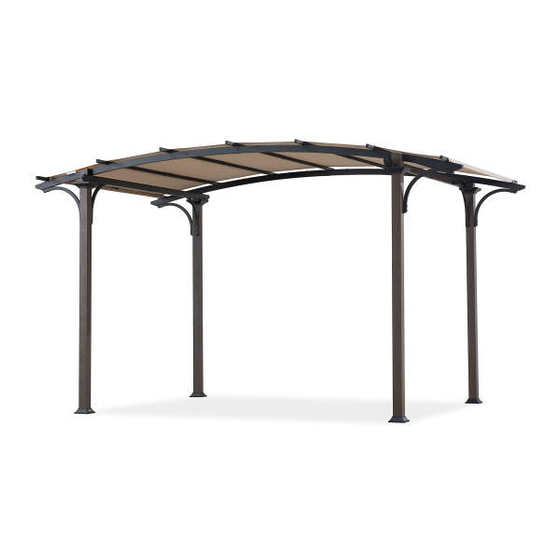
Summary of Contents for Broyhill A106004504
- Page 1 ASSEMBLY INSTRUCTIONS ITEM#: A106004504 SKU# 810490384 MADISON PERGOLA Need help? We are here for you! 1(866)578.6569 24/7 ・ Toll Free...
- Page 2 GENERAL BEST PRACTICES FOR ASSEMBLY: • Please read and understand this entire manual before attempting to assemble or install the product. • Before beginning assembly of product, make sure all parts are present. Compare parts with package contents list and hardware contents list.
- Page 3 EXPLODED DRAWING 3/18...
- Page 4 PARTS LIST Label Part Number Description Part Image Post 1 P000200422 P000200423 Post 2 Base Cover P006100092 P000100152 Base Post P005600124 Decoration P000400527 Arc Beam1 P000400528 Arc Beam2 Short side P000400961 beam Long side P000400962 beam Arc Beam P000500614 Connector Beam P000500615 Connector...
- Page 5 HARDWARE LIST Label Part Number Description Part Image H010030030 Bolt M6*15 Flat washer H050030001 H010030036 Bolt M6*45 Stake H070010003 Φ8 * 180 H090030002 Wrench M6 5/18...
- Page 6 HELPFUL HINTS • Tools needed and not included: • How many people needed for the installation work Provided in hardware pack How many people needed for the installation work 6/18...
- Page 7 STEP 1 Assembled View: Attach the Base Cover(C)and Base(D) to the Post(A1,A2) by Bolt(AA) , Flat Washer(BB) and Wrench(Z1) 7/18...
- Page 8 STEP 2 Assembled View: Attach the Post Decoration(E) to Post(A1, A2) by Bolt(AA), Flat Washer(BB) and Wrench(Z1) 8/18...
- Page 9 STEP 3 Assembled View: Attach the Short Side Beam(H) through Beam Connector(K) to Long Side Beam by Bolt(AA), Flat Washer(BB) and Wrench(Z1) 9/18...
- Page 10 STEP 4 Assembled View: Attach the assemblyed Beam(H,K,I) to Post(A1, Bolt (AA,EE) Wrench(Z1) 10/18...
- Page 11 STEP 5 Assembled View: Attach the Arc Beam1(F) through Arc Beam Connector(J) to Arc Beam2(G) by Bolt(AA), Flat Washer(BB) and Wrench(Z1) 11/18...
- Page 12 STEP 6 Assembled View: Attach the assembled(F,J,G) to the Post(A1, A2) by Bolt(EE), Flat Washer(BB) and Wrench(Z1) 12/18...
- Page 13 STEP 7 Assembled View: Attach the Arc Support Bar(P) to Post(A1, A2) and Arc Beam(F,G) by Bolt(EE), Flat Washer(BB) and Wrench(Z1) 13/18...
- Page 14 STEP 8 Assembled View: Attach the Short Side Arc Support Bar(Q) to the Post(A1, A2) and Side Beam(H, I) by Bolt(EE), Flat Washer(BB) and Wrench(Z1) 14/18...
- Page 15 STEP 9 Assembled View: Attach the Middle Small Beam1(N) to the Middle Small Beam2(O) by Bolt(AA), Flat Washer(BB) and Wrench(Z1) 15/18...
- Page 16 STEP 10 Assembled View: Attach the Side Small Beam1(L) and Side Small Beam2(M) by Bolt(AA), Flat Washer(BB) and Wrench(Z1) 16/18...
- Page 17 STEP 11 Assembled View: Attach the assembled Beam(N,O,L,M), Canopy and Arc Beam(F,G) by Bolt(AA,EE), Flat Washer(BB) and Wrench(Z1), then sticked the Hoop and Loop. 17/18...
- Page 18 STEP 12 Assembled View: First, pulling the Base Cover(C), then, fix the Netting through Stake(GG) and Base(D) to the ground 18/18...


Need help?
Do you have a question about the A106004504 and is the answer not in the manual?
Questions and answers