Subscribe to Our Youtube Channel
Summary of Contents for NRS Healthcare Seahorse
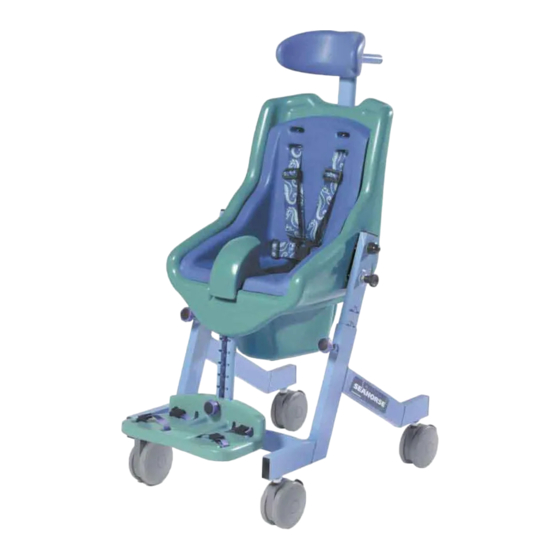
- Page 1 SEAHORSE SEAHORSE s a n i c h a i r TOILET AND SHOWER CHAIR OPERATING AND ASSEMBLY INSTRUCTIONS 75220_12pp-Leaflet.indd 1 15/05/2012 12:17...
-
Page 2: Table Of Contents
SEAHORSE SEAHORSE s a n i c h a i r TOILET AND SHOWER CHAIR CONTENTS PACK CONTENTS Page 2 INTRODUCTION Page 3 ADJUSTING THE SEAT HEIGHT Page 3 ASSEMBLING AND ADJUSTING THE FOOTREST Page 4 FITTING THE POTTY Page 4... -
Page 3: Pack Contents
PACK CONTENTS Your Seahorse pack should contain the following parts: MAIN COMPONENTS Seat assembly Frame Pommel Potty Foot rest 4 point harness SMALL COMPONENTS Locking handwheels Footrest handwheel Foot and ankle strap T-nut Washer If you have purchased the optional headrest... -
Page 4: Introduction
INTRODUCTION The Seahorse range consists of two separate seat and frame sizes. Within each size option it is possible to specify two sizes of soft liner, allowing you to tailor the product to your child’s needs. As your child grows, the liner can be changed to increase the size of the seat without the need to re-invest in a completely new toileting and showering chair. -
Page 5: Assembling And Adjusting The Footrest
4 ASSEMBLING AND ADJUSTING THE FOOTREST • Place a washer onto the footrest threaded hand wheel H and put the hand wheel screw through the open hole on the front of the footrest. • Wind a T nut J onto the screw (ensure that it is in the correct orientation). •... -
Page 6: Fitting The Pommel
6 FITTING THE POMMEL • Hook the rear flange at the back of the pommel onto the front of the seat aperture. • Hinge the pommel downwards so that the front flange of the pommel clips over the ridged detail on the front of the seat. -
Page 7: Adjusting The Seat Angle
9 ADJUSTING THE SEAT ANGLE The Seahorse has been designed to provide angular adjustment of the seat allowing the Carer to orientate the child in a convenient position for showering and toileting. UNLOCKING THE SEAT • A locking hand wheel is located on the right adjustment leg of the Seahorse. -
Page 8: Assembling The Headrest
10 ASSEMBLING THE HEADREST If you have purchased the optional headrest this can be assembled to the seat in the following manner: • Place a washer onto threaded hand wheel • Position a T nut N behind the adjustment plate on the back of the seat (ensure that it is in the correct orientation). -
Page 9: Cleaning And Maintenance
Ensure all instructions have been read and understood prior to assembly and use of the product and are kept in a safe place for future reference. Once the Seahorse has been pivoted to the desired angle ensure that the locking hand wheel on the side of the seat is firmly tightened before use. - Page 10 14 PARTS LIST The exploded drawing illustrates all the components that constitute a Sanichair Seahorse. For ordering parts please identify the part number that you require and contact your supplier. FRAMEWORK FOOT REST ASSEMBLY Part No Description Large frame Small frame...
- Page 11 14 SEAT ASSEMBLY 16 17 18 19 75220_12pp-Leaflet.indd 11 15/05/2012 12:17...
- Page 12 NRS HEALTHCARE 04/13 SHERWOOD HOUSE CARTWRIGHT WAY PN4789-2 FOREST BUSINESS PARK BARDON HILL COALVILLE LEICESTERSHIRE LE67 1UB UK Tel: 0845 121 8111 Int’l: +44 (0) 1530 418 378 Fax: 0845 121 8112 Email: customerservice@nrs-uk.co.uk Web: www.nrs-uk.co.uk...


Need help?
Do you have a question about the Seahorse and is the answer not in the manual?
Questions and answers