Advertisement
Advertisement

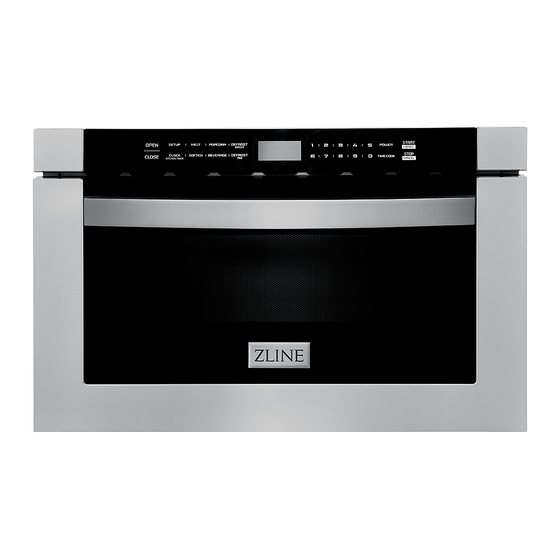
Related Manuals for Zline MWD-1


Summary of Contents for Zline MWD-1
- Page 1 Installation Manual MICROWAVE DRAWER www.zlinekitchen.com...
- Page 2 With an endless selection of features and finishes, our inspiration is your reality. ZLINE is fueled by a passion for innovation; A relentless pursuit of bringing the highest end luxury designs and professional features into everyone’s homes. Because we continually strive to improve our products, we may change specifications and designs without prior notice.
- Page 4 WARRANTY COVERAGE ZLINE Kitchen and Bath microwave parts will be warrantied for two years from the original purchase date for the original purchaser of the product. TERMS This warranty applies only to the original purchaser of the product installed for normal residential use.
-
Page 5: Table Of Contents
TABLE OF CONTENTS SAFETY INSTRUCTIONS BEFORE INSTALLATION INSTALLATION TRIM KIT INSTALLATION 24” OPERATION 30” OPERATION TROUBLESHOOTING... -
Page 6: Safety Instructions
SAFETY INSTRUCTIONS WARNING • Installation and service must be performed by a qualified installer. The oven should not be adjusted or repaired by anyone except properly qualified service personnel. • IMPORTANT: Save this installation manual for local electrical inspector’s use. •... - Page 7 SAFETY INSTRUCTIONS • Use this appliance only for its intended use as described in the manual. Do not use corrosive chemicals or vapors in this appliance. This type of oven is specifically designed to heat, cook, or dry food. • As with any appliance, close supervision is necessary when used by children.
- Page 8 SAFETY INSTRUCTIONS • To reduce the risk of fire in the oven cavity: • Do not overcook food. Carefully attend appliance when paper, plastic, or other combustible materials are placed inside the oven to facilitate cooking. • Remove wire twist-ties from paper or plastic bag before placing bag in oven.
- Page 9 SAFETY INSTRUCTIONS • To reduce the risk of injury to persons: • Do not overheat liquid. • Stir the liquid before and halfway through heating it. • Do not use straight sided containers with narrow necks. • After heating, allow the container to stand in the microwave oven for a short time before removing the container.
- Page 10 BEFORE INSTALLATION Remove the oven and all materials from the carton and oven cavity. Your oven comes with the following accessories: AFTER Touch pad 24” Microwaves (MWD-1 and MWD-1-BS) Right Control box mounting plate Handle Cavity Window SETTING UP YOUR OVEN...
- Page 11 BEFORE INSTALLATION Product Specifications 24” 30” Rated Voltage 120V, 60 Hz, 13A 120V, 60 Hz, 13A Rated Input Power 1500W 1500W Rated Output Power 1000W 1000W Oven Capacity 1.2 Cu. Ft. 1.2 Cu. Ft. External Dimensions 23 1/2”W x 14 7/8”H x 23 5/8”D 29 7/8”W x 15 15/16”H x 24 3/16”D Internal Dimensions 16”W x 7”H x 16 D”...
-
Page 12: Before Installation
BEFORE INSTALLATION WARNING ELECTRICAL CONNECTION • This appliance must be grounded. In the event of an electrical short circuit, grounding reduces the risk of electric shock by providing an escape wire for the electric current. This appliance is equipped with a cord having a grounding wire with a grounding plug. - Page 13 If there is any damage, do not operate the microwave drawer and contact your dealer or ZLINE. IMPORTANT NOTES TO THE INSTALLER Read the entire installation portion of the manual before installing the microwave drawer.
-
Page 14: Installation
• The power cord access hole inside the cabinet should have a minimum diameter of 1 1/2” and be free of all sharp edges. ALWAYS allow for sufficient power cord length to the electrical outlet in order to prevent tension. 24” Microwaves (MWD-1 and MWD-1-BS) 30” Microwaves... - Page 15 INSTALLATION 24” Microwaves 30” Microwaves...
- Page 16 INSTALLATION ELECTRICAL OUTLET AND ANTI-TIP BLOCK To reduce the risk of tipping the drawer, the anti-tip block must be properly located 14 13/16” above the floor on which the microwave drawer will sit. The 6” anti-tip block must be provided by the installer. The anti-tip block prevents serious injury that might result from spilled hot liquids.
- Page 17 Figure 4 DRAWER INSTALL ATION Figure 4 24” Microwaves (MWD-1 & MWD-1-BS) Mounting Flange 1. Place the drawer adjacent to the wall or cabinet opening. Plug the power supply cord into the electrical outlet. Mounting Screws DRAWER INSTALLATION 2.
-
Page 18: Trim Kit Installation
Trim Kit TRIM KIT INSTALLATION • The trim kit is available for purchase as a separate accessory for the MWD-1 in stainless only (TK-MWD). The trim kit is only available for the MWD-1. • The trim kit is included with MWD-TK-30. - Page 19 横梁安装位置 ② Use 1# Screw fixing support beam 使用长螺丝垂直安装 INSTALLATION Trim Kit 三、Install step 安装步骤 Install the support beams using the holes in the front bracket as a guide. Use the ① according to front bracket fixing hole marker the support ②...
- Page 20 INSTALLATION Trim Kit ① Use 2# screws to install the four buckles on the corresponding mounting 3. Use #2 screws to install the four buckles on the corresponding mounting holes holes around the trim kit 使用 2#螺丝将四个卡扣安装在外观框四周对 around the trim kit. 应的安装孔上...
- Page 21 INSTALLATION Trim Kit 5. Push the microwave into the slot in the rear bracket by extending the support beam ① Push the microwave which had install bracket into the slot in the rear bracket by extending the (Figure 1). support beam( picture 1)将预装好的微波炉顺延着支撑横梁推到后支架卡槽内为止(如图一) 6.
- Page 22 INSTALLATION Trim Kit ① Insert the trim kit into the corresponding buckle seat 将 预装好外观框卡进对应卡扣座里 Insert the trim kit into the corresponding buckle seat. Finish...
- Page 23 OPERATION INTERFERENCE • Operation of the microwave oven may cause interference to your radio, TV, or similar equipment. • When there is interference, it may be reduced or eliminated by taking the following measures: • Clean door and sealing surface of the oven. •...
- Page 24 OPERATION Material Usage Browning dish Follow manufacturer instructions. Dinnerware Microwave-safe only. Follow manufacturer’s instructions. Do not use cracked or chipped dishes. Glass jars Always remove lid. Use only to heat food until just warm. Most glass jars are not heat resistant and may break. Oven cooking bags Follow manufacturer instructions.
- Page 25 OPERATION 24” Microwaves Open Setup Auto Menu Defrost Weight Close Clock/Kitchen Timer Defrost Time Number Keys Power 1 1. Start/+30sec. Time Cook . Stop/Cancel POWER ON • When the microwave oven is plugged into an outlet, buzzer sounds once. Screen displays “WELCOME”. Then the oven turns into waiting state. The screen displays “00:00”.
- Page 26 OPERATION 24” Microwaves KITCHEN TIMER • Press “CLOCK/KITCHEN TIMER” button twice, Screen will display 00:00. “FUNCTION” will light. • Press the number buttons to enter the time. The maximum cooking time is 99 minutes 99 seconds. • Press “START/+30SEC.” to confirm the setting. . The time begins to count down. •...
- Page 27 OPERATION 24” Microwaves MICROWAVE COOKING FUNCTION • In waiting state, instant cooking at 100% power level with 30 seconds cooking time can be started by pressing “START/+30SEC”. Each press on the same button will increase cooking time by 30 seconds. •...
- Page 28 OPERATION 24” Microwaves AUTO MENU: POPCORN • Press “POPCORN” button. Screen displays “1.75”. “AUTO MENU” and “OZ” indicators will light. • Continue to press “POPCORN” button, “1.75”, “3” or “3.5” will display in order. • Press “START/+30SEC.” to start cooking. Buzzer sounds once. “OZ” will go out. The cooking time begins to count down.
- Page 29 OPERATION 24” Microwaves AUTO MENU: SOFTEN Press “SOFTEN” button. Screen displays “BUTTER”. “AUTO MENU” indicator will light. • Continue to press “SOFTEN” button, “BUTTER”, “ICE-CRE”, or “CHEESE” will display in order. • Press “START/+30SEC.” to confirm the selection. • Press “SOFTEN” button to select the weight. “OZ” will light except butter menu. •...
- Page 30 OPERATION 24” Microwaves PANEL LOCK • Lock: In waiting state, press “STOP/CANCEL” for 3 seconds, the oven will enter into the panel lock state. Screen will display the current time if the clock has been set. Otherwise, “00:00” will display. •...
- Page 31 OPERATION 30” Microwaves Open Mute Auto Menu Defrost Weight Close Clock/Kitchen Timer Defrost Time Number Keys Time Cook 1 1. Start/+30sec. Power Level . Stop/Cancel POWER ON • When the microwave oven is plugged into an outlet, buzzer sounds once. Then the oven turns into waiting state.
- Page 32 OPERATION 30” Microwaves KITCHEN TIMER • Press “TIMER/CLOCK” button once. “00:00” will display. • Press number keys to set the clock,it should be within 00:01-99:99. • Press “START+30SEC.” to start counting down . • When the kitchen time arrives, buzzer will ring 4 times. The oven turns into waiting state.
- Page 33 OPERATION 30” Microwaves WEIGHT DEFROST FUNCTION: • Press “DEFROST WEIGHT” button. Screen displays the defrost icon. And “0.0 lbs” will light. • Press number buttons to input the weight to be defrosted. The input weight should be between 0.1-6.0 lbs. •...
- Page 34 OPERATION 30” Microwaves SENSOR COOK • In waiting state, press “Sensor Cook” once,”Sc-1” will display. • Press “Sensor Cook” repeatedly or press “1-7” to choose the menu. • Press “START+30SEC.” to start cooking. Potato Sc-1 Chicken Sc-2 Fish Sc-3 Ground meat Sc-4 Fresh veggies Sc-5...
- Page 35 OPERATION 30” Microwaves SOFTEN • In waiting state, press “SOFTEN” once,”1 buTT” will display. • Press “SOFTEN” repeatedly to choose the menu. • Press “1”or “2” to choose the correspond weight. • Press “START+30SEC.” to start cooking. Menu Display Weight 1 buTT 1 (stick) 2 buTT...
- Page 36 OPERATION 30” Microwaves LOCK FUNCTION FOR CHILDREN • Lock: In waiting state, press “STOP/CANCEL” for 3 seconds, then oven will enter into the children-lock state. Screen will display “Loc.” • Unlock: In locked state, press “STOP/CANCEL” for 3 seconds to release the lock.
-
Page 37: Troubleshooting
TROUBLESHOOTING ZLINE Customer Service is available at 1-614-777-5004. Fault Possible Cause Troubleshooting Electrical cord is unplugged. Plug into the outlet. Oven won’t start. Door is open. Close the door and retry. Wrong operation is set. Check instructions Materials to be avoided in... - Page 38 Use correct cooking time and/ level is not suitable. or power level. Food is not turned or stirred. Turn or stir food. Need to purchase a part or accessory for your ZLINE product? Visit ZLINEparts.com, ZLINE's official parts distribution partner.
- Page 39 2.5.0 zlinekitchen.com 1-614-777-5004 contact@zlinekitchen.com...
Need help?
Do you have a question about the MWD-1 and is the answer not in the manual?
Questions and answers