Zline MWO-24 Installation Manual And User's Manual
Hide thumbs
Also See for MWO-24:
- Installation manual and user's manual (47 pages) ,
- Installation manual (22 pages) ,
- Manual (25 pages)
Advertisement
Advertisement

Related Manuals for Zline MWO-24


Summary of Contents for Zline MWO-24
- Page 1 icrowave Installation Guide and Users Manual...
- Page 2 REGISTERING YOUR PRODUCT Please register your ZLINE appliance. Begin the simple registration process by scanning the QR code. By registering your appliance, you will have easy and accurate SCAN ME access to: • Technical Support • Warranty Service • Tracking your support inquiries WARNING: This product can expose you to chemicals including nickel, which is known to the State of California to cause cancer.
- Page 3 With an endless selection of features and finishes, our inspiration is your reality. ZLINE is fueled by a passion for innovation; A relentless pursuit of bringing the highest end luxury designs and professional features into everyone’s homes. Because we continually strive...
- Page 4 WARRANTY COVERAGE ZLINE Kitchen and Bath microwave parts will be warrantied for two years from the original purchase date for the original purchaser of the product. TERMS This warranty applies only to the original purchaser of the product installed for normal residential use.
-
Page 5: Table Of Contents
TABLE OF CONTENTS IMPORTANT SAFETY INSTRUCTIONS BEFORE INSTALLATION INSTALLATION OPERATION MAINTENANCE TROUBLESHOOTING... -
Page 6: Important Safety Instructions
SAFETY INSTRUCTIONS Read all instructions before using the appliance. When using electrical appliances basic safety precautions should be followed, including the following: • Install or locate this appliance only in accordance with the provided installation instructions. • This appliance is intended to be used in household and similar applications such as: staff kitchen areas in shops, offices, and other working environments;... - Page 7 SAFETY INSTRUCTIONS • Use this appliance only for its intended use as described in the manual. Do not use corrosive chemicals or vapors in this appliance. This type of oven is specifically designed to heat, cook or dry food. It is not designed for industrial or laboratory use.
- Page 8 SAFETY INSTRUCTIONS • To reduce the risk of fire in the oven cavity: • Do not overcook food. Carefully attend appliance when paper, plastic, or other combustible materials are placed inside the oven to facilitate cooking. • Remove wire twist-ties from paper or plastic bag before placing bag in oven.
- Page 9 SAFETY INSTRUCTIONS • Liquids, such as water, coffee, or tea may be heated beyond the boiling point without appearing to be boiling. Visible bubbling or boiling when the container is removed from the microwave oven is not always present. THIS COULD RESULT IN VERY HOT LIQUID SUDDENLY BOILING OVER WHEN THE CONTAINER IS DISTURBED OR A UTENSIL IS INSERTED INTO THE LIQUID.
- Page 10 SAFETY INSTRUCTIONS • Do not use paper products when appliance is operated in the toaster mode. • Do not store any materials, other than manufacturer’s recommended accessories, in this oven when not in use. • Do not cover racks or any other part of the oven with metal foil.
- Page 11 SAFETY INSTRUCTIONS • Water in the hot cooking compartment: Never pour water into the hot cooking compartment. This will cause steam. The temperature change can cause damage. • Moist food: Do not store moist food in the closed cooking compartment for long periods. •...
-
Page 12: Before Installation
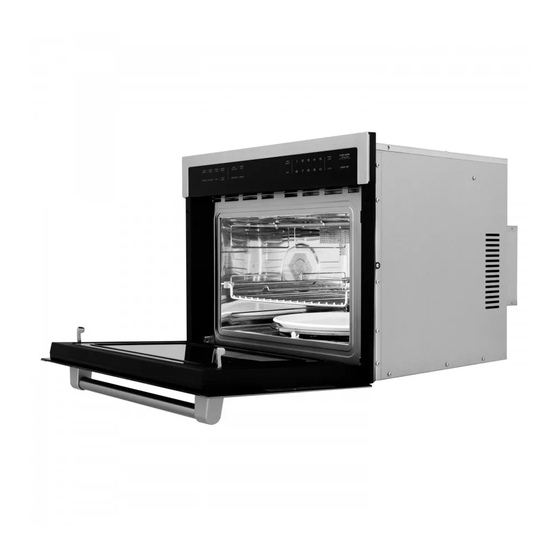
BEFORE INSTALLATION MWO-24 Appliance Dimensions PRODUCT SPECIFICATIONS MWO-24 48” “ “ “ “ “ 21” “ MWO-30 Appliance Dimensions “ MWO-30 48” “ “ “ “ 19” “ “ “... - Page 13 BEFORE INSTALLATION Gather the required tools before starting installation. Read and follow the instructions provided with any tools listed here. TOOLS AND PARTS NEEDED • Philips head screwdriver • 1/8” drill bit and drill • Measuring tape • Knife PARTS PROVIDED •...
- Page 14 BEFORE INSTALLATION WARNING ELECTRIC SHOCK HAZARD • Before you plug in an electrical cord or turn on power supply, make sure all controls are in the OFF position. • This appliance must be grounded. Connect only to properly grounded outlet. •...
- Page 15 BEFORE INSTALLATION • Only a qualified electrician who takes the appropriate regulations into account may install the socket or replace the connecting cable. If the plug is no longer accessible following installation, an all-pole isolating switch must be present on the installation side with a contact gap of at least 1/8”.
- Page 16 OUTLET AREA • Anywhere within the shaded area the minimal distance between the appliance and the wall is 1 3/4”. • The outlet can be located anywhere within the shaded area. MWO-30 MWO-24...
-
Page 17: Installation
• The appliance door will overlap the furniture below by approx 3/16” when opened. • There must be an air gap of at least 1/4” between the appliance and the cabinet walls when the appliance is installed, i.e. 1/8” each side. MWO-24 MWO-30... - Page 18 • The safe operation of this appliance can only be guaranteed if it has been installed in accordance with these installation instructions. • The units into which the appliance is fitted must be heat-resistant up 194°F. • Note: There should be a gap above the oven. MWO-24 MWO-30...
- Page 19 INSTALLATION Flush installation also requires: • Two side cleats to be attached inside the cabinet frame, recessed from the front • A 5/16” baseplate underneath the unit body. MWO-24 MWO-30...
- Page 20 INSTALLATION BUILDING IN MWO-24 MWO-30 • Carefully push the microwave into the cabinetry, making sure that it is in the center. • Do not kink the connecting cable. • Open the door and fasten the microwave with the screws that were supplied.
-
Page 21: Operation
OPERATION Accessories Turntab As a sur ACCESSORIES ACCESSORIES Food wh prepared Accessories Accessories The turn Place the compartm Never ■ The tu ■ The tu ■ TURNTABLE ■ ■ Lower w • Food which particularly requires a lot of heat from underneath can be prepared ■... - Page 22 OPERATION RADIO INTERFERENCE • Operation of the microwave oven may cause interference to your radio, TV or similar equipment. • When there is interference, it may be reduced or eliminated by taking the following measures: • Clean door and sealing surface of the oven. •...
- Page 23 OPERATION MATERIALS YOU CAN USE IN MICROWAVE OVEN UTENSILS GUIDE Follow manufacturer* instructions. The bottom of browning dish must be at least Browning dish 3/16” above the turntable. Incorrect usage may cause the turntable to break. Microwave-safe only. Follow manufacturer’s instructions. Do not use Dinnerware cracked or chipped dishes.
- Page 24 Control panel Control panel Use this section to familiarise yourself with your new appliance. Use this section to familiarise yourself with your new appliance. explained. You explained. You The control panel and the individual operating controls are and the accesso The control panel and the individual operating controls are and the accesso Control panel...
- Page 25 OPERATION CHILDPROOF LOCK The oven has a childproof lock to prevent children switching it on accidentally. The oven will not react to any settings. The timer and clock can also be set when the childproof lock has been switched on. SWITCHING ON THE CHILDPROOF LOCK No cooking time should be set.
- Page 26 OPERATION SETTING THE CLOCK Once the appliance is connected, “12:00” will be displayed as the time of day. To set the correct time, proceed as follows: 2. Touch Clock. 3. Enter the correct time using the number keys. Example: To set the clock to 12:41 type in 1 2 4 1. 4.
- Page 27 OPERATION HEATING UP THE OVEN To remove the new oven smell, heat up the microwave when it is empty and closed. One hour with Convection at 350°F is ideal. Ensure that no packaging remnants have been left in the oven cavity. Touch Convection once to enter bake mode.
- Page 28 OPERATION RAPID PREHEATING With rapid preheating, your oven reaches the set temperature particularly quickly. To ensure an oven cooking result, only put your food in the cooking compartment when the preheating phase is complete. 2. Touch the PREHEAT key. 3. Enter the temperature setting with the number keys. The input temperature should be within 100°F to 450°F .
- Page 29 OPERATION OVENWARE TEST Do not switch on the microwave unless there is food inside. The following ovenware test is the only exception to this rule. Perform the following test if you are unsure whether your ovenware is suitable for use in the microwave: •...
- Page 30 Microwave power settings microwave Microwave power settings microwave th a different You can select from 11 different microwave power levels. Microwave power settings Microwave power settings OPERATION th a different microwave You can select from 11 different microwave power levels. are and how microwave Microwave power settings...
- Page 31 OPERATION SETTING THE MICROWAVE Enter the desired cook time with the number keys. The timer display will fill in from right to left. Example: To set a microwave time of 20 minutes and 30 seconds, enter the numbers 2 0 3 0. 2.
- Page 32 OPERATION SPEEDY MICROWAVE COOKING Use the Start/Enter key to quick-start your microwave at the highest power level. You can touch the key repeatedly to increase the microwave time in increments of 30 seconds. 2. Touching this key during microwave operation will add 30 seconds to the remaining microwave time.
- Page 33 OPERATION AUTOMATIC PROGRAMS SETTING A PROGRAM When you have selected a program, set the oven. The temperature selector must be in the off position. 2. Touch Auto menu. 3. Touch Auto menu repeatedly to scroll through all Auto menu . 4.
- Page 34 OPERATION DEFROSTING PROGRAMS You can use the 2 defrosting programs to defrost ground meat and meat pieces. Touch Auto Defrost once or twice to choose “GROUND MEAT” or “MEAT PIECES”. 2. Enter the weight of the food you want to defrost using the number keys. 3.
- Page 35 OPERATION POPCORN • Do not leave oven unattended while popping corn. Popcorn may ignite and cause fire. • Never set the microwave power too high. Use a power setting no higher than 600 watts. Always place the popcorn bag on a glass plate. The disc may jump if overloaded.
- Page 36 OPERATION SETTING BEVERAGE MODE Touch Beverage. The cook time is displayed. 2. Touch Beverage repeatedly or touch number key 1 to 4 to choose the desired amount. 3. Touch Start/Enter. 4. The microwave timer starts counting down. When the microwave timer has elapse, a beep will sound.
- Page 37 OPERATION PIZZA You can use the Pizza mode to bake three different types of pizza: MODE NO. PIZZA TYPE BAKE ON Frozen pizza Metal tray Fresh pizza Metal tray Microwave pizza Ceramic tray PIZZA TIPS • Check pizza before minimum time, pizza may cook faster compared to a traditional oven.
- Page 38 OPERATION OPENING APPLIANCE DOOR DURING OPERATION Opening the appliance door during operation will interrupt the current mode. When you close the appliance door, operation will be resumed. SETTING PIZZA MODE FOR MICROWAVE PIZZA Place the microwave pizza on the ceramic tray and put it in the oven following package directions.
- Page 39 OPERATION SENSOR COOKING You can select two sensor cooking modes. Sensor cooking allows you to cook many of your favorite foods without selecting cooking times and power levels. The microwave oven automatically determines the required cooking time for each food item.
- Page 40 OPERATION REHEAT COOKING SUGGESTIONS FOOD DIRECTIONS QUANTITY Use only pre-cooked, refrigerated foods. Cover plate with vented plastic wrap or waxed paper, tucked under plate. If food is not hot enough after heating with the Reheat feature, continue heating using manual time Dinner and power level setting.
- Page 41 OPERATION SETTING SENSOR COOK The appliance must be turned off. Example: Set Sensor Cook for Ground Meat. 2. Touch Sensor Cook. 3. Select the desired program from the label at the oven cavity. For Ground Meat, touch Sensor Cook repeatedly to scroll through all Sensor Cook modes. 4.
- Page 42 OPERATION OPENING APPLIANCE DOOR DURING OPERATION Opening the appliance door during operation will interrupt the current mode. Close the appliance door and then touch Start/Enter to resume operation. CANCEL OPERATION Touch Clear/Off to cancel the active oven mode. The appliance turns off and the clock is displayed.
- Page 43 OPERATION BROIL: Place pan of food on the wire rack with the recess facing up. OVEN COOKING INTERNAL FOOD COOKING TIPS TEMP TIME (MINS) TEMP Hamburgers High Side 1: 9-1 1 160°F Use pan that allows fat to 3/4”-1”, Side 2: 10-12 drain away from the food.
- Page 44 OPERATION CONVECTION BROIL: Place pans of food on the wire rack with the recess facing up. OVEN COOKING INTERNAL FOOD COOKING TIPS TEMP TIME (MINS) TEMP Chicken breasts, Side 1: 9-1 1 170°F Start breast side down. bone-in Side 2: 10-12 Fish fillet 1 1-15 145°F...
- Page 45 OPERATION COOKING SEAFOOD IN YOUR MICROWAVE Be sure to place fish on a microwave-safe roasting rack in a microwave-safe dish. Be sure to always cook fish until it flakes easily with a fork. Use a tight cover to steam fish; a lighter cover of wax paper or paper towel provides less steaming. And be sure not to overcook fish;...
- Page 46 OPERATION g foods. Once the oven is loss of heat. Place pans of food on the wire rack with the e oven quickly to minimize recess facing down. Cooking time Cooking tip / Procedure perature (minutes) COOKING EGGS AND VEGETABLES IN YOUR MICROWAVE °F (175°C) 13 - 20 A dark or dull baking sheet will result in a browner, crisper crust.
- Page 47 OPERATION ACRYLAMIDE IN FOOD Which foods are affected? Acrylamide is mainly produced in grain and potato products that are heated to high temperatures, such as potato crisps, chips, toast, bread rolls, bread, fine baked goods (biscuits, gingerbread, cookies). Tips for keeping acrylamide to a minimum when preparing food: •...
-
Page 48: Maintenance
MAINTENANCE AND CLEANING CARE AND CLEANING • Risk of electric shock! Penetrating moisture may cause an electric shock. Do not use any high-pressure cleaners or steam cleaners. • Risk of burns! Never clean the appliance immediately after switching off. Let the appliance cool down. - Page 49 MAINTENANCE AND CLEANING CLEANING GUIDE Appliance Hot soapy water: Clean with a dish cloth and dry with a soft cloth. front Do not use glass cleaners or metal or glass scrapers for cleaning. Hot soapy water: Clean with a dish cloth and dry with a soft cloth. Remove flecks of limescale, grease, starch and albumin (e.g.
-
Page 50: Troubleshooting
TROUBLESHOOTING unction table Malfunction table ZLINE Customer Service is available at 1-614-777-5004. � ons often have simple explanations. Please refer to the Risk of electric shock! � Malfunctions often have simple explanations. Please refer to the on table before calling the after-sales service. - Page 51 appears in the display panel. Power cut Power cut Power cut Check wh Check wh Check wh The appliance does not work. Childproof lock is active. Deactivate The microwave does not switch on. Door not fully closed. Check wh Power cut Check wh is in the display panel.
- Page 52 Installation Guide and User Manual 2.8.0 1-614-777-5004 contact@zlinekitchen.com www.zlinekitchen.com...
Need help?
Do you have a question about the MWO-24 and is the answer not in the manual?
Questions and answers