Table of Contents
Advertisement
Quick Links
Advertisement
Table of Contents

Related Manuals for LAUNCH TECH X-431 Torque 5


Summary of Contents for LAUNCH TECH X-431 Torque 5
- Page 1 Version: V1.00.000 Revised date: 10-18-2022...
- Page 2 LAUNCH X-431 Torque 5 User Manual Trademarks LAUNCH is a registered trademark of LAUNCH TECH CO., LTD. in China and other countries. All other marks are trademarks or registered trademarks of their respective holders. Copyright Information Copyright © 2022 by LAUNCH TECH CO., LTD. (also called LAUNCH for short).
- Page 3 LAUNCH X-431 Torque 5 User Manual Using This Manual This manual contains device usage instructions. Some illustrations shown in this manual may contain modules and optional equipment that are not included in your system. The following conventions are used. Bold Text Bold text is used to highlight selectable items such as buttons and menu options.
- Page 4 LAUNCH X-431 Torque 5 User Manual Illustrations Illustrations used in this manual are samples, the actual testing screen may vary for each vehicle being tested. Observe the menu titles and on-screen instructions to make correct option selection. Important Safety Precautions To avoid personal injury, property damage, or accidental damage to the product, read all of the information in this section before using the tool.
- Page 5 LAUNCH X-431 Torque 5 User Manual ignition wires and spark plugs. These components create hazardous voltage when the engine is running. To avoid damaging the tool or generating false data, please make sure the vehicle battery is fully charged and the connection to the vehicle DLC (Data Link Connector) is clear and secure.
- Page 6 LAUNCH X-431 Torque 5 User Manual FCC Statement Any Changes or modifications not expressly approved by the party responsible for compliance could void the user’s authority to operate the equipment. This device complies with part 15 of the FCC Rules. Operation is subject to the...
-
Page 7: Table Of Contents
LAUNCH X-431 Torque 5 User Manual TABLE OF CONTENTS 1 Introduction ....................1 1.1 Product Profile ..................1 1.2 Components & Controls ................. 1 1.2.1 Display Tablet .................. 2 1.2.2 DBSCar IX Device................4 1.3 Technical Parameters ................7 1.4 Package List ..................10 2 Initial Use .................... - Page 8 LAUNCH X-431 Torque 5 User Manual 5.1 Smart Diagnosis (AutoDetect) .............. 25 5.2 Manual Diagnosis ................. 29 5.3 Tech 2 Tech ..................44 5.3.2.1 Request remote help ..............46 5.3.2.2 Provide remote help ..............51 5.4 Diagnostic History................. 56 6 Diagnostic Feedback .................. 57 7 I/M Readiness .....................
- Page 9 LAUNCH X-431 Torque 5 User Manual 10.9 Diagnostic Software Clear ..............71 11 Add-on Modules ..................73 11.1 TPMS ....................73 11.2 ADAS (Calibration) ................73 11.3 Videoscope..................73 11.4 BST360 (Battery Tester) ..............73 11.5 Immobilizer Programmer ..............73 11.6 Mall.....................
-
Page 10: Introduction
LAUNCH X-431 Torque 5 User Manual 1 Introduction 1.1 Product Profile This tool is a new Android-based vehicle diagnostic tool. It is characterized by featuring powerful functions, and providing precise test result. Through Bluetooth communication between the DBSCar IX device and display... -
Page 11: Display Tablet
LAUNCH X-431 Torque 5 User Manual Chapter “1.2.1”). DBSCar IX Device – the device for accessing vehicle data (See Chapter “1.2.2”). 1.2.1 Display Tablet The tablet acts as the central processing system, which is used to receive and analyze the live vehicle data from the DBSCar IX device and then output the test result. - Page 12 LAUNCH X-431 Torque 5 User Manual In Off mode, press it for 3 seconds to turn the tablet on. In On mode: • Press it once to activate the LCD if the LCD is off. Press it once to turn off the LCD if the LCD lights up.
-
Page 13: Dbscar Ix Device
LAUNCH X-431 Torque 5 User Manual 1.2.2 DBSCar IX Device The DBSCar IX device features powerful functions and it can be applied in the following situations: 1). When as a VCI (Vehicle Communication Interface) device, it needs to work in conjunction with the Diagnose module of the tablet, which is used to obtain vehicle data, and then send it to the tablet for analysis via Bluetooth / USB. - Page 14 LAUNCH X-431 Torque 5 User Manual Note: The items marked with * indicates the device is functioning as a 2-channel oscilloscope or a multimeter. 1. DB-15 diagnostic connector Connect on vehicle’s OBD II DLC via the diagnostic cable.
- Page 15 LAUNCH X-431 Torque 5 User Manual 2*. CH2 Channel 2. 3*. CH1 Channel 1. 4. Power button Press to turn on/off the device. 5. Handle 6. Power LED Illuminate red while the device is powered up. 7. Battery LED Battery level indicator. It is defined as follows: 1).
-
Page 16: Technical Parameters
LAUNCH X-431 Torque 5 User Manual cable. • Blue Flashes: Communicating. • Solid Blue: USB connected. 10*. Measurement LED It is defined as follows: 1). Blue: Indicates the VCI is communicating with the tablet via Bluetooth. • Blue Flashes: Communicating. - Page 17 LAUNCH X-431 Torque 5 User Manual Storage 128GB 10.1 inch capacitive touch screen with a Screen resolution of 1280 x 800 pixels Front-facing 5.0MP + Rear-facing 8.0MP Camera camera Wi-Fi (802.11a/b/g/n/ac) Connectivity Bluetooth Working temperature 0℃ ~ 50℃...
- Page 18 LAUNCH X-431 Torque 5 User Manual Coupling DC, AC Input impedance 1MΩ±2%, 15pF±5pF parallel Vertical scale 10mV/div~10V/div Sample bit 8 bits Max. input voltage 40V peak value (DC + AC peak value) Probe attenuation 1X, 10X,100X (need probe support) coefficient...
-
Page 19: Package List
LAUNCH X-431 Torque 5 User Manual 1.4 Package List The following packing list is for reference purpose only. For different destinations, the accessories may vary. For details, please consult from the seller or check the packing list supplied with this tool together. - Page 20 LAUNCH X-431 Torque 5 User Manual Multilingual Quick Start Guide Note: The following accessory items are used only when the DBSCar IX device works as a 2-channel oscilloscope or a multimeter. Dedicated cable used to connect BNC to 4mm test...
-
Page 21: Initial Use
LAUNCH X-431 Torque 5 User Manual 2 Initial Use 2.1 Charging & Turning On 1. Use the included power adaptor to charge the tablet. 2. After charging is complete, press the POWER button to turn the tablet on. The system starts initializing and then enters the home screen. -
Page 22: Change System Language
LAUNCH X-431 Torque 5 User Manual Double-tap: To zoom in so that the text on a webpage appears in a column that fits your device’s screen. Long press: Tap and hold on the current interface or area until a contextual menu pops up on the screen, and then release it. -
Page 23: Network Setup
LAUNCH X-431 Torque 5 User Manual locked automatically and the system enters sleep mode to save power. 1. On the home screen, tap Settings -> Display -> Advanced -> Sleep. 2. Choose the desired sleep time. 2.7 Network Setup The tablet has built-in Wi-Fi that can be used to get online. Once you’re online, you can register your tool, surf the Internet, get apps, send email, launch the remote diagnosis, and check for software updates etc. -
Page 24: Getting Started
LAUNCH X-431 Torque 5 User Manual 3 Getting Started For new users, you will need to experience a user registration process before getting started. 3.1 Register & Update Follow the steps below to proceed registration and update: Tap the application icon on the home screen to launch it, and then tap Login to enter the login interface of diagnosis software. - Page 25 LAUNCH X-431 Torque 5 User Manual 1. Create an App Account: Input the information to create a new account (all fields must be completed). When finished tap Register, the following screen will appear: 2. Activate VCI: Input the Product Serial Number and Activation Code (can be found in the supplied Password Envelope), and tap Activate to go to the next step.
-
Page 26: Job Menu
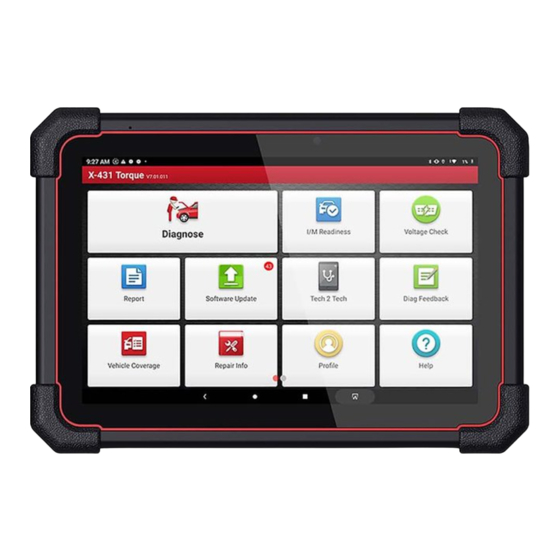
LAUNCH X-431 Torque 5 User Manual 3. Finish Registration: Tap OK to navigate to the download page and download the diagnostic software. Tap Update to start downloading. To pause downloading, tap Stop. After the downloading is complete, the system will install the software package automatically. - Page 27 LAUNCH X-431 Torque 5 User Manual Name Description Diagnose Configure the tablet as a professional diagnostic tool. Check whether or not the various emissions-related I/M Readiness systems on the vehicle are operating properly, and ready for Inspection and Maintenance testing.
-
Page 28: Toolbox
LAUNCH X-431 Torque 5 User Manual Include customer service phone and email, training Help videos, FAQ and user manual of add-on modules. 3.2.1 Toolbox It mainly includes the following items: Name Description Configure this tool as a professional TPMS (Tire Pressure Monitoring System) service tool. - Page 29 LAUNCH X-431 Torque 5 User Manual voltage, current and resistance to help determine faults.
-
Page 30: Connections
LAUNCH X-431 Torque 5 User Manual 4 Connections 4.1 Preparation The ignition is turned on. The vehicle battery voltage range is 11-14 volts. The throttle is in the closed position. Find DLC location. For Passenger Vehicles, The DLC (Data Link Connector) is usually located 12 inches from the center of the instrument panel, under or around the driver’s side for most vehicles. -
Page 31: Obd Ii Vehicle Connection
LAUNCH X-431 Torque 5 User Manual vehicle’s configuration as follows: A vehicle equipped with an OBD II management system supplies both communication and 12V power through a standardized DLC. A vehicle not equipped with an OBD II management system supplies... - Page 32 LAUNCH X-431 Torque 5 User Manual B. Cigarette Lighter Cable (not included): Connect one end of the cigarette lighter cable to the power jack of the diagnostic cable, and the other end to the cigarette lighter receptacle. If you choose to perform vehicle diagnosis via data cable, connect one end of the data cable into the VCI device, and the other end into the USB port of the tablet.
-
Page 33: Diagnosis
LAUNCH X-431 Torque 5 User Manual 5 Diagnosis Three methods are available for vehicle diagnosis: Smart Diagnosis (AutoDetect), Manual Diagnosis and Tech to Tech Remote Diagnosis. Tap Diagnose on the Job Menu to enter the Diagnose main menu. 1. Auto Detect: Obtain vehicle data from the cloud server to perform quick test via reading VIN, to avoid various defects resulting from step-by-step menu selection. -
Page 34: Smart Diagnosis (Autodetect)
LAUNCH X-431 Torque 5 User Manual 5.1 Smart Diagnosis (AutoDetect) Through simple Bluetooth communication between the display tablet and VCI, you can easily get the VIN (Vehicle Identification Number) information of the currently identified vehicle. Once the VIN is successfully identified, the system will retrieve it from the remote server and then guide you to vehicle information page without step-by-step manual menu selection. - Page 35 LAUNCH X-431 Torque 5 User Manual • Tap Diagnostic to start a new diagnostic session. • Tap Scan History to view its historical repair record. If there are records available, it will be listed on the screen in sequence of date.
- Page 36 LAUNCH X-431 Torque 5 User Manual B. If the tablet failed to access the VIN information, the following screen will appear: • Tap the input field to directly, tap OK. If the VIN exists on the remote server, the system will enter the diagnostic function selection screen.
- Page 37 LAUNCH X-431 Torque 5 User Manual Place the VIN inside the viewfinder rectangle to scan it. The most recognizable location for this number is in the top left corner on the vehicle’s dashboard. Other locations include the driver’s door or post, and the firewall under the hood.
-
Page 38: Manual Diagnosis
LAUNCH X-431 Torque 5 User Manual • If the VIN scanned is incorrect, tap the result field to modify it and then tap • To scan it again, tap REPEAT. If the VIN exists on the remote server, the system will enter the diagnostic function selection screen. - Page 39 LAUNCH X-431 Torque 5 User Manual What’s new: Tap to view the optimized items and enhancements. Introduction: Tap to check the software function list. Note: Tap to read some precautions on using the current diagnostic software. Search Bluetooth: Tap to scan for all available Bluetooth VCIs.
- Page 40 LAUNCH X-431 Torque 5 User Manual 4). Choose the test item: After reading the vehicle information, double check if the information is correct or not. If yes, tap Diagnostic to enter the following screen. All vehicle systems can be displayed in form of topology or list. By default, all vehicle systems are displayed in form of topology.
- Page 41 LAUNCH X-431 Torque 5 User Manual Warning: Diagnostic Trouble Codes or Fault Codes can be used to identify which engine systems or components that are malfunctioning. Never replace a part based only on the DTC definition. Retrieving and using DTCs for troubleshooting vehicle operation is only one part of an overall diagnostic strategy.
- Page 42 LAUNCH X-431 Torque 5 User Manual Enter the tester and customer name and then tap OK to save it. All reports are saved in Report -> Health Reports. Note: By default, the workshop information is blank. You can configure and revise it from Profile ->...
- Page 43 LAUNCH X-431 Torque 5 User Manual made some repairs and service and cleared the DTCs after the pre-repair reported is generated. Otherwise, no differences exist between the pre- and post- repair reports. • Diagnostic Plan: Figures out the diagnostic plan and repair solutions for the detected DTCs.
- Page 44 LAUNCH X-431 Torque 5 User Manual Select Detection: Select certain system and tap it to start scanning the system. Alternatively user also can tap certain system to manually scan it. While in System List mode, different highlight bars indicate different detection status.
- Page 45 LAUNCH X-431 Torque 5 User Manual B. Read Fault Code This function displays the detailed information of DTC records retrieved from the vehicle’s control system. On-screen Buttons: Freeze Frame: When an emission-related fault occurs, certain vehicle conditions are recorded by the on-board computer. This information is referred to as freeze frame data.
- Page 46 LAUNCH X-431 Torque 5 User Manual Report: To save the current data in text format. All reports are saved in Report -> Health Reports. Clear DTCs: Tap to clear the existing diagnostic trouble codes. C. Clear Fault Code After reading the retrieved codes from the vehicle and certain repairs have been carried out, you can use this function to erase the codes from the vehicle.
- Page 47 LAUNCH X-431 Torque 5 User Manual diagnostic tool at the same time is dangerous, and could cause a serious traffic accident. Tap Read Data Stream, the following screen will appear: On-screen Buttons: Select Page: Tap it to select all items of the current page. To select certain data stream item, just check the box before the item name.
- Page 48 LAUNCH X-431 Torque 5 User Manual 1. Tap , the following popup will appear. Here the user can set different display style for each selected item. indicates sticky top. If it is tapped, it will change into . On the data stream...
- Page 49 LAUNCH X-431 Torque 5 User Manual (Single graph): Tap it to view the waveform. • Min/Max: Tap it to define the maximum/minimum value. When the value goes beyond the specified value, the system will alarm. Graph: Tap it to view the waveform.
- Page 50 LAUNCH X-431 Torque 5 User Manual customized and saved in process of data stream sampling will be imported into the Standard Range column for your comparison. Note: Before executing this function, you have to sample the values of data stream items and save it as a sample data stream file.
- Page 51 LAUNCH X-431 Torque 5 User Manual Help: Tap to view the help information. Save Sample: This item enables you to customize the standard range of live data stream items and save it as DS sample file. Each time you run the data stream items, you can call out the corresponding sample data to overwrite the current standard range.
- Page 52 LAUNCH X-431 Torque 5 User Manual -> Sample. E. Actuation Test This option is used to access vehicle-specific subsystem and component tests. Available test vary by vehicle manufacturer, year, and model. During the actuation test, the tablet outputs commands to the ECU in order to...
-
Page 53: Tech 2 Tech
LAUNCH X-431 Torque 5 User Manual 5.3 Tech 2 Tech This option aims to help repair shops or technicians launch instant messaging and remote diagnosis, making the repair job getting fixed faster. Tap Tech 2 Tech on the Job menu, a disclaimer page will pop up on the screen:... - Page 54 LAUNCH X-431 Torque 5 User Manual Home button Tap it to navigate to the Job menu screen. Directly input the registered username of the tool to Search bar start searching, and then tap the desired one to add it into your Contacts list.
-
Page 55: Request Remote Help
LAUNCH X-431 Torque 5 User Manual following: Workshop Technician golo users The display tablet is allowed to launch remote diagnosis with other diagnostic tools (including but not limited to the X-431 Torque Link) of Launch family, which are equipped with this module. - Page 56 LAUNCH X-431 Torque 5 User Manual Method 1: Tap the target partner’s avatar, the following screen will appear: Tap Invite Remote Diagnose Assistant, choose the desired vehicle model and wait for the partner’s confirmation. Method 2: Tap Remote Diagnose, the following screen will appear:...
- Page 57 LAUNCH X-431 Torque 5 User Manual Tap Invite Remote Diagnose Assistant, choose the desired vehicle model and wait for the partner’s confirmation. Method 3: Tap the target user name to enter the instant messaging mode. The following screen will appear:...
- Page 58 LAUNCH X-431 Torque 5 User Manual Note: Here the following operations are available: Tap to send the voice message. Tap to send the emoj. Add friend: Add it into the Contacts list. After the partner receives the request, a beep will sound.
- Page 59 LAUNCH X-431 Torque 5 User Manual wait for the partner’s confirmation. Via “Remote” Method 4: Tap Remote to ether the following screen. Tap Request remote help, the following screen will appear: Slide the switch Allow device to be connected to the WEB client remote...
-
Page 60: Provide Remote Help
LAUNCH X-431 Torque 5 User Manual Choose the desired vehicle model and wait for the partner’s confirmation. Notify the partner of your device Serial Number and wait for receiving the remote help. 5.3.2.2 Provide remote help Notes: Before performing this operation, please make sure that you have registered the Launch’s diagnostic tool. - Page 61 LAUNCH X-431 Torque 5 User Manual There are 4 ways available for providing remote help. Via “Contacts” Tap Contacts. Input the partner’s user name and tap Search, the following screen will appear: Note: If the partner is added into the Contacts, directly tap it to enter the instant messaging screen.
- Page 62 LAUNCH X-431 Torque 5 User Manual Method 2: Tap Remote Diagnose, the following screen will appear: Tap Request Control Remote Device to launch the remote help. After the partner accepts the request, the remote diagnosis is ready to start. Method 3: Tap the target user name to enter the instant messaging mode.
- Page 63 LAUNCH X-431 Torque 5 User Manual Tap Tech 2 Tech, the following options will appear: Tap Request Control Remote Device to launch the remote help. After the partner accepts the request, the remote diagnosis is ready to start. Via “Remote”...
- Page 64 LAUNCH X-431 Torque 5 User Manual Tap Remote help, it will automatically navigate to the real-time remote full system diagnosis platform. Note: Alternatively, you can also use a PC to access the website http://remote.x431.com/cn/ to login the remote full system diagnosis platform if no LAUNCH diagnostic tool keeps attended.
-
Page 65: Diagnostic History
LAUNCH X-431 Torque 5 User Manual Check the box Series Number and enter the Serial Number provided by the remote help requester, and then tap Start remote diagnosis to start the remote help. The operations in remote diagnosis are same as those in local diagnosis. Once the session is complete, a remote diagnostic report will be automatically generated. -
Page 66: Diagnostic Feedback
LAUNCH X-431 Torque 5 User Manual 6 Diagnostic Feedback This item allows you to feedback your diagnostic problems to us for analysis and troubleshooting. Tap Diag Feedback, a pop-up message will appear: Tap OK, the following 3 options will be displayed on the left column of the screen. -
Page 67: M Readiness
LAUNCH X-431 Torque 5 User Manual 7 I/M Readiness An important part of a vehicle’s OBD II system is the Readiness Monitors, which are indicators used to find out if all of the emissions components have been evaluated by the OBD II system. They are running periodic tests on specific systems and components to ensure that they are performing within allowable limits. - Page 68 LAUNCH X-431 Torque 5 User Manual 7) Heated Catalyst 8) A/C system I/M refers to Inspection and Maintenance that is legislated by the Government to meet federal clean-air standards. I/M Readiness indicates whether or not the various emissions-related systems on the vehicle are operating properly and are ready for Inspection and Maintenance testing.
- Page 69 LAUNCH X-431 Torque 5 User Manual Note: means not available on this vehicle, means incomplete or not ready, means Completed or Monitor Ok.
-
Page 70: Reports
LAUNCH X-431 Torque 5 User Manual 8 Reports This option is used to view, delete or share the saved reports. 1. Health Reports This module stores all diagnostic reports generated in process of vehicle diagnosis. All diagnostic reports are sorted by Date and Make. Tap the desired type to re-arrange and filter it. - Page 71 LAUNCH X-431 Torque 5 User Manual 4. ROXIE Reports This option stores all vehicle inspection reports generated by the ROXIE W device that has been bound to the tool. 5. Recorded Data If user records the running parameters or waveform graphs while reading data stream, it will be saved as diagnostic records and appear under this tab.
-
Page 72: Software Update
LAUNCH X-431 Torque 5 User Manual 9 Software Update This module enables you to update the diagnostic software & App and frequently used software. 9.1 Update Diagnostic Software & APP Go to Software Update on the Job Menu and tap the Downloaded tab. -
Page 73: Update Frequently Used Software
LAUNCH X-431 Torque 5 User Manual To download certain software that is not frequently used, check the box before the vehicle model. Tap Update to start downloading. Once download is finished, the software packages will be installed automatically. 9.2 Update Frequently Used software If the user only intends to update the frequently used software, go to Software Update and tap the Downloaded tab. -
Page 74: Renew Subscription
LAUNCH X-431 Torque 5 User Manual 9.3 Renew Subscription If the software subscription is due or expires, the system will prompt you to renew your subscription. Tap Renewal on the bottom of the screen to go to the Mall to make payment. -
Page 75: Profile
LAUNCH X-431 Torque 5 User Manual 10 Profile This function allows users to manage personal information and VCI etc. 10.1 VCI Management If several VCI devices are activated on this tool, a list of VCI devices will be displayed on the screen. -
Page 76: Roxie Management
LAUNCH X-431 Torque 5 User Manual Input the Serial Number and Activation Code (can be found from the included Password Envelope), and then tap Activate to activate it. Note: please be sure to keep the VCI powered on while performing the operation. -
Page 77: Sample
LAUNCH X-431 Torque 5 User Manual 10.3 Sample This feature allows you to manage the recorded data stream sample files. 10.4 My Order This item allows you to check the status of all your orders. 10.5 Subscription Renewal Card This item is used to check the status of the subscription renewal card. -
Page 78: Shop Information
LAUNCH X-431 Torque 5 User Manual detection once the tablet is properly connected to the vehicle’s DLC. 4). Auto Generate Health Report once connected Once it is set as ON, the system will automatically output a health report once the AutoDetect diagnostic session is finished. - Page 79 LAUNCH X-431 Torque 5 User Manual • The print service plug-in associated with the printer is already installed on the tablet (Go to Google Play or use the Browser to download and install it). Follow the steps below to proceed: 1.
-
Page 80: Clear Cache
LAUNCH X-431 Torque 5 User Manual 6. Select the desired Wi-Fi printer from the list. If the chosen Wi-Fi printer hotspot is open, the tablet can connect it directly. If it is encrypted, a password may be required. Refer to the Wi-Fi printer user manual to get the default password. - Page 81 LAUNCH X-431 Torque 5 User Manual Under the Remove Software tab, select the desired diagnostic software and tap Delete, it will disappear from the screen. Note: Removing software may completely delete the software from the tablet. If some software is not used and the tablet runs out of space, you can use this feature to...
-
Page 82: Add-On Modules
LAUNCH X-431 Torque 5 User Manual 11 Add-on Modules 11.1 TPMS This module allows you to configure the tablet as TPMS activation & diagnostic tool, which provides the ability to trigger TPMS sensor, program TPMS sensor, perform the relearning procedure. It needs to work with the compatible TSGUN device (sold separately). -
Page 83: Mall
LAUNCH X-431 Torque 5 User Manual EEPROM, MCU, and EEPROM/FLASH of vehicle engine and gearbox ECU. It needs to work with the specific immobilizer programmer (sold separately). For more details, please refer to the User Manual included with the module. - Page 84 LAUNCH X-431 Torque 5 User Manual Description Operation tips Car Test Tap this button once to Provides all kinds of the testing expand the submenu. applications on the automotive parts Tap it again to fold the (including circuits, sensors, actuators, submenu.
- Page 85 LAUNCH X-431 Torque 5 User Manual • About: Display the detailed information of the app. Trigger Use to setup trigger condition and trigger type. Check detailed operation Help instructions of application. Trigger information of current channel Readouts represent storage depth, Displays working status.
- Page 86 LAUNCH X-431 Torque 5 User Manual RUN/STOP/WAIT WAIT: All pre-triggered data has been acquired and the oscilloscope is ready to accept a trigger. STOP: The oscilloscope has stopped acquiring waveform data. RUN: The oscilloscope is running. Auto...
- Page 87 LAUNCH X-431 Torque 5 User Manual “Connected” when successfully connected. Cursor position Turn on/off the horizontal/vertical cursor measurement function. When set to ON, Tap this button once to two horizontal/vertical reference lines start the cursor named with Y1 & Y2/X1 & X2 will be calculation function.
- Page 88 LAUNCH X-431 Torque 5 User Manual Waveform display area Channel 1 marker Shows the reference points of the Same with “Channel 2 displayed waveforms. If there is no marker.” marker, the channel is not displayed. 2. Automatic Calibration The automatic calibration routine lets you optimize the oscilloscope signal path for maximum measurement accuracy.
- Page 89 LAUNCH X-431 Torque 5 User Manual Note: While calibrating, no operations are allowed to perform until the calibration process is successfully finished. The self-calibration routine takes several minutes. After calibration is complete, the prompt message “Correction successful” will pop up on the screen.
-
Page 90: Operations
LAUNCH X-431 Torque 5 User Manual 1. Connect the BNC connector of the BNC to 4mm test lead to the CH1/CH2 (select number of channel and channel No. according to actual situations). 2. Plug the black (GND) and red (SIGNAL) 4mm connectors into the Black (GND) and other color (SIGNAL) banana sockets of the 6-way breakout leads respectively. - Page 91 LAUNCH X-431 Torque 5 User Manual User can change the horizontal time/division scale by tapping directly or by tapping the time/division value from the pull-down list. If the waveform acquisition is stopped, the time/division selector ( expands or compresses the waveform.
- Page 92 LAUNCH X-431 Torque 5 User Manual DC offset. AC: The DC signal of the tested signal is blocked, and only AC current is allowed to pass through, and can be used to view waveform with large DC offset. Choose the probe attenuation coefficient.
- Page 93 LAUNCH X-431 Torque 5 User Manual The oscilloscope applies edge trigger, which is the most commonly used and effective trigger method. A clear majority of applications apply this trigger method to trigger waveform. An edge trigger determines whether the oscilloscope finds the trigger point on the rising/falling/dual edge of a signal.
- Page 94 LAUNCH X-431 Torque 5 User Manual The oscilloscope provides 6 parametric auto measurements. Tap Measure and the following screen will appear: Tap to select the desired measurement item. All selected items will be shown on the left side of the Clear button.
- Page 95 LAUNCH X-431 Torque 5 User Manual Tap Clear to turn off all measurement items. 2. Save This function allows you to save the waveforms of the channels. Tap Save and the following screen will appear: Select the desired measurement channel, select file type (.WAV or .CSV), tap...
- Page 96 LAUNCH X-431 Torque 5 User Manual user can save the waveform files to the designated folder (R1, R2). If the files are saved under this folder, the user can recall the saved files for reference and play back through REF channel.
- Page 97 LAUNCH X-431 Torque 5 User Manual Item description: Clear Data: Clear saved data and user setup. Oscilloscope settings: User can save system setup parameter using Save function. Restore function can enable user to use system setup saved previously to avoid repeated setup.
- Page 98 LAUNCH X-431 Torque 5 User Manual measurement point to read the waveform measurement value. There are two types of cursors: horizontal cursor and vertical cursor. The horizontal cursor measures the value in the vertical direction, and the vertical cursor can measure the value in the horizontal direction.
-
Page 99: Multimeter
LAUNCH X-431 Torque 5 User Manual 8. REF (reference) Waveform The oscilloscope has reference channel to display reference waveform. User can upload previously saved WAV file to reference channel and compare it with actual waveform to identify difference. 11.8 Multimeter... - Page 100 LAUNCH X-431 Torque 5 User Manual 2. Select DC voltage/AC voltage and corresponding range. Tap Not connected to search for DBSCar IX devices. When it is successfully connected, the diagnostic tool will display connection status. 3. Insert the black and red test pen into COM and V/Ω terminal of the DBSCar IX device respectively.
- Page 101 LAUNCH X-431 Torque 5 User Manual 2. Select DC current/AC current and corresponding range. Tap Not connected to search for DBSCar IX devices. When it is successfully connected, the diagnostic tool will display connection status. 3. Insert black test pen into COM terminal of the DBSCar IX device. If measured current is above 400mA, insert red test pen into A terminal of the DBSCar IX device.
- Page 102 LAUNCH X-431 Torque 5 User Manual 2. Select Resistance, tap Not connected to search for DBSCar IX devices. When it is successfully connected, the diagnostic tool will display connection status. 3. Insert the black and red test pen into COM and V/Ω terminal of the DBSCar IX device respectively.
-
Page 103: Test Example
LAUNCH X-431 Torque 5 User Manual 3. Insert the black and red test pen into COM and V/Ω terminal of the DBSCar IX device respectively. 4. Attach red test pen to positive end of diode, black test pen to negative end of diode. -
Page 104: Attention
LAUNCH X-431 Torque 5 User Manual knock sensor, “Resistance” can also be used to detect the coil resistance. The resistance should be consistent with the specified value (Refer to the service manual for the specific data). Otherwise, the knock sensor must be replaced. - Page 105 LAUNCH X-431 Torque 5 User Manual 2. The tip of the test pen is metal, do not touch it with hands during measurement, otherwise it might cause electric shock and affect measurement results. 3. Before test, please check measurement range and socket into which the test pen is inserted, perform test after checked with no error.
-
Page 106: Faq
LAUNCH X-431 Torque 5 User Manual 12 FAQ 1. How to save power? • Please turn off the screen while the tool keeps idle. • Set a shorter standby time. • Decrease the brightness of the screen. • If WLAN connection is not required, please turn it off. - Page 107 LAUNCH X-431 Torque 5 User Manual 4. Tap ERASE EVERYTHING to start resetting until the tool automatically reboots. 5. What to do if the language of vehicle diagnostic software does not match the system language? English is the default system language of the tool. After the system language is set to the preference language, please go to the update center to download the vehicle diagnostic software of the corresponding language.
- Page 108 LAUNCH X-431 Torque 5 User Manual 2. Plug the Type C end of the included data cable into the Type C port of the tool, and the other end to the USB port of the PC. 3. After the PC successfully identifies the tool, you can perform data backup.
- Page 109 Quantity Part number Item description Customer Service If you have any questions or comments please forward them to: LAUNCH Tech USA Product Support Phone: 877-528-6249 xt: 4 E-mail: support@launchtechusa.com Fax: 562-463-1590 Monday - Friday 5 am - 5 pm PST Service &...
- Page 110 If the unit is determined to be out of warranty, it will be repaired for a nominal service charge plus return freight. Send the unit pre-paid to: Attn: LAUNCH Tech USA 1820 South Milliken Ave. Ontario, CA 91761...
- Page 111 specifications without notice. The actual object may differ a little from the descriptions in the manual in physical appearance, color and configuration. We have tried our best to make the descriptions and illustrations in the manual as accurate as possible, and defects are inevitable, if you have any question, please contact local dealer or after-sale service center, LAUNCH does not bear any responsibility arising from misunderstandings.
Need help?
Do you have a question about the X-431 Torque 5 and is the answer not in the manual?
Questions and answers