Table of Contents
Advertisement
Quick Links
We advise you to read this manual carefully, which contains all the instructions for maintaining the
appliance's aesthetic and functional qualities. For further information on the product: www.smeg.com
These instructions apply only to the destination countries listed on the appliance's data plate.
This is a class 3 built-in hob.
PRECAUTIONS
General safety instructions
Risk of personal injury
• During use the appliance and
its accessible parts become
very hot. Keep children well
away from the appliance.
• Protect hands with heat resistant
gloves during use.
• Never try to put out a fire or
flames with water: Turn off the
appliance and smother the
flames with a fire blanket or
other appropriate cover.
• This appliance may only be
used by children aged 8 years
and over, and by people of
reduced physical, sensory or
91477A688/A
3
3
6
7
7
7
8
8
8
8
Gas connection
8
9
9
9
9
9
mental capacity, or lacking in
experience in the use of
electrical appliances, provided
that they are supervised or
have been given instructions on
the safe use of the appliance
and of the hazards associated
with it.
• Children must not play with the
appliance.
• Keep children under the age of
eight at a safe distance unless
they are constantly supervised.
• Keep children under the age of
8 away from the appliance
when it is in use.
• Cleaning and maintenance
must not be carried out by
10
10
10
11
11
12
12
13
13
13
16
16
17
18
19
PRECAUTIONS - 3
Advertisement
Table of Contents

Related Manuals for Smeg PGA32G


Summary of Contents for Smeg PGA32G
-
Page 1: Table Of Contents
We advise you to read this manual carefully, which contains all the instructions for maintaining the appliance’s aesthetic and functional qualities. For further information on the product: www.smeg.com These instructions apply only to the destination countries listed on the appliance's data plate. - Page 2 unsupervised children. objects (cutlery or utensils) into • Make sure that the flame- the slots in the appliance. spreader crowns are correctly • Do not use or store flammable positioned in their housings with materials near the appliance or their respective burner caps. directly underneath the hob.
- Page 3 installed. Make sure there is SPACE HEATER. good ventilation, especially • Cooking vessels or griddle when the appliance is in use: plates should be placed inside keep the natural ventilation the perimeter of the hob. openings open or install a •...
-
Page 4: Installation
• This appliance is not designed • Installation using a hose must to operate with external timers be carried out so that the length or with remote-control systems. of the hose does not exceed 2 • This appliance can be used up metres when fully extended for to a maximum altitude of 2,000 steel hoses and 1.5 metres for... -
Page 5: Appliance Purpose
• Run the power cable in the rear sufficient to provide complete part of the unit. Make sure that disconnection in category III it does not come into contact overvoltage conditions, with the lower part of the hob pursuant to installation or a built-in oven below it. -
Page 6: Identification Plate
Identification plate top of the pan, as the top is almost always larger than the base. The identification plate bears the technical data, • When preparing dishes with long cooking serial number and brand name of the times, you can save time and energy by appliance. -
Page 7: Description
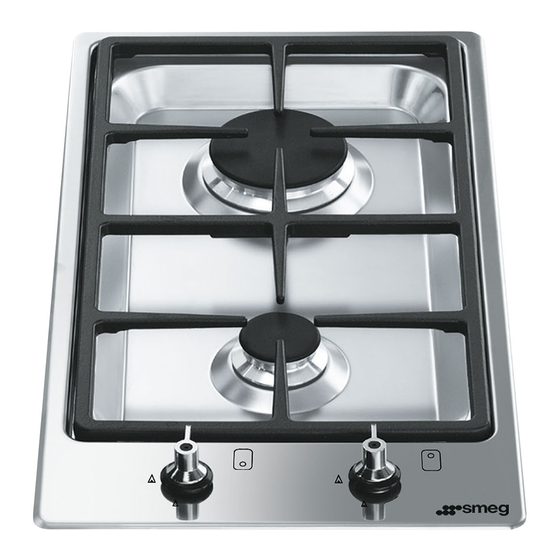
DESCRIPTION General description minimum setting to adjust the flame. Return 1: Pan support grid the knobs to the position to turn off the 2: Control panel burners. AUX: Auxiliary burner Accessories R: Rapid burner UR2 int: Internal Ultra-Rapid Burner • Not all accessories are available on some models. -
Page 8: Preliminary Operations
appliances and do not remove plugs from placed properly. power sockets. Do not use phones or mobile phones inside the building. • Open the window in order to ventilate the room. • Call customer assistance services or your gas supplier. Malfunctions Any of the following indicate a malfunction and you should contact a service centre. -
Page 9: Cleaning And Maintenance
Using cookware • Never use the griddle for more than 40 minutes. Correct positioning of the flame-spreader crowns and burner caps To prevent burns or damage to the hob or the counter top during cooking, all pans or griddles must be placed inside the perimeter Before lighting the hob burners, make sure that of the hob. -
Page 10: Cleaning The Hob
lukewarm water and non-abrasive detergent. the surface, rinse thoroughly and dry with a soft Make sure to remove any encrustations. Dry cloth or a microfibre cloth. them thoroughly and return them to the hob. Weekly cleaning The continuous contact between the Clean and maintain the hob once a week using pan supports and the flame can cause an ordinary glass cleaning product. -
Page 11: Installation
The cooking results are unsatisfactory: • Make sure that the food has not spilled out of the pan and use a larger cooking vessel, • Make sure that the hob is properly if needed. ventilated and that the air inlets are unobstructed. - Page 12 fitting. The pressure should be checked and, if Connection to LPG necessary, adjusted to 2.75 kPa. A test point must be installed between the piping and the appliance to check that the pressure is 2.75 kPa. Use a pressure regulator and make the connection on the gas cylinder following the guidelines set out in the standards in force.
- Page 13 issue a certificate of conformity. Replacing nozzles Extraction using a hood Extraction without a hood Extraction with a single natural draught chimney A = External nozzle, B = Internal nozzle. Extraction with a single chimney with 1. Remove the pan supports, burner caps and extractor fan flame-spreader crowns to access the burner Extraction directly outdoors with wall- or...
-
Page 14: Burner And Nozzle Characteristics Tables
spindle (depending on the model) until the 5. Repeat the operation on all the gas taps. correct minimum flame is achieved. Adjusting the minimum setting for LPG Tighten the screw located at the side of the cock spindle clockwise all the way. Following adjustment to a gas other than the one originally set in the factory, replace the gas setting label on the... -
Page 15: Section Cut From The Countertop
For the Australian/New Zealand market: Built-in cabinet dimensions (mm) The circuit breaker incorporated in the fixed connection must comply with AS/NZS 3000. Connection with plug and socket Make sure that the plug and socket are of the same type. Avoid using adapters, gang sockets or shunts as these could cause overheating and a risk of burns. -
Page 16: Mounting
front and rear sides of the seal must be flush Connection positions (mm) with the hole. Electrical connection 3. Place the hob on the insulating seal and fix it Gas connection to the supporting structure using the screws and fastening brackets supplied (A) so that Mounting the hob is perfectly level. -
Page 17: Instructions For The Installer
base using suitable equipment. contact your local Authorised Service Centre. • Once the appliance has been installed, please explain to the user how to use it correctly. 1 Opens on bottom 2 Opens on back A min. 20 mm - max. 50 mm B max.
Need help?
Do you have a question about the PGA32G and is the answer not in the manual?
Questions and answers