Advertisement
1. INSTRUCTIONS FOR USE..................................................... 22
2. SAFETY PRECAUTIONS........................................................ 23
3. ENVIRONMENTAL CARE ....................................................... 25
4. USING THE HOB .................................................................... 26
5. CLEANING AND MAINTENANCE .......................................... 28
6. POSITIONING IN THE COUNTER TOP ................................. 29
7. ADAPTATION TO DIFFERENT TYPES OF GAS ................... 36
8. FINAL OPERATIONS .............................................................. 38
THESE INSTRUCTIONS ARE VALID ONLY FOR THE DESTINATION COUNTRIES
WHOSE IDENTIFYING SYMBOLS ARE INCLUDED ON THE COVER OF THIS
MANUAL.
INSTRUCTIONS FOR THE USER: these contain user advice, the description
of the controls and the correct procedures for cleaning and maintenance of
the appliance.
INSTRUCTIONS FOR THE INSTALLER: these are intended for the
authorized person who must install the appliance, set it functioning and
carry out an inspection test.
Contents
21
Advertisement
Table of Contents

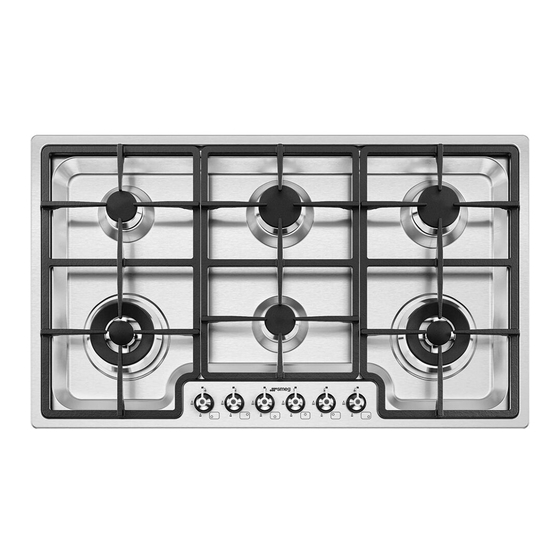
Summary of Contents for Smeg PGF96
-
Page 1: Table Of Contents
WHOSE IDENTIFYING SYMBOLS ARE INCLUDED ON THE COVER OF THIS MANUAL. INSTRUCTIONS FOR THE USER: these contain user advice, the description of the controls and the correct procedures for cleaning and maintenance of the appliance. INSTRUCTIONS FOR THE INSTALLER: these are intended for the authorized person who must install the appliance, set it functioning and carry out an inspection test. -
Page 2: Instructions For Use
General instructions 1. INSTRUCTIONS FOR USE This manual is an integral part of the appliance. It must be kept in its entirety and in an accessible place for the whole working life of the appliance. We recommend reading this manual and all information it contains carefully before using the appliance. -
Page 3: Safety Precautions
Do not remove the plate on the casing for any reason. Before connecting the appliance, ensure that it is set to the type of gas that it will be supplied with, checking the label applied under the casing. -
Page 4: General Instructions
General instructions This appliance may be used by children from the age of 8 and by people of reduced physical and mental ability or lacking in experience and knowledge, provided they are supervised or instructed on the safe use of the appliance and if they understand the associated risks. -
Page 5: Environmental Care
Therefore, the user must consign the... -
Page 6: Using The Hob
If the burners should go out accidentally, after about 20 seconds a safety device will be tripped, cutting off the gas supply, even if the gas tap is open. Turn off the control knob and wait at least 1 minute before trying to re-light the burner. - Page 7 For better burner efficiency and to minimise gas consumption, use pans with a flat, smooth base and a lid that have a suitable size for the burner, thus preventing the flames reaching the sides of the pan (see point “4.3 Cookware diameters”).
-
Page 8: Cleaning And Maintenance
To clean and preserve stainless steel surfaces, use only specific products that do not contain abrasives or chlorine-based acids. How to use: pour the product onto a damp cloth and wipe the surface, rinse thoroughly and dry with a soft cloth or chamois leather. -
Page 9: Positioning In The Counter Top
Installation can be carried out on various materials such as masonry, metal, solid wood or plastic laminated wood as long as they are heat resistant (T 90°C). Fixing to the traditional built-in model support structure... - Page 10 Instructions for the installer Carefully trim the surplus away from edge beyond the seal. The dimensions given in figure 2 refer from the hole to the inside of the seal. Dimensions: Gas and electrical connection location (measurements in mm).
- Page 11 IMPORTANT: if the appliance is mounted on a unit, make sure that a separating shelf is installed, as shown in the figure. If the appliance is instead on an oven installed under the hob, there is no need to install a separating shelf.
- Page 12 Do not remove this plate for any reason. The plug at the end of the supply cable and the wall socket must be of the same type and must conform to the applicable legislation on electrical installations.
- Page 13 The air vents, protected by grills, must be the right size to comply with current regulations and positioned so that no part of them is obstructed, not even partially.
- Page 14 Once the operation is complete, check the hose fittings for leaks using a soapy solution; never use a flame. The hob is preset for natural gas G20 (2H) at a pressure of 20 mbar. For supplying it with other types of gas, see chapter "7. ADAPTATION TO DIFFERENT TYPES OF GAS".
- Page 15 1 of the appliance, placing the seal 2 between them. Installation with flexible hose must be carried out so that the length of the piping does not exceed 2 metres when fully extended; make sure that the hoses do not come into contact with moving parts and that they are not crushed in any way.
-
Page 16: Adaptation To Different Types Of Gas
Before carrying out the following operations, disconnect the appliance from the power supply. The appliance is preset for natural gas G20 (2H) at a pressure of 20 mbar. In case of operation with other types of gas, the burner nozzles must be changed and the minimum flame adjusted on the gas taps. - Page 17 Natural gas – G20 20 mbar capacity (kW) Nozzle diameter Reduced capacity 1/100 mm Auxiliary (1) 1.05 Semi-rapid (2) 1.75 Ultra-rapid (3) 3.90 130 + 75 1600 Arrangement of the burners on the hob BURNERS 1 Auxiliary 2 Semi-rapid 3 Ultra-rapid...
-
Page 18: Final Operations
“7.1 Replacing the hob nozzles” in reverse order. After adjustment with a gas other than the preset one, replace the label on the casing of the appliance with the label corresponding to the new gas. This label can be obtained from the nearest Authorised Service Centre.


Need help?
Do you have a question about the PGF96 and is the answer not in the manual?
Questions and answers