Table of Contents
Advertisement
Quick Links
I
ISTRUZIONI DI INSTALLAZIONE ED IMPIEGO
ATTENZIONE!
La sicurezza dell'apparecchio é garantita solo rispettando queste istruzioni sia in fase di installazione che di impiego; é
pertanto necessario conservarle.
AVVERTENZE
- All'atto dell'installazione ed ogni volta che si interviene sull'apparecchio, assicurarsi che sia stata tolta la tensione di
alimentazione.
- L'apparecchio non può essere in alcun modo modificato o manomesso, ogni modifica ne può compromettere la sicurezza
rendendo lo stesso pericoloso. FLOS declina ogni responsabilità per i prodotti modificati.
- Per un funzionamento sicuro e corretto è necessario che questo apparercchio sia collegato ad un efficiente impianto di
messa a terra.
- Se il cavo flessibile si danneggia, deve essere sostituito da FLOS o da personale qualificato al fine di evitare pericoli.
- Il simbolo
riportato sull'apparecchio indica che il prodotto deve essere smaltito in modo differenziato dai rifiuti
urbani.
DATI TECNICI
- Lampada incandescente ad alogeni Max 100W, attacco E27, tipo HSGS.
- Lampada a fluorescenza 23W, attacco E27, tipo FB.
ISTRUZIONI PER LA PULIZIA DELL'APPARECCHIO
Per la pulizia dell'apparecchio utilizzare esclusivamente un panno morbido eventualmente inumidito con acqua e sapone
o detersivo neutro per lo sporco più tenace. Attenzione: non utilizzare alcool o solventi.
GB
INSTRUCTION FOR CORRECT INSTALLATION AND USE
WARNING!
The safety of this fitting can only be guaranteed if these instructions are observed, during both installation and use. Please
retain these instructions safety.
REMARKS
- When installing and whenever acting on the appliance, ensure that the power supply has been switched off.
- The appliance may in no way be modified or tampered with, any modification may compromise safety causing the appliance
to become dangerous. FLOS declines all responsibility for products that are modified.
- This appliance must be connected to an efficient grounding system in order to work safely and correctly.
- Should the external trailing cable get damaged,it must be replaced by FLOS or by qualified personnel in order to avoid
any danger.
- The symbol
shown on the device indicates that the product must be thrown out in a different manner than with the
urban trashes.
TECHNICAL DATA
- Incandescent halogen bulb Max 100W, E27 fitting, HSGS type.
- F luorescent light bulb 23W, E27 fitting, FB type.
CLEANING INSTRUCTIONS
Use only a soft cloth to clean the appliance, dampened with water and soap or mild cleanser if needed for resistant dirt.
Warning: do not use alcohol or other solvents.
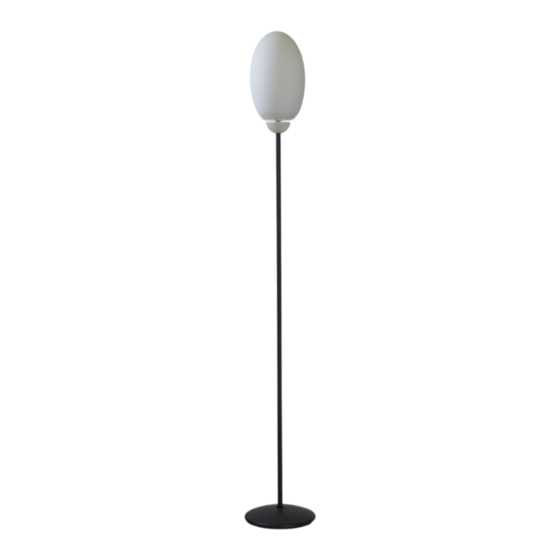
BRERA F1/2/3
1
08-05-2014
Cod.07977
Advertisement
Table of Contents

Related Manuals for FLOS BRERA F1


Summary of Contents for FLOS BRERA F1
- Page 1 BRERA F1/2/3 ISTRUZIONI DI INSTALLAZIONE ED IMPIEGO ATTENZIONE! La sicurezza dell’apparecchio é garantita solo rispettando queste istruzioni sia in fase di installazione che di impiego; é pertanto necessario conservarle. AVVERTENZE - All’atto dell’installazione ed ogni volta che si interviene sull’apparecchio, assicurarsi che sia stata tolta la tensione di alimentazione.
- Page 2 - Bei der Installation und bei Eingriffen an der Leuchte ist sicherzustellen, daß die Anlage vom Netz abgeschaltet ist. - Der Apparat darf auf keinen Fall veraendert oder unerlaubt geoeffnet werden, jede Veraenderung desselben kann die Sicherheit in Frage stellen und somit gefaehrlich werden. FLOS lehnt jede Verantwortung fuer unsachgemaess behandelte Produkte ab. - Für eine sichere und ordnungsgemäße Funktionsweise ist diese Leuchte an eine effiziente Erdungsanlage anzu- schließen. - Falls das flexible äußere Kabel beschädigt wird, muß es von FLOS oder von qualifiziertem Personal ersetzt werden, um Gefahren zu vermeiden. - Das auf dem Gerät wiedergegebene Symbol zeigt an, dass das Produkt getrennt vom Stadtmüll entsorgt werden muss. TECHNISCHE DATEN - Halogen-Glühlampe max 100W, Anschluss E27, typ HSGS.
- Page 3 - Para um funcionamento seguro e correcto é necessário que este aparelho esteja ligado a uma eficiente instalação de ligação a terra. - Se o cabo flexível está danificado, deve ser substituído pela FLOS ou por pessoal qualificado para evitar qualquer perigo. - O símbolo indicado no aparelho indica que o produto deve ser eliminado de forma diferenciada em relação ao lixo urbano.
- Page 4 - В момент установки и каждый раз при проведении работ с устройством, убедиться в снятии напряжения питания. - У стройство не может изменяться или разбираться, любые изменения могут нарушить надёжность, делая его опасным. FLOS не несёт ответственность за измененную продукцию. - Для надежного и правильного функционирования данного устройства необходимо обеспечить его подсоединение к эффективной системе заземления. - При повреждении гибкого кабеля он должен быть заменён FLOS или квалифицированным персоналом в целях предотвращения опасности. - Символ приведённый на устройстве, указывает на то, что данная продукция должна быть переработана отдельно от городских отходов. ТЕХНИЧЕСКИЕ ДАННЫЕ...
- Page 5 Fig.1 Fig.2 Fig.1 Montare la zavorra (A) nella base dell’apparecchio d’illuminazione (B) con le apposite viti (C) in dotazione. Fig.2 Montare la lampada, appoggiare il diffusore (D) sul supporto (E), facendo attenzione alla loro complanarità. Fig.1 Mount the weight (A) to the lamp base (B) with the screws (C) supplied. Fig.2 Fit the bulb. Rest the diffuser (D) on support (E), making sure that they are correctly aligned with each other. Abb.1 Den ballast (A) mit den entsprechenden beigepackten schrauben (B) in die leuchtenbasis (C) einbauen. Abb.2 Glühlampe einschrauben. Lichtstreuer (D) auf den Halter (E), unter Beachtung ihrer Komplanarität, aufsetzen. Fig.1 M onter le ballast (A) sur la base de la lampe (B) à l’aide des vis ad hoc (C) fournies de sèries. Fig.2 Visser l’ampoule. Appuyer le diffuseur (D) sur le support (E) en veillant à ce qu’ils soient coplanaires. Fig.1 M ontar el lastre (A) en la base de la làmpara (B) con los correspondientes tornillos (C) adjuntos. Fig.2 Instalar la bombilla. Apoyar el difusor (D) en el soporte (E) cuidando mantener la coplanitud de los mismos.
- Page 6 Fig.3 Fig.3 Ruotare il diffusore (D) in senso orario fino allo scatto di blocco. Fig.3 Turn the diffuser clockwise until it clicks into place. To remove the diffuser turn it counter-clockwise. Abb.3 Lichtstreuer (D) im Uhrzeigersinn bis zum Einschnappen drehen. Fig.3 Tourner le diffuseur (D) dans le sens d’horloge jusqu’au cran de blocage. Fig.3 Girar el difusor (D) en el sentido de las manecillas del reloj hasta percibir el enganche de bloqueo del mismo. Fig.3 Girar o difusor (D) no sentido horário até ouvir o bloqueio. Рис.3 Повернуть диффузор (D) по часовой стрелке до щелчка блокировки.
Need help?
Do you have a question about the BRERA F1 and is the answer not in the manual?
Questions and answers