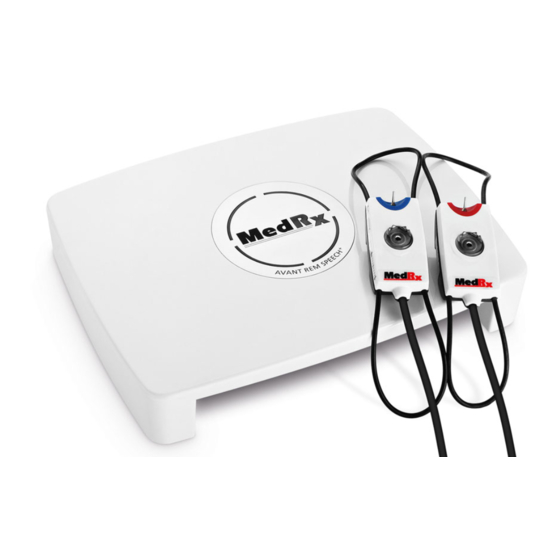
MedRx AVANT Training Manual
Audiometer
Hide thumbs
Also See for AVANT:
- Training manual (22 pages) ,
- Installation manual (10 pages) ,
- Installation manual (12 pages)

Subscribe to Our Youtube Channel
Related Manuals for MedRx AVANT


Summary of Contents for MedRx AVANT
- Page 1 T R A I N I N G MANUAL AVANT AUDIOMETERS Air, Bone, Speech and Masking Audiometry www.medrx-int.com...
-
Page 2: Table Of Contents
Contents Introduction………………….………………………………………………… AVANT™ Audiometer Software Overview……..………………….……………. AVANT™ Audiometer Software Options...……………….………..…………… Preparing for Testing…………………………………………………………… 8 Pure Tone Audiometry………………………….……………………………… 11 Speech Audiometry…………………………..……………….………….…… Speech MCL & Speech UCL…………………..……………….………….…… Word Recognition (WR)…………………….………………….……….…….… 18 QuickSIN (Optional)………………………………………….……….……… 19 Tinnometer (Optional)……………………….…………………….………… 21 Hearing Loss Simulator……………….………………………………….……. Master Hearing Aid……………………………………………………..………. 33 Printing……………………………………………………………………….…... -
Page 3: Introduction
Installation Manual is included in the original AVANT Audiometer packaging in both printed and PDF formats. The scope of this manual is to get you “up and running” with your AVANT Audiometer System. Please consult the interactive Help System within the software for more detailed information of features and functionality. -
Page 4: Avant™ Audiometer Software Overview
Software to meet their needs. Access these options from the File Menu on The Options may also be accessed the AVANT Audiometer Main Screen as from the Audio screen by clicking on shown below. the Options text menu as shown below. - Page 5 The View tab allows you to set the default The Audiometry tab sets the look and appearance of the test environment. behavior of the audiometer. The MHA/HLS tab sets the default look and If your system has a Tympanometer behavior of the Master Hearing Aid and connected, this tab will assist in configuring Hearing Loss Simulator.
- Page 6 Assign Transducers Option 1: On the Audiometry Options Option 2: You can change transducers by screen click Transducers to assign specific Right-Clicking on any transducer icon on the Audiometry screen. transducers to the audiometer outputs. The Transducers dialog box will then appear. Select the appropriate transducer for each output.
- Page 7 Technical Support with tools for helping you troubleshoot technical issues. Access this screen from the File Menu on the Avant Main Screen as shown to the right. The key features of each tab are described below. For more in-depth information, consult the interactive Help system within the software by pressing the F1 key or clicking the Help icon.
-
Page 8: Preparing For Testing
“Transducer & Accessories” page in the Installation manual. Operator headsets for use with the Avant Audiometer should have 32 ohms impedance and the speaker power should be at least 50 watts. Air conduction transducers for use with this device should have an impedance of 10 ohms. - Page 9 If you need to test ear canal. frequencies beyond 8000 Adjust the headband so the earphones Hz, you must notify MedRx. remain in place, but be careful not to This option carries a price make it so tight as to cause patient differential which will be detailed at the time of order.
- Page 10 1 meter from the patient ear and at the same height. Device Maintenance Annual re-calibration of the transducers used with the Avant Audiometer is recommended. There are no user repairable components of this device. Refer to the Installation Manual for care and cleaning instructions.
-
Page 11: Pure Tone Audiometry
These thresholds are plotted on a standard graph called an audiogram. The AVANT Audiometer software controls the hardware, stores the data (if running within NOAH or TIMS) and prints a standard audiogram report. - Page 12 NOTE: If the threshold at 2000 Hz is more than 20 dB different (less than or greater than) the threshold at 1000 Hz, repeat steps 5 through 8 at 1500 (the “half octave” between 1000 Hz and 2000 Hz). 11. Repeat steps 5 through 8 for 4000 Hz, 8000 Hz, 500 Hz and 250 Hz. 12.
- Page 13 Masking for Pure Tone Audiometry There are several accepted methods for masking. This manual will not promote one over another, however, to use the masking function on the AVANT Audiometer, follow the steps below: 1. Click the Masking button. The red light will appear indicating that the masking is on.
-
Page 14: Speech Audiometry
Audiometer Only. If the high frequency control selectors do not appear on the right panel and if you need to test frequencies beyond 8000 Hz, you must notify MedRx. This option carries a price differential which will be detailed at the time of order. - Page 15 4. Select Spondee Word Lists A&B from the list. 5. Click Start Test. 6. Click the Play button or press the F9 key to present a word. The word will play through the chosen transducer as well as display on the screen. 7.
-
Page 16: Speech Mcl & Speech Ucl
Speech MCL & Speech UCL The patient’s most Comfortable Level and Uncomfortable Level for speech can be obtained while you are in Work Recognition (WR). 1. From the Avant main screen, Click the Audiometry button. 2. Click the WR button located on the toolbar on the top of the screen. - Page 17 8. When using the Mic option adjust your input using the slider so that it is peaking at the black triangle under the VU meter. The VU meter is at the top of the MedRx Software and will become active once you press Start Signal.
-
Page 18: Word Recognition (Wr)
They are to repeat the words the best they can. If they are not sure of a word, they should take a guess. 6. From the Avant main screen, Click the Audiometry button. 7. Click the WR button located on the toolbar on the top of the screen. -
Page 19: Quicksin (Optional)
QuickSIN (Optional) The primary complaint of hearing-impaired persons is difficulty hearing in background noise. The measurement of SNR loss (signal-to-noise ratio loss) is important because speech understanding in noise cannot be reliably predicted from the pure tone audiogram (Killion & Niquette, 2000). The QuickSIN test was developed to: Provide a one-minute estimate of SNR loss. - Page 20 Performing the QuickSIN Test Click the QuickSIN From the Avant main • • screen, click the button on the top of Audiometry icon. the Audiometry screen. Present the test with earphones or in a sound field. The attenuator dial is set to 70 dB HL. For subjects with PTA hearing losses greater than 45 dB HL, the attenuator dial is set to a level that is “loud but OK.”, this is...
-
Page 21: Tinnometer (Optional)
5. Repeat steps 2-4 until all 6 sentences in the list have been played and scored. After all six sentences are scored, the following results are displayed: • Total SNR Loss in dB. Recommendations. • Tinnometer (Optional) Purpose of the Tinnometer Tinnitus is experienced by millions of people worldwide. - Page 22 7. A graphical display of the sounds being played for the patient. Stimulus and Audiogram (if done within Avant or Noah) are display in dB SPL Interactions with the patient are controlled as follows: 1. Patient response switch indicator 4.
- Page 23 There are 3 Steps needed for Tinnitus Assessment with the Tinnometer 1. Identify patient’s tinnitus by frequency, bandwidth, slope and tempo 2. Lower the identified tinnitus until patient threshold is reached 3. Raise the tinnitus level above the identified tinnitus intensity (widen bandwidth if needed) until the patient states they no longer hear the tinnitus.
- Page 24 Step 2: Find Identified Tinnitus Threshold 1. Use down arrow on your keyboard to lower stimulus until patient states they are no longer able to hear the tinnitus. 2. Click Threshold Level button. Step 3: Masking Tinnitus for 60 Seconds 1.
- Page 25 To use the Modulation features within Tinnometer, you must first complete the three steps involved with tinnitus assessment. Once tinnitus assessment is complete, you can use modulation by: Activating the channel in which the tinnitus assessment was performed. Enter the modulation tab on the right side of Tinnometer software.
- Page 26 Tinnometer Audiometry Scan The Tinnometer Scan tab is designed for various forms of air conduction audiometry. There are three types of audiometry that can be performed with Tinnometer. You can access the forms of audiometry with the buttons located by the number 1 in the image below. Tinnometer Residual Inhibition (RI) The Tinnometer RI tab is designed for Residual Inhibition (RI) testing for a patient’s tinnitus.
- Page 27 Select the RI tab on the right side of the Tinnometer software. Ask the patient the bothersome level of their tinnitus from 1 to 10 and mark their response. Click the stop watch to begin the masking stimulus (stimulus to play for 60 seconds).
- Page 28 When the stimulus stops the patient must redefine their tinnitus bothersome level every 30 seconds. The bothersome level should decrease upon the stimulus stopping and will increase with time. The test continues until the bothersome level returns to pre-test level. Tinnometer Report Printing The Tinnometer has four reports available for printing: tinnitus assessment report, manufacturer guidance report, questionnaire report...
- Page 29 Tinnitus Assessment Report Tinnitus assessment reports are able to be generated after completing the three steps to tinnitus assessment. Once all steps are complete you are able to print a report To generate your tinnitus assessment report, select “printer …” from the File menu.
- Page 30 Manufacturer Guidance Report Manufacturer guidance reports are designed to provide hearing aid sound therapy guidance to a clinician based on tinnitus assessment results. Sound therapy is an option to tinnitus treatment. We encourage all clinics to develop a tinnitus treatment protocol that is in line with their tinnitus treatment goals.
- Page 31 Graph Channel Report Graph channel reports will print a patient report which displays an image of the patient’s tinnitus with QR codes for YouTube videos that play a wind modulation noise nearest to their tinnitus. To generate the report you must: 1.
-
Page 32: Hearing Loss Simulator
Hearing Loss Simulator The Hearing Loss Simulator demonstrates the effect of the client’s hearing loss for the significant third party. The program attenuates an input signal to simulate the audiogram. The third party listens to the free field speakers. The third party can hear how their own voice is distorted by the hearing loss when the Record input option is used. -
Page 33: Master Hearing Aid
File allows the user to play sound files. The program supports MP3 and WAV files and comes with a preset MedRx Sounds Sensations set of files. After the option is activated, use the player panel to control the playback. CD allows the user to play music CDs. After the option is activated, use the player panel to control the playback. - Page 34 How to use the Master Hearing Aid: 1. Select the Master Hearing Aid (MHA) icon from the main screen. 2. Enter the Audiogram values manually if the data is not automatically imported to this screen. 3. Select the input signal type: File, CD, Mic, or Record. 4.
-
Page 35: Printing
Printing Printing within the Avant Audiometer software is very simple. From the File menu, click one of the following options: Page Setup – Allows you to set margin sizes and the default text header for your reports. Print Setup – selects the printer you want the report to be sent to. - Page 36 (operating instructions) (operating instructions) Temperature limitation Type B applied part. lass II equipment (Type B equipment) Manufacturer (MedRx) Microphone Start (of action) Start (of action) Stop (of action) Non-ionizing electromagnetic radiation Authorized Representative...
-
Page 37: Limited Warranty
If this system fails to perform as specified during this period, the purchaser is responsible for calling MedRx at +49 30 70 71 46 43. The company's representative will advise the owner to either return specific components or the entire system...
Need help?
Do you have a question about the AVANT and is the answer not in the manual?
Questions and answers