Advertisement
Quick Links
Walk-Behind Trowels
Handle/Throttle Assembly Installation
The following instructions are intended to assist the user in the installation of the Standard Handle (SXH/SXHD) and Quick
Pitch™ (QXH/QXHD) on the Multiquip walk-behind trowels. It is not intended to take the place of the Operation and Parts
Manual shipped with the trowel. Refer to the Operation and Parts Manual for SAFETY, OPERATION, and MAINTENANCE
Information. If you did not receive a manual with your trowel, contact Multiquip at (800) 421-1244 for a replacement.
REQUIRED TOOLS
„ Ratchet/Socket set
„ Wrench
„ Phillips Screwdriver
PARTS
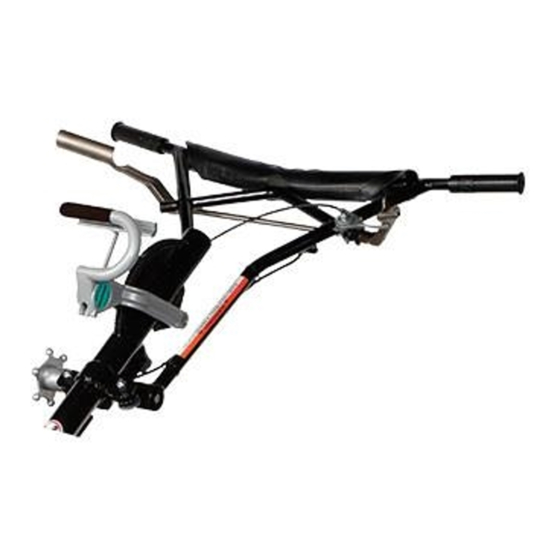
Verify that all parts are accounted for. See Figure 1 and
Table 1.
1
OR
1
QUICK PITCH™
HANDLE
Figure 1. Standard/Quick Pitch
WALK-BEHIND TROWELS — HANDLE INSTALLATION INSTRUCTIONS P/N 20485 — REV. #4 (09/18/14) — PAGE 1
STANDARD
2
HANDLE
6
7
N S
3
I O
C T
R U
S T
I N
5
4
Trowel Handle
TM
Table 1. Handle Parts
Item
Part No.
No.
SXH
1
or QXH
or Quick-Pitch™ Handle
2
22100
Handle Installation Kit
3
1493
3/8-16 x 3 1/4 HHC Screw
4
10133
5
10136
6
20485
Installation Instructions
7
21746
Spring, Primary Throttle Return
WORK SAFELY!
Only a qualified service technician with proper training
should perform this installation. Follow all shop safety rules
when performing this installation.
PREPARATION
1. Make sure trowel is turned off and engine is cool.
2. Place the trowel in an area free of dirt and debris. Make
sure it is on secure level ground.
Description
Qty.
Standard Handle
1
1
1
3/8-16 Nyloc Nut
2
3/8 Flat Washer
2
1
1
Remarks
Includes
item 2
Includes
items 3-7
Advertisement

Subscribe to Our Youtube Channel
Summary of Contents for MULTIQUIP Standard Handle SXH
- Page 1 The following instructions are intended to assist the user in the installation of the Standard Handle (SXH/SXHD) and Quick Pitch™ (QXH/QXHD) on the Multiquip walk-behind trowels. It is not intended to take the place of the Operation and Parts Manual shipped with the trowel. Refer to the Operation and Parts Manual for SAFETY, OPERATION, and MAINTENANCE Information.
- Page 2 UNPACKING THE TROWE MAIN HANDLE TUBE INSTALLATION This trowel is equipped with a folding upper handle (Figure 2). 1. Attach the main handle tube to the gearbox using the The trowel is shipped with the handle in the folded or stowed supplied hardware as shown in Figure 3.
- Page 3 BLADE PITCH CABLE INSTALLATION 3. Remove brass set nut #1 from the blade pitch cable end. See Figure 7. 1. For trowels equipped with a Standard handle (SXHC), simply turn the star wheel counterclockwise to pitch the blades flat. This will release the tension on the blade pitch cable (Figure 5).
-
Page 4: Throttle Cable Installation
THROTTLE CABLE INSTALLATION 10. Adjust cable tension by loosening the lock nut on the throttle cable receiver (see Figure 10), loosening or Refer to Figure 9 for the location of components. tightening the adjusting nut below it, then retightening the lock nut. CABLE SWIVEL STOP... - Page 5 2. Using a 10MM socket, remove the existing bottom mounting screw on the recoil starter cover (Figure 11) and connect the bottom black/red wire from the centrifugal stop switch to this engine ground point. 3. Reinstall mounting screw and tighten securely. 4.
-
Page 6: Here's How To Get Help
© COPYRIGHT 2014, MULTIQUIP INC. Multiquip Inc and the MQ logo are registered trademarks of Multiquip Inc. and may not be used, reproduced, or altered without written permission. All other trademarks are the property of their respective owners and used with permission.


Need help?
Do you have a question about the Standard Handle SXH and is the answer not in the manual?
Questions and answers