Table of Contents
Advertisement
User Guide
This guide shows you how to operate the Take-it MV500 digital video camera (DV camera) and provides
information on basic functions, video/audio clip recording, still image shooting, playback, and troubleshooting.
Before using the Take-it MV500, be sure to read the safety precautions to prevent injuries or damage to users
or equipment.
Advertisement
Table of Contents

Related Manuals for Microtek Take-it MV500


Summary of Contents for Microtek Take-it MV500
-
Page 1: User Guide
This guide shows you how to operate the Take-it MV500 digital video camera (DV camera) and provides information on basic functions, video/audio clip recording, still image shooting, playback, and troubleshooting. Before using the Take-it MV500, be sure to read the safety precautions to prevent injuries or damage to users or equipment. - Page 2 June 2005 Disclaimer of Warranty Microtek does not guarantee the content of any written materials or software, and is not liable for losses sustained by the purchaser arising from the use or inability to use these written materials, software or equipment.
-
Page 3: Federal Communications Commission Interference Statement
This device may not cause harmful interference, and (2) this device must accept any interference received, including interference that may cause undesired operation. Responsible Party: Loi Han Microtek Lab, Inc. 16941 Keegan Avenue Carson, CA 90746 Phone: 310-687-5800 Fax: 310-687-5950... -
Page 5: Table Of Contents
Table of Contents Federal Communications Commission Interference Statement ... 3 Safety Precautions ... 6 Introduction ... 8 DV Camera Package ... 9 DV Camera Components ... 10 Front/Bottom View ... 10 Rear/Side View ... 11 LCD Screen Display ... 12 Video Mode ... - Page 6 Playback Playback Mode ... 40 Playback Zoom ... 42 Slide Show ... 43 Rotating Images ... 43 Specifying the Startup Image ... 44 MP3 Playback ... 45 Deleting and Printing Deleting Files ... 46 Deleting Current ... 46 Deleting Selected ... 46 Deleting All ...
-
Page 7: Safety Precautions
Safety Precautions Before you use the digital video camera (DV camera), be sure to read the following safety precautions, which detail the proper operation of the DV camera and its accessories to prevent injuries or damage to users or equipment. This symbol indicates situations where improper use of the DV camera may result in harm to the DV camera operator. - Page 8 Do not drop batteries or let them be banged around. This could damage the casings, causing the batteries to leak. • If the internal parts or components of the battery come into contact with your eyes or your mouth, flush the affected site with water and get medical help.
-
Page 9: Introduction
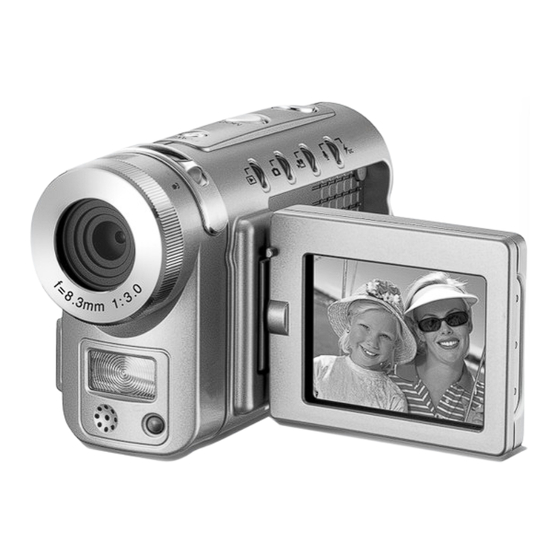
Introduction The Microtek Take-it MV500 is a digital video camera (DV camera) that applies the ASF (MPEG 4) recording video format to capture motion pictures at a resolution of 640 x 480 or 320 x 240 pixels, offering superior image quality and super audio. Equipped with a large 2.0"... -
Page 10: Dv Camera Components
DV Camera Components Front /Bottom View 1. Shutter button 2. MODE button ( Playback/ Photo/ Video / Audio) 3. POWER button 4. Macro focus lever ( / ) 5. Lens 6. Flash 7. Self-timer indicator 8. Microphone 9. Strap ring(s) 10. -
Page 11: Rear/Side View
Rear/Side View 1. Mode indicators/READY LEDs 2. Charger LED/Audio mode indicator 3. Multifunction/4-way arrow button • Zoom In/ Play/ Pause • Down/ Zoom Out/ Stop • Right/ Fast Forward/ Flash • Left/ Rewind 4. OK/Pan button 5. MENU button 6. Earphone/TV-out connector 7. -
Page 12: Lcd Screen Display
LCD Screen Display Video Mode STBY STBY 00:02:09 1.0X +2.0 SNAP SNAP START Video recording standby +2.0 SNAP SNAP STOP Video recording in progress 1. Video mode 2. Video format ( 3. Standby 4. Available recording time (Suggested) 5. Digital zoom level* (1X – 12X) 6. -
Page 13: Photo Mode
Photo Mode 10 9 1. Photo mode 2. White Balance (WB) Auto*/ 3. Drive mode Self-timer/ 4. Sharpness ( 1.0X 5. EV Compensation 6. Digital zoom level* (1X – 12X) 7. Macro mode 8. Number of pictures remaining 9. Card indicator 10. -
Page 14: Audio Mode
Audio Mode STBY STBY SNAP SNAP START Audio recording standby SNAP SNAP STOP Audio recording in progress 1. Audio mode 00:02:09 2. Standby 3. Available recording time (Suggested) 4. Shutter button (Press to begin audio recording) 5. Card indicator 6. Battery status indicator ( 1. -
Page 15: Playback Mode
Playback Mode VIDEO VIDEO 01/09 01/09 Nine-image display 1. Playback mode 2. The selected file is enclosed in a yellow border 3. Video file 4. Still image with voice memo 5. Selected file/Total number of files taken 6. Press the OK button to display the selected file in single-image display mode 7. - Page 16 01/09 IMAGE IMAGE Still image (Normal view) 1. Playback mode 1. Playback mode 2. Selected file/Total number 2. Image magnification level of files taken 3. Press the OK button to 3. Selected file/Total return to nine-image display mode 4. Pan mode 4.
-
Page 17: Getting Started Attaching The Strap
Getting Started Attaching the Strap 1. Thread the strap through the strap ring of the DV camera as shown. 2. Fasten the two ends of the strip as shown. Ensure that the strap is adjusted correctly to fit your hand. 3. -
Page 18: Checking Battery Status
3. Hold the battery in place and close the battery door securely. 4. Push the battery door latch in the direction indicated by the arrow to close the battery door. To remove the batteries, first make sure the DV camera is turned off. -
Page 19: Charging The Lithium Ion Battery
Charging the Lithium ion Battery If your DV camera is supplied with an AC adapter (5V, 2A), when connected using the AC adapter, the DV camera can function as a charger, allowing you to charge the Lithium ion battery or power the DV camera. 1. -
Page 20: Using The Lcd Screen
To remove the SD/MMC card, make sure the DV camera is turned off, open the SD/MMC card compartment cover, push the card in, and release; the card pops out. NOTE: • Incorrect insertion of the SD/MMC card may cause a memory error, blocking you from storing any data in the SD/MMC card. -
Page 21: Turning The Dv Camera On/Off
Turning the DV Camera On/Off Press the POWER button to turn the DV camera on. When the DV camera is turned on, the green Mode indicators start blinking and will stay on steady in the Video mode, and the LCD screen is activated as well. -
Page 22: Selecting The Language
The time should also be set accurately on your DV camera. To set the time: 1. In the Setup ( ) menu screen, use the / button to select “ ” – Time, then press the button. A Time adjustment screen appears on the screen, allowing you to set the time. -
Page 23: Formatting The Sd Card
Formatting the SD/MMC Card* Before you insert an SD/MMC card into your DV camera for the first time, you will need to format the SD/MMC card with the DV camera. In most cases, the newly purchased SD/MMC card can be directly used for storing images. -
Page 24: Before Shooting Using Modes
Before Shooting Using Modes The MODE button allows you to switch among Playback, Photo, Video, and Audio modes. Press the MODE button, and the LCD screen shows the mode screen with the four mode options. Select the desired mode by using the 4-way arrow button. -
Page 25: Using The Menus
Using the Menus Different menus are available for Video, Photo, Playback, and Setup modes. You can customize the DV settings for your own use, as well as for shooting- related functions. Press the MENU button to display a menu for the selected mode. (The Setup menu appears in all modes, except Audio mode.) To access the menus: 1. -
Page 26: Using The Multifunction Button
Using the Multifunction Button The Multifunction button provides Up, Down, Left, and Right arrow selections for navigating the menu screens. In addition, the button can perform different functions, depending on the selected DV mode, as shown by the table below. Button Playback Photo... -
Page 27: Shooting
Shooting Shooting Your First Video Video mode allows you to record digital video clips in ASF (MPEG 4) and AVI format with resolutions of 640x480 or 320x240 pixels. The video clips can be stored in the DV camera’s internal memory or in the SD/ MMC expansion card, the length of which is determined only by the size of your available memory. -
Page 28: Shooting Your First Still Images
Shooting Your First Still Image In addition to making vide clips, the Take-it MV500 can be used to take digital still images in the JPEG format at resolutions of up to 12 megapixels (interpolated). 1. Press the POWER button to turn on the DV camera. -
Page 29: Shooting With Digital Zoom
Shooting with Digital Zoom The DV camera is equipped with a digital zoom function. You can zoom in on distant images by pressing the ( ) button on the rear of the DV camera without changing the shooting distance; the maximum zoom scale is 12X. -
Page 30: Using The Flash
Using the Flash The flash serves as a built-in supplemental light source for taking pictures in environments with insufficient lighting. The effective flash range is 1.5m to 2m. The flash with red-eye reduction allows you to reduce the phenomenon of “red eyes,” which occurs when a subject is photographed directly while using a flash. -
Page 31: Using The Self-Timer
Using the Self-Timer A 10-second self-timer mode in the DV camera enables you to be part of any picture. With the self-timer on, a picture is taken automatically after 10 seconds. To take pictures with the Self-timer: 1. In Photo mode ( ), press the MENU button. 2. -
Page 32: Recording A Voice Memo
Recording a Voice Memo When you have taken your picture, your DV camera can record a maximum 10-second audio clip that can be saved with the picture. To record an audio clip to go with your picture: 1. In Photo mode ( ), press the MENU button. 2. -
Page 33: Customizing Shoot Settings
Customizing Shoot Settings This section lists the shooting-related settings available to the Take-it MV320. You can modify selected functions by changing the parameter for a given option. To access these functions, use the MENU button on the rear on the DV camera. The following table lists the available functions for the Video and Photo mode. -
Page 34: Selecting Image Size
Selecting Image Size The Size function enables you to capture images with different image size settings. Choosing a bigger image size will require more memory for storing recorded still images or video clips. The DV camera can capture still images as large as 12 megapixels (4000x3000 pixels) or as small as VGA (640x480 pixels). -
Page 35: Selecting A Drive Mode
Selecting a Drive Mode The Drive Mode function enables you to determine how you want to take your still images. Use the Drive Mode setting to switch between a standard Shutter operation, a delayed shutter, and a continuous-shot shutter. This function is available only in Photo mode. -
Page 36: Adjusting White Balance
Adjusting White Balance The White Balance function enables you to adjust the color balance in shots taken under different lighting conditions. With white balance activated, the DV camera also can eliminate color variations caused by lighting conditions. In most cases, if you choose “Auto”, the DV camera automatically adjusts the White Balance to the environment. -
Page 37: Turning Voice Memo On/Off
Turning Voice Memo On/Off The Voice Memo function allows you to add a maximum 10-second audio clip immediately to the captured image you just made. The Voice Memo file will have the same basic file name as the captured image with a different file extension — .WAV. This function is available only in Photo mode. -
Page 38: Turning Image Stabilizer On/Off
Turning Image Stabilizer On/Off The Electrical Image Stabilizer function minimizes the effect of camera shake caused by an unstable position during handheld shooting, and offers the best possible results for a stable picture. This function is available only in Video mode. To access the Image Stabilizer: 1. -
Page 39: Audio
Audio Recording Audio Audio mode allows you to record audio clips in WAV format. You can record audio clips of any length; recording time is determined only by the size of your available memory. To record audio clips: 1. Press the POWER button to turn on the DV camera. The DV camera starts up in Video mode when you turn the DV camera on. -
Page 40: Playback Playback Mode
Playback Playback Mode Playback Mode is used to play the stored images and video/audio clips made with the DV camera in either nine-image display or single-image display. Image and video clips will be displayed on the LCD screen. Audio clips will be played using the internal speaker. - Page 41 Video and still images will be displayed on the LCD screen. Audio files can be heard through the internal speaker of the DV camera. 00:00:00 00:02:09 01/09 01/09 IMAGE VIDEO VIDEO In this display mode, you can use the to toggle forwards/backwards through all the recorded files.
-
Page 42: Playback Zoom
Playback Zoom In playback mode, the magnification feature allows you to magnify a captured still image at up to four times the original viewing size. This feature works only on captured still images. • Press the ( ) button repeatedly to magnify the image from the original viewing size to four times the size in 0.1-step increments. -
Page 43: Slide Show
Slide Show The Slide Show function enables you to view your all stored files by playing them back in sequence (if you have stored more than one file). You can set the delay to either two or five seconds (2s or 5s) between files. To run a slide show: 1. -
Page 44: Specifying The Startup Image
Specifying the Startup Image The Startup Image function allows you to specify which image will be displayed when you turn on the DV camera. To specify a new startup image: 1. In Playback mode, select a captured still image you require. -
Page 45: Mp3 Playback
MP3 Playback The DV camera can also function as an MP3 player, allowing you to play downloaded MP3 music files, like a regular MP3 player. Before starting MP3 playback, make sure the MP3 music files are already in memory. Otherwise, transfer MP3 music files from your computer with a supplied USB cable. -
Page 46: Deleting And Printing Deleting Files
Deleting and Printing Deleting Files The Erase function lets you remove files from memory, allowing you to free up space in which to store future recordings. Deleting Current 1. In Playback mode, select the file you want to remove from the memory, then press the MENU button. -
Page 47: Deleting All
Deleting All 1. In Playback mode, press the MENU button. 2. Use the / button to select “ ” – Erase, then press the button. 3. Choose “Erase All”, then press the OK button. A confirmation screen appears, allowing you to erase all or to cancel. -
Page 48: Using Direct-Print
Using Direct-print 1. Set the DV camera to Direct-print mode. a) In Playback mode, press the MENU button. b) Press to select the Setup ( ) menu option at the top. c) Use the / button to select “ ” – USB Switch, then select “... -
Page 49: Using Dpof
Using DPOF 1. In Playback mode, press the MENU button. 2. Use the / button to select “ ” – Print. 3. Press the button. A Print options menu appears, allowing you to print all images, to print selected images, or to cancel. -
Page 50: Dv Camera Setup
DV Camera Setup The DV camera provides some manual settings that enable you to customize the functions of the DV camera for your specific needs. Use the Setup menu to set the various setting for your DV camera. The Setup menu can be accessed from any mode except Audio mode, and is always the same. -
Page 51: Format
Format Use this function to prepare the SD card to record data. Formatting the SD card will erase all previous files that existed in the SD card. Make sure you have saved everything that you need on your computer before you format the SD card. -
Page 52: System Requirements
Downloading to Your Computer The Take-it MV500 DV camera is equipped with a USB connector that allows you to download stored files that were made with the DV camera to your computer using the USB link. You can play back these downloaded files with your computer system’s default applications... -
Page 53: Getting The Dv Camera Ready
Getting the DV Camera Ready 1. Make sure the SD card* containing the files you wish to download is inserted in the DV camera. 2. Make sure that the USB Switch function is switched to USB Mode. If the USB Switch is set to the incorrect mode, you will need to do the following: a. -
Page 54: Copying Files
Copying Files After connection, a newly created icon appears on the desktop, indicating the DV camera is connected to your computer successfully. Files can now be transferred into any folder on your hard drive. 1. For PC Users: Double-click the “My Computer” icon, then double-click “Removable Disk”. -
Page 55: Browsing Files
For Macintosh users: Visit the “http://www.videolan.org/ vlc“ website to download the video player application. Value-bundled Software The software bundled with the Take-it MV500 provides user-friendly tools for image editing and management, allowing you to open, view, print, email, upload to web or manage transferred images. -
Page 56: Appendix A - Viewing On A Television Set
Appendix A – Viewing on a Television Set In addition to being viewed on the DV camera’s LCD screen, recorded video clips or still images can be viewed on a TV screen. The TV screen can be used to frame the subject during video recording. To view images on a TV set, select the video output system first. -
Page 57: Appendix B - Web Cam (Windows Only)
DV camera driver. b) When the Microtek Software Installer screen comes up, click “Camera Driver”, then follow the on-screen instructions to install. c) Click “EXIT” on the Microtek Software Installer screen when the driver has been installed. -
Page 58: Appendix C - Using The Sd Card
Appendix C – Using the SD Card* An SD card can be inserted in the DV camera to provide external memory in which to store images and video/audio clips. This section covers the following topics: Inserting the SD card • Formatting the SD card •... -
Page 59: Appendix D - Maintenance
Do not use synthetic cleaning solutions or other solvents to clean the DV camera body or lens. If you are unable to remove marks or dirt from the lens, contact Microtek Customer Service. • Do not rub the LCD screen forcefully or apply excessive pressure to it to avoid scratching the surface. -
Page 60: Appendix E - Troubleshooting
Appendix E – Troubleshooting DV Camera Problems The DV camera does not power on. The DV camera turns off suddenly. A1: The DV camera is not powered up. • Press and hold the POWER button for a few moments to see if the READY LED is lit. - Page 61 The DV camera does not record video clips, audio clips, or shoot still images. The subject is not in the LCD screen. The date stamp could not be found on the captured image. The time/date stamp on the images or video/audio clips is incorrect. MP3 cannot be played on camera.
- Page 62 Battery Problems The battery power is depleted prematurely. Rechargeable battery cannot be successfully charged. A1: The incorrect type of battery is being used. • Replace the batteries with a rechargeable Lithium ion or four AAA- sized alkaline batteries. A2: The temperature of the batteries is lower than that of standard operating conditions.
- Page 63 Photography Problems Shots are out of focus and blurry, or photograph quality is not as good as expected. Photographed subject is too dark or underexposed. Photographed subject is too bright or overexposed. The flash does not fire. A1: The “Anti-Shake” setting is disabled. •...
- Page 64 Images or video/audio clips cannot be played back. The DV camera cannot delete images or video/audio clips. Images or video/audio clips cannot be played back on TV. Image cannot be printed directly from a Direct-print printer. A1: The Mode is set to the incorrect mode. •...
- Page 65 The DirectX driver is not installed. • Install the DirectX driver appropriate for your system from the Microtek CD-ROM; version 8.1 or later is recommended. DirectX is automatically installed each time when you install Ulead VideoStudio.
- Page 66 Go to the Windows Control Panel and double-click “Add/Remove Programs”. If the DV camera driver does not appear in the list, you must install the DV camera driver from the Microtek CD-ROM. • Check if the DV camera is detected by your system.
- Page 67 Go to the Windows Control Panel and double-click “Add/Remove Programs”. If the DV camera driver (for Web Cam) does not appear in the list, you must install the DV camera driver from the Microtek CD- ROM. • Check if the DV camera is detected by your system.
-
Page 68: Appendix F - Warning And Error Messages
• Use cotton swab dipped with industrial alcohol to clean the contacts • Replace the SD card • Contact Microtek Customer Service Erase some data or use an SD card that has ample free space Set the write-protected tab on the SD card to the unlocked position... -
Page 69: Appendix G - Menu Items And Factory Defaults
Appendix G - Menu Items and Factory Defaults Video/Photo Menu Options Video Format*** Size 10M, 8M, 5M*, 3M, 2M/ Quality Drive Mode** EV Compensation -2.0, -1.5, -1.0, -0.5, 0.0*, +0.5, +1.0, +1.5, +2.0 White Balance Sharpness** Voice Memo** On, Off* Color Mode Anti-Shake*** On*, Off... -
Page 70: Appendix H - Specifications
Appendix H – Specifications Image Sensor 5.1 megapixels CMOS Sensor Size 1/1.8” Resolution Video clips 640x480 pixels (30 fps) 320x240 pixels (30 fps) Still image 4000x3000 (12 megapixels, interpolated), 3264x2448 (8 megapixels, interpolated), 2592x1944 (5M), 2048x1536 (3M), 1600x1200 (2M) File Formats Video clips: ASF (MPEG 4), AVI •...
Need help?
Do you have a question about the Take-it MV500 and is the answer not in the manual?
Questions and answers