Table of Contents
Advertisement
Quick Links
Advertisement
Table of Contents

Related Manuals for Microtek Digital Video Camera


Summary of Contents for Microtek Digital Video Camera
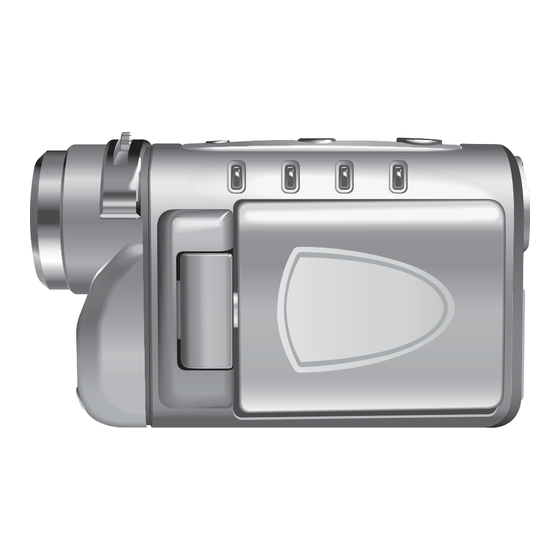
- Page 1 Digital Video Camera User Manual...
- Page 3 Fur- ther, Microtek reserves the right to revise this publication and to make changes in the contents hereof without obligation to notify any person of such revision or changes.
- Page 4 Taking Care of Your Camera • Do not use your camera at temperatures below 0°C or above 40°C. • Do not use or store your camera in the environments listed below: – Direct sunlight – High and dusty places – Next to an air conditioner, electric heater or other heat sources –...
-
Page 5: Table Of Contents
Table of Contents Getting started ........... 1 Features..........1 Digital still camera......1 Digital video camera......1 Digital audio recorder ......2 webcam ..........2 Picture and video player ....2 Unpacking..........3 Camera components ......4 Inserting the battery ......6 Charging the battery ...... - Page 6 Audio mode ........23 Playback mode........25 USB mode .......... 27 Downloading files......27 Webcam feature ....... 29 Using the setup menus......31 Picture Menu ........32 Image size ........32 Quality ..........34 Drive mode ........36 Exposure adjustment......37 White balance ........
- Page 7 Date Stamp........57 Video Out......... 59 Format..........61 Reset ..........62 Copy to SD ........63 Frequency ........65 Power Saving ........66 Language.......... 68 USBSwitch ........69 FileNoRST........70 Music Menu........71 Appendix A ..........75 Specification ........75 Appendix B ..........
-
Page 9: Getting Started
Pictures can be stored in the 16 MB internal memory or on optional SD expansion card. Digital video camera The DV can record digital movies in ASF format with QVGA quality (30 frames per second). Video footage can be stored in the 16 MB internal memory or on optional SD expansion card. -
Page 10: Digital Audio Recorder
Digital audio recorder The DV can record digital audio in WAV format. Audio footage can be stored in the 16 MB internal memory or on optional SD expansion card. webcam When connected to a host computer using a USB cable, the DV can function as an advanced webcam with QVGA quality. -
Page 11: Unpacking
1.2 Unpacking All the items shown below should be present and undamaged. If any items are missing or damaged, consult your dealer straight away. Pouch DV digital camera Strap Lithium battery Video and USB cables User manual and warranty card AC power adapter... -
Page 12: Camera Components
1.3 Camera components Shutter button Mode button Power button Battery com- partment cover SD card slot Tripod mount... - Page 13 Charge/ Playback Photo Video Audio Focusing mode mode mode mode lever LCD screen Up, Down, Left, Lens Right, and OK Menu assembly Flash buttons button port DC-in Self timer indicator...
-
Page 14: Inserting The Battery
1.4 Inserting the battery Your DV is powered by a 3.7V, rechargeable lithium battery. Follow the instructions below to insert a bat- tery. Open the battery compartment door. Insert the battery as shown. Close the battery compartment door. - Page 15 Your DV can also use non rechargeable alkaline bat- teries instead of a single rechargeable battery. Four AAA size, alkaline batteries should be used in place of the supplied lithium battery and should be inserted as shown below. Note: The AC adapter can still be used when non rechargeable batteries are installed, but it will not recharge the cells.
-
Page 16: Charging The Battery
1.5 Charging the battery Charge the bat- tery using the supplied AC adapter. Plug the AC adapter into the DC-in socket on the rear of the cam- era. Verify that the DC light illuminates to indicate that the battery is being charged. Charge light Note: Use only the AC adapter provided with the DV to charge the battery. -
Page 17: Inserting An Sd Card
1.6 Inserting an SD card You can install an SD memory card in your camera to increase the memory capacity. Follow the instructions below to install an SD card. Open the SD card compartment door on the bottom of the camera. Insert an SD card until it clicks into place. - Page 18 To remove the card: Open the SD card compartment door. Press the card into the slot and release. The card will spring part way out and can be removed. Close the SD card compartment door.
-
Page 19: Taking Your First Still Picture
1.7 Taking your first still picture Follow these instructions to take your first still photo- graph with your DV digital camera. Turn on the DV by pressing the power button for 2 seconds. Power button The camera must be in Photo mode to take still pictures. - Page 20 Press the shutter button to take the picture. Shutter button When you press the shutter button you will hear a sound to indicate that the picture has been taken (unless the sound has been disabled), and the captured picture will remain on the screen for two seconds. You can review your picture in Playback mode.
-
Page 21: Shooting Your First Video
1.8 Shooting your first video Follow these instructions to take your first video with your DV digital camera. Turn on your DV by pressing the power button for two seconds. The camera may start up in Photo mode and you will need to switch to Video mode to shoot video. - Page 22 The DV changes to Video mode. Check for the Video mode icon in the top left corner of the screen to con- firm this. 08:10 Video mode icon Start Use the LCD screen to frame your shot. Press the shutter button to begin recording. Shutter button Press the shutter button a second time to stop recording.
-
Page 23: Connecting
1.9 Connecting You can connect your DV digital camera to a TV to view either still pictures or video stored on the inter- nal memory or on an SD card. You can also connect the DV to a computer using a USB cable and download pictures or videos to the hard disk. -
Page 24: Connecting To A Computer
Connecting to a computer Connect your DV to a computer using the supplied USB cable as shown below. When the DV is connected to your computer you can download the images, videos and audio samples you have made to your hard disk. You can also use the DV as a webcam. -
Page 25: Modes
Chapter 2: Modes The DV digital camera can operate in four different modes. Each mode offers different features and func- tions. In this section you will learn what each mode is for and how to use them. This section also covers how to use the DV as a web- cam and how to download your pictures, videos, and audio samples from the camera to your hard disk. -
Page 26: Photo Mode
2.1 Photo mode Use Photo mode for taking still pictures in JPEG for- mat. To switch the camera to Photo mode from another mode: Press the Mode button on the top of the camera. Mode button The LCD displays the 4 mode options. Press the Up arrow button on the rear of the cam- era. -
Page 27: Zoom
size and resolution of the image, white balance, and other settings. See Picture Menu on page 32. See Taking your first still picture on page 11 for details on how to take pictures in Photo mode. Zoom The DV is equipped with a digital zoom function. You can zoom in on distant images by pressing the Up arrow button on the rear of the camera. -
Page 28: Voice Memo
Focusing lever When the focusing lever +2.0 +2.0 is in the macro position, an icon will appear on the LCD screen to warn you. Macro icon Voice Memo You can also record a short audio clip when you take a picture. To record an audio clip to go with your still picture: Make sure that the voice memo function is turned on. -
Page 29: Video Mode
2.2 Video mode Use Video mode for recording digital moving images. Video recordings will be in ASF format and will be stored in memory. To switch the camera to Video mode from another mode: Press the Mode button on the top of the camera. Mode button The LCD screen displays the 4 mode options. - Page 30 footage you record. You can adjust size and resolu- tion of the image, white balance and other settings. See Picture Menu on page 32. See Shooting your first video on page 13 for details on how to shoot video. Focusing The DV is a fixed focus camera but there is a manual focusing function that you can adjust to get the best results.
-
Page 31: Audio Mode
2.3 Audio mode Use Audio mode for recording digital sounds. To switch the camera to Audio mode from another mode: Press the Mode button on the top of the camera. Mode button The LCD screen displays the 4 mode options. - Page 32 Press the Right arrow button on the rear of the camera. Right arrow button The camera will switch to Audio mode. In Audio mode the LCD screen will not display any picture but the microphone icon will appear in the center of the screen to indicate that the camera is ready to record sounds.
-
Page 33: Playback Mode
2.4 Playback mode Use Playback mode to review all the pictures, movies and sounds that you have stored on the DV. To switch your DV to Playback mode: Press the Mode button on the top of the camera. Mode button The LCD screen displays the 4 mode options. - Page 34 The camera will switch to Playback mode. In Playback mode, the LCD screen displays all the files stored in the camera memory. Still photographs and movies are displayed as thumbnails of the image. Audio files are displayed as the microphone icon. Use the arrow buttons on the back of the camera to highlight a file to display, and press the OK button to confirm your selection.
-
Page 35: Usb Mode
2.5 USB mode The DV will automatically switch to USB mode when it is connected to a USB port using the cable pro- vided. See Connecting on page 15 for details on how to connect your camera to a computer. Note: When the camera is connected to a com- puter with a USB cable, it automatically goes into USB mode. - Page 36 ware. Windows ME, 2000 and XP will do this auto- matically but if your computer uses Windows 98 SE, you will have to insert the CD provided and follow the on-screen instructions. See Installing Software on page 81. Open Windows Explorer and click on the My Computer folder.
-
Page 37: Webcam Feature
of the SD card will be displayed. If no SD card is inserted, the contents of the cam- era internal memory will be displayed. Tip: Before you connect your DV to a com- puter, you may want to copy the contents of the internal camera memory to the SD card. - Page 38 The first time you connect your camera to a computer as a webcam the operating system will attempt to load driver software. You will need to insert the CD pro- vided and follow the on-screen instructions. See Installing Software on page 81. Start a webcam enabled application on your com- puter.
-
Page 39: Using The Setup Menus
Chapter 3: Using the setup menus Your DV can be configured using three menus. You can access the menus using the menu button on the rear on the camera. Navigate through the menu sys- tem using the arrow buttons on the rear of the camera and make selections using the OK button. -
Page 40: Picture Menu
3.1 Picture Menu Use the picture menu to set the size, quality, sharp- ness, and color properties of pictures. You can also adjust the exposure, white balance, set the shutter mode, and turn the voice memo feature on or off. Note: The picture menu can be accessed from either Photo mode, Video mode, or Play- back mode. - Page 41 Use the Up and Down arrow buttons on the rear of the camera to highlight the Size icon. Size +2.0 +2.0 +2.0 +2.0 Select Select Select Select PHOTO PHOTO Size Size Press the Right arrow button to display the Size options.
-
Page 42: Quality
Use the Up and Down arrow buttons to highlight the image size you require and press the Left but- ton to confirm your choice. Arrow buttons and OK button Press the Menu button to exit the menu. Quality The quality option can be accessed from either Video mode or Photo mode. - Page 43 Press the Menu button at the rear of the camera to display the main menu screen. +2.0 +2.0 Select Select PHOTO PHOTO Use the Up and Down arrow buttons on the rear of the camera to highlight the Quality icon. Press the Right arrow button to display the Qual- ity options.
-
Page 44: Drive Mode
Press the Left button to confirm your choice Arrow buttons and OK button Press the Menu button to exit the menu. Drive mode Use the Drive Mode setting to switch between a stan- dard shutter operation, a delayed shutter that allows you to take pictures of yourself, and a multi-shot shut- ter that allows you to take three pictures in rapid suc- cession every time you press the shutter button. -
Page 45: Exposure Adjustment
Use the Up and Down arrow buttons on the rear of the camera to highlight the Drive Mode icon. Press the Right arrow button to display the Shut- ter Mode options. Use the Up and Down arrows to select the option you require. - Page 46 Turn on the camera and make sure that it is in either Photo mode or Video mode. See Modes on page 17. Press the Menu button at the rear of the camera to display the main menu screen. +2.0 +2.0 Select Select PHOTO...
-
Page 47: White Balance
Press the Left button to confirm your choice Arrow buttons and OK button Press the Menu button to exit the menu. White balance The white balance setting is used to set the correct color balance under different lighting conditions. Without the correct white balance setting, white objects would look red under artificial lighting, or blue in sunlight. -
Page 48: White Balance Options
Press the Menu button at the rear of the camera to display the main menu screen. +2.0 +2.0 Select Select PHOTO PHOTO Use the Up and Down arrow buttons on the rear of the camera to highlight the White Balance icon. -
Page 49: Sharpness
When set to Auto the camera detects the ambient light and sets White Balance automatically. Press the Left button to confirm your choice Arrow buttons and OK button Press the Menu button to exit the menu. Sharpness Use the Sharpness option to sharpen or soften the outlines in your images. -
Page 50: Voice Memo
Use the Up and Down arrow buttons on the rear of the camera to highlight the Sharpness icon. Press the Right arrow button to display the Sharpness options. +2.0 +2.0 +2.0 +2.0 Sharp Sharp Normal Normal Soft Soft Select Select Select Select Sharpness... - Page 51 Press the Menu button at the rear of the camera to display the main menu screen. +2.0 +2.0 Select Select PHOTO PHOTO The Voice Memo icon is not displayed on the screen when you first enter the setup menu screen. Use the arrow buttons to scroll through the list of options to find the Voice Memo icon.
-
Page 52: Color Mode
Press the Left button to confirm your choice. Arrow buttons and OK button Press the Menu button to exit the menu. With the voice memo function turned on, you can record a short audio clip with each photo. After you have taken your photo in the usual way, the voice memo icon appears on the screen. - Page 53 Press the Menu button at the rear of the camera to display the main menu screen. +2.0 +2.0 Select Select PHOTO PHOTO Use the Up and Down arrow buttons on the rear of the camera to highlight the Color Mode icon. Press the Right arrow button to display the Color Mode options.
-
Page 54: Erase
Press the Left button to confirm your choice. Arrow buttons and OK button Choosing the Normal option will produce standard color pictures and video. The Black & White setting produces monochrome style pictures and video. The Classic option produces pictures and videos tinted to look like old fashioned sepia photographs. - Page 55 Press the Menu button at the rear of the camera to display the main menu screen. Select Select Erase Erase Use the Up and Down arrow buttons on the rear of the camera to highlight the Erase icon. Press the Right arrow button to display the Erase options.Use the Up and Down arrows to select the option you require.
-
Page 56: Slide Show
will erase all the files on your camera and SD card if inserted. Press the Menu button to exit the menu. Slide Show Use the Slide Show function to display all the files stored in your camera, one after the other. The Slide Show function can only be accessed from Playback mode. -
Page 57: Rotate
Press the OK button to confirm your choice. Set the delay to either two or five seconds or cancel the slide show and return to Playback mode. When you have selected a delay, all files on the camera will be displayed, one after the other. Press the Menu button to exit the menu. -
Page 58: Print
You can choose to roate an image by 90°, 180°, or 270°. The image rotated will be the last one you selected. Cancel Cancel Select Select Select Select Rotation Rotation Rotation Rotation Press the Menu button to exit the menu. Print Use the Print function to print still images stored on your camera. -
Page 59: Setup Menu
Press the Right arrow button to display the Print options. Use the Up and Down arrows to select the option you require. Cancel Cancel Select Select Select Select Select Select Print Print Print Print Press the OK button to confirm your choice. Arrow buttons and OK button If you chose to print just a single image, the last... -
Page 60: Brightness
Brightness Use the Brightness option to set the LCD screen brightness level. There are five levels of brightness available. Turn on the camera and press the Menu button to display the main menu screen. Press the Right arrow button once to highlight the Setup menu option at the top. -
Page 61: Beep
Press the Left arrow button to confirm your choice. 2004/05/15 2004/05/15 2004/05/15 2004/05/15 03:12:15 03:12:15 03:12:15 03:12:15 NTSC NTSC NTSC NTSC Select Select Select Select Brightness Brightness Brightness Brightness Press the Menu button to exit the menu. Beep Use the Beep option to turn on or off the beep noise made by the camera when buttons are pressed. -
Page 62: Date
Use the Up and Down arrow buttons to highlight the Beep option. Press the Right arrow button to display the avail- able options. 2004/05/15 2004/05/15 2004/05/15 2004/05/15 03:12:15 03:12:15 03:12:15 03:12:15 NTSC NTSC NTSC NTSC Select Select Select Beep Beep Beep Beep Use the Up and Down buttons to highlight an... - Page 63 Press the Right arrow button once to highlight the Setup menu option at the top. 2004/05/15 2004/05/15 +2.0 +2.0 03:12:15 03:12:15 NTSC NTSC Select Select Select Select PHOTO PHOTO SETUP SETUP Use the Up and Down arrow buttons to highlight the Date option.
-
Page 64: Time
Press the Left button repeatedly to confirm your changes and return to the Setup menu screen. Press the Menu button to exit the menu. Time Use the Time option to set the time. To access the Time option: Turn on the camera and press the Menu button to display the main menu screen. -
Page 65: Date Stamp
Press the Right button to display the submenu. Time HH : MM : SS 2004/05/15 2004/05/15 03:12:15 03:12:15 06 : 07 : 00 NTSC NTSC Select Select Select Time Time Use the Left and Right buttons to highlight the field you want to change. Enter a new value in the chosen field using the Up and Down buttons. - Page 66 Press the Right arrow button once to highlight the Setup menu option at the top. 2004/05/15 2004/05/15 +2.0 +2.0 03:12:15 03:12:15 NTSC NTSC Select Select Select Select PHOTO PHOTO SETUP SETUP Use the Up and Down arrow buttons to highlight the Date Stamp option.
-
Page 67: Video Out
Video Out Use the Video Out option to define the type of TV you want to use to display your camera pictures on. You can set the video output to either PAL or NTSC format. NTSC is a format used in North America and some of Asia. - Page 68 Press the Right arrow button to display the avail- able options. 2004/05/15 2004/05/15 2004/05/15 2004/05/15 03:12:15 03:12:15 03:12:15 03:12:15 NTSC NTSC NTSC NTSC NTSC NTSC Select Select Select Select Video Out Video Out Video Out Video Out Use the Up and Down buttons to highlight an option.
-
Page 69: Format
Format Use the Format option to erase all files on the camera and SD card. Note: When you perform a format, all data on the camera and SD card will be lost. Make sure you have saved everything you need on your computer hard disk before you perform a format. -
Page 70: Reset
Use the Up and Down arrow buttons to highlight either OK or Cancel and press the Left arrow button to perform the function. Format 03:12:15 03:12:15 WARNING ! All images will NTSC NTSC be deleted. Cancel Select Select Select Format Format All image files, audio files, and movie files will be deleted. -
Page 71: Copy To Sd
Use the Up and Down arrow buttons to highlight the Reset option. Press the Right arrow button to display the sub- menu. Use the Up and Down arrow buttons to highlight either OK or Cancel and press the Left arrow button to perform the function. - Page 72 Press the Right arrow button once to highlight the Setup menu option at the top. 2004/05/15 2004/05/15 +2.0 +2.0 03:12:15 03:12:15 NTSC NTSC Select Select Select Select PHOTO PHOTO SETUP SETUP Use the Up and Down arrow buttons to highlight the Copy to SD option.
-
Page 73: Frequency
Frequency To avoid flickering images on the LCD screen, you should make sure that the camera Frequency setting matches the frequency of mains electricity in your country. China and Europe use a 50 Hz system. America and Japan use a 60 Hz system. If you are unsure what frequency your mains supply is, consult your power company. -
Page 74: Power Saving
Use the Up and Down arrow buttons to highlight the required setting. 50HZ 50HZ 50HZ 50HZ 50HZ 50HZ 60HZ 60HZ English English English English Frequency Frequency Frequency Frequency Select Select Select Select Press the Left arrow button to confirm your choice. - Page 75 Press the Right arrow button once to highlight the Setup menu option at the top. 2004/05/15 2004/05/15 +2.0 +2.0 03:12:15 03:12:15 NTSC NTSC Select Select Select Select PHOTO PHOTO SETUP SETUP Use the Up and Down arrow buttons to highlight the Power Saving option.
-
Page 76: Language
Language Use the Language setting to change the language in which the camera menus are displayed. Available lan- guages are, traditional Chinese, simplified Chinese, German, French, Spanish and, English. To access the language setting: Turn on the camera and press the Menu button to display the main menu screen. -
Page 77: Usbswitch
USBSwitch The DV can be connected to your PC to download your pictures to the hard disk It can also be used as a webcam. Use the USBSwitch setting to switch between webcam mode or standard USB mode. To access the USBSwitch setting: Turn on the camera and press the Menu button to display the main menu screen. -
Page 78: Filenorst
Press the Left arrow button to confirm your choice. 50HZ 50HZ 50HZ 50HZ English English English English Web Cam Web Cam USB Mode USB Mode USBSwitch USBSwitch Select Select USBSwitch USBSwitch Select Select Press the Menu button to exit the menu. FileNoRST Each picture you take with the DV is given a number. -
Page 79: Music Menu
Use the Up and Down arrow buttons to highlight the required setting. File No. Reset WARNING ! 50HZ 50HZ All images number will be reset. English English Cancel Select FileNoRst FileNoRst Select Select Press the Left arrow button to confirm your choice. - Page 80 Press the Right arrow button twice to display the Music menu. Select: Select: Exit:MENU Exit:MENU Select Select PLAYBACK PLAYBACK A music note icon appears on the screen. Press the OK button on the rear of the camera to display a list of MP3 files stored in the camera. Use the Left and Right arrow buttons on the rear of the camera to highlight the MP3 file to play.
- Page 81 Use the Left and Right arrow buttons to adjust the volume control. Press the Up arrow button during playback to pause playback. Press the Down arrow button to stop playback.
-
Page 83: Appendix A
Appendix A Specification Resolution Sensor resolution 3 megapixel (2048 x 1536) Output resolution 6 megapixel Functions Digital still camera 6, 4, 3, 2, or 1 megapixel Video recording VGA (12fps) QVGA (30fps) Audio recording synchronize Web camera VGA (12fps) QVGA (30fps) Digital zoom 4 x (in increments of 0.1) MP3 player... - Page 84 Specification Exposure Exposure control Automatic EV compensation -2 EV ~ 2 EV (in increments of 0.5) Shutter speed 1/8 - 1/4000 second White balance Auto/sunlight/tungsten/fluorescent/cloudy Flash Built-in flash Flash modes On (red eye reduction), auto (red eye reduction), off Effective range 1.5m - 2m Display and main menu functions LCD screen...
- Page 85 Specification Memory Internal memory 16 MB built-in flash External SD card slot Software PC compatible Windows 98SE/ME/2000/XP Mac compatible Mac OS (9.x or later) Mass storage Can function as a mass storage device device Connections Yes (USB1.1) TV-out NTSC and PAL compatible Dimensions Size 112 x 67 x 50 mm...
- Page 86 Specification Box contents Accessories Pouch Strap CD-rom (drivers and applications) Warranty card User manual Lithium battery USB cable TV out cable AC power adaptpr Application Wise cam for Windows 98SE/ME/2000 and XP...
-
Page 87: Appendix B
Appendix B Troubleshooting Problem Cause Solution Power does •The batteries are Check that the bat- not turn on. inserted incorrectly. tery is inserted cor- •The batteries are rectly and recharge if dead. necessary. The camera •The camera is set to •Check the camera does not take Playback mode. - Page 88 Troubleshooting Images are The camera was If the battery low not saved in turned off before the indicator appears on memory. image was stored in the LCD screen, memory. replace the batteries immediately. Cannot trans- The USB driver is not •Install the USB fer images to installed.
-
Page 89: Appendix C
Appendix C Installing Software Your DV digital camera comes complete with a CD- rom containing drivers and applications. If your com- puter uses Windows 98SE operating system, you will need to load a driver from the CD-ROM before you can download files from your camera to your com- puter. -
Page 90: Appendix D
Appendix D Guarantee Certificate for Product Services This certificate is invalid without the stamp of the dealer. In the event the date is not filled in, or the dealer's stamp is not present, the date of guarantee begins on the production date of the machine. The period of guarantee expires one year after the date of purchase.
Need help?
Do you have a question about the Digital Video Camera and is the answer not in the manual?
Questions and answers