Philips NeoPix 320 User Manual
Hide thumbs
Also See for NeoPix 320:
- Quick start manual (19 pages) ,
- Quick start manual (21 pages) ,
- Quick start manual

Related Manuals for Philips NeoPix 320


Summary of Contents for Philips NeoPix 320
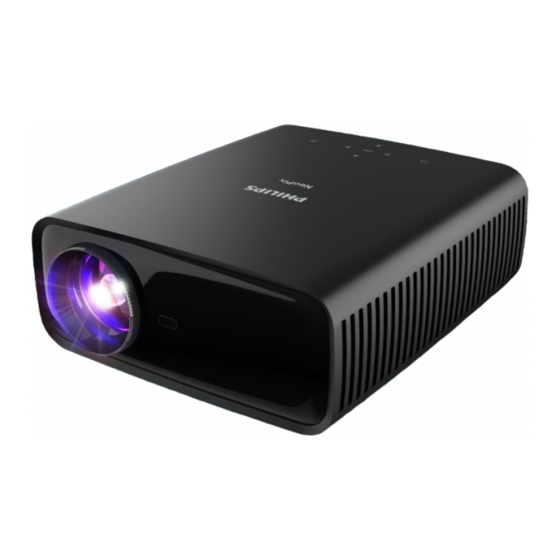
- Page 1 User Manual NeoPix 320 Home Projector Register your product and get support at www.philips.com/support...
-
Page 2: Table Of Contents
Table of contents Introduction �������������������������������������������������3 6 Play media from USB storage devices ����������������������������������������������������������������19 Dear customer ...............3 Connect a USB storage device ......19 About this user manual ..........3 Play videos ..............19 What’s in the box ............3 Play audios ..............20 Customer service centre ..........3 View images ..............20 General safety information ���������������... -
Page 3: Introduction
Introduction What’s in the box NeoPix 320 projector (NPX320/INT) Remote control with 2 AAA batteries Dear customer Quick Start Guide with Warranty Card Thank you for purchasing this projector. AC power cables with plugs x 3 We hope you enjoy this product and the many... -
Page 4: General Safety Information
If the product gets too hot or emits smoke, shut it down immediately and unplug the power cable. Have your product checked by an authorised service centre. Keep the product away from open flames (e.g. candles). Philips · NeoPix 320... -
Page 5: Power Supply
Confirm a selection or change the value for the current setting. Navigation buttons (Up, Down, Left, Right) • Navigate items on the screen. • Press or / to change the value for the current setting. Return to the previous screen. Left speaker Philips · NeoPix 320... -
Page 6: Front View
LED lights up in red. Rear IR sensor Connect to a USB input device, USB storage device or dongle. HDMI Connect to an HDMI™ output port on a playback device. 3.5 mm audio output; connect to external speakers or headphones. Philips · NeoPix 320... -
Page 7: Initial Setup
Quick access to the setup options (e.g. panel by pressing on the projector/ picture and sound options). remote control one or more times. Then select Image > Projection Direction > Front. Switch the projector on or to standby mode. Philips · NeoPix 320... -
Page 8: Connect To Power Supply
A special rear projection screen is required. From the home screen, open the Quick Settings panel by pressing on the projector/remote control one or more times. Then select Image > Projection Direction > Rear. Philips · NeoPix 320... -
Page 9: Prepare The Remote Control
2 seconds or press this button twice. The projector enters standby mode and its power LED turns from white to red. • To fully shut down the projector, disconnect the power cable from the electrical socket. Philips · NeoPix 320... -
Page 10: Set Up The Projector System
From the home screen, open the Quick buttons and OK button to make changes. Settings panel by pressing on the projector/remote control one or more times. Then select Keystone > H/V Correction. Follow the on-screen instructions to adjust the image shape. Philips · NeoPix 320... - Page 11 4 by selecting Next and pressing the OK using ExpressVPN button. Select either "No thanks, I'm not interested" or "Yes, start my free trial for better streaming" and then press the OK button. You will see the home screen after completing the setup. Philips · NeoPix 320...
-
Page 12: Use Home Screen
Bluetooth mouse or keyboard. To learn how • On the Bluetooth setting screen, the remote to connect a Bluetooth mouse or keyboard, control appears as Philips AirMote. see Connect to a Bluetooth device, page • The LED indicator near the top of the 16�... -
Page 13: Open And Configure Apps
Wi-Fi network, see Step 3: Connect to a Wi-Fi network, page 11. Open an app To open an app, select it on the home screen and then press the OK button on the remote control. Philips · NeoPix 320... -
Page 14: Connect To Other Devices
Rotate the wheel to scroll up or down. Keyboard • Your keyboard is best for entering text in text fields, allowing you to type much faster and see more of the screen by removing the need for the on-screen keyboard. Tip: Philips · NeoPix 320... -
Page 15: Connect To A Playback Device Through Hdmi
Game consoles Tablets Connect the dongle to the projector's HDMI DVD/VCR port using an HDMI™ cable. Computers Connect the dongle to the projector's USB Philips · NeoPix 320... -
Page 16: Connect To A Bluetooth Device
Paired. From the projector's home screen, open the Quick Settings panel by pressing • Disable Bluetooth on the projector. the projector/remote control one or more • Turn off the projector. times. Then select Bluetooth. Philips · NeoPix 320... -
Page 17: Use The Projector As A Bluetooth Speaker
• If you switch the projector's audio output mode and turns off its screen to save type to Bluetooth, the Bluetooth setting power. screen automatically opens if Bluetooth is disabled, or Bluetooth is enabled but the Philips · NeoPix 320... -
Page 18: Connect To Wired Speakers Or Headphones
1-2 in "Put the projector into Bluetooth speaker mode, page 17". Note: The projector can be paired with multiple Bluetooth playback devices, but can only output audio from one paired device at a time. Philips · NeoPix 320... -
Page 19: Play Media From Usb Storage Devices
USB storage device, which is to the right of the Internal memory folder. Select a media file. Note: Only supported media files are displayed on the screen. All folders and files are ordered alphabetically Philips · NeoPix 320... -
Page 20: Play Audios
Then select Miracast • The projector displays its device name and the status of the Miracast connection on the screen. On your Android device, access the “Settings” menu and then select the setting for wireless display or projection. Philips · NeoPix 320... -
Page 21: Wireless Projection With Ios Devices/Mac Computers
On iPhone 8 or earlier or iOS 11 or earlier: Swipe up from the bottom edge of the screen. Or on your Mac computer, select the AirPlay status icon in the menu bar, which is near the upper-right corner of the screen. Philips · NeoPix 320... -
Page 22: Change Projector Settings
Timed Shutdown: Select this to turn off the projector after a specific period of • Input Source: Toggle the input source time. between Built-in Android (Philips OS) and • Change Wallpaper: Change the wallpaper HDMI. for the home screen by selecting one of the •... -
Page 23: Change Settings Using Settings Menu
• Time Zone: Set the time zone used by • Input Source: Toggle the input source the projector by selecting a city. between Built-in Android (Philips OS) and • Keyboard Input Method: Select your HDMI. preferred on-screen keyboard or input •... - Page 24 • Philips OS: Select this to use the internal • Red Gain: Adjust the gain for red. Philips OS as the input source. This is the • Green Gain: Adjust the gain for green. default input source. • Blue Gain: Adjust the gain for blue.
- Page 25 Room 3. • Projection Direction: Adjust the projection to the correct direction based on how the projector is installed. • Auto Keystone: Turn auto keystone correction on or off by selecting Yes or No. Philips · NeoPix 320...
-
Page 26: Maintenance
Step 3: Connect to a Wi-Fi network, page 11. Follow the on-screen instructions to Press on the remote control and then complete the update. select System > Firmware Upgrade > Online Upgrade. The projector will automatically Philips · NeoPix 320... -
Page 27: Troubleshooting
• Check that the power cable is connected correctly. The projector cannot read the USB storage • The projector does not support the exFAT file device. system. • Format the USB storage device in FAT32 or NTFS format, then use it. Philips · NeoPix 320... - Page 28 Please clean the lens with a gentle specific glass tissue. You can also push dry air into the product by the side holes in order to clean the optical engine inside. Philips · NeoPix 320...
-
Page 29: Appendixes
Sleep timer ..............yes Power cables (EU, UK, US) AAA batteries for remote control Operating system Quick Start Guide with Warranty Card Philips OS with pre-loaded apps: Netflix, Amazon Prime Video, Hulu, MyCanal, Disney+, VLC, etc. (Apps may vary depending Model on availability) -
Page 30: Ce Statement
Connect the equipment into an outlet on a circuit different from that to which the The Declaration of Compliance can be receiver is connected. consulted on the site www.philips.com. • Consult the dealer or an experienced radio/ Frequency bands Maximum output TV technician for help. -
Page 31: Other Notice
The desire of Screeneo Innovation SA is to other than those designated as original operate systems respecting the environment Screeneo Innovation SA/PHILIPS products or and consequently it has decided to integrate Screeneo Innovation SA/PHILIPS approved environmental performances in the life cycle products. - Page 32 Route de Lully 5c - 1131 Tolochenaz - Switzerland Philips and the Philips Shield Emblem are registered trademarks of Koninklijke Philips N.V. and are used under license. Screeneo Innovation SA is the warrantor in relation to the product with which this booklet was packaged.
Need help?
Do you have a question about the NeoPix 320 and is the answer not in the manual?
Questions and answers