Table of Contents
Advertisement
Quick Links
Casambi Wireless Mesh Network
Detectors
System manual
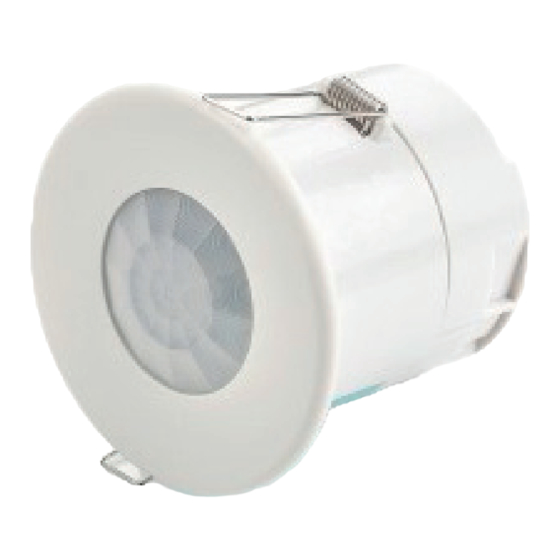
EBDSPIR-CB
Casambi wireless, compact,
flush mounted, ceiling PIR
presence detectors
EBDMR-CB
Casambi wireless, mid range,
flush mounted, ceiling, PIR
presence detectors
Casambi Wireless Mesh Network Detectors
EBDHS-B-CB
Casambi wireless, flush
mounted, high bay/high level,
PIR presence detectors
WDA035 Issue 1.1
System Manual
Advertisement
Table of Contents

Related Manuals for CP Electronics EBDSPIR-CB


Summary of Contents for CP Electronics EBDSPIR-CB
- Page 1 WDA035 Issue 1.1 Casambi Wireless Mesh Network Detectors System Manual Casambi Wireless Mesh Network Detectors System manual EBDSPIR-CB EBDMR-CB EBDHS-B-CB Casambi wireless, mid range, Casambi wireless, flush Casambi wireless, compact, flush mounted, ceiling, PIR mounted, high bay/high level, flush mounted, ceiling PIR...
-
Page 2: Table Of Contents
1.3.1 Equipment Requirements ....................2 1.3.2 NFC Feature Required ......................2 1.3.3 Internet Access ........................2 CP Electronics Sensor Firmware Updates ..................2 APPLICATION OVERVIEW.......................3 App View on Networks ..........................3 Create a Network ............................3 2.2.1 Classic is the Original Network ....................3 2.2.2 Evolution is the Upgraded Network ..................3... - Page 3 Adding Another Sensor to Group Occupancy .................21 5 TIPS AND SHORT-CUTS.......................22 Operations Specific to CP Electronics Sensors ...............22 5.1.1 Apply CP Electronics Sensor Initial Setup First (See appendix 1) ......22 5.1.2 Daylight Control With Switched Output Operation ..........22 General app Hints and Short-cuts ....................22...
-
Page 4: Overview
This guide acts as a complementary document and intends to make recommendations to users on how to apply the unique properties of CP Electronics sensors and highlight the most efficient methods to make the configuration process faster and smoother. -
Page 5: Equipment And Internet Access
1.4. CP ELECTRONICS SENSOR FIRMWARE UPDATES Since newer CP Electronics sensors can be easily updated to the Casambi cloud, any user with the Casambi app can update their installed sensors in situ wirelessly with no physical disruption. -
Page 6: Application Overview
2. APPLICATION OVERVIEW Each project is constructed as a network. Each network will have its security levels permitted to certain login credentials. Once logged into the Casambi user app, multiple networks or multiple projects become accessible. Each network can be given names relevant to the project. Network ‘My Network’... -
Page 7: Control Links And Workflow
2.3 CONTROL LINKS AND WORKFLOW Each light fixture is grouped to act with the same behaviour using scenes. Control functions, such as occupancy control, then call these scenes to activate them. The luminaire groups cannot be used in conjunction with these scenes and they are primarily for manual group switch and dim operation on the app only. -
Page 8: Casambi User App
3. CASAMBI USER APP Within the Casambi system, CP Electronics sensors are configured as ’luminaires with sensors’. Only light fixtures are shown in the app and sensors are built as control properties. Sensors are therefore, not displayed in the gallery tab (used as the floor plan display in the app). -
Page 9: Scenes Tab]
3.3.1. SCENES FOR CP ELECTRONICS SENSORS WITH SWITCHING AND DIMMING OUTPUTS CP Electronics sensors have a great feature of built-in outputs for both switched power output and a DALI dimming output. The value of these two can be defined by the user as part of the scene definition. -
Page 10: Valid Sensor Output Settings
3.3.2. Valid Sensor Output Settings: Dim Out : 1-100% Switched Out (L-Out): OFF Dim Out : 0% Switched Out (L-Out): OFF Dim Out : 1-100% Switched Out (L-Out): ON Dim Out : 0% Switched Out (L-Out): ON Not Valid! The scenario of dimming level at zero and the switched output being ON is NOT a valid scene setting. -
Page 11: Daylight Control Settings
Allow a minute or so for it to take effect. The default settings will give a slow but smooth non-distracting response. 3.3.5. Faster Response Behaviour Settings CP Electronics sensors can give faster daylight control response if the [Sensitivity] set higher. A lower [Tolerance] setting aims to achieve closer to the desired set level. -
Page 12: Other Methods Of Daylight Control
The desired target and light control speed of response is set within the chosen scene as mentioned earlier in the set up steps. 3.3.6 Other Methods of Daylight Control Basic (ON/OFF) Luminaires will switch ON or OFF based on two configurable Lux threshold levels. Sensors may or may not be affected by the nearby luminaires and the mode only operates when it is the highest priority item on control hierarchy. -
Page 13: More Menu
3.4. MORE MENU […] All other control functions can be found under the […] More menu at the bottom right. Timer, sensor and switch control can be accessed here. Also, use the [Network setting] option to activate the [Control hierarchy] to allow occupancy control. 3.5. -
Page 14: Setting The Dimming And Switched Output Values In Scenes
3.7 TIMER SETTINGS There are no special arrangements required for CP Electronics devices as these follow exactly as per the Casambi implementation. They are intuitive and are entirely under the control of the Casambi system. -
Page 15: Manual Control
3.8.1 Manual Control Manual lighting control has the highest priority and will always override the automated control. It can be set to timeout or stay on indefinitely. There are configurable timeouts for manual control assigned for day and night periods of each weekday. When the timeout is reached, the manual control will be removed and the luminaire fades out to the next highest priority control. -
Page 16: Adding The Enocean Switch
3.10 ADDING THE ENOCEAN SWITCH EnOcean switches are added using the Near Field NFC interface built into the latest mobile devices. Therefore, ensure the device chosen for performing the commissioning has NFC built-in to that device when configuring EnOcean switches. Access the switches menu under the […] More tab at the bottom right. -
Page 17: Assigning Functions To The Buttons
3.11 ASSIGNING FUNCTIONS TO THE BUTTONS Each button can be set as scene calls or used as toggle ON/OFF control of an individual or group of luminaires. The example shows the setting as a scene call for button 1. 3.11.1 Control Switch Output Only - Element Control A button can be assigned to control only an element of the sensor which in this case is the switched output which can be controlled without changing the state of the dimming output. -
Page 18: Manual Time-Out
3.12 MANUAL TIME-OUT To avoid lights being wastefully lit ON indefinitely, there is also a backup manual time out where manual switch operations will time out and turn off the lights automatically should no other automation turn it off. Choose [Network setup], then [Control options], then scroll to the option below: Sets the manual switch time-out to turn lights off after this period as a regime based on the day or night of the week. - Page 19 Tap [Done] to finish the settings for the scene. 3. Refer to the Appendix 1 and set all the parameters under different menus to the CP Electronics Initial Setup values. 4. Select [Use Control hierarchy] to allow occupancy control: a.
-
Page 20: Adding Scene Switch For Absence Mode
Choose [Network setup], then enable [Use control hierarchy]. This enables occupancy control to work with switch control and other types of control. 5. Setting occupancy to control both the ’inner row’ and ’dim row’: a. Within the [Luminaire] tab, double tap on the luminaire group to edit. - Page 21 Implementation Function Implementation Occupancy Occupancy switches OFF both Dim Mode = Absence (absence) row channel and inner row switched Switch = toggle mode on various scenes output channel. OFF scene = All OFF Daylight Daylight control settings: Window row to dim with available day- Control light in daylight control scenes Mode = closed loop...
- Page 22 Programming Steps on the Casambi App: 1. Discover nearby devices and add to desired network, name as e.g. Regents Floor 1 a. Choose to use the Evolution network and in Balanced mode to ensure compatibility with older versions of EnOcean switches. 2.
- Page 23 Assign each button to their designed scenes Button 2 to control switch out element only Use toggle so the switch out element for the whiteboard row can be toggled on/off 7. Daylight Setting for ‘dim row’ only: a. Go to [SCENES], tap [Edit] at the top right, then the ’dim row” scene to edit. b.
-
Page 24: Adding Another Sensor To Group Occupancy
4.3. ADDING ANOTHER SENSOR TO GROUP OCCUPANCY Add another occupancy sensor so that the room lights only turn off when both sensors have timed-out. Additional occupancy sensors to control the same group of lights as the first sensor can be added by pairing the new sensor to the same network and setting its occupancy parameters to control the same ON and OFF scenes as that of the first occupancy sensor. -
Page 25: Tips And Short-Cuts
The CP Electronics initial setup values listed in the appendix table are worked through examples known to work well for CP Electronics sensor units. Therefore, these can be good starting values that can help to solve any issues for a project. Once the unit is seen to be working using these values, one can then move to make the specific refinements preferred for the specific project. -
Page 26: Security, Sharing And Remote Support
6. SECURITY, SHARING AND REMOTE SUPPORT By default, the app configures the network as private and is NOT shared. None of the paired devices will be visible to other users. To enable security sharing, configure Sharing settings, under […More] => [Network setup] => [Sharing settings] 6.1. -
Page 27: Logging In From Remote For Support
6.2. LOGGING IN FROM REMOTE FOR SUPPORT When given the email and password, anyone with experience at a remote location can use the Casambi app to view the setup of that network and advise of any helpful improvements. At this point there would not be the ability to connect to the live devices. A gateway setup will be required should this be necessary. -
Page 28: Appendix 1 - Cp Electronics Sensor Initial Setup
APPENDIX 1 – CP ELECTRONICS SENSOR INITIAL SETUP Using these tried and tested settings could help to fix any setup errors should the unpair and pair again process be a little cumbersome. The unit can be checked to see that it functions well with these FIRST before adjusting to customise for the specific project. - Page 29 OCCUPANCY CONTROL SETTINGS Settings CP Setup Comments Network setup -> Enable Must enable this to allow occupancy control Control options -> Use control Hierarchy Always time-out Network setup -> Switch overrides to time-out regardless whether occupancy is detected or not, thus never leaving Control options ->...
- Page 30 MANUAL CONTROL SETTINGS Settings CP Setup Comments Network setup -> Enable Must enable this to allow occupancy control Control options -> Use control Hierarchy Network setup -> Always time Switch overrides to timeout regardless whether occupancy is detected or not thus never leaving Control options ->...
- Page 31 APP SWITCHING CONTROL SETTINGS Settings CP Setup Comments Network setup -> 1.0 sec Responsive fade for on/off switching Control options -> Fade time for toggling ON or OFF Network setup -> 5.0 Sec Smoother raise and lower dimming rates Control options -> Fade time for switch dimming Network setup ->...
-
Page 32: Appendix 2 - Led Status And Diagnostics
A. IS IT CASAMBI OR CP ELECTRONICS PROBLEM? Hardware failure in general should fall within the remit of CP Electronics to support and diagnose. Outside of that, the software behaviour is all within the control of the Casambi system and can be supported via that channel. -
Page 33: Casambi Network Bluetooth Communication Test
Should the unit function ok as above then the issue is likely to be a configuration fault by the user. Apply the procedure as recommended by the CP Electronics use guide using the initial settings laid in Appendix 1 and use the basic setup for occupancy and daylight control as test routines. -
Page 34: Remote Live Testing
Remote Live Testing Where live testing is required, a mobile device running the Casambi app on-site connected to the site network can be used as a gateway to make live changes and perform live tests. See details in earlier chapters for the setup of a mobile device as a gateway, D. -
Page 35: Expert Support From Casambi
E. EXPERT SUPPORT FROM CASAMBI For development works within R&D, contact with Casambi directly may be required from time to time. Should any bugs or special requirements arise, a further path to offer site information is possible as a direct app function call, [Send feedback]. This is to be used with co-ordination from the product manager or the R&D engineer. - Page 36 CP Electronics, a business unit of Legrand Electric Limited, Brent Crescent, London NW10 7XR, UK Issue 1.1 Casambi Wireless Mesh Network Detectors System manual. Designs and specifications are subject to change without notice. WDA004 Issue 1.2 Vitesse Plus 7 Hardwired Lighting Control System Manual.
Need help?
Do you have a question about the EBDSPIR-CB and is the answer not in the manual?
Questions and answers