
Related Manuals for Vestfrost R-90i


Summary of Contents for Vestfrost R-90i
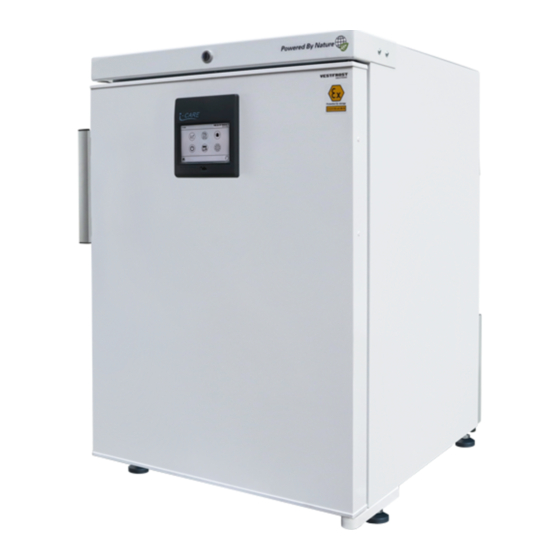
- Page 1 SERVICEMANUAL - EN - R-90 - R-138 - R-427 models B I O M E D I C A L S O L U T I O N S REFRIGERATORS...
-
Page 3: Table Of Contents
ELECTRICAL SYSTEM � � � � � � � � � � � � � � � � � � � � � � � � � � � � � � � � 16 Wire diagram R-90i � � � � � � � � � � � � � � � � � � � � � � � � � � � � 16 Wire diagram R-138i �... - Page 4 Vestfrostsolutions.com ATTENTION! Before servicing or cleaning nor assume any liability, for the appliance, unplug the injury or damage of any kind appliance from the mains arising from the use of this or disconnect the electrical manual� power supply� ATTENTION! ATTENTION! Bare pcbs are sensitive to This service manual is in- ESD, so please take precau-...
-
Page 5: Access To Components
Vestfrost Solutions ACCESS TO COMPONENTS Top panel Loosen the screws see picture Pull the top panel straight out and place it on top of the unit. Unplug the wires from connector Note! Be careful not to damage electric wires and not to scratch the unit when placing... -
Page 6: Fan
The location and number of fans may vary, but the procedure for access is identical, except for the number of screws to be removed. To access the plate with fans, start by remov- ing all shelves and any drawers. R-90i R-427i R-138i... - Page 7 Vestfrost Solutions Remove the screws (4 in R-90i and R-138i, 10 in R-427i) Flip out the fan sheet and discon- nect the fan When replacing fan, fan grill must also be replaced Press together 4 fan grill fasteners and push to release...
-
Page 8: Sensors
Vestfrostsolutions.com Sensors Remove the screws, 4- 10 in ventila- tor plate (4 in R-90i and R-138i, 10 in R-427i) and 2 in air guide step plate. TR3 Temperatur sensor EVP Defrost sensor TL1 Logging sensor S1 Safety thermostat sensor... -
Page 9: Engine Room & Electrical Box
Vestfrost Solutions Engine room & electrical box Remove 4 screws in the engine room cover For access to the electrical box remove 2 screws Slide out the electrical box... -
Page 10: Display - With Integrated Keyboard
Vestfrostsolutions.com Display - with integrated keyboard Tilt the appliance and release the touch panel by pushing in the plast lock and lifting up the panel simul- tanously Carefully demount the plug/wire from the touch panels back side... -
Page 11: Replacement Of Door
Vestfrost Solutions REPLACEMENT OF DOOR Start by disassembling the Display with integrated keyboard (see previous page) Place the unit on its back (we recom- mend 2 people) To avoid damage, place some soft pad- ding under the unit. Remove foot... - Page 12 Vestfrostsolutions.com Pull out the wire Place the unit in an upright position Loosen the 4 screws Pull the top panel straight out and place it on top of the unit.
- Page 13 Vestfrost Solutions Remove the handle by removing the 2 screws. Remove top hinge by removing the 2 screws. Change the door by lifting it up from the bottom hinge.
- Page 14 Vestfrostsolutions.com Follow the above steps in reverse order and the door change is complete.
-
Page 15: Cooling System
Vestfrost Solutions COOLING SYSTEM Change compressor Repairs to the cooling system may only be carried out by trained professionals. When changing the compressor, the filter drier must also be replaced. Is is important to cut out the filter drier, as heating with solder flame will release moisture inside the dry filter. -
Page 16: Electrical System
Vestfrostsolutions.com ELECTRICAL SYSTEM Wire diagram R-90i... -
Page 17: Wire Diagram R-138I
Vestfrost Solutions Wire diagram R-138i... -
Page 18: Wire Diagram R-427I
Vestfrostsolutions.com Wire diagram R-427i... -
Page 20: Spare Parts
Vestfrostsolutions.com SPARE PARTS Spare parts exploded view R-90i... -
Page 21: Spare Parts List R-90I
Vestfrost Solutions R-90i + Extra Hardware Spare parts list R-90i Position Item number Item name 0061 0-6538001 Filter drier, 0087 0-6038175 Base plate fittings, complete 0125 6520047 Inverter CF02D01 freq. 230V 50-60Hz 0126 8-036510012 Compressor - Complete FMXA4C, 230V 43-134Hz... -
Page 22: Spare Parts Exploded View R-90I Glass Door
Vestfrostsolutions.com Spare parts exploded view R-90i Glass door... -
Page 23: Spare Parts List R-90I Glass Door
Vestfrost Solutions R-90i Spare parts list R-90i Glass door Position Item number Item name 0061 0-6538001 Filter drier, 0087 0-6038175 Base plate fittings, complete 0125 6520047 Inverter CF02D01 freq. 230V 50-60Hz 0126 8-036510012 Compressor - Complete FMXA4C, 230V 43-134Hz 0163... -
Page 24: Spare Parts Exploded View R-138I
Vestfrostsolutions.com Spare parts exploded view R-138i... -
Page 25: Spare Parts List R-138I
Vestfrost Solutions R-138i + Extra Hardware Spare parts list R-138i Position Item number Item name 0061 0-6538001 Filter drier, 0087 0-6038175 Base plate fittings, complete 0125 6520047 Inverter CF02D01 freq. 230V 50-60Hz 0126 8-036510012 Compressor - Complete FMXA4C, 230V 43-134Hz... -
Page 26: Spare Parts Exploded View R-138I Glass Door
Vestfrostsolutions.com Spare parts exploded view R-138i Glass door... -
Page 27: Spare Parts List R-138I Glass Door
Vestfrost Solutions R-138i Spare parts list R-138i Glass door Position Item number Item name 0061 0-6538001 Filter drier, 0087 0-6038175 Base plate fittings, complete 0125 6520047 Inverter CF02D01 freq. 230V 50-60Hz 0126 8-036510012 Compressor - Complete FMXA4C, 230V 43-134Hz 0163... -
Page 28: Spare Parts Exploded View R-427I
Vestfrostsolutions.com Spare parts exploded view R-427i... -
Page 29: Spare Parts List R-427I
Vestfrost Solutions R-427i + Extra Hardware Spare parts list R-427i Position Item number Item name 0061 0-6538001 Filter drier, 0087 0-6038175 Base plate fittings, complete 0125 6520047 Inverter CF02D01 freq. 230V 50-60Hz 0126 8-036510012 Compressor - Complete FMXA4C, 230V 43-134Hz... -
Page 30: Spare Parts Exploded View R-427I Glass Door
Vestfrostsolutions.com Spare parts exploded view R-427i Glass door... -
Page 31: Spare Parts List R-427I Glass Door
Vestfrost Solutions R-427i Spare parts list R-427i Glass door Position Item number Item name 0061 0-6538001 Filter drier, 0087 0-6038175 Base plate fittings, complete 0125 6520047 Inverter CF02D01 freq. 230V 50-60Hz 0126 8-036510012 Compressor - Complete FMXA4C, 230V 43-134Hz 0163... -
Page 32: List Of Parameters
Vestfrostsolutions.com LIST OF PARAMETERS List of default parameters R-90i, R-138i, R-427i Profile name PROFILE 1 Description Temperature range: +2C to +20C Set point: +5C INDEX PAR NAME VALUE UNIT 1 ADR 49 AD1 2 ALL 30 Tenth of°C/F 50 AD2 3 ALH 30 Tenth of°C/F 51 AD3 4 AAL ‐100 Tenth of°C/F 52 AD4 5 AAH 300 Tenth of°C/F... -
Page 33: List Of Lcp Parameters R90-I, R-138I, R-427I
30 CSP 255 Tenth of°C/F 31 TCO 8000 Millisec 32 BCO 1 Sec 33 PTD 60 Tenth of°C/F 34 FCE 95 Tenth of°C/F Vestfrost Solutions 35 MCT 195 Tenth of°C/F 36 FOP 261 Bit flag 37 FAS 350 Tenth of°C/F 38 FAD 0 Sec 39 FSD 50 Tenth of°C/F... -
Page 34: List Of Lcs Parameters R-90I, R-138I, R-427I
Vestfrostsolutions.com List of LCS parameters R-90i, R-138i, R-427i INDEX PAR NAME VALUE UNIT 1 PCT ‐10 Tenth of°C/F 2 PHT 500 Tenth of°C/F 3 PCH 0 Tenth of°C/F 4 PHH 0 Tenth of°C/F 5 PCD 0 Sec 6 PHD 0 Sec 7 PCN 0 Unit... - Page 36 Revision date: 18-10-2022 Drawing no.: 8195126 rev 02 www.vestfrostsolutions.com info@vestfrostsolutions.com...
Need help?
Do you have a question about the R-90i and is the answer not in the manual?
Questions and answers