Table of Contents
Advertisement
Quick Links
Advertisement
Table of Contents

Related Manuals for CLA-VAL e-FlowMeter


Summary of Contents for CLA-VAL e-FlowMeter
- Page 1 CLA-VAL e-FlowMeter Vortex Flow Meter User Manual CLA-VAL Europe www.cla-val.ch cla-val@cla-val.ch 1 - LIN041UE C 11/20 © Copyright CLA-VAL Europe - Specifications subject to change without notice - no contractual illustrations. Reduce your waste - Sort your rubbish...
-
Page 2: Table Of Contents
6.3 4-20 mA, Pulse and Pulse Digital Ouput Configuration ............19 6.4 Calibration ..........................20 CLA-VAL Europe www.cla-val.ch cla-val@cla-val.ch 2 - LIN041UE C 11/20 © Copyright CLA-VAL Europe - Specifications subject to change without notice - no contractual illustrations. Reduce your waste - Sort your rubbish... -
Page 3: Introduction
DEFAULT CALIBRATION AND SET TIME : By default, the e-FlowMeter is factory calibrated according to the DN and the valve model requested see chapter 4.3 « Flow Parameters Factory Calibrated ». But it is possible to change some parameters, for examples values of the 4 mA, 20 mA, pulse weight and pulse width by using the e-FlowMeter Software available on our website www.cla-val.ch... -
Page 4: Operation Of The E-Flowmeter
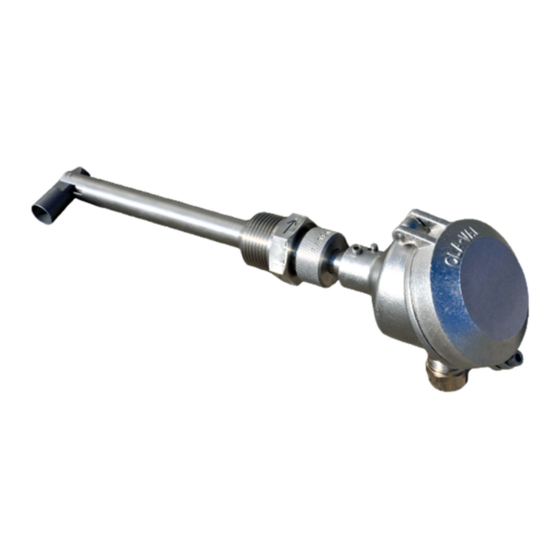
CLA-VAL Automatic Control Valve to provide accurate flow measurement data without the need to install a separate meter. Configured to be installed in the inlet tapping of a CLA-VAL Automatic Control Valve, the e-FlowMeter can be used in valves directly downstream of a turbulent flow such as elbows, valves or reducers. The e-FlowMeter employs an innovative and patented swivel mechanism allowing the meter to be inserted into tappings as small as 1/2". - Page 5 4-20 mA, pulse or digital pulse to suit the desired application. Printed Circuit Board CLA-VAL Europe www.cla-val.ch cla-val@cla-val.ch 5 - LIN041UE C 11/20 © Copyright CLA-VAL Europe - Specifications subject to change without notice - no contractual illustrations. Reduce your waste - Sort your rubbish...
-
Page 6: Installation Of The E-Flowmeter
Pipe Reducer Upstream *(1) Needs a special calibration, contact CLA-VAL CLA-VAL Europe www.cla-val.ch cla-val@cla-val.ch 6 - LIN041UE C 11/20 © Copyright CLA-VAL Europe - Specifications subject to change without notice - no contractual illustrations. Reduce your waste - Sort your rubbish... -
Page 7: Installation Instructions
Knurled screw Locking collar Score marks The insertion tool with a length of 165 mm is used for e-FlowMeter sizes 1,2a and 2b, the insertion tool with a length of 368 mm is used for e-FlowMeter sizes 3 and 4. 3.3.1.2 Power supply for pulse and digital pulse output There are 2 ways to power the e-FlowMeter for the pulse output. -
Page 8: Installation
Swivel insert assemby must be parallel to the direction of to the direction of flow. flow. CLA-VAL Europe www.cla-val.ch cla-val@cla-val.ch 8 - LIN041UE C 11/20 © Copyright CLA-VAL Europe - Specifications subject to change without notice - no contractual illustrations. Reduce your waste - Sort your rubbish... - Page 9 Proceed in accordance with wiring diagrams. Fig.2 Fig.3 Headless screw CLA-VAL Europe www.cla-val.ch cla-val@cla-val.ch 9 - LIN041UE C 11/20 © Copyright CLA-VAL Europe - Specifications subject to change without notice - no contractual illustrations. Reduce your waste - Sort your rubbish...
-
Page 10: Removal Instructions
(Fig.2), taking extra care to protect the sensor tip. CLA-VAL Europe www.cla-val.ch cla-val@cla-val.ch 10 - LIN041UE C 11/20 © Copyright CLA-VAL Europe - Specifications subject to change without notice - no contractual illustrations. Reduce your waste - Sort your rubbish... - Page 11 Insert body plug into tapping while servicing the e-FlowMeter CLA-VAL Europe www.cla-val.ch cla-val@cla-val.ch 11 - LIN041UE C 11/20 © Copyright CLA-VAL Europe - Specifications subject to change without notice - no contractual illustrations. Reduce your waste - Sort your rubbish...
-
Page 12: E-Flowmeter Wiring
Standard wiring 3.3.4.2 Wiring example: 4-20 mA output CLA-VAL Europe www.cla-val.ch cla-val@cla-val.ch 12 - LIN041UE C 11/20 © Copyright CLA-VAL Europe - Specifications subject to change without notice - no contractual illustrations. Reduce your waste - Sort your rubbish... -
Page 13: Specification
Vortex Flow Meter SPECIFICATION CALIBRATION The e-FlowMeter is factory calibrated according to the part number. The calibration is specific to the type and size of the valve. The calibration has been set according to the CLA-VAL IT050 quality test. TECHNICAL DATA... -
Page 14: Flow Parameters Factory Calibrated
1000 1000 Note: The default flow at 4 mA = 0 l/s, Pulse width = 62.5 ms All these values could be changed using e-FlowMeter Software (see chapter 6.3 « 4-20 mA, Pulse and Pulse Digital Ouput Configuration »). DIMENSIONS... -
Page 15: Maintenance And Repair
DEALING WITH SENSOR TIP DAMAGE If the sensor tip is bent, broken or damaged in the course of the handling or installation, the e-FlowMeter will not function properly. The sensor should be straight with respect to the sleeve. Since it is designed to sense micro-motion, if the sensor is forced to enough to detect the movement with the naked eye, it may have been damage. -
Page 16: Software And Firmware
When launching the e-FlowMeter Software, if no e-FlowMeter is connected to your PC, the list allowing e-Line product multi- connection is empty (see image below), select "Cancel". If you are connected to one or more e-FlowMeter or other e-Line products, click on "View All" and select the product line you wish to connect to. -
Page 17: Firmware Update (Internal Software)
If yes, go directly to the next chapter. 10. If no, select "Firmware update" in the "Parameters" tab. 11. Click "Save screen to .BMP file" to save an image of the e-FlowMeter calibration settings on your computer. CLA-VAL Europe www.cla-val.ch... - Page 18 13. Open the corresponding "hex" file, previously downloaded from our website www.cla-val.ch. 14. Then click on "Read parameters" in order to view the firmware version update. Calibrate the e-FlowMeter by choosing "Metric units", select the size and the model of the valve (see chapter 4.4 « Dimensions » for more information).
-
Page 19: 4-20 Ma, Pulse And Pulse Digital Ouput Configuration
4-20 MA, PULSE AND PULSE DIGITAL OUPUT CONFIGURATION The e-FlowMeter is factory calibrated. Calibration depends on the model and size of the valve (see chapter 4.3 « Flow Parameters Factory Calibrated » for the corresponding values). But if necessary, it is possible to change the 4-20 mA scaling or pulse weight and pulse width. -
Page 20: Calibration
CALIBRATION According to table from chapter 4.4 « Dimensions », an e-FlowMeter size covers more than 1 valve model. For example, it is possible to take an e-FlowMeter calibrated for a NGE 80 valve and to recalibrate for a NGE 100 valve. To do this: Start the e-FlowMeter Software and click on "Calibration".
Need help?
Do you have a question about the e-FlowMeter and is the answer not in the manual?
Questions and answers