Advertisement
Available languages
Available languages
Quick Links
1. BEFORE YOU BEGIN
IMPORTANT INSTRUCTIONS
READ AND SAVE FOR THE CONSUMER
WARNING: Risk of scalding or other severe injury.
S Before completing installation, the installer must set the maximum water temperature setting of this valve to
minimize the risks associated with scalding hazards according to ASTM F 444.
The installer is responsible for installing the valve and adjusting the maximum water temperature of this
thermostatic valve according to instructions.
This valve meets or exceeds ANSI A112.18.1M, ASSE 1016, and CSA B125.
If you do not understand any of the installation or temperature adjustment instructions in this document, in the United
States please contact our Customer Service Department at 1-800-4-KOHLER. Outside the U.S. please contact your
distributor.
IMPORTANT: Please fill in the blanks below and on the valve label. Then insert these instructions into the plastic
bag included with the valve package, and attach the plastic bag to the valve handle for the owner's reference.
THIS DEVICE HAS BEEN PRESET BY ______________________ OF
_______________________ TO ENSURE A SAFE MAXIMUM TEMPERATURE.
ANY CHANGE IN THE SETTING MAY RAISE THE DISCHARGE TEMPERATURE
ABOVE THE LIMIT CONSIDERED SAFE, AND LEAD TO SCALDS.
DATE: _____________
CAUTION: Risk of scalding hazard. This device
has been calibrated at the factory to ensure a safe
maximum water temperature. Any variance in
settings or water inlet conditions from those used
during factory calibration may raise the discharge
temperature above the safe limit, and may present a
scalding hazard. Responsibility for installation and
adjustment of this device in accordance with these
instructions lies with the installer.
TOOLS AND MATERIALS REQUIRED
S
Thermometer
S
3/4" nominal copper tubing and fittings
S
Wrenches
S
Thin-blade knife or screwdriver
A
1012606-2-
THERMOSTATIC MIXING VALVE TRIM
R
Español, Página 11
Français, Page 21
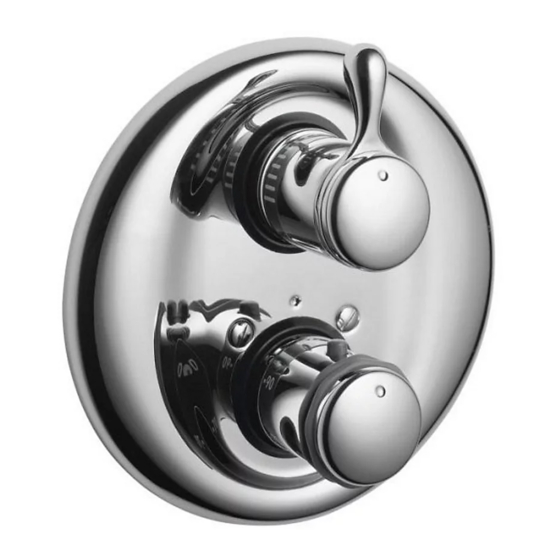
K-T9493, K-T9494
CAUTION: Risk of product damage. This valve
contains plastic and rubber components. Do not
apply excessive heat to the valve body when you
make solder connections. Do not apply flux or acids
directly to the valve, as damage to the seals, plastic
components, and trim finish may result. Do not apply
petroleum-based lubricants to the valve components,
as damage may result.
S
Thread sealant
S
Solder and flux
S
Hacksaw or tubing cutter
S
Silicone Sealant (optional)
Advertisement

Related Manuals for Kohler K-T9493


Summary of Contents for Kohler K-T9493
- Page 1 This valve meets or exceeds ANSI A112.18.1M, ASSE 1016, and CSA B125. If you do not understand any of the installation or temperature adjustment instructions in this document, in the United States please contact our Customer Service Department at 1-800-4-KOHLER. Outside the U.S. please contact your distributor.
- Page 2 25% cold. A custom shower application using three 2-1/2 gpm (.16 lps) showerheads can use about 45 gal. (170.3 l) of hot water in 8 minutes. Choose a water heater large enough for your installation. Kohler Co., Kohler, WI U.S.A. 1012606-2-...
- Page 3 ROUGHING-IN – K-400-K WITH K-T9494-7 6-1/8” D. (15.6cm) 3-1/16” (7.8cm) 1-9/16” (4cm) MIN. 2-1/4” (5.7cm) MAX. 4-13/16” (12.2cm) Fig. #1 ROUGHING-IN – K-401-K WITH K-T9493-4 OR K-T9493-7 TRIM 2-3/16” (5.6cm) 2-1/8” (5.4cm) 3-1/8” 7-1/2” (7.9cm) (19.1cm) D. LEVER 2-3/16” 1-7/8”...
- Page 4 F. K-9660 Vacuum Breaker (for use with Handshower) G. Bath Spout H. K-405 3-Way Transfer Valve and K-T9474 Trim Pressure Loop with Bodysprays J. K-401 Thermostatic Mixer with Volume Control and K-T9493 Trim K. Showerhead Fig. #3 Kohler Co., Kohler, WI U.S.A. 1012606-2-...
-
Page 5: Installation
The finished wall surface must be within the MIN. - MAX. depth shown on the plaster guard. 11/16” Secure the water supply piping to the support framing. (1.7cm) 1-9/16” (4cm) – 2-1/4” (5.7cm) Fig. #5 Kohler Co., Kohler, WI U.S.A. 1012606-2-... - Page 6 Hot water temperature = 149_ F (65_ C) Cold water temperature = 59_ F (15_ C) If the actual water supply conditions differ significantly from those listed, you may need to re-calibrate the valve. Kohler Co., Kohler, WI U.S.A. 1012606-2-...
- Page 7 Carefully slip the escutcheon over the collar(s) and Valve against the finished wall. Position the escutcheon so the “Kohler” logo is to the top. Secure the escutcheon to the valve with two screws. NOTE: For the K-400 mixing valve, proceed to Fig. #10, Adhesive “Complete Trim Installation - All Models”...
- Page 8 If needed apply a small amount of lubricant to the inside Grip Indicator wall of the cap to aid in assembly (a capsule of lubricant Ring Graphic is included in the hardware kit). “High” Indicator Graphic Fig. #9 Kohler Co., Kohler, WI U.S.A. 1012606-2-...
- Page 9 If needed, apply a small amount of the supplied silicone lubricant (capsule included in hardware kit) to the inside wall of the cap to aid in assembly. Detent Screw Grip Ring Detent O-Ring Silicone Lubricant (if needed) Fig. #10 Kohler Co., Kohler, WI U.S.A. 1012606-2-...
- Page 10 Questions? Problems? First review the installation instructions to ensure correct installation. For additional assistance, call our Customer Service Department for direct help. You may also contact us at our web site listed below. In the U.S.A., call 1-800-4-KOHLER In Mexico, call 001-877-680-1310 In Canada, call 1-800-964-5590 www.kohler.com...
-
Page 11: Instrucciones De Instalación
Si usted no entiende las instrucciones de instalación o de ajuste de temperatura contenidas en este documento, llame a nuestro Departamento de Atención al Cliente en los Estados Unidos, al 1-800-4-KOHLER. Fuera de los Estados Unidos, comuníquese con su distribuidor. - Page 12 Una función personalizada con tres cabezales de regadera de 2-1/2 gpm (0,16 Lps), puede emplear cerca de 45 galones (170,3 L) de agua caliente en 8 minutos. Elija un calentador de agua de suficiente tamaño para su instalación. Kohler Co., Kohler, WI U.S.A. 1012606-2-...
- Page 13 6-1/8” (15,6cm) D. 3-1/16” (7,8cm) 1-9/16” (4cm) MÍN. 2-1/4” (5,7cm) máx. 4-13/16” (12,2cm) Fig. #1 DIAGRAMA DE INSTALACIÓN – K-401-K CON GUARNICIÓN K-T9494-4 O K-T9493-7 2-3/16” (5,6cm) 2-1/8” (5,4cm) 3-1/8” 7-1/2” (7,9cm) (19,1cm) D. PALANCA 2-3/16” 1-7/8” (5,6cm) (4,8cm) D.
- Page 14 G. Surtidor de bañera H. Válvula triple de transferencia K-405 y Guarnición K-T9474 Bucle de presión con chorros corporales Mezclador termostático K-401 con control de volumen y guarnición K-9493 K. Cabezal de regadera Fig. #3 Kohler Co., Kohler, WI U.S.A. 1012606-2-...
-
Page 15: Instalación
La superficie de la pared acabada debe tener la profundidad MÍN. - M X. indicada en el 11/16” protector de yeso. (1,7cm) Fije el suministro de agua a la estructura de soporte. 1-9/16” (4cm) – 2-1/4” (5,7cm) Fig. #5 Kohler Co., Kohler, WI U.S.A. 1012606-2-... -
Page 16: Ajuste De La Temperatura
Temperatura del agua caliente = 149_ F (65_ C) Temperatura del agua fría = 59_ F (15_ C) Si las condiciones del suministro de agua actuales difieren de manera significativa de las establecidas, puede ser necesario calibrar nuevamente la válvula. Kohler Co., Kohler, WI U.S.A. 1012606-2-... - Page 17 Deslice con cuidado el chapetón sobre el collarín y contra la pared acabada. Coloque el chapetón de manera que el Empaque logotipo de “Kohler” esté hacia arriba. Fije el chapetón a adhesivo la válvula con dos tornillos. Chapetón NOTA: Para la válvula de mezclado K-400, prosiga a K-T9494 Fig.
- Page 18 De ser necesario, aplique una pequeña cantidad de Empaque Gráfico lubricante en la pared interior del tapón para facilitar el de anillo montaje (se ha incluido lubricante en el material de “High” ferretería). Indicador Gráfico Fig. #9 Kohler Co., Kohler, WI U.S.A. 1012606-2-...
- Page 19 (incluido en el material de ferretería) en la pared interior del tapón para facilitar el montaje. Retén Tornillo Anillo de asimiento Retén Empaque de anillo Tapón Lubricante de silicona (de ser necesario) Fig. #10 Kohler Co., Kohler, WI U.S.A. 1012606-2-...
- Page 20 ¿Preguntas? ¿Problemas? Primero, revise las instrucciones para asegurarse de haber realizado la instalación correcta. Para mayor asistencia, llame a nuestro Departamento de Atención al Cliente. También puede localizarnos en la dirección de Internet escrita abajo. En los Estados Unidos, llame al 1-800-4-KOHLER En México, llame al 001-877-680-1310 En Canadá, llame al 1-800-964-5590 www.kohler.com...
-
Page 21: Notice D'installation
à la clientèle aux États-Unis, au 1-800-4-KOHLER. Si vous demeurez à l’extérieur des États-Unis, veuillez communiquer avec votre distributeur. IMPORTANT : Veuillez remplir le coupon ci-dessous et l’étiquette de la valve. Ensuite, mettre cette notice dans le sac en plastique inclus dans l’emballage de la valve et attacher le sac au levier de la valve pour servir de référence... - Page 22 2-1/2 gpm (0,16 Lpm) consomme environ 45 gal. (170,3 litres) d’eau chaude en 8 minutes. Choisir un chauffe-eau de taille suffisante pour votre installation. Kohler Co., Kohler, WI U.S.A. 1012606-2-...
- Page 23 (7,8cm) 1-9/16 po (4cm) MIN. 2-1/4 po (5,7cm) MAX. 4-13/16 po (12,2cm) Fig. #1 DIAGRAMME DE RACCORDEMENT - K-401-K AVEC GARNITURE K-T9493-4 OU K-T9493-7 2-3/16 po (5,6cm) 2-1/8 po (5,4cm) 3-1/8 po 7-1/2 po (7,9cm) (19,1cm) D. LEVIER 2-3/16 po...
- Page 24 H. Robinet coupleur à trois vois K-405 et garniture K-T9474 Boucle de pression avec gicleurs du corps J. Mitigeur thermostatique K-401 avec commande de débit et garniture K-T9493 K. Pomme de douche Fig. #3 Kohler Co., Kohler, WI U.S.A. 1012606-2-...
- Page 25 La surface du mur fini doit être comprise dans la profondeur MIN. - MAX. indiquée sur le renfort de plâtre. 11/16 po Assujettir la tuyauterie à l’ossature d’appui. (1,7cm) 1-9/16 po (4cm) – 2-1/4 po (5,7cm) Fig. #5 Kohler Co., Kohler, WI U.S.A. 1012606-2-...
-
Page 26: Réglage De La Température
Température de l’eau chaude = 149_ F (65_ C) Température de l’eau froide = 59_ F (15_ C) Si les conditions d’alimentation d’eau du site d’installation diffèrent de manière significative de celles énumérées, un réétalonnage du robinet pourra être nécessaire. Kohler Co., Kohler, WI U.S.A. 1012606-2-... - Page 27 Insérer soigneusement la plaque par-dessus le collier et contre le mur fini. Placer la plaque de façon telle que le logotype de “Kohler” soit vers le haut. Assujettir la plaque Butée au robinet et l’assujettir au moyen de deux vis.
- Page 28 “High” sur le bouton de commande du serrage débit. Appliquer une petite quantité de lubrifiant le long la paroi intérieure du capuchon, afin de faciliter l’assemblage (le Indicateur lubrifiant est inclus avec la quincaillerie). pictographique Fig. #9 “High” Kohler Co., Kohler, WI U.S.A. 1012606-2-...
- Page 29 Pour faciliter l’assemblage, appliquer une petite quantité de lubrifiant à la silicone (inclus avec la quincaillerie) le long la paroi intérieure du capuchon. Rainure Anneau de serrage Rainure Joint torique Capuchon Lubrifiant à la silicone (au besoin) Fig. #10 Kohler Co., Kohler, WI U.S.A. 1012606-2-...
- Page 30 Kohler Co., Kohler, WI U.S.A. 1012606-2-...
- Page 31 Kohler Co., Kohler, WI U.S.A. 1012606-2-...
- Page 32 Pour toute assistance additionnelle, contactez notre département de service à la clientèle pour une aide directe. Vous pouvez aussi nous joindre sur notre site Web à l'adresse donnée ci dessous. Aux É.-U., composez le 1-800-4-KOHLER Au Mexique, composez le 001-877-680-1310 Au Canada, composez le 1-800-964-5590 www.kohler.com...
Need help?
Do you have a question about the K-T9493 and is the answer not in the manual?
Questions and answers