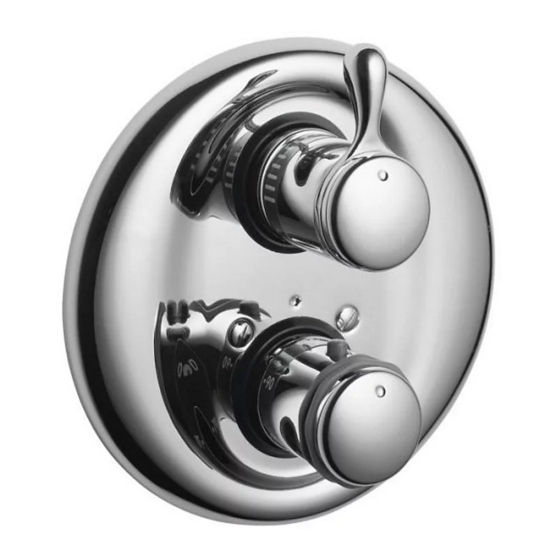
Kohler K-T9493 Installation Manual
Thermostatic mixing valve trim
Hide thumbs
Also See for K-T9493:
- Installation instructions manual (32 pages) ,
- Installation manual (10 pages)
Table of Contents
Advertisement
Available languages
Available languages
Quick Links
Advertisement
Table of Contents

Related Manuals for Kohler K-T9493


Summary of Contents for Kohler K-T9493
- Page 1 Installation Guide Thermostatic Mixing Valve Trim K-T9493 K-T9494 M product numbers are for Mexico (i.e. K-12345M) Los números de productos seguidos de M corresponden a México (Ej. K-12345M) Français, page“ Français-1” Español, página“ Español-1” 1012606-2-B...
-
Page 2: Important Instructions
If you do not understand any of the installation or temperature adjustment instructions in this document, in the United States please contact our Customer Service Department at 1-800-4-KOHLER. Outside the U.S., please contact your distributor. IMPORTANT NOTICE TO INSTALLERS! Please fill in the blanks in the information box in the Homeowners Guide and on the valve label. -
Page 3: Tools And Materials
Wrench Screwdrivers Thank You For Choosing Kohler Company We appreciate your commitment to Kohler quality. Please take a few minutes to review this manual before you start installation. If you encounter any installation or performance problems, please don’t hesitate to contact us. Our phone numbers and website are listed on the back cover. - Page 4 The installer must check the mixed flow temperature after installation, and adjust the valve as needed according to the instructions. Kohler Co. reserves the right to make revisions in the design of products without notice, as specified in the price book. 1012606-2-B...
-
Page 5: Water Temperature Adjustment
If necessary, carefully pry the limit stop off the valve cartridge with a thin blade, and re-install it so the white mark faces upward as required. The limit stop must be correctly positioned to ensure trim fit. Kohler Co. 1012606-2-B... - Page 6 Water Temperature Adjustment (cont.) Do not turn the thermostatic mixing valve stem after you adjust the temperature setting until you have installed the mixing handle trim. 1012606-2-B Kohler Co.
- Page 7 Once applied, carefully trim away any excess gasket material so the escutcheon drain opening is not blocked. Carefully slip the escutcheon over the collar(s) and against the finished wall. Position the escutcheon so the ″Kohler″ logo is at the top. Secure the escutcheon to the valve with two screws.
- Page 8 (as shown in the illustration). If needed, apply a small amount of lubricant to the inside wall of the cap to aid in assembly; a capsule of lubricant is included in the hardware kit. 1012606-2-B Kohler Co.
- Page 9 Let the water run briefly and check the water temperature with the thermometer to confirm that it is at 120° F (49° C). If the water temperature matches the marked setting, then rotate the knob clockwise so the ″104″ or ″40″ mark faces upward again. Kohler Co. 1012606-2-B...
- Page 10 Press the cap onto the valve so the cap detent is in line with knob button (as shown in the illustration). If needed, apply a small amount of lubricant to the inside wall of the cap to aid in assembly; a capsule of lubricant is included in the hardware kit. 1012606-2-B Kohler Co.
-
Page 11: Guide D'installation
S’il ne vous est pas possible de comprendre les instructions d’installation ou de réglage de la température données par ce document, veuillez contacter notre département du service clientèle aux États-Unis.1-800-4-KOHLER. Hors des États-Unis, veuillez contacter votre distributeur. Kohler Co. Français-1... -
Page 12: Outils Et Matériels
Merci d’avoir choisi la compagnie Kohler Nous apprécions votre engagement envers la qualité Kohler. Veuillez prendre s’il vous plaît quelques minutes pour lire ce manuel avant de commencer l’installation. Ne pas hésiter à nous contacter en cas de problème d’installation ou de fonctionnement. - Page 13 Kohler Co. se réserve le droit d’apporter toutes modifications sur le design des produits et ceci sans préavis, tel que spécifié dans le catalogue des prix.
- Page 14 Si les conditions d’alimentation d’eau correspondent aux conditions de réglage en usine, la température d’eau devrait être d’environ 104° F (40° C). Si la température d’eau diffère, retirer et jeter le renfort en plâtre s’il est encore attaché. 1012606-2-B Français-4 Kohler Co.
- Page 15 La butée doit être correctement positionnée pour assurer un bon ajustement de la garniture. Ne pas tourner la tige du mitigeur thermostatique après avoir effectué le réglage de la température, jusqu’à ce que la garniture de la poignée de mélange soit installée. Kohler Co. Français-5 1012606-2-B...
- Page 16 à ce que l’ouverture de l’applique du drain ne soit pas bloquée. Insérer soigneusement l’applique sur le(s) collier(s) et contre le mur fini. Positionner l’applique de façon à ce que le logotype ″Kohler″ soit au-dessus. 1012606-2-B Français-6 Kohler Co.
- Page 17 ″HIGH″ sur le bouton de contrôle de volume. Appliquer une petite quantité de lubrifiant le long la paroi intérieure du capuchon, afin de faciliter l’assemblage (une capsule de lubrifiant est incluse avec le kie de quincaillerie). Kohler Co. Français-7 1012606-2-B...
- Page 18 à gauche de manière à ce que les marques ″120″ ou ″49″ soient vers le haut. Laisser l’eau couler brièvement et vérifier la température avec un thermomètre pour confirmer qu’ell est à 120° F (49° C). 1012606-2-B Français-8 Kohler Co.
- Page 19 (tel qu’illustré). Appliquer une petite quantité de lubrifiant le long la paroi intérieure du capuchon, afin de faciliter l’assemblage (une capsule de lubrifiant est incluse avec le kie de quincaillerie). Kohler Co. Français-9 1012606-2-B...
-
Page 20: Guía De Instalación
Si usted no entiende las instrucciones de instalación o de ajuste de temperatura contenidas en este documento, llame a nuestro Departamento de Atención al Cliente, al 1-800-4-KOHLER. Fuera de los Estados Unidos, comuníquese con su distribuidor. ¡AVISO IMPORTANTE A LOS INSTALADORES! Rellene los espacios en blanco en la Guía del usuario y en la etiqueta de la válvula. -
Page 21: Herramientas Y Materiales
Gracias por elegir los productos de Kohler Apreciamos su elección por la calidad de Kohler. Dedique unos minutos para leer este manual antes de comenzar la instalación. En caso de problemas de instalación o de funcionamiento, no dude en contactarnos. - Page 22 flujo mixto después de la instalación y ajustar la válvula según sea necesario conforme a las instrucciones. La empresa Kohler se reserva el derecho de modificar el diseño de los productos sin aviso, tal como se especifica en la lista de precios.
- Page 23 Si las condiciones de suministro existentes corresponden a las condiciones de fábrica, la temperatura del agua debe estar alrededor de 104° F (40° C). Si la temperatura del agua varía, retire y deseche el protector de yeso si aún está montado. Kohler Co. Español-4 1012606-2-B...
- Page 24 El limitador debe estar correctamente colocado para asegurar que la guarnición encaje bien. No gire la espiga de la válvula mezcladora termostática después de ajustar la temperatura, hasta haber instalado la guarnición de la válvula mezcladora. 1012606-2-B Español-5 Kohler Co.
- Page 25 Gire a la izquierda. Válvula de control de caudal Empaque Perilla de control de adhesivo caudal de la manija Collarín de palanca Chapetón Empaque K-T9493 de anillo (O-Ring) Collarín Tornillo Tapa Pared Tornillo acabada Retén Sello de la Collarín guarnición...
- Page 26 Deslice con cuidado el chapetón sobre el collarín y contra la pared acabada. Coloque el chapetón de manera que el logotipo ″Kohler″ esté en la parte superior. Fije el chapetón a la válvula con dos tornillos. NOTA: Continúe en la sección ″Termine la instalación de la guarnición″...
- Page 27 ″120″ o ″49″ esté hacia arriba. Deje correr el agua brevemente y compruebe la temperatura del agua con el termómetro para confirmar que esté a 120° F (49° C). Kohler Co. Español-8 1012606-2-B...
- Page 28 (tal y como se ilustra). De ser necesario, aplique una pequeña cantidad de lubricante en la pared interior de la tapa para facilitar el montaje; se ha incluido una cápsula de lubricante en el juego de fijaciones. 1012606-2-B Español-9 Kohler Co.
- Page 29 1012606-2-...
- Page 30 1012606-2-...
- Page 31 1012606-2-...
- Page 32 USA: 1-800-4-KOHLER Canada: 1-800-964-5590 México: 001-877-680-1310 kohler.com ©2004 Kohler Co. 1012606-2-B...
Need help?
Do you have a question about the K-T9493 and is the answer not in the manual?
Questions and answers
How do I remove the 9493 valve cover?
The documents do not provide specific instructions for removing the Kohler K-T9493 valve cover. Therefore, the answer cannot be determined from the provided information.
This answer is automatically generated