
Related Manuals for Geokon 4100 Series


Summary of Contents for Geokon 4100 Series
- Page 1 Model 4100/4150 Series Vibrating Wire Strain Gauges Instruction Manual ©2021, GEOKON. All rights reserved. Document Revision: HH | Release date: 04/12/21...
- Page 3 WARRANTY STATEMENT warrants its products to be free of defects in materials and workmanship, GEOKON under normal use and service for a period of 13 months from date of purchase. If the unit should malfunction, it must be returned to the factory for evaluation, freight prepaid.
-
Page 5: Table Of Contents
TABLE OF CONTENTS 1. INTRODUCTION ............................2. PRELIMINARY CHECKS ........................2.1 USING A READOUT ..........................2.2 USING AN OHMMETER ........................3. INSTRUMENT PROTECTION ......................3.1 CABLE SPLICING AND TERMINATION ................3.2 PROTECTION FROM MECHANICAL DAMAGE ............3.2.1 SECURING CABLES .......................... 3.2.2 COVER PLATES .......................... - Page 6 6.2 GK-404 VIBRATING WIRE READOUT ................6.2.1 OPERATING THE GK-404 ......................6.3 GK-405 VIBRATING WIRE READOUT ................6.3.1 CONNECTING SENSORS WITH 10-PIN BULKHEAD CONNECTORS ATTACHED ............................6.3.2 CONNECTING SENSORS WITH BARE LEADS ..............6.3.3 OPERATING THE GK-405 ......................6.4 MEASURING TEMPERATURES ....................
- Page 7 FIGURES FIGURE 1: MODEL 4100 VIBRATING WIRE STRAIN GAUGE .........1 FIGURE 2: MODEL 4150 VIBRATING WIRE STRAIN GAUGE .........2 FIGURE 3: MODEL 4151 VIBRATING WIRE STRAIN GAUGE .........2 FIGURE 4: MODEL 4100 COVER PLATE - TOP VIEW ............5 FIGURE 5: MODEL 4150 COVER PLATE - TOP VIEW ............5 FIGURE 6: COVER PLATE - END VIEW ................5 FIGURE 7: COVER PLATE INSTALLATION, TOP VIEW ............6 FIGURE 8: COVER PLATE INSTALLATION, SIDE VIEW ...........6...
- Page 8 TABLES TABLE 1: GUIDE TO INITIAL TENSION SETTINGS ............9 TABLE 2: STRAIN GAUGE READOUT POSITIONS............20 TABLE 3: SPECIFICATIONS ....................25 TABLE 4: 3KΩ THERMISTOR RESISTANCE ..............28 TABLE 5: 10KΩ THERMISTOR RESISTANCE ..............29 TABLE 6: MODEL 4100/4150 SERIES MODEL AND PARTS LIST ........34...
- Page 9 EQUATIONS EQUATION 1: AXIAL STRESS CALCULATION ..............17 EQUATION 2: STRESS DUE TO BENDING ON AXIS YY ..........17 EQUATION 3: STRESS DUE TO BENDING ON AXIS XX..........17 EQUATION 4: MAXIMUM STRESS .................. 17 EQUATION 5: THEORETICAL MICROSTRAIN ..............23 EQUATION 6: STRAIN CALCULATION................
-
Page 11: Introduction
INTRODUCTION ’s 4100/4150 Series Vibrating Wire Strain Gauges are intended primarily GEOKON for measuring strain on structural steel members, such as tunnel linings, arches, struts, piles, sheet piling, etc. ■ Model 4100 consists of a vibrating wire gage element and removable coil assembly. -
Page 12: Figure 2: Model 4150 Vibrating Wire Strain Gauge
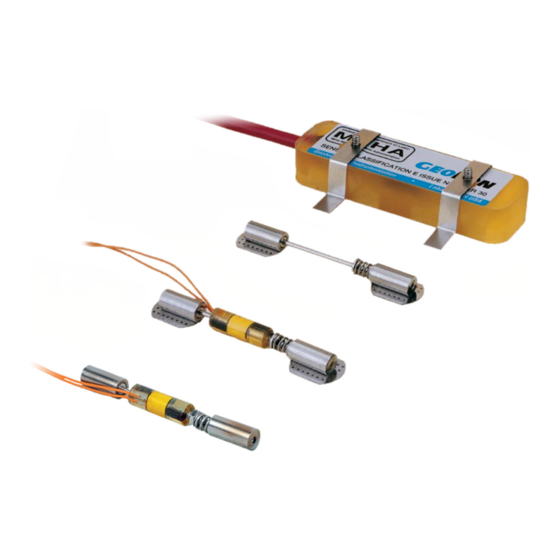
FIGURE 2: Model 4150 Vibrating Wire Strain Gauge End Block Protective Tube Coil Assembly Tension Nut Spring Green Wire White Wire Thermistor Red Wire Black Wire Instrument cable (4 conductor, 2 AWG) FIGURE 3: Model 4151 Vibrating Wire Strain Gauge 2 | INTRODUCTION | GEOKON... -
Page 13: Preliminary Checks
PRELIMINARY CHECKS 2.1 USING A READOUT Perform a preliminary check before installing the gauge in the field. To perform the preliminary check, complete the following steps: Insert the gauge into the underside of the coil assembly (4100 only). Connect the gauge leads to a readout box. See Section 6 in necessary. Observe the displayed readout. -
Page 14: Instrument Protection
Note: It is not necessary to use continuous welds; tack welding is sufficient as long as it holds the angles or channels firmly in place. Cables must be restrained using welding studs, to which the cables can be tied at three-meter intervals. 4 | INSTRUMENT PROTECTION | GEOKON... -
Page 15: Figure 4: Model 4100 Cover Plate - Top View
, or the cover plate can be flipped onto its back and GEOKON the holes in the cover plate can be used to mark the bolt locations. One hole in the cover plate is slotted, so the spacing is not critical. Avoid welding anywhere near the gauge as this will cause large local distortions in the metal. -
Page 16: Cable And Connector Protection
Be sure to spray beneath the coil housing, if applicable; do not worry if the primer also coats the instrument. 6 | INSTRUMENT PROTECTION | GEOKON... -
Page 17: Protection From Electrical Noise
(e.g. Plymouth 10 Plyseal), which is available from GEOKON 3.5 PROTECTION FROM ELECTRICAL NOISE Be sure to install instrument cables as far away as possible from sources of electrical interference such as power lines, generators, motors, transformers, arc welders, etc. -
Page 18: Figure 9: Lightning Protection Scheme
FIGURE 9: Lightning Protection Scheme 8 | INSTRUMENT PROTECTION | GEOKON... -
Page 19: Gauge Installation
GAUGE INSTALLATION 4.1 ADJUSTING THE GAUGE WIRE TENSION WARNING! Under no circumstances should the gauge tension be adjusted after the gauge has been welded down. Gauges are supplied with an initial reading of approximately 2500 microstrains. This gives a range of ±1500 microstrains. This range is usually adequate for most purposes and should not be altered except in unusual circumstances. -
Page 20: Spot Welding The 4100 Gauge
Carefully move the lead wires out of the way before beginning. Start FIGURE 12: Spot welding Sequence, Outer Rows 10 | GAUGE INSTALLATION | GEOKON... -
Page 21: Welding The Second End Piece
Next, add another row of welds as close to gauge ends as possible, between the welds of the previous row, as shown in below. Once that is complete weld the second mounting tab per the instructions in Section 4.2.5. FIGURE 13: Spot Welding Sequence, Inner Rows 4.2.5 WELDING THE SECOND END PIECE When all the weld dots on one mounting flange have been welded, proceed to weld the other end as follows:... -
Page 22: Figure 15: Collar Shim
Repeat the process on the other gauge end. When both ends of the gauge have been spot welded, take the handle of a small screwdriver and lightly tap both end blocks at points over the flanges 12 | GAUGE INSTALLATION | GEOKON... -
Page 23: Installing The Plucking Coil Housing (Model 4100 Only)
4.2.8 INSTALLING THE GAUGE COVER (MODEL 4150 ONLY) provides the 4150 with a semicylindrical metal cover. Spot weld the GEOKON cover in place over the gauge as shown in the figure below. Next, waterproof the spot-welding tabs as described in Section 3.4. - Page 24 Record the ambient temperature at the time of each reading, along with notes concerning the construction activity that is taking place. This data might supply logical reasons for observed changes in the readings. For temperature correction factors when used on concrete, see Appendix D. 14 | GAUGE INSTALLATION | GEOKON...
-
Page 25: Installing The 4151 Strain Gauge
Drill two 5 mm (3/16") diameter holes 13 mm (1/2") deep, at a spacing of 51 mm (2"). provides a drill hole spacer bar to make this easier. After drilling the GEOKON first hole, secure the spacer bar to the hole then use the spacer bar to locate the second hole. -
Page 26: Gauge Location
(see Appendix H). Consider the example of an I-beam, as shown in the figure below. FIGURE 20: Strain Gauges Mounted on Central Web 16 | GAUGE LOCATION | GEOKON... -
Page 27: Equation 1: Axial Stress Calculation
It is always best to locate gauges in pairs, one on each side of the neutral axis corresponding to the section of the I-beam to which the gauge is attached. This, along with locating the gauges on the web making them easy to protect from accidental damage, is why the configuration shown above is preferable. -
Page 28: Figure 21: Strain Gauges Mounted On Flanges
A real world example of this was seen when welding on the exposed flange of a soldier pile close to one gauge produced large strain changes which were not felt by the other gauge on the back side of the pile. 18 | GAUGE LOCATION | GEOKON... -
Page 29: Figure 23: Axial Strain And Bending Moment About Xx Axis
FIGURE 23: Axial Strain and Bending Moment About XX Axis The configuration shown in the figure below has been used to allow the calculation of the axial strains, as well as to provide a measurement of the bending moment around the major XX axis. However, any bending around the minor YY axis will affect the reading to some extent. -
Page 30: Taking Readings
Pos and Mode buttons. The unit display (from left to right) is as follows: ■ The current position: set by the Pos button, displayed as A through F. FIGURE 26: Lemo Connector to GK-404 20 | TAKING READINGS | GEOKON... -
Page 31: Gk-405 Vibrating Wire Readout
6.3.2 CONNECTING SENSORS WITH BARE LEADS Attach the flying leads to the bare leads of a vibrating wire sensor by GEOKON connecting each of the clips on the leads to the matching colors of the sensor conductors, with blue representing the shield (bare). -
Page 32: Measuring Temperatures
48.5Ω per km (14.7Ω per 1000') at 20 °C. Multiply these factors by two to account for both directions. Look up the temperature for the measured resistance in Appendix C. 22 | TAKING READINGS | GEOKON... -
Page 33: Data Reduction
DATA REDUCTION Readings in position E on ’s readout boxes are displayed directly in GEOKON microstrain based on the theoretical equation: –3 µε = 0.391 (f x 10 theory EQUATION 5: Theoretical Microstrain Where με is the strain in the wire in microstrain and f is the resonant frequency of the vibrating wire. -
Page 34: Troubleshooting
Refer to the expected resistance for the various wire combinations below. Vibrating Wire Sensor Lead Resistance Levels ≅180Ω (≅50Ω for Model 4150) Red/Black Green/White 3000Ω at 25 °C Any other wire combination will result in a measurement of infinite resistance. 24 | TROUBLESHOOTING | GEOKON... -
Page 35: Appendix A. Specifications
APPENDIX A. SPECIFICATIONS A.1 VIBRATING WIRE STRAIN GAUGE Model Model 4100 Model 4150/4151 Model 4150 3000 με 10,000 με Range (nominal) 0.4 με 1.3 με Resolution Accuracy 0.5% FS 0.5% FS Stability 0.1% FS / yr 0.1% FS/yr Linearity ±2.0% FSR ±7.5% FSR 12.2 με/ °C Thermal Coefficient... -
Page 36: Appendix B. Theory Of Operation
Note that the tension (F) can be expressed in terms of strain, e.g., Where: Ɛ is the wire strain (inches/inches). E is the Young’s modulus of the wire (30 x 10 Psi). Combining the equations from steps four and five gives: 26 | THEORY OF OPERATION | GEOKON... - Page 37 Substituting the given values for E, g, and ρ yields: In position A, (which displays the period of vibration, T) multiplied by a factor of 10 Combining the equations from steps seven and eight gives: 10. The equation from the previous step must now be expressed in terms of the strain in the surface of the body to which the gauge is attached.
-
Page 38: Appendix C. Thermistor Temperature Derivation
166.7 58.3 21.89K 2872 582.6 162.0 56.8 20.70K 2750 562.8 157.6 55.6 19.58K 2633 543.7 153.2 18.52K 2523 525.4 149.0 17.53K 2417 507.8 145.0 16.60K 2317 490.9 141.1 TABLE 4: 3KΩ Thermistor Resistance 28 | THERMISTOR TEMPERATURE DERIVATION | GEOKON... -
Page 39: 10Kω Thermistor Resistance
C.2 10KΩ THERMISTOR RESISTANCE Thermistor Type: US Sensor 103JL1A Resistance to Temperature Equation: – 273.15 A+B(LnR)+C(LnR) +D(LnR) EQUATION 8: 10KΩ Thermistor Resistance Where: T = Temperature in °C LnR = Natural Log of Thermistor Resistance –3 A = 1.127670 x 10 –4 B = 2.344442 x 10 –8... -
Page 40: Appendix D. Temperature Correction When Used On Concrete
104 – 31 = –73 microstrains. This, multiplied by Young's Modulus, will give the actual stress in the concrete caused by the imposed load change. 30 | TEMPERATURE CORRECTION | GEOKON... -
Page 41: Appendix E. Temperature Effects
APPENDIX E. TEMPERATURE EFFECTS If the ends of the structural member are free to expand or contract without restraint, strain changes can occur without any change in the stress reading. However, if the ends of a steel structural member are restrained by some semi- rigid medium, then any increase in temperature of the structural member will result in a buildup of compressive load related strain in the member, even though the actual strain would be tensile. -
Page 42: Appendix F. Calculations From Three Strain Gauges
Y = ±(300 / 3 – 20) = ±80 θ θ = 53 degrees from the X axis = 80 / 60 = 1.333 and P = ±[60 x 0.6 + 80 x 0.8] + 100 = 200 microstrains, tensile, 0 microstrain minimum 32 | CALCULATIONS | GEOKON... -
Page 43: Appendix G. Model 4150-5 Extended Range Strain Gauge
APPENDIX G. MODEL 4150-5 EXTENDED RANGE STRAIN GAUGE The Model 4150-5 strain gauge, a modified version of the 4150 gauge, features a range of 10,000 microstrains. Note the following when using the 4150-5: ■ The gauge is installed in the same manner as the standard 4150 gauge; however, the position within the range should be set by the user, using the calibration report for each gauge as a guide. -
Page 44: Appendix H. Parts List
, 2 twisted pairs, for the above θ 02-187V3-M Red PVC Cable, 0.187" , 2 twisted pairs, for the above 4151-3 Drilling Template for 4151 TABLE 6: Model 4100/4150 Series Model and Parts List 34 | PARTS LIST | GEOKON... - Page 48 GEOKON Phone: +1 (603) 448-1562 GEOKON 48 Spencer Street Email: info@geokon.com is an ISO 9001:2015 Lebanon, New Hampshire Website: www.geokon.com registered company 03766, USA...
Need help?
Do you have a question about the 4100 Series and is the answer not in the manual?
Questions and answers