Table of Contents
Advertisement
Quick Links
Advertisement
Table of Contents

Related Manuals for DS18 CF-X10TPNEO


Summary of Contents for DS18 CF-X10TPNEO
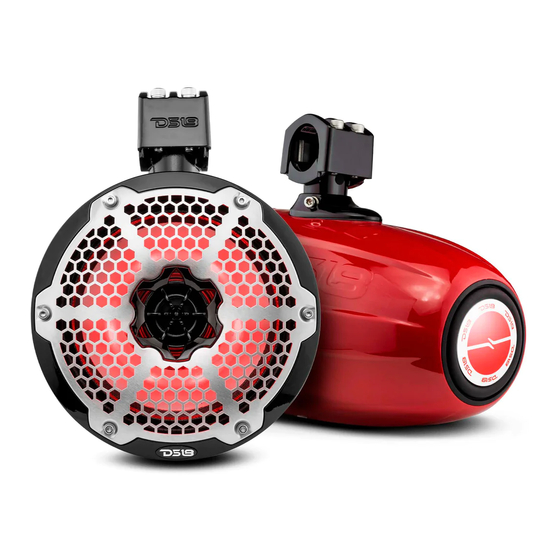
- Page 1 OWNER’S MANUAL CF-X10TPNEO MANUAL DEL USUARIO CARBON FIBER TEXTURE 10" MARINE TOWER NEODYMIUM SPEAKER WITH BULLET TWEETER AND PASSIVE RADIATOR TORRE MARINA CON TEXTURA DE FIBRA DE CARBON DE 10" CON ALTAVOZ DE NEODIMIO CON TWEETER BALA Y RADIADOR PASIVO...
-
Page 2: Specifications
SPECIFICATIONS CF-X10TPNEO SPECIFICATIONS Nominal Diameter ............. 10”... -
Page 3: Especificaciones
ESPECIFICACIONES CF-X10TPNEO ESPECIFICACIONES Diametro Nominal..............10”... -
Page 4: Dimensions / Dimensiones
SPECIFICATION / ESPECIFICACIONES CF-X10TPNEO MEASURMENTS / MEDIDAS Overall Diameter / Diámetro Total ......... . 10.76” / 273.3 mm Overall Depth / Profundidad Total . -
Page 5: Setup / Configuración
SETUP / CONFIGURACIÓN READ BEFORE INSTALLATION LEER ANTES DE LA INSTALACIÓN 1. Be sure to carefully read and understand the 1. Asegúrese de leer detenidamente y entender las instrucciones antes de intentar instalar estos instructions before attempting to install these altavoces. -
Page 6: Packaging Includes
SETUP / CONFIGURACIÓN PACKAGING INCLUDES LA CAJA INCLUYE 1 Pair 10” Wakeboard Pod Tower Speaker 1 par de altavoces de torre para wakeboard de 10” 1 Piece 6 mm Hex wrench Chromed 1 Llave hexagonal de 6 mm Cromada 1 pieza Llave hexagonal de 4 mm Cromada 1 Piece 4 mm Hex wrench Chromed 1 par de almohadillas NBR para tubos de 1 "a 3"... - Page 7 INSTALLATION & CONNECTION OPTIONS / OPCIONES DE CONEXIÓN E INSTALACIÓN To connect without LED Control Para conectarse sin el módulo de control LED Module (LED-BTC), Connect as (LED-BTC), conecte como se muestra en el Shown in the Following Diagram: siguiente diagrama: •...
- Page 8 INSTALLATION / INSTALACIÓN BEGINNING MOUNTING COMENZANDO EL MONTAJE Paso 1: Retire los altavoces de torre del embalaje Step 1: Remove tower speakers from the y TODO el hardware. packaging and ALL hardware. Paso 2: Encuentre una BUENA ubicación que permita Step 2: Find a GOOD location that allows for easy el cableado fácil del altavoz (y las luces LED) - wiring of the speaker (and LED lights) -PLUS does...
-
Page 9: Installation / Instalación
INSTALLATION / INSTALACIÓN Paso 7: Envuelva la almohadilla de goma alre- Step 7:Wrap the rubber pad around the pipe and dedor de la tubería y alinee el orificio de salida align wire out hole According to the diagram. del cable de acuerdo con el diagrama. Rubber Pad Step 7 Almohadilla de Goma... - Page 10 INSTALLATION / INSTALACIÓN Step 11: During the mounting process, you should have located the spot to drill your tower Wire NBR bar for the 6 conductor wire (Speaker and RGB Plug lightning wiring) insertion. Or NOT (see Tie-wrap solution below) Enchufe del cable NBR Paso 11: Durante el proceso de montaje, debería haber...
- Page 11 INSTALLATION / INSTALACIÓN EL LOGO FRONTAL PUEDE GIRAR FRONT LOGO CAR ROTATION / 30 DEGREE ROTATION Rotación FLAT MOUNTING de 30 grados Montaje Plano Step 13: When you want to install a flat mounting, remove the clamp and take out the 6 core through it into the flat mounting bracket, then assemble it, see depiction below.
- Page 12 FOR MORE INFORMATION PLEASE VISIT DS18.COM We LIKE IT LOUD...
Need help?
Do you have a question about the CF-X10TPNEO and is the answer not in the manual?
Questions and answers