Table of Contents
Advertisement
Quick Links
Advertisement
Table of Contents

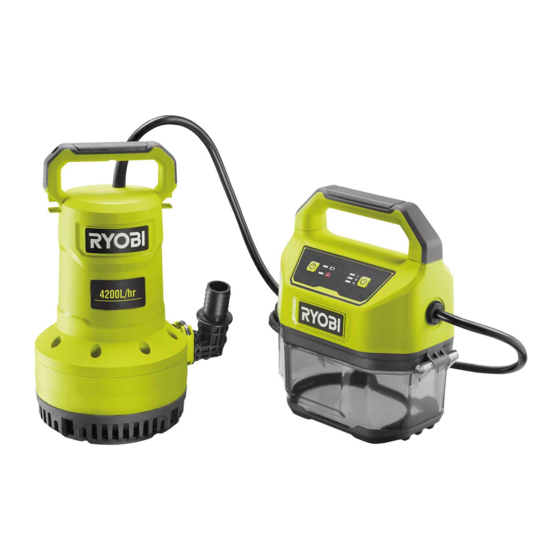
Summary of Contents for Ryobi ONE+ R18SUP10
- Page 1 FRONT PAGE R18SUP10...
-
Page 2: Intended Use
footwear. Wear protective footwear that will IMPORTANT! protect your feet and improve your footing It is essential that you read the instructions on slippery surfaces. in this manual before assembling, operating, ■ Exercise caution to avoid slipping or falling. and maintaining the product. ■... -
Page 3: Transportation And Storage
paper clips, coins, keys, nails, screws, or may cause slipping. Make sure to clean other small metal objects that can make a the discharged water after operating the connection from one terminal to another. product. Shorting the battery terminals together may ■... -
Page 4: Maintenance
Follow all special requirements on packaging Waste electrical products and labelling when transporting batteries should not be disposed of by a third party. Ensure that no batteries with household waste. Please can come in contact with other batteries or recycle where facilities exist. conductive materials while in transport by Check with your local authority protecting exposed connectors with insulating,... -
Page 5: Led Indicator Descriptions
LED INDICATOR DESCRIPTIONS LED indicator Red LED Green LED Status The battery pack capacity is at Low battery 25%. The LED light stays on until the battery pack is recharged. The product is on. 2 quick flashes The 15-minute timer is running out. 3 quick flashes The 10-minute timer is running out. - Page 7 R18SUP10 Operator’s manual Cable Submersible pump Filter switch Locking pin Discharge elbow Air release valve Screw Handle Control panel Power connector Battery box Battery cover On/off button Low battery LED indicator Timer button Timer LED indicator Water sensor LED indicator Clip hook Wall mount hook Latch...
- Page 8 Flip up the latch. Remove the metal bar from the groove to unlock the battery box from the battery cover. Hook the metal bar on the groove and Install the discharge elbow into the Insert the locking pin to secure the flip down the latch to lock the battery submersible pump.
- Page 9 Open the battery box. Install the battery pack. Make sure that Close the battery box. the latches on the battery pack click into place. Attach the flexible hose and hose clamp to the discharge elbow. Tighten the hose Lay the submersible pump on its side. clamp to secure the flexible hose.
- Page 10 Operating the Cleaning the p.xxx p.11 p.xxx p.15 Title header Title header product product Title header p.xxx Title header p.xxx Title header p.xxx Title header p.xxx Mounting the Title header Storing the product Title header p.xxx p.17 p.xxx p.14 battery box...
- Page 11 OPERATING THE PRODUCT WARNING: Do not use the submersible pump without the filter installed. 1. Flip up the latch and remove the metal bar from the groove. 2. Open the battery box. 3. Install the battery pack. Make sure the latches on the battery pack click into place.
- Page 12 5. Tie a rope to the carrying handle of the submersible pump and lower the submersible pump into water using the rope. Do not lift or lower the submersible pump using the hose or power cord. NOTE: The submersible pump can only be submerged within the specified immersion depth.
- Page 13 NOTE: If the topmost timer LED indicator is on, the timer is set to 5 minutes. If the middle LED indicator is on, the timer is set to 10 5min minutes. If the bottom LED indicator is on, the timer is set to 15 minutes. 8.
- Page 14 MOUNTING THE BATTERY BOX 1. Install the wall mount hook onto the wall. Turn the screws clockwise to tighten and secure the wall mount hook. Mount the battery box onto the wall mount hook. NOTE: The battery box has a groove behind it where the wall mount hook can be hooked into.
- Page 15 CLEANING THE PRODUCT 1. Lay the submersible pump on its side. 2. Turn the screws counterclockwise to remove them from the filter. 3. Remove the filter. Clean the filter with water and remove dirt or debris with a stiff brush. 4.
- Page 16 6. Install the screws into the filter and turn them clockwise to tighten and secure the filter into the submersible pump. 7. Remove dirt or debris from the battery box with a stiff brush. Do not use water to clean the battery box. Maintenance...
- Page 17 STORING THE PRODUCT NOTE: Do not store the product while there is still dirt or debris on it. Always make sure to clean the product before storing. WARNING: Make sure to clean any excess water from the product to avoid slipping. 1.
- Page 18 4. Hook the metal bar on the groove and flip down the latch to lock the battery box to the battery cover. 5. Store the product in a dry, well-ventilated area that is inaccessible to children. Keep the product away from corrosive agents, such as garden chemicals and de-icing salts.
-
Page 19: Product Specifications
The flow rate of the product depends on the height of the water outlet. As the height of the product increases, the slower it discharges water. Outlet height (m) Flow rate (L/h) 4,200 3,500 2,700 1,800 NOTE: Visit your local special orders desk or contact RYOBI customer service for replacement parts. - Page 20 Techtronic Industries Australia Pty Ltd 31 Gilby Road, Mount Waverley, VIC 3149 Melbourne, Australia Techtronic Industries N.Z. Limited Unit C, 70 Business Parade South, Highbrook, Auckland 2013, New Zealand RYOBI is a trade mark of Ryobi Limited, and is used under license. 961479068-01...


Need help?
Do you have a question about the ONE+ R18SUP10 and is the answer not in the manual?
Questions and answers