Table of Contents
Advertisement
Item #XXX XXX XXXX
Model #FRN-312641
USE AND CARE GUIDE
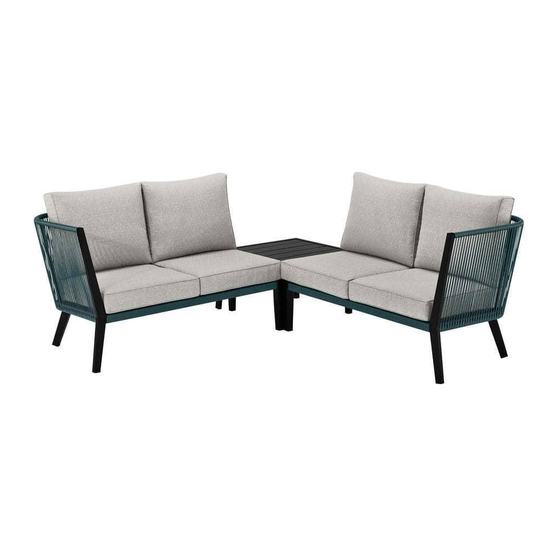
HEATHER GLEN 3 PC CORNER SECTIONAL
Questions, problems, missing parts? Before returning to the store,
call Hampton Bay Customer Service
8 a.m. - 7 p.m., EST, Monday – Friday, 9 a.m. – 6 p.m., EST, Saturday
1-855-HD-HAMPTON
HAMPTONBAY.COM
THANK YOU
We appreciate the trust and confidence you have placed in Hampton Bay through the purchase of this sectional. We strive to continually create
quality products designed to enhance your home. Visit us online to see our full line of products available for your home improvement needs.
Thank you for choosing Hampton Bay!
Advertisement
Table of Contents

Summary of Contents for HAMPTON BAY HEATHER GLEN FRN-312641
- Page 1 THANK YOU We appreciate the trust and confidence you have placed in Hampton Bay through the purchase of this sectional. We strive to continually create quality products designed to enhance your home. Visit us online to see our full line of products available for your home improvement needs.
-
Page 2: Table Of Contents
The frame is warranted to be free of manufacturing defects for two years from the purchase date . If the frame of your furniture fails (ie . broken frame or weld) within two years of ownership, Hampton Bay will repair, provide replacement parts, or replace the product at our option . -
Page 3: Hardware Included
Table Assembly PLANNING ASSEMBLY Before beginning the assembly of this product, make sure all parts are present . Compare parts with Package Contents and Hardware Included lists . If any part is missing or damaged, do not attempt to assemble the product, and return it to the place of purchase . Assembly requires two people . - Page 4 Table Assembly (continued) Attaching the Legs to the Table Top □ Place the Table Top (I) upside down on a soft, clean and lever surface . □ Insert the Legs (J) into the Table Top (I) using the Bolts (AA) and the Washers (CC) .
-
Page 5: Left Corner Assembly
Left Corner Assembly PLANNING ASSEMBLY Before beginning the assembly of this product, make sure all parts are present . Compare parts with Package Contents and Hardware Included lists . If any part is missing or damaged, do not attempt to assemble the product, and return it to the place of purchase . Assembly requires two people . -
Page 6: Assembly
Left Corner Assembly (continued) Connecting the Front Leg to the Right □ Connect the Front Leg (C) to the Right Leg (A), using the Bolts (AA) and Washers (CC) . Do not over tighten all the bolts . Connecting the Sofa Seat to the Legs □... - Page 7 Left Corner Assembly (continued) Inserting the Back Leg □ Insert the Back Leg (H) to the Sofa Seat (G) using the Bolts (AA) and Washers (CC) . Do not over tigthen all the bolts . Assembling the Backrest to the Sofa Seat □...
- Page 8 Left Corner Assembly (continued) Adjusting the Self-Leveling Feet □ Adjust the self-leveling feet on the chair for equal balance . Put the Cushions on Sofa Seat □ Put the Seat Cushions (K) and Back Cushions (L) on the Sofa Seat (G) . □...
-
Page 9: Right Corner Assembly
Right Corner Assembly PLANNING ASSEMBLY Before beginning the assembly of this product, make sure all parts are present . Compare parts with Package Contents and Hardware Included lists . If any part is missing or damaged, do not attempt to assemble the product, and return it to the place of purchase . Assembly requires two people . -
Page 10: Assembly
Right Corner Assembly (continued) Connecting the Front Leg to the Right □ Connect the Front Leg (F) to the Left Leg (D) using the Bolts (AA) and Washers (CC) . Do not over tighten the bolts . Connecting the Sofa Seat to the Legs □... - Page 11 Right Corner Assembly (continued) Inserting the Back Leg □ Insert the Back Leg (H) into the Sofa Seat (G) using the Bolts (AA) and Washers (CC) . Do not over tigthen all the bolts . Assembling the Backrest to the Sofa Seat □...
- Page 12 Right Corner Assembly (continued) Adjusting the Self-Leveling Feet □ Adjust the self-leveling feet on the chair for equal balance . Put the Cushions on Sofa Seat □ Put the Seat Cushions (K) and Back Cushions (L) on the Sofa Seat (G) . □...
-
Page 13: Replacement Parts
Replacement Parts Model #FRN-312641 Replacement Part No . Description Replacement Part No . Table Leg FRN-312641-J Self-Leveling Feet FRN-312641-SLF Table Hardware Kit FRN-312641-TABLE-KIT Left Corner Hardware Kit FRN-312641-LEFT-KIT Right Corner Hardware Kit FRN-312641-RIGHT-KIT HAMPTONBAY .COM Please contact 1-855-HD-HAMPTON for further assistance . - Page 14 Questions, problems, missing parts? Before returning to the store, call Hampton Bay Customer Service 8 a.m. - 7 p.m., EST, Monday-Friday, 9 a.m. - 6 p.m., EST, Saturday 1-855-HD-HAMPTON HAMPTONBAY.COM Retain this manual for future use. Factory Corner Sofa ID # FRN-312641-C...


Need help?
Do you have a question about the HEATHER GLEN FRN-312641 and is the answer not in the manual?
Questions and answers