
Related Manuals for Gigaset PREMIUM 300


Summary of Contents for Gigaset PREMIUM 300
- Page 1 PREMIUM 300 You can find the most up-to-date user guide at www.gigaset.com/manuals...
-
Page 2: Table Of Contents
Contents Contents Overview ................4 Handset . - Page 3 Contents Appendix ................70 Questions and answers .
-
Page 4: Overview
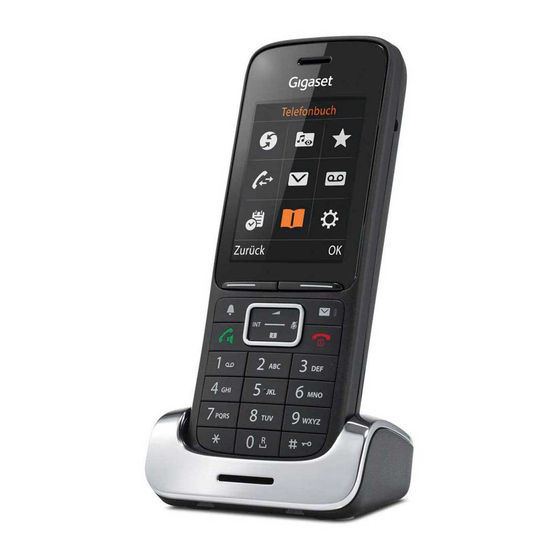
Overview Overview Handset 5 End call key / On/off key End call; Cancel function; one Press briefly level back Switch the handset on/off Press and hold 6 Hash key / Lock key Lock/unlock the keypad Press and hold Toggle between upper/lower Press briefly case and digits 7 Microphone... -
Page 5: Base
Base Base A Registration/paging key Locate a handset (paging) Press briefly Register a handset Press and hold The colour and shape of your device may be different from the illustration. -
Page 6: Illustration In The User Guide
Illustration in the user guide Illustration in the user guide Warnings, which if not heeded, can result in injury to persons or damage to devices. Important information regarding function and appropriate handling or functions that could generate costs. Prerequisite for being able to carry out the following action. Additional helpful information. -
Page 7: Safety Precautions
Use only rechargeable batteries that correspond to the specification (see list of permitted batteries www.gigaset.com/service). Never use a conventional (non-rechargeable) battery or other battery types as this could result in significant health risks and personal injury. Rechargeable batteries, which are noticeably damaged, must be replaced. -
Page 8: Getting Started
Getting started Getting started Contents of the package • One base, • One power adapter for the base, • One phone cable, • One handset • One battery cover (rear cover for the handset) • One battery • One charging cradle incl. power adapter •... -
Page 9: Base
Base Base Insert the phone cable into the connection socket at the rear of the base until it clicks into place. Insert the power cable from the power adapter into the connection socket Depending on the model, if included in the delivery: Click the cover into place in the notches on the back of the base (not if mounting on a wall). - Page 10 Handset Setting up the handset for use The display is protected by a plastic film. Please remove the protective film! Inserting the battery Only use a rechargeable battery, as this could otherwise result in significant health risks and personal injury. For example, the outer casing of the battery could be destroyed or the battery could explode.
- Page 11 Handset Charge the battery Charge the battery fully prior to first use in the charging cradle or using a standard USB mains adapter. 2.5 h The battery is fully charged when the power icon disappears from the display. The battery may heat up during charging. This is not dangerous. After a time, the charge capacity of the battery will decrease for technical reasons.
- Page 12 Handset Setting the date and time Set the date/time so that the correct date and time can be assigned to incoming calls and to enable the alarm to be used. Press the display key Set Time Calls or, if the date and time have already been set: Settings Date/Time The active input position flashes.
- Page 13 Handset Connecting the USB data cable For data exchange between the handset and PC: Connect the USB data cable with micro-USB plug into the USB socket at the bottom of the handset Connect the handset directly to the PC, not via a USB hub.
-
Page 14: Using The Telephone
Getting to know your telephone Using the telephone Getting to know your telephone Switch the handset on/off Switch on: When the handset is switched off, press and hold the End call key Switch off: When the handset is in idle status, press and hold the End call key Lock/unlock the keypad The keypad lock prevents any accidental use of the telephone. - Page 15 Getting to know your telephone During a conversation Open the directory Open the list of available online directories Press and hold Mute the microphone Initiate an internal consultation call Adjust the loudspeaker volume for receiver and handsfree mode Display keys The display keys perform a range of functions depending on the operating situation.
- Page 16 Getting to know your telephone Main menu In idle status: Press the centre of the control key Example the control key to select a submenu Settings The main menu functions are shown in the display as icons. The icon for the selected function is highlighted in colour and the name of the associated function appears in the display header.
- Page 17 Getting to know your telephone Entering text Input position to select an entry field. A field is activated when the New Entry cursor is blinking inside it. First Name : to move the position of the cursor. Peter Correcting incorrect entries Surname : •...
-
Page 18: Making Calls
Making calls Making calls Making calls enter the number briefly press the Talk key Press and hold the Talk key enter the number Cancel dialling: Press the End call key Information for Calling Line Identification: p. 24 If the display backlight is deactivated, you can reactivate it by pressing any key. Digit keys that are pressed appear in the display for pre-dialling, other keys have no further function. - Page 19 Making calls Managing entries in the redial list Briefly press the Talk key . . . the redial list is opened select an entry Options . . . possible options: Copy an entry to the directory: Copy to Directory Copy the number to the display: Display Number Use as required to change or...
- Page 20 Making calls One touch call A saved number is dialled by pressing any key. This allows children Example who are not yet able to enter a number to call a certain number, for example. 07:15 Activate one touch call mode: INT 1 22 Feb Additional Features...
- Page 21 Making calls Making internal calls Multiple handsets have been registered to the base station ( p. 55). Press briefly . . . the handset list is opened, this handset is indicated by < select handset or Call All (group call) Press the Talk key Fast access for group call: Press briefly...
- Page 22 Making calls Accepting/rejecting call waiting An external call arriving during an internal call is indicated with a call waiting tone. If the number is transferred, you will see the number or the name of the caller on the display. • Rejecting a call: Reject The call waiting tone is turned off.
- Page 23 Making calls During a conversation Handsfree mode Activating/deactivating handsfree mode during a call and when establishing a connection: Press the handsfree key Placing the handset in the charging cradle during a call: Press and hold down the handsfree key Place the handset in the charging cradle hold for a further 2 seconds Call volume...
-
Page 24: Provider-Specific Functions (Network Services)
Provider-specific functions (network services) Provider-specific functions (network services) Network services depend on the network (analogue fixed line network or IP telephony) and on the network provider (Service provider or phone system) and must be requested from that provider if required. You will find a description of the features on your network provider's website or at one of their store branches. -
Page 25: Select Services
Provider-specific functions (network services) Calling Line Identification for outgoing calls Switching Calling Line Identification on/off for all calls These settings apply to all registered handsets. Select Services All Calls Anonym. Change ( = activated) Deactivating Calling Line Identification for the next call Select Services Next Call Anonym. -
Page 26: Call Divert
Provider-specific functions (network services) Cancelling ringback Select Services Ringback Off OK . . . You will receive a confir- mation from the telephone network Press the End call key You can only activate one ringback at a time. Activating a ringback will automatically cancel any ringback that is already active. - Page 27 Provider-specific functions (network services) Calls with three participants (if available) Consultation calls Make another external call during an external call. The first call is Consultation placed on hold. Ext. Call enter the number of the second participant . . . the active call is placed on hold and the second participant is called Call to:...
- Page 28 Provider-specific functions (network services) Conference Speaking to both participants at the same time. During an external call, dial the number of a second participant (consultation call) or accept a waiting caller . . . then Initiate conference call: Confer..all callers can hear one another and hold a conversation with one another Return to call swapping: End Conf.
-
Page 29: Call Lists
Call lists Call lists The telephone saves different types of calls (missed, accepted and outgoing calls) in lists. List entry The following information is displayed in the list entries:: Example • The list type (in the header) All Calls • Icon for the type of entry: Frank Missed Calls... -
Page 30: Message Lists
Message lists Number into black list: select entry Options Copy to Blacklist Request SMS information about a call number (might require payment): select entry Options SMS Enquiry Delete an entry: select entry Options Delete Entry Delete list: Options Delete List Message lists Notifications about missed calls, messages on the network mailbox, missed SMS messages and missed alarms are saved in the messages list and can be shown on the handset display. - Page 31 Message lists Activating/deactivating Message key flashing Receipt of new messages is displayed by a flashing message key on the handset. This type of alert can be activated/deactivated for each message type. In idle status: Press keys . . . the number 9 System appears in the display to select the message type:...
-
Page 32: Directory
Directory Directory The local directory is unique to the handset. However, it is possible to send entries to other handsets. Opening the directory Briefly press in idle status Directory Directory entries Number of entries: up to 500 Information: First name and surname, up to three telephone numbers, e-mail address, anniversary with alert, VIP ringtone with VIP icon, CLIP- picture Length of the entries:... - Page 33 Directory For Caller Melody (VIP) and Caller Picture : the telephone number of the caller must be supplied. Searching for/selecting a directory entry browse searched names enter initial letters (max. 8 letters) . . . the display jumps to the first name starting with these initial letters continue browsing to the desired entry, if needed Scroll through directory:...
- Page 34 Directory Displaying the number of entries available in the directory Options Available Memory Copying number to the directory Copy numbers to the directory: • From a list e.g. the call list or the redial list • From the text of an SMS •...
- Page 35 OK . . . the entries are copied one after the other Synchronising the phonebook with the PC address book (Gigaset QuickSync) The Gigaset QuickSync programme has been installed on the computer. The handset is connected via a USB data cable to the computer. Free download and further information at...
-
Page 36: Network Mailbox
Network mailbox Network mailbox Enter number Voice Mail Network Mailbox enter or amend the network mailbox number Save To activate/deactivate the network mailbox use the phone number and a function code of your network provider. Please contact the network provider if you require any further information. -
Page 37: Additional Functions
Sound profiles Additional functions Sound profiles The telephone has sound profiles for adapting the handset to the environmental conditions: Profile Loud, Profile Silent, Profile Personal. switch between the profiles . . . the profile is changed straight away without a prompt The profiles are set as follows by default: Default setting Profile... - Page 38 Calendar Saving appointments to the calendar Date and time have been set. Organizer Calendar select desired day OK . . . then Switch on/off: Activation: select On or Off Enter date: Date . . . the selected day has been pre-set enter new date Enter time:...
-
Page 39: Timer
Timer Opening the list Press the Message key Missed Alarms: browse through the list of any appointments Organizer Missed Alarms Each entry is displayed with the number or name, date and time. The most recent entry appears at the top of the list. Delete an appointment/anniversary: Delete Compose an SMS:... -
Page 40: Alarm Clock
Alarm clock Disabling/repeating the alarm Switch off the alarm: Repeat the alarm: Restart . . . the timer display is displayed again set another duration as required Save . . . the countdown is restarted Alarm clock Date and time have been set. Activating/deactivating the alarm clock and setting the wake-up time Organizer Alarm Clock... -
Page 41: Baby Monitor
Baby monitor Baby monitor When the baby monitor is switched on, the stored (internal or external) destination number is called as soon as a defined noise level is exceeded in the vicinity of the handset. The alarm to an external number is cancelled after approximately 90 seconds. You can answer the alarm using the Two Way Talk function. -
Page 42: Eco Dect
ECO DECT Deactivate baby monitor / Cancel alarm Deactivate the baby monitor: In idle status press the display key Off Cancel the alarm: Press the End call key during an alarm Deactivate the baby monitor remotely The alarm is forwarded to an external destination number. The receiving phone supports tone dialling. -
Page 43: Protection Against Unwanted Calls
Protection against unwanted calls Deactivating radiation in idle status Settings ECO DECT No Radiation Change ( = activated) To benefit from the advantages of the setting No Radiation, all registered handsets must support this feature. If the setting No Radiation is activated and a handset is registered to the base that does not support this feature, No Radiation is automatically deactivated. -
Page 44: Call Lists
Protection against unwanted calls Protection from anonymous callers The handset will not ring if callers' numbers are not revealed. This setting can be applied to only one or to all registered handsets. For one handset Settings Audio Settings Ringtones (H/Set) Anon. - Page 45 Protection against unwanted calls Setting the protection mode Settings Telephony Black List Edit Protection Mode select desired protection: No Protection All calls are indicated, including from callers whose numbers are on the black list. Silent Call The telephone will not ring and the incoming call will only appear in the display.
-
Page 46: Sms (Text Messages)
SMS (text messages) SMS (text messages) It is possible to send SMS messages as soon as the telephone has been connected. Calling Line Identification is enabled ( p. 24). The network provider supports the SMS service. If no SMS service centre is entered, the submenu SMS only consists of the entry Settings. - Page 47 SMS (text messages) Sending SMS messages to an e-mail address The network provider supports this feature. New SMS OK . . . then Enter address: to enter the e-mail address at the start of the SMS message Options Insert E-mail Adr. to select a directory entry containing an e-mail address Write text:...
-
Page 48: Incoming
The incoming SMS message list contains all the received SMS messages and those SMS messages that could not be sent due to an error. New SMS messages are indicated on all Gigaset handsets by the icon on the display, the flashing Message key and an advisory tone. - Page 49 SMS (text messages) Reading and managing SMS messages Incoming select SMS Read . . . possible options: Answer SMS: Options Reply Edit SMS text and send to recipient of your choice: Options Edit to edit text Options Forward Forward SMS to recipient of your choice: Options Forward Display text in a different character set:...
-
Page 50: Service Centres
SMS (text messages) SMS notification Receive notifications of missed calls and/or new messages on the answer machine. Settings Notification Change = activated) . . . then Enter number: To : use to enter the number to which the SMS should be sent Missed calls: Missed Calls to select On or Off... - Page 51 SMS (text messages) SMS to PABXs • The Call Line Identification must be forwarded to the extension of the PABX (CLIP). • If necessary, the access code/outside line code must be prefixed to the number of the SMS service centre (depending on your PABX). To test: Send an SMS to your own number, once with the access code and once without.
-
Page 52: Resource Directory
Sounds for ringtones and images that can be used as caller pictures (CLIP pictures) or as a screensaver are saved in the handset's resource directory. A range of monophonic and polyphonic sounds and pictures have been pre-set but further images and sounds can be downloaded using a PC ( Gigaset QuickSync). Media types Type Format... -
Page 53: Additional Functions Using The Pc Interface
Resource Directory Capacity OK . . . the percentage of avail- able memory is displayed Additional functions using the PC interface The Gigaset QuickSync program has been installed on the computer. Free to download at www.gigaset.com/quicksync QuickSync functions: • Sync the handset's directory with Microsoft® Outlook®... - Page 54 Launch Gigaset QuickSync Establish connection to the handset Start firmware update in Gigaset QuickSync . . . Information about this can be found in Gigaset QuickSync help feature The update process may take up to 10 minutes (not including download time).
-
Page 55: Expanding The Functionality Of The Telephone
Multiple handsets Expanding the functionality of the telephone Multiple handsets Up to six handsets can be registered to the base station. Each registered device is assigned an internal number (1 – 6) and an internal name (INT 1 – INT 6). The number or name assigned can be changed. If all internal numbers have already been assigned at the base station: de-register a handset that is no longer needed... - Page 56 Multiple handsets Registering a handset to multiple base stations Your handset can be registered to up to four base stations. The active base station is the base station to which the handset was last registered. The other base stations remain saved in the list of available base stations.
-
Page 57: Repeater
Repeater without encryption, e.g. Gigaset repeater prior to Version 2.0 • Repeater with encryption, e.g. Gigaset repeater later than Version 2.0 Further information about the Gigaset repeater can be found in the repeater user guide and at www.gigaset.com. Repeater without encryption... -
Page 58: Operation With A Router
Operation with a router Repeater with encryption Encryption is activated (default setting). Registering a repeater Connect the repeater to the mains power supply Press and hold the Registration/paging key on the telephone base station (min. 3 secs) . . . the repeater is automatically registered Up to 2 repeaters may be registered. -
Page 59: Operation With A Pabx
Operation with a PABX Operation with a PABX To find out which settings are required for a PABX, please refer to the PABX user guide. You cannot send or receive SMS messages on PABXs that do not support Calling Line Identification. - Page 60 Operation with a PABX Setting pauses . . . then Pause after line seizure: 1 sec 3 secs 7 secs Pause after Recall key: 800 ms 1600 ms 3200 ms Dialling pause (pause after access code): 1 sec 2 secs 3 secs 6 secs To enter dialling pause when dialling...
-
Page 61: Adjusting The Telephone Settings
Handset Adjusting the telephone settings Handset Changing the language Settings Language select language Select ( = selected) If the handset has been set to an incomprehensible language: Press the keys slowly one after the other select the correct language press the right display key Display and keypad Screensaver A digital or analogue clock and a range of pictures can be selected to be displayed as a screen-... - Page 62 Handset Colour scheme You can choose from a range of colour combinations for the display. to select Settings Display + Keypad Colour Schemes to select the desired colour scheme Select ( = selected) Display backlight The display backlight always illuminates when the handset is taken out of the base station/ charging cradle or when a key is pressed.
- Page 63 Handset Changing the earpiece and handsfree volume You can set the volume of the earpiece and speaker at 5 levels independently of each other. Changes are only saved permanently in Profile Personal. During a conversation Handset Volume to select volume Save .
- Page 64 Handset Ringtones Ringtone volume to select Settings Audio Example Settings Ringtones (H/Set) Volume Volume to select Internal Calls and Alarms or External Internal Calls Calls to set volume in 5 levels or in crescendo mode and Alarms: (increasing volume) Save <...
- Page 65 Handset Switching advisory tones on/off The handset notifies acoustically about different activities and statuses. These advisory tones can be switched on/off independently of each other. to select Settings Audio Settings Advisory Tones OK . . . then Tone when keys are pressed: Key Tones: use to select On or Off Confirmation/error tone after making entries, advisory tone when a new message has been...
- Page 66 Handset Dialling a number Press and hold the digit key . . . the number is dialled immediately Briefly press the digit key . . . the number/name (possibly in abbreviated form) is shown on the left display key press the display key . . . the number is dialled Changing the digit key assignment Briefly press the digit key Change .
- Page 67 Handset Resetting a handset Reset any individual settings and changes that you have made. Settings System Handset Reset Yes . . . the handset's settings are reset The following settings are not affected by a reset • Registration of the handset to the base station •...
-
Page 68: System
System System Date and time To ensure you have the correct time for incoming calls and to use the alarm clock and calendar, for example, the date and time must be set. If the date and time have not yet been set on the handset, the display key Set Time appears. Press the display key Set Time Settings Date/Time... - Page 69 System Changing the system PIN Secure the telephone's system settings with a system PIN. You must enter the system PIN when, for example, (de)registering a handset or resetting to the default settings. Change the telephone's 4-digit system PIN (default setting: 0000): Settings System System PIN...
-
Page 70: Appendix
Questions and answers Appendix Questions and answers Possible solutions are available online at www.gigaset.com/service Troubleshooting The display is blank. • The handset is not activated. Press and hold • The battery is empty. Charge the battery or replace it "No Base" flashes on the display. - Page 71 Questions and answers The caller's number is not displayed. • Calling Line Identification (CLI) is not enabled for the caller. The caller should ask the network provider to enable Calling Line Identification (CLI). • Calling Line Identification Presentation (CLIP) is not supported or enabled by the network provider. Ask the network provider to enable Caller Line Identification Presentation (CLIP).
-
Page 72: Customer Service & Assistance
Customer Service & Assistance Customer Service & Assistance Do you have any questions? As a Gigaset customer, you can find help quickly in this User Manual and in the service section of our Gigaset online portal www.gigaset.com/service. In our constantly updated online service you can find: •... - Page 73 Mexico - - - - - - - - - - - - - - - - - - (Preço de uma ligação local) - - - - - - -01800 999 4442738 (01800 999 GIGASET) Demais localidades: Netherlands - - - - - - - - - - - - - - - - - - - 0900-3333102...
-
Page 74: Manufacturer's Advice
Data protection We at Gigaset take the protection of our customers’ data very seriously. It is precisely for this reason that we are ensuring all our products feature "Privacy by Design" as standard. All information we collect is used to make our products as good as possible. - Page 75 Manufacturer's advice Environment Environmental management system Gigaset Communications GmbH is certified pursuant to the international standards ISO 14001 and ISO 9001. ISO 14001 (Environment): Certified since September 2007 by TÜV SÜD Management Service GmbH. ISO 9001 (Quality): Certified since 17/02/1994 by TÜV SÜD Management Service GmbH.
-
Page 76: Technical Data
3.7 V Capacity: 750 mAh Handset operating times/charging times The operating time of your Gigaset depends on the capacity of the battery, its age and the way it is used. (All times are maximum possible times.) Standby time (hours) 200/160 * Talktime (hours) Operating time with 1.5 hours of calls per day (hours) - Page 77 Technical data Range Up to 50 m indoors, up to 300 m outdoors Base station power supply 230 V ~/50 Hz Environmental conditions for operation +5 °C to +45 °C; 20% to 75% relative humidity Dialling mode DTMF (tone dialling) Pin connections on the telephone jack 1 unused 2 unused...
- Page 78 Technical data Power adapter for the base Manufacturer Salom Electric (Xiamen) Co. Ltd. Commercial registration number: 91350200612003878C 31 Building, Huli Industrial District, Xiamen, Fujian 361006, P.R. China Salcomp (Shenzen) Co. Ltd. Commercial registration number: 91440300618932635P Salcomp Road, Furond Industrial Area, Xinqiao, Shajing, Baoan District, Shenzen 518125 China Model identifier C707/C769...
-
Page 79: Display Icons
Display icons Display icons The following icons are displayed depending on the settings and the operating status of your telephone. Icons in the status bar Icon Meaning Icon Meaning Signal strength (No Radiation off ) Battery charge status: 1% -100% White: between 11% and 100% white, if Maximum Range on;... - Page 80 Display icons Display icons to indicate . . . Icon Meaning Icon Meaning External call Reminder for anniversary Internal call Alarm call Establishing a call (outgoing call) Countdown timer Connection established No connection established/ connection terminated Reminder for appointment Other display icons Icon Meaning Icon...
-
Page 81: Menu Overview
Menu overview Menu overview Not all functions described in the user guide are available in all countries or from all network providers. Open the main menu: when handset is in idle status press Select Services Call Divert p. 26 Call Waiting p. - Page 82 Menu overview p. 32 Directory Settings Date/Time p. 68 Audio Settings Handset Volume p. 63 Acoustic Profiles Earpiece Profiles p. 63 Handsfree Profiles p. 63 Advisory Tones p. 65 Ringtones (H/Set) Volume p. 64 Melodies p. 64 Time Control p. 43 Anon.
-
Page 83: Index
Index Index ......59 ........37 Access code (PABX) Calendar . - Page 84 ..... . .35, 53 ....... . 34 Gigaset QuickSync memory .
- Page 85 Index ......23 ....... 5 handset volume paging key .
- Page 86 Index ....32 saving in the directory Reception booster, see Repeater ....... 25 .
- Page 87 Index ......50 SMS notification Troubleshooting ....... . . 70 SMS service centre general .
- Page 88 Issued by Gigaset Communications GmbH Frankenstr. 2, D-46395 Bocholt © Gigaset Communications GmbH 2022 Subject to availability. All rights reserved. Rights of modification reserved. www.gigaset.com...
Need help?
Do you have a question about the PREMIUM 300 and is the answer not in the manual?
Questions and answers