Table of Contents
Advertisement
Available languages
Available languages
Advertisement
Chapters
Table of Contents

Subscribe to Our Youtube Channel
Related Manuals for Medel ACMNP-1


Summary of Contents for Medel ACMNP-1
-
Page 2: Table Of Contents
Indice 1. INTRODUZIONE 1.1. Caratteristiche MEDEL DISPLAY 1.2. Informazioni importanti sull’auto-misurazione 2. INFORMAZIONI IMPORTANTI SULLA PRESSIONE SANGUIGNA E LA SUA MISURAZIONE 2.1. Come varia la pressione sanguigna alta / bassa? 2.2. Quali valori sono normali? 2.3. Che cosa si può fare se si ottengono valori regolarmente alti / bassi? 4 3. -
Page 3: Introduzione
è stato progettato per gna, vengono alterate la forza e la frequenza cardiaca (Battito) e l’ampiezza essere di semplice utilizzo. Il modello MEDEL DISPLAY dispone di un display a cri- dei vasi sanguigni. Quest’ultima viene influenzata per mezzo di piccoli muscoli stalli liquidi di grandi dimensioni, grazie al quale è... -
Page 4: Che Cosa Si Può Fare Se Si Ottengono Valori Regolarmente Alti / Bassi
Se si è sottoposti ad un trattamento medico per tenere sotto controllo la propria risultato può essere una scarsa fornitura di sangue agli organi importanti pressione sanguigna, annotare il livello della pressione sanguigna effettuando (cuore, cervello, muscoli). Inoltre, a lungo andare il cuore può subire danni regolari auto-misurazioni in specifici periodi della giornata. -
Page 5: I Vari Componenti Del Misuratore Di Pressione
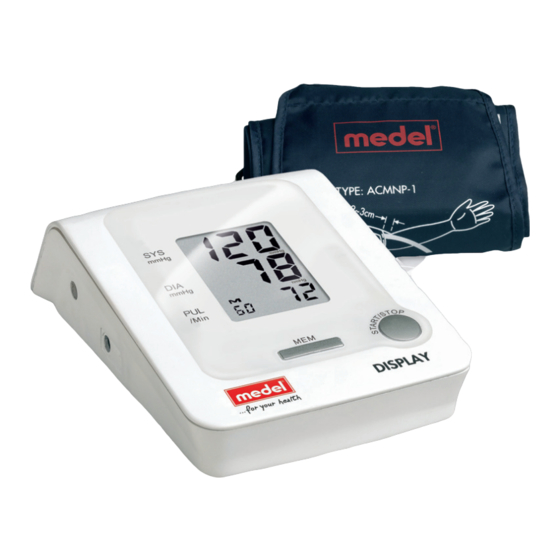
3. I VARI COMPONENTI DEL MISURATORE DI PRESSIONE Accessori Bracciale standard: Presa per l’aria Adatto per braccia Unità misuratore con circonferenza da 22 cm a 32 cm Display a crsitalli liquidi (parte applicata tipo BF) Pulsante Start/Stop Presa per l’aria Pulsante Memoria Tubo Anello bloccante... -
Page 6: Inserimento E Sostituzione Delle Batterie
4. INSERIMENTO E SOSTITUZIONE DELLE BATTERIE 5. COLLEGAMENTO DEL BRACCIALE 4.1. Inserire le batterie Assicurarsi che la presa per Rimuovere il coperchio del l’aria sia correttamente inserita vano batterie. nell’unità principale. Inserire quattro batterie cariche nel vano e assicurarsi che ogni batteria sia inserita secondo la corretta polarità. -
Page 7: Effettuare Una Misurazione
7. EFFETTUARE UNA MISURAZIONE Applicare il bracciale come descritto precedentemente. Premere il pulsante START/STOP. Vengono visualizzati sullo schermo tutti gli indicatori. Il bracciale inizia a gonfiarsi automaticamente. Far passare l’estremità del Avvolgere il bracciale sul brac- cio. Il tubo è collocato tra il manicotto attraverso il metallo mantenendo il tubo verso l’alto. -
Page 8: La Funzione Di Memoria
8. LA FUNZIONE DI MEMORIA Impostazione dell’unità di misura Cancellazione della memoria (kPa or mmHg) Quando si visualizzano le 8.1. Utilizzare la funzione di memoria Premere per 3-4 secondi il misurazioni , premere e tenere • Dopo ogni misurazione l’apparecchiatura archivia il valore della pressione pulsante MEM fino a che premuto il pulsante MEM poi sanguigna e della pulsazione. -
Page 9: Eventi Eccezionali
9. EVENTI ECCEZIONALI Altre possibili disfunzioni e loro eliminazione Se si verificano problemi quando si usa l’apparecchio, si devono controllare i punti seguenti ed eventualmente devono essere presi i relativi provvedimenti: Indicatori di errore Quando i valori misurati sono anormali verranno visualizzati sullo schermo i seguenti simboli. -
Page 10: Manutenzione E Riparazione
Il livello della pressione sanguigna è soggetto a fluttuazioni anche nelle persone in salute. È perciò importante tenere presente che misurazioni comparabili richiedo- In caso di guasto, rivolgersi a personale qualificato autorizzato da Medel. no sempre le stesse condizioni (Condizioni di tranquillità)! Non aprire in alcun caso l’apparecchio. -
Page 11: Cura E Manutenzione
11. CURA E MANUTENZIONE 12. NORMATIVE DI RIFERIMENTO Cura Normative: L’apparecchio soddisfa i requisiti degli standard europei per il controllo • Quando non si utilizza l’unità conservarla non invavsivo della pressione sanguigna nell’astuccio. -EN 1060-1 Sfigmomanometri non invavsivi - Requisiti generali •... -
Page 12: Specifiche Tecniche
13. SPECIFICHE TECNICHE 14. CERTIFICATO DI GARANZIA Classificazione: Apparecchio ad alimentazione interna,con parte Condizioni di garanzia applicata tipo BF L’apparecchio è garantito 2 anni dalla data di acquisto contro qualsiasi Monitor: Monitor digitale LCD difetto originario di materiali o di costruzione. Principio di misurazione: Metodo oscillometrico La garanzia consiste nella sostituzione e/o riparazione gratuita dei compo-... -
Page 13: Garanzia
✁ TAGLIANDO DA RESTITUIRE IN CASO DI RIPARAZIONE LA GARANZIA È VALIDA SOLO ALLEGANDO LO SCONTRINO FISCALE Apparecchio Tipo: Modello: N.Serie: Data d’acquisto: DATI DELL’ACQUIRENTE Cognome e Nome: Indirizzo: Telefono: Descrizione difetto: Firma per accettazione delle condizioni di garanzia Autorizzo l’uso delle informazioni sopra riportate ai sensi della legge 675/96 sulla Privacy... - Page 14 AUTOMATIC BLOOD PRESSURE MONITOR Instruction manual...
-
Page 15: Introduction
2.3. What can be done, if regular high/low values are obtained? Thanks to the large MEDEL DISPLAY LCD display, both operational status and cuff pressure are visible during measurement. 3. THE VARIOUS COMPONENTS OF THE BLOOD-PRESSURE MONITOR Before using, please read through this instruction manual carefully and then keep 4. -
Page 16: Important Information On The Subject Of Blood-Pressure And Its Measurement
2. IMPORTANT INFORMATION ON THE SUBJECT OF keep a record of the level of your blood pressure by carrying out regular self-mea- surements at specific times of the day. Show these values to your doctor. Never BLOOD-PRESSURE AND ITS MEASUREMENT use the results of your measurements to alter independently the drug doses prescribed by your doctor. - Page 17 3. THE VARIOUS COMPONENTS OF THE BLOOD-PRESSURE Furthermore, with long-term continuously increased blood-pressure values, the heart will become structurally damaged. MONITOR There are many different causes of the appearance of high blood pressure. We differentiate between the common primary (essential) hypertension, and Main Unit secondary hypertension.
-
Page 18: Battery Installation / Replacement
4. BATTERY INSTALLATION / REPLACEMENT Accessorial Standard Cuff: Air Plug Fit for 22cm~32mm range 4.1. How to Install Battery of upper arm perimeter (type BF applied part) Remove the battery cover from the battery compartment. Hose Metal Insert four AA powerful batteries into the compartment and ensure each battery is in the proper If your arm cuff is broken or not functional, Please use a new cuff. -
Page 19: Proper Use Of The Arm Cuff
5. PROPER USE OF THE ARM CUFF Make sure the air plug is inserted properly in the main The hose runs down the inside of Pass the end of the cuff through unit. the metal, and keep the hose your arm. The bottom of the cuff should be approximately 1~2 outward. -
Page 20: Take A Measurement
7. TAKE A MEASUREMENT 8. USE THE MEMORY FUNCTION Apply the cuff as described. 8.1. How to Use the Memory Function • The unit stores the blood pressure and pulse rate in the memory after com- Press the START/STOP button. pleting a measurement every time. -
Page 21: Exceptional Situations
Unit Setting (kPa or mmHg) Memory Values Cleaning out 9. EXCEPTIONAL SITUATIONS Long press the memory button When reading the measurement Error Indicators for 3~4 seconds until the units values, press and hold the “MEM” The following symbol will appear on the display when measuring abnormal. displayed when the unit button, then press START/STOP powered off. -
Page 22: Maintenance And Repairs
10. MAINTENANCE AND REPAIRS Measure the blood pressure again in complete peace and quiet. In case of failure, address to qualified personnel authorized by Medel. Never open the device. There are no user-serviceable parts within. The device requires no lubrication or maintenance. -
Page 23: Care And Maintenance, Recalibration
11. CARE AND MAINTENANCE 12. REFERENCE TO STANDARDS Care Device standard: Device corresponds to requirements of the European standard • Keep the unit in the storage case when not in for non-invasive blood-pressure monitor. use. -EN 1060-1 Non-invasive sphygmomanometers - Part 1: General requirements •... -
Page 24: Technical Specifications
13. TECHNICAL SPECIFICATIONS 14. WARRANTY CERTIFICATE Classification: Internally powered equipment,with type BF applied part Warranty conditions Display: LCD Digital Display The device is covered by a 2 years warranty from date of purchase for any Measuring Principle: Oscillometric Method defects in the design or in the materials used. Measurement Localization: Upper Arm The warranty consists in the replacement and/or repair free of charge of... - Page 25 ✁ COUPON TO BE RETURNED IN CASE OF REPAIRS THE WARRANTY IS VALID ONLY IF ACCOMPANIED BY THE TICKET/INVOICE Product type: Model: Serial No.: Date of purchase: BUYER DATA Name: Address: Phone number: Defect description: Signature for acceptance of the above mentioned warranty conditions I hereby authorise use of the above information in accordance with Privacy Law 675/96.
Need help?
Do you have a question about the ACMNP-1 and is the answer not in the manual?
Questions and answers
HOW TO SET DATE AND TIME
How do I clear the saved numbers on machine and reset date