Table of Contents
Advertisement
Quick Links
Advertisement
Table of Contents

Related Manuals for ALGE-Timing TIMY


Summary of Contents for ALGE-Timing TIMY
- Page 1 Version-E101012 General...
- Page 2 Important Information General Before using your ALGE-TIMING device read the complete manual carefully. It is part of the device and contains important information about installation, safety and its intended use. This manual cannot cover all conceivable applications. For further information or in case of problems that are mentioned not at all or not sufficiently detailed, please contact your ALGE-TIMING representative.
- Page 3 TIMY General Control elements USB-interface Charging socket ALGE multiport Connection for displayboard Connection for start emitter (C0) Connection for finish emitter (C1) Standard ALGE photocell socket Page 3...
-
Page 4: Table Of Contents
Power Supply......................9 Printer........................10 Change of Paper...................... 10 Synchronising ......................11 Synchronisation of Other Devices with a TIMY:............11 Connection of Auxiliary Devices................11 Channels........................11 Delay and Block Times .................... 11 Diagram of Delay and Block Time ................12 TIMY Update...................... -
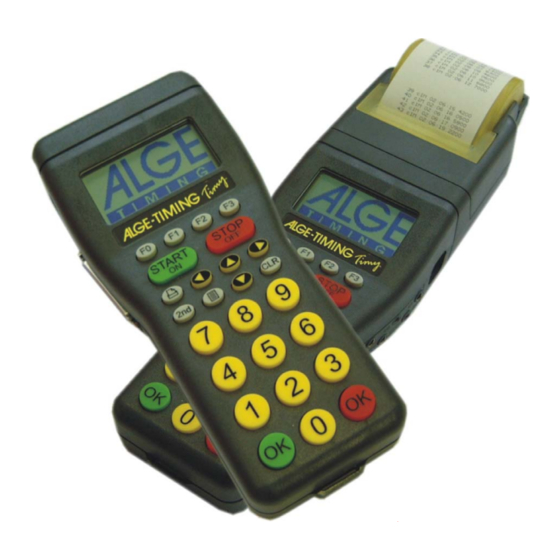
Page 5: Device Description
In spite of the handy dimensions, the TIMY provides a large and easy-to-use silicone keypad. It can be operated easily in any weather condition and even with gloves. The model TIMY PXE has an integrated printer that records the entire competition. -
Page 6: Timy Software
TIMY General TIMY Software Starting from TIMY version V0591 all programs are activated for free. We recommend to up- date older versions. Currently available programs: Stopwatch: Universal timing program which is suitable for several runs (run/total time). Backup: to measure time-of-day times (e. g. as backup-system or as time refer-... -
Page 7: Keypad
Keypad The TIMY has a weather-proof (and water-proof) silicone keypad. The keypad is ideal for outdoor usage. The keys are raised and have ideal pressure points. Although the TIMY is small in dimensions, they are easy to operate. Control keys: all-purpose keys; the function of each one is always visible in the display. -
Page 8: Start Up
• Display shows: • “Really switch-off? Press the red OK-button!“ • If you press the red OK-button within 10 seconds, the TIMY will switch off, otherwise it starts again at the last used pro- gramm. Method 2: • Press buttons „2nd“ and „STOP/OFF“... -
Page 9: Power Supply
• External battery e.g. 12V plumb rechargeable battery NLG4 and NLG8 must NOT be used as the off-load voltage is too high (TIMY might be de- stroyed!). With external supply of at least 11.5 VDC, the internal rechargeable batterys is charged. -
Page 10: Printer
The operating period depends on the TIMY Model, the batteries utilized and the ambient temperature. Printer TIMY P and PXE dispose of an integrated thermal printer. The best paper for the printer is our ALGE paper. It is recognizable by the ALGE logo print on the reverse side, available with your ALGE representative. -
Page 11: Synchronising
START button or via channel Synchronisation of Other Devices with a TIMY: The TIMY can send a synchronisation signal via channel 0 every full minute when using the programs BACKUP or PC-TIMER. •... -
Page 12: Diagram Of Delay And Block Time
– invalid time is saved but not printed end of impulse – delay time starts timing channel is triggered – valid time is saved – block time starts TIMY Update You update your TIMY for free – please visit our homepage www.alge-timing.com Page 12... -
Page 13: Update With Cable 205-02
„ALGE devices software (Flash Technology)“ • if not installed yet, download “Install Manager” • open Install Manager and connect TIMY with cable 205-02 to the PC • click on “firmware RS232” in the Install Manager • the firmware automatically searches for TIMY •... -
Page 14: Update With Usb Cable
TIMY General Update with USB Cable • if not yet done, the TIMY USB driver has to be installed • find the TIMY USB driver at Download/PC-Software/TIMY USB Update • start the Install Manager and click on TIMY USB •... -
Page 15: Gps Synchronisation
After receipt of a valid GPS signal, the TIMY varifies the checksum and measures the duration of the sync signal. If the sync signal is erroneous, the TIMY carries out a reset. Thus it is impossible to generate an invalid sync time. -
Page 16: Menu
TIMY General Menu The TIMY menu allows you to adjust individual settings. Push to access the main menu. With the cursor buttons you can navigate through the menu. enter or exit the menu navigate up or down next previous Confirm the entry On the following pages the different menu items are described. -
Page 17: General
CHANGE HEAT Depending on the active program, this item enables moving on to the next heat. 10.2.3 STN-AUTOMATIC The TIMY supports different types of automatic start number continuation for the competitors at the start and reaching the finish. 10.2.3.1 START Controls the start number continuation for competitors at the start. -
Page 18: Channels
TIMY General 10.2.5 LANGUAGE You can adjust the following languages as defaults for the TIMY • <GERMAN> • <ENGLISH> • <FRENCH> • <ITALIAN> • <SPANISH> • <SCHWEDISH> 10.2.6 STANDARD Reset the TIMY to the factory defaults. • <STANDARD-SETT> 10.2.7 HARDWARE This menu is only available for our service technicians. -
Page 19: Display
Activates the multichannel reception by the TED-RX. • <OFF> Factory default • <ON> ATTENTION! If this function is activated the serial interface of the TIMY is occupied by the TED. 10.3.4 CHANNEL-PATTERN This menu is currently not avialable. Certain channels can be activated or deactivated. 10.4 DISPLAY Setting for TIMY display and scoreboard. -
Page 20: Printer
Program Specific Settings Depending on active program these settings are different. 10.9 KEYBOARD-LOCK Activates the keyboard lock to disable accidental entries. All internal keys of the TIMY are disabled. To enable the keyboard press 1 2 3 4 5 6. Page 20... -
Page 21: Technical Data
-5 to 60°C TIMY XE and PXE: -20 to 60°C Dimensions: TIMY S and XE: 204 x 91 x 50 mm TIMY P and PXE: 307 x 91 x 65 mm Weight: TIMY S and XE: 450 g (without battery) -
Page 22: Pin Assignment
TIMY General 11.1 Pin assignment USB-Interface (1): The USB-interface is used as interface between TIMY and PC. Via this interface the TIMY can completely be controlled and all data can be called. Charger Connection (2): ALGE-Multiport (3): Pin assignment: 1 ....terminal numbering connection 2 .. - Page 23 TIMY General Banana plugs for displayboard (4) Banana plugs for start channel C0 (5) Banana plugs for stop channel C1 (6) Photocell plug (7) Pin assignment: 1 ..c0..start channel 2 ..c1..stop channel 3 ..GND... common ground 4 ..
-
Page 24: Interfaces
TIMY General Interfaces 12.1 RS232 Interface Output format: 1 start bit, 8 data bit, no parity bit, 1 stop bit Bit rate: 9 600 baud factory setting adjustable: 2400, 4800, 9600, 19200, 28800, 38400 Transmisson protocol: ASCII yNNNNxCCCxHH:MM:SS.zhtqxGGRRRR(CR) first sign is blank or info (see below) - Page 25 TIMY General TIMY General Page 25 Page 25...
- Page 26 TIMY General TIMY General Page 26 Page 26...
-
Page 27: Rs485 Interface
USB Interface Currently avalable applications for USB interface: • update the TIMY software with installation manager or TIMY USB program • query and change of settings (as RS232) • recording of times with program ComtoFile • evaluation with program Time.NET •... - Page 28 TIMY General Page 28...
Need help?
Do you have a question about the TIMY and is the answer not in the manual?
Questions and answers