
Subscribe to Our Youtube Channel
Related Manuals for heat-timer 928072 Series


Summary of Contents for heat-timer 928072 Series
- Page 1 INSTALLATION AND OPERATION MANUAL 2-WAY AND 3-WAY MOTORIZED VALVES FOR STEAM, VACUUM, AND HOT WATER 059700-00 Rev. B...
- Page 2 WARNING This Heat-Timer valve is strictly an operating valve; it should never be used as a primary limit or safety control. All equipment must have its own certified limit and safety controls required by local codes. The installer must verify proper operation and correct any safety problems prior to the installation of any Heat-Timer equipment.
-
Page 3: Table Of Contents
TABLE OF CONTENTS CONTROLS, INDICATORS, AND CONNECTIONS INSTALLATION INSTRUCTIONS SUPPLIED MATERIALS REQUIRED MATERIALS (NOT SUPPLIED) DETAILED OPERATION DESIGN CONSIDERATIONS OVERVIEW CALCULATING VALVE SIZING HOT WATER VALVE SIZING SINGLE-SEATED VALVES STEAM VALVE SIZING (< 10PSI) 2-WAY LOW-PRESSURE STEAM VALVE APPLICATION INSTALLING THE VALVE BODY 2-WAY VACUUM STEAM VALVE APPLICATION MOUNTING THE VALVE ACTUATOR 3-WAY CONVERTED HOT WATER... -
Page 4: Controls, Indicators, And Connections
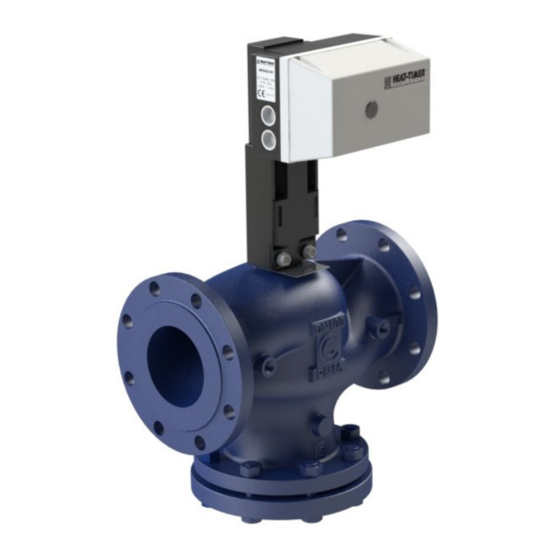
2-WAY AND 3-WAY MOTORIZED VALVES CONTROLS, INDICATORS, AND CONNECTIONS ITEM DESCRIPTION Valve Body Valve Actuator Wiring Entry Fittings Actuator Manual Adjustment Knob Wiring Connections • Terminal Y1—Drives Valve Stem Up • Terminal N—24Vac Common • Terminal Y2—Drives Valve Stem Down 059700–00 REV. B HEAT-TIMER CORP. - Page 5 Actuator Manual Adjustment Knob Wiring Connections • Terminal Y1—Drives Valve Stem Up • Terminal N—24Vac Common • Terminal Y2—Drives Valve Stem Down • Terminal W1—Valve OPEN Signal • Terminal W2—Common • Terminal W3—Valve CLOSE Signal HEAT-TIMER CORP. 059700–00 REV. B...
- Page 6 0–10V (Factory Default) • Terminal S1—Feedback Common • 2–10V • Terminal S2—0-10V/0-200μA • 1–5V Output Signal • 4–20mA • Terminal S3—10-0V/0-200μA • C–10V Drives Valve Stem Down Output Signal • A–10V Drives Valve Stem Up 059700–00 REV. B HEAT-TIMER CORP.
-
Page 7: Detailed Operation
HWR Platinum control resets the hot water temperature based on outside temperature. The operation of the actuator allows the hot supply and the cold supply to be interchangeable, allowing additional flexibility in the installation of the valve. HEAT-TIMER CORP. 059700–00 REV. B... -
Page 8: Double-Seated And Balanced Plug Valves
The valve and actuator do not require any formal maintenance to operate. The internal lubrication of the actuator is sufficient for the life of the actuator. Cleaning Any cleaning of the actuator external enclosure should be done with a light detergent with a low level of chemical aggressiveness. 059700–00 REV. B HEAT-TIMER CORP. -
Page 9: Specifications
0–10V (default), 8–11V, 6–9V, 4–7V, 2–10, 1–5V, 4–20mA Power Consumption 12VA Operating Temperature Ambient 5°F to 122°F (-15°C to 50°C) Locations NEMA Type 2 / IP54 Indoor Only User Interface Manual Override Handle Status Output Signal—Valve Position 0–10V or 0–200µA HEAT-TIMER CORP. 059700–00 REV. B... -
Page 10: Valve Specifications
14°F to 302°F (-10°C to 150°C) Stem/Plug Material Stainless/Brass Seat Closure Double or Balanced Port ANSI — Class IV Shutoff Packing Material Long-Life EPDM Rubber Packing Temperature Rating 302°F (150°C) Maximum Operating Pressure at 302°F 55 psi 059700–00 REV. B HEAT-TIMER CORP. -
Page 11: 2-Way Single-Seated Valves
Temperature Rating 14°F to 302°F (-10°C to 150°C) Stem/Plug Material Stainless/Brass Seat Closure Single-Seated ANSI — Class IV Shutoff Packing Material Long-Life EPDM Rubber Packing Temperature Rating 302°F (150°C) Maximum Operating Pressure at 302°F 55 psi HEAT-TIMER CORP. 059700–00 REV. B... -
Page 12: 3-Way Single-Seated Valves
14°F to 302°F (-10°C to 150°C) Stem/Plug Material Stainless/Brass Seat Closure Single-Seated ANSI — Class IV Shutoff Packing Material Long-Life EPDM Rubber Packing Temperature Rating 302°F (150°C) Maximum Operating Pressure 200 psi @ 200°F — 165 psi @ 302°F 059700–00 REV. B HEAT-TIMER CORP. -
Page 13: Installation Instructions
General tool kit (screwdrivers, wire strippers, power drill, pipe wrenches, etc.) • 1/2”, 14mm, and adjustable wrenches • 18 AWG cable (Heat-Timer p/n 703001-01 or equivalent #18/2 cable) for actuator wiring • Electrical conduit as required by local or state requirements HEAT-TIMER CORP. -
Page 14: Design Considerations
– Use isolation valves to isolate system components. – Use unions to allow for servicing and, if required, removal of the valve and other components. – Include drain valves to assist in servicing the valve. 059700–00 REV. B HEAT-TIMER CORP. -
Page 15: Calculating Valve Sizing
(21.7 - 19.7) x (21.7 - 19.7) Refer to “Valve Specifications” on page 7 and select the valve size where the C v matches or exceeds the 262. In this example, a 6” two-way single or double-seated valve. HEAT-TIMER CORP. 059700–00 REV. B... -
Page 16: Installing The Valve Body
SINGLE-SEAT VALVE - 2-WAY OR 3-WAY COVER AND BOLTS Install the valve body while observing the following precautions: • Reference the labeling and casting marks on the valve body to ensure proper direction of flow through the valve body. 059700–00 REV. B HEAT-TIMER CORP. - Page 17 • Port A—HOT supply • Port AB—MIXED outlet Flow Flow NOTE: If the 3-way valve is installed in the alternate configuration, reverse the actuator Open and Close connections (see “Wiring the Actuator” on page 19. HEAT-TIMER CORP. 059700–00 REV. B...
- Page 18 (see Figure 4). • DO NOT install motorized valves upside down. Doing so can stress the valve stem. FIGURE 4 ACCEPTABLE VALVE BODY AND ACTUATOR ORIENTATION 059700–00 REV. B HEAT-TIMER CORP.
-
Page 19: Mounting The Valve Actuator
Secure the U-bolt (8) in place with two locking nuts (7), ensuring the locking nuts are tightened evenly. NOTE: If the locking nuts are not tight the actuator could potentially make a grinding noise and potentially damage the actuator. HEAT-TIMER CORP. 059700–00 REV. B... -
Page 20: Wiring The Actuator
The mounting surface should be flat and strong enough to hold the weight of the transformer. • DO NOT mount the device in a location where it will be exposed to extreme heat, cold, humidity, or moisture. Secure the transformer(s) to the mounting surface using two screws (not supplied). 059700–00 REV. B HEAT-TIMER CORP. -
Page 21: Connecting The Actuator Wiring- Floating Actuator
Run the other transformer wire through one of the actuator wiring entry fittings (3) and connect it to actuator terminal N. Place the actuator faceplate on the actuator and secure it with four screws (1). Restore power to the circuit powering the actuator transformer. HEAT-TIMER CORP. 059700–00 REV. B... -
Page 22: Connecting The Actuator Wiring- Floating Actuator With Feedback
SRC Platinum A5 terminal to Actuator W2 terminal—Common SRC Platinum A6 terminal to Actuator W3 terminal—Valve CLOSED Place the actuator faceplate on the actuator and secure it with four screws (1). Restore power to the circuit powering the actuator transformer. 059700–00 REV. B HEAT-TIMER CORP. -
Page 23: Connecting The Actuator Wiring- Proportional Actuator
S3 equals 10V or 200 μA when the valve stem is up. Place the actuator faceplate on the actuator and secure it with four screws (1). Restore power to the circuit powering the actuator transformer. HEAT-TIMER CORP. 059700–00 REV. B... -
Page 24: Selection Of Input Signal- Proportional Actuator
Table 1 on page 16 then the jumper placed on A FIGURE 7 terminal must be move to the C terminals. The terminal between A and C is a common terminal and must be included in either setting. SW3 TERMINALS 059700–00 REV. B HEAT-TIMER CORP. -
Page 25: Actuator Wiring Diagrams
INSTALLATION INSTRUCTIONS ACTUATOR WIRE TERMINAL HEAT-TIMER CONTROL 120Vac 24Vac TRANSFORMER ACTUATOR FIGURE 8 ACTUATOR WIRING DIAGRAM—2-WAY VALVE OR 3-WAY VALVE STANDARD CONFIGURATION ACTUATOR WIRE TERMINAL 120Vac HEAT-TIMER CONTROL 24Vac TRANSFORMER ACTUATOR FIGURE 9 ACTUATOR WIRING DIAGRAM—3-WAY VALVE ALTERNATE CONFIGURATION HEAT-TIMER CORP. - Page 26 INSTALLATION INSTRUCTIONS FIGURE 10 ACTUATOR WIRING DIAGRAM— FLOATING ACTUATOR WITH FEEDBACK AND SRC PLATINUM FIGURE 11 ACTUATOR WIRING DIAGRAM—PROPORTIONAL ACTUATOR AND DIGI SPAN MCA 0–10V 059700–00 REV. B HEAT-TIMER CORP.
-
Page 27: Troubleshooting
Ensure the pump is installed after the valve close. input port. Valve actuator does not discharge port. Refer to the precautions listed have the force to close the valve against on page 16. pump flow. HEAT-TIMER CORP. 059700–00 REV. B... - Page 28 NOTES 059700–00 REV. B HEAT-TIMER CORP.
- Page 29 NOTES HEAT-TIMER CORP. 059700–00 REV. B...
- Page 30 NOTES 059700–00 REV. B HEAT-TIMER CORP.
- Page 31 WARRANTIES AND LIMITATIONS OF LIABILITY AND DAMAGE: Heat-Timer Corporation warrants that it will replace, or at its option, repair any Heat-Timer Corporation manufactured product or part thereof which is found to be defective in material workmanship within one year from the date of installation only if the warranty registration has been completed online within 30 days of the date of installation.
- Page 32 20 NEW DUTCH LANE, FAIRFIELD, NJ 07004 PHONE: 973-575-4004 FAX: 973-575-4052 HEAT-TIMER.COM...
Need help?
Do you have a question about the 928072 Series and is the answer not in the manual?
Questions and answers