Table of Contents
Advertisement
Quick Links
- 1 Single-Frequency Transom Installations
- 2 Shoot-Through Hull Installations
- 3 Dual-Frequency Transom Installations
- 4 Selecting a Transducer Location
- 5 How Low Should You Go?
- 6 Trolling Motor Bracket Installation
- 7 Transducer Orientation and Fish Arches
- 8 Testing Determines Best Location
- Download this manual
Pub. 988-0147-582
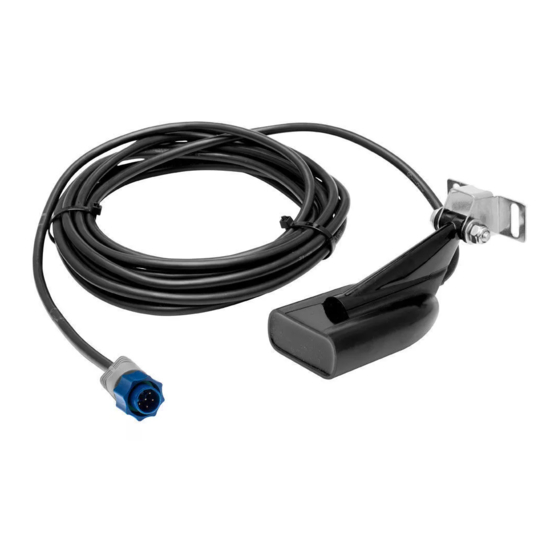
Installation Instructions for
Skimmer
Transducers
Single- or Dual-Frequency
This instruction booklet will help you install your Skimmer
transducer
on a transom, on a trolling motor or inside a hull. These instructions
cover both single- and dual-frequency Skimmer transducers.
Read these instructions carefully before attempting the installation.
Determine which of the mounting positions is right for your boat. Use
extreme care if mounting the transducer inside the hull, because once it
is epoxied into position, the transducer usually cannot be removed.
Remember, the transducer location and installation is the most
critical part of a sonar installation!
The smaller single-frequency Skimmers typically use a one-piece,
stainless steel mounting bracket. The larger dual-frequency Skimmers
typically use a two-piece, plastic mounting bracket. The trolling motor
mount uses a one-piece plastic bracket with an adjustable strap.
These are all "kick-up" mounting brackets. They help prevent damage if
the transducer strikes an object while the boat is moving. If the trans-
ducer does "kick-up," the bracket can easily be pushed back into place
without tools.
Depending on your sonar unit's connectors, your transducer cable may
also have the sonar unit's power cable attached to it. If that is the case,
be sure to install the transducer first, before connecting the power cable
to a power source. See the instructions in your sonar unit's manual for
connecting the power cable to a battery or other power supply. (Lost your
manual? Most current product manuals are available for free download
from the manufacturers' web sites. See the back page for web links.)
Recommended Tools and supplies
If you prefer the option of routing the cable through the transom, you will
need either a 1" drill bit or a 5/8" drill bit depending on the type of cable
connector (see figure at top of page 11). Each transom mount requires use
of a high quality, marine grade above- or below-waterline seal-
ant/adhesive compound. The following installation types also call for these
recommended tools and required supplies (supplies are not included):
Single-frequency transom installations
Tools include: two adjustable wrenches, drill, #29 (0.136") drill bit, flat-
head screwdriver. Supplies: none.
1
Advertisement
Table of Contents

Related Manuals for Lowrance Skimmer Transducer


Summary of Contents for Lowrance Skimmer Transducer
- Page 1 These are all "kick-up" mounting brackets. They help prevent damage if the transducer strikes an object while the boat is moving. If the trans- ducer does "kick-up," the bracket can easily be pushed back into place without tools.
- Page 2 1. The location must be in the water at all times, at all operating speeds. 2. The transducer must be placed in a location that has a smooth flow of water at all times. If the transducer is not placed in a smooth flow of...
- Page 3 Good and poor transducer locations. How low should you go? For most situations, you should install your Skimmer transducer so that its centerline is level with the bottom of the boat hull. This will usually give you the best combination of smooth water flow and protec- tion from bangs and bumps.
- Page 4 Third, a transducer CAN NOT shoot through wood and metal hulls. Those hulls require either a transom mount or a thru-hull installation. Fourth, if your Skimmer transducer has a built in temp sensor, it will only show the temperature of the bilge, not the water surface temp.
- Page 5 The best way to install these transducers is to loosely assemble all of the parts first, place the transducer's bracket against the transom and see if you can move the transducer so that it's parallel with the ground. The following instructions sometimes vary depending on the mounting bracket that came with your transducer.
- Page 6 Place the ratchets into the holes in the bracket with the letter "B" aligned with the dot stamped in the bracket. Reassemble the transducer and bracket and place them against the transom. Again, check to see if you can move the transducer so it's...
- Page 7 Looking at the transducer from the side, check to see if it will adjust so that its face is parallel to the ground. If it does, then the "A" positions are correct for your hull.
- Page 8 Don't tighten the lock nut at this time. Assemble transducer and bracket. B. Two-piece bracket: Once you determine the correct position for the ratchets, assemble the transducer as shown in the figure in step 2B. Don't tighten the lock nut at this time. 4. Drilling mounting holes.
- Page 9 For single frequency Skimmer, route cable over bolt and through bracket. Side view shown at left and seen from above at right. Both bracket types: Attach the transducer to the transom. Slide the transducer up or down until it's aligned properly with the bottom of...
- Page 10 Adjust the transducer so that it's parallel to the ground and tighten the nut until it touches the outer washer, then add 1/4 turn. Don't over tighten the lock nut! If you do, the transducer won't "kick-up" if it strikes an object in the water.
- Page 11 TROLLING MOTOR BRACKET INSTALLATION (single-frequency only) 1. Attach the TMB-S bracket to the transducer as shown in the follow- ing figure, using the hardware supplied with the transducer. (Note: The internal tooth washer is supplied with the TMB-S.) Bolt Attach motor mounting bracket to transducer.
- Page 12 TRANSDUCER ORIENTATION AND FISH ARCHES If you do not get good fish arches on your display, it could be because the transducer is not parallel with the ground when the boat is at rest in the water or at slow trolling speeds.
- Page 13 If the arch slopes up – but not back down – then the front of the trans- ducer is too high and needs to be lowered. If only the back half of the arch is printed, then the nose of the transducer is angled too far down and needs to be raised.
- Page 14 1. Anchor the boat in about 30 feet of water. Add a little water to the sump of the boat. Plug the transducer into the sonar unit, turn it on, then hold the transducer over the side of the boat in the water. Adjust the sensitivity and range controls until a second bottom echo is seen on the display.
- Page 15 2. Next, take the transducer out of the water and place it in the water in the sump of the boat, face down. (The transducer face is shown in the figure on the following page.) Notice how the signal strength de- creases.
- Page 16 4. Apply a weight, such as a brick, to hold the transducer in place while the epoxy cures. Be careful not to bump the transducer while the ep-...
- Page 17 oxy is wet. Leave the weight in place for a minimum of three hours. Allow the epoxy to cure for 24 hours before moving the boat. 5. After the epoxy has cured, route the cable to the sonar unit and it's ready to use.
- Page 18 Notes...
- Page 19 LEI EXTRAS FULL ONE-YEAR WARRANTY "We," "our," or "us" refers to LEI EXTRAS, INC., the manufacturer of this product. "You" or "your" refers to the first person who purchases this product as a consumer item for personal, family, or household use. We warrant this product against defects or malfunctions in materials and workmanship, and against failure to conform to this product's written specifications, all for one (1) year from the date of original purchase by you.
- Page 20 For Eagle: 8 a.m. to 5 p.m. Central Standard Time, M-F Lowrance Electronics and Eagle Electronics may find it necessary to change or end their shipping policies, regulations and special offers at any time. They reserve the right to do so without notice.
Need help?
Do you have a question about the Skimmer Transducer and is the answer not in the manual?
Questions and answers