Advertisement
Quick Links
Advertisement

Related Manuals for fantastic furniture Nova Mid Sleeper Desk Lowboy White


Summary of Contents for fantastic furniture Nova Mid Sleeper Desk Lowboy White
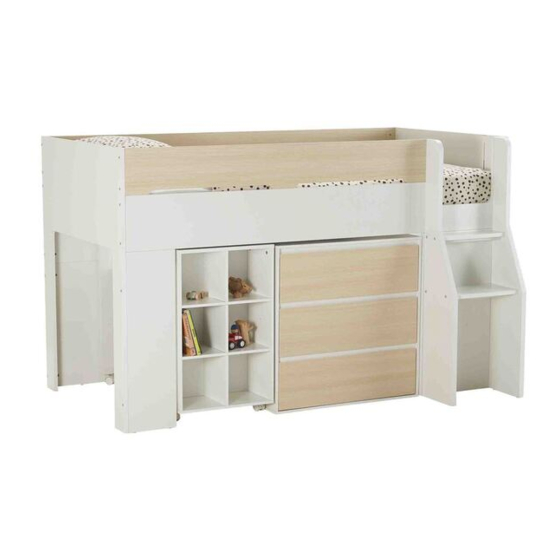
- Page 1 Version 1.1 Nova Mid Sleeper Desk Lowboy White fantasticfurniture.com.au...
- Page 2 ’re thrilled you’ve chosen Fantastic Furniture to help create a home you’ll love Love it? Share it! Fantastic buy! Share how it looks at home on Instagram for your chance to win a $250 Fantastic Furniture Gift Card! @fantasti cfurni ture fantasticfurniture.com.au Page 2...
-
Page 3: Assembly Checklist
Assembly checklist Read through the instructions Make sure you have all the required tools. Never use power tools unless instructed. carefully before you begin. Unless instructed, do not fully tighten Identify and lay out all of the components before you begin assembly. screw s until the item is fully assembled. -
Page 4: What You Need
What You Need to assemble the product Box 2: Rear Side Rail (P4) (P3) Rear Side Bottom Rail (P5) (P5) Bed Bottom Panel Rear Side Bottom Rail Box 3: 2 x Bed Bottom Panel (P3) Front Side Rail (P6) Other tools you need 2 x Bed Base Panel (P8) Phillips Head screwdriver;... - Page 5 What You Need to assemble the product Other tools you need Phillips Head screwdriver; Hammer Hardware list: 72 x Cam Nuts 72 x Cam Bolts 5 x Cover Stickers 1 x Wrench 54 x Small Dowels 23 x Large Dowels (H1) (H2) (H3)
- Page 6 Step 1: To Assemble The Desk You will need You will need 14 x Cam Bolts Phillips Head (H2) (H2) Screwdriver (H2) (H2) (H2) (H2) (H2) (H2) (H2) (H2) (H2) (H2) (H2) (H2) (H2) Attach 14 x Cam Bolts (H2) to the Shelf Front Panel (P37) and Shelf Rear (H2) Panel (P35) by tightening with a Phillips Head Screwdriver.
- Page 7 Step 3 This side has raw edge Slot in the Shelf Middle Panel (P36) into the grooves of the 2 x Shelf Panels (P38) as shown. Step 4 You will need 3 x Cam Nuts 2 x Small Dowels (H1) (H5) (H1) Phillips Head...
- Page 8 Step 5 You will need (H5) 7 x Cam Nuts 6 x Small Dowels (H1) (H5) (H1) (H5) (H1) (H5) (H1) (H1) (H5) Phillips Head Screwdriver (H1) Insert 3 x Cam Nuts (H1) and 2 x Small Dowels (H5) into the Shelf Back Panel (P39).
- Page 9 (H14) Step 7 (H14) (H2) You will need (H14) (H6a) (H14) (H6a) (H2) 2 x Cam Bolts 6 x Small Dowels (H2) (H5) (H7) 8 x Screws 1 x CL Runner (H7) (H7) Track (H6a) (H7) (H7) (H7) (H5) (H7) (H5) 3 x Screws Phillips Head...
- Page 10 Step 9 You will need (H5) (H11) (H5) 6 x Small Dowels 2 x Nuts (H5) (H11) (H5) (H5) (H11) (H5) (H5) Insert 6 x Small Dowels (H5) into Desk Back Panel (P33) and Support Panel (P34). Insert 2 x Nuts (H11) into Desk Back Panel (P33). Rotate the nuts so the opening faces the incoming screws.
- Page 11 Step 11 You will need 1 x Caster With 1 x Caster Brake (H23) (H22) (H22) 1 x Wrench (H4) (H23) (H23) (H4) Attach Castor (H22) and Castor with Brake (H23) onto Desk Side Panel (P32) by tightening with the Wrench (H4) as shown. Step 12 You will need (H2)
- Page 12 (H1) Step 13 (H1) (H1) You will need (H5) (H5) (H1) (H5) (H1) (H5) (H1) (H5) (H1) 8 x Small Dowels 14 x Cam Nuts (H5) (H1) (H1) (H5) (H1) (H1) Insert 14 x Cam Nuts (H1) into Panels (P32, P33, P34, P35, P36, P37, P39).
- Page 13 Step 15 You will need (H2) 5 x Cam Bolts Phillips Head (H2) Screwdriver (H2) (H2) (H2) Insert 5 x Cam Bolts (H2) into the Drawer Front Panel (P41), tightening with the Phillips Head Screwdriver. Step 16 You will need 5 x Cam Nuts Phillips Head (H1)
- Page 14 Step 17 Raw side facing bottom Slide in the Drawer Base Panel (P45) into the grooves of the Drawer Front Panel (P41) and Drawer Side Panels (P42 & P43). Step 18 (H12) You will need (H12) Phillips Head 6 x Screws Screwdriver (H12) (H12)
- Page 15 Step 19 You will need (H14) (H14) 1 x DR Runner (H6b) 1 x DL Runner (H14) (H6d) (H6b) (H14) 6 x Screws Phillips Head (H14) (H14) (H14) (H6d) (H14) (H6d) Attach 1 x Left Drawer Runner (H6b) to the Left Drawer Side Panel (P42), and 1 x Right Drawer Runner (H6d) to the Right Drawer Side Panel (P43), using 6 x Screws (H14), tightening with the Phillips Head Screwdriver.
- Page 16 (H1) Step 21:To Assemble The Lowboy You will need (H2) (H14) (H1) (H6a) (H2) (H2) (H14) 6 x Cam Bolts (H6a) 4 x Cam Nuts (H1) (H2) (H14) (H1) (H6a) (H2) 3 x CR Runner 3 x CL Runner (H14) Track (H6c) Track (H6a) (H1)
- Page 17 This side has raw edge This side has raw edge Step 23 You will need 8 x Small Dowels Phillips Head (H5) (H1) (H5) This side has raw edge Insert 8 x Small Dowels (H5) into Panels (P21, P22, & P23). Attach Panels (P21, P22, &...
- Page 18 This side has raw edge Step 25 You will need (H5) (H5) (H5) (H5) (H5) 4 x Screws 12 x Small Dowels (H5) (H7) (H5) (H5) (H7) Phillips Head Screwdriver (H5) (H5) (H7) (H5) (H7) This side has raw edge (H5) (H7) Slot in the Support Bar (P47) into the grooves of the Side Panels (P19 &...
- Page 19 Step 27 You will need (H2) (H2) 15 x Cam Bolts Phillips Head Screwdriver (H2) (H2) (H2) (H2) Insert 5 x Cam Bolts (H2) into the Drawer Front Panel (P25), tightening with the (H2) Phillips Head Screwdriver. Repeat for the remaining drawers. Step 28 You will need Phillips Head...
- Page 20 Step 29 Raw side facing bottom Slide in the Drawer Base Panel (P29) into the grooves of the Drawer Front Panel (P25) and Drawer Side Panels (P26 & P27). Repeat for remaining drawers. Step 30 (H12) You will need (H12) 18 x Screws Phillips Head (H12)
- Page 21 Step 31 You will need (H6b) (H14) 3 x DL Runner 3 x DR Runner (H6d) (H6b) 18 x Screws Phillips Head (H6d) (H14) (H14) (H14) (H6d) Attach 1 x Left Drawer Runner (H6b) to the Left Drawer Side Panel (P26), and 1 x Right Drawer Runner (H6d) to the Right Drawer Side Panel (P27), using 6 x Screws (H14), tightening with the Phillips Head Screwdriver.
- Page 22 Step 33: To Assemble The Bed You will need (H18) 6 x Cam Bolts 6 x Screws (H9) (H2) (H9) (H9) (H9) 1 x Allen Key 6 x Feet (H9) Glides (H18) (H21) (H9) (H9) (H2) Hammer (H18) (H2) (H2) (H18) (H2) (H2)
- Page 23 Step 35 You will need (H1) (H1) (H1) (H2) 6 x Large Dowels 6 x Cam Nuts (H6) (H6) (H1) (H6) Phillips Head (H6) Screwdriver (H1) (H1) (H6) (H6) (H6) Insert 6 x Large Dowels (H6) into Panels (P9 & P10). Insert 6 x Cam Nuts (H1) into 2 x Panels (P10).
- Page 24 Step 37 You will need 2 x Nuts 2 x Screws (H11) (H8) (H8) (H11) (H6) 2 x Large Dowels 1 x Allen Key (H6) (H21) Phillips Head Screwdriver (H6) Opening of nut (H8) face incoming screw (H11) Attach Panel (P11) to the Footboard (P2). Insert 2 x Large Dowels (H6) into Panel (P11).
- Page 25 Step 39 (H6) You will need 8 x Large Phillips Head Dowels (H6) Screwdriver (H6) Attach Panel (P4) to the Panel (P5). Insert 2 x Large Dowels (H6) into Panel (P4). Tighten the nut in Rear Side Rail (P4) with a Phillips Head Screwdriver as shown. Step 40 You will need (H8)
- Page 26 Step 41 You will need 6 x Screws 6 x Nuts (H8) (H11) (H11) (H8) (H8) 1 x Allen Key Phillips Head (H21) Screwdriver (H8) (H11) (H6) Opening of nut face incoming screw (H6) (H8) (H11) Attach Panels (P4 & P5) to the Footboard (P2). Insert 6 x Nuts (H11) into Panels (P4 &...
- Page 27 Step 43 (H10) (H16) You will need (H10) (H10) 18 x Screws 1 x Bracket (H10) (H16) (H10) (H10) (H10) (H10) 1 x Allen Key (H21) Attach 4 x Bed Support Bars (P7) to the to Panels (P4 & P6) with 16 x Screws (H10),tightening with Allen Key (H21).
- Page 28 Step 45 You will need 4 x Large Dowels 6 x Screws (H7) (H6) (H8) 5 x Screws 5 x Nuts (H8) (H11) (H7) (H11) (H7) (H7) (H7) (H7) (H7) (H7) 1 x Allen Key Phillips Head (H21) Screwdriver (H7) (H11) (H8) (H6)
-
Page 29: Job Complete
Step 47 You will need 3 x Washers (H20) (H20) Seek advice from a qualified trades person on how to attach this safety strap to your specific wall. Seek advice from a qualified trades person on how to attach this safety strap to your specific wall. - Page 30 Step 48 Page fantasticfurniture.com.au...
Need help?
Do you have a question about the Nova Mid Sleeper Desk Lowboy White and is the answer not in the manual?
Questions and answers
Where are the screws etc? I want to make the desk first so need to know where the bits are?? Which box as it’s not clearly marked
The screws and assembly parts for the Fantastic Furniture Nova Mid Sleeper Desk Lowboy White are included within the packaging boxes labeled with the part numbers and descriptions. For example, screws (H14) and other parts like Cam Nuts, Cam Bolts, Drawer Runners, and Tracks are listed in the instructions. Refer to the assembly manual to match the parts with their specific steps. If any components are missing, you can visit the Fantastic Furniture Help Centre for assistance.
This answer is automatically generated