Advertisement
Quick Links
Advertisement

Related Manuals for fantastic furniture NIVA


Summary of Contents for fantastic furniture NIVA
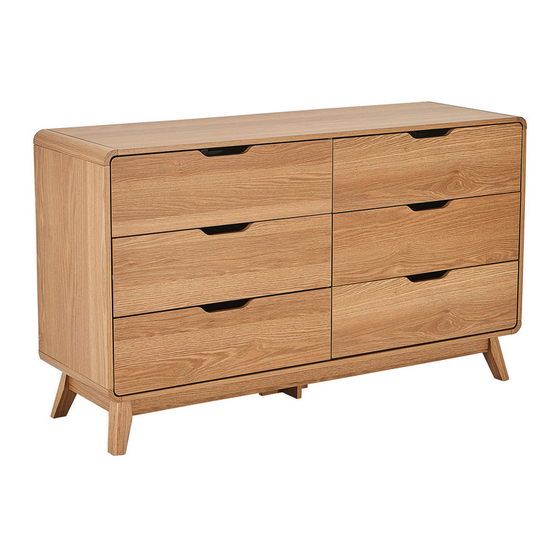
- Page 1 Version 1.0 NIVA Two People Dresser fantasticfurniture.com.au Required...
- Page 2 Secure it! Reduce the risk of furniture tip-over accidents WARNING: ENSURE THE WALL STRAP IS ATTACHED TO AVOID SERIOUS INJURY OR DEATH. To avoid any serious or fatal injury, a wall strap has been provided with this product to prevent toppling. We strongly recommend that this product is permanently fixed to the wall or other suitable surface.
- Page 3 We’re thrilled you’ve chosen Fantastic Furniture to help create a home you’ll love! Love it? Share it! Fantastic buy! Share how it looks at home on Instagram for for your chance to win a $250 Fantastic Furniture Gift Card! @fantasticfurniture fantasticfurniture.com.au Page 3...
-
Page 4: Assembly Checklist
Assembly Checklist Read through the instructions carefully Make sure you have all the required tools. before you begin. Never use power tools unless instructed. Unless instructed, do not fully tighten Identify and lay out all of the screws until the item is fully assembled. components before you begin assembly. -
Page 5: What You Need
What you need to assemble the product Othe tools you need Flat head screwdriver; Phillips head screwdriver; Hammer; Mallet Top Panel (P1) Right Side Panel (P3) Metal Rail (P8) Front Rail Front Rail (P9) (P9) Left Side Back Panel Panel Divider (P10) (P2) - Page 6 Hardware Pack 38 x Dowels 4 x Screws 36 x Small Cam 71 x Cam Bolts 37 x Big Cam (H3) (H5) Nuts (H4) (H1) Nuts (H2) 4 x Felt Feet 6 x Left Runners 34 x Nails 63 x Screws 6 x Left Runner (H7) (H10)
- Page 7 Step 1 You will need 13 x Cam bolts Phillips head (H1) screwdriver (P4) Using a Phillips head screwdriver, screw 13 x cam bolts (H1) into bottom panel (P4) as shown. Step 2 (P6) (P6) You will need 14 x Dowels Mallet (H3) (P7)
- Page 8 Step 3 You will need 8 x Cam bolts Phillips head (H1) screwdriver (P5) 4 x Felt feet (H7) Screw 2 x cam bolts (H1) into each leg (P5) using a Phillips head screwdriver. Attach 1 x felt feet (H7) onto each leg (P5) as shown. Step 4 You will need (P5)
- Page 9 Step 5 (P5) (P5) You will need 4 x Big cam Flat head (P7) nuts (H2) screwdriver (P7) (P5) (P5) Position 2 x long rail (P7) between the assembled unit as shown. Insert 4 x big cam nuts (H2) into long rails (P7), and turn clockwise to lock. Two People Step 6 You will need...
- Page 10 Step 7 You will need (P23) (P24) 2 x Dowels 1 x Screws (H3) (H17) (P23) (P23) Phillips head Mallet screwdriver (P24) (P24) Insert 2 x dowels (H3) into small middle leg (P24) and big middle leg (P23). Attach small middle leg (P24) to big middle leg (P23) with 1 x screw (H17), tighten with a Phillips head screwdriver.
- Page 11 Step 9 You will need 4 x Cam bolts Phillips head (H1) screwdriver (P4) 4 x Screws (H5) Screw 4 x cam bolts (H1) into bottom panel (P4) as shown, tighten with a Phillips head screwdriver. Screw 4 x screws (H5) into bottom panel (P4), tighten with a Phillips head screwdriver. Step 10 Laminated edge...
- Page 12 Step 11 You will need Laminated edge 1 x Cam bolt 9 x Screws (H1) (H8) 3 x Left runner 4 x Dowels tracks (H9) (H3) (P2) Phillips head Mallet screwdriver Insert 4 x dowels (H3) into left side panel (P2). Attach 3 x left runner tracks (H9) to left side panel (P2) with 9 x screws (H8) using a Phillips head screwdriver.
- Page 13 Step 13 You will need Laminated edge 6 x Dowels 9 x Screws (H3) (H8) 3 x Left runner 3 x Right runner tracks (H9) tracks (H11 9 x Screws Mallet (H21) Laminated edge H8 H21 Phillips head screwdriver Insert 6 x dowels (H3) into divider panel (P16). Attach 3 x left runner tracks (H9) to divider panel (P16) with 9 x screws (H21).
- Page 14 Step 15 Two People You will need Laminated edge Required 2 x Long 1 x Long cam (P9) dowels (H19) bolt (H20) Flat head 2 x Big cam screwdriver nuts (H2) (P9) (P16) (P25) Attach front rails (P9) to divider panel (P16) with 2 x long dowels (H19) and 1 x long cam bolt (H20) as shown, tighten with a Flat head screwdriver.
- Page 15 Step 17 Two People You will need 4 x Big cam 4 x Screws nuts (H2) (H17) Required Flat head Phillips head screwdriver screwdriver (P2) (P16) (P4) (P25) (P3) Attach panels (P2) (P3) (P16) and back rail (P25) to bottom panel (P4). Insert 4 x big cam nuts (H2) into side panels (P2) &...
- Page 16 Step 18 Two People You will need 8 x Big cam Flat head Required nuts (H2) screwdriver (P1) (P2) (P16) (P4) (P25) (P3) Position top panel (P1) onto panels (P2) (P3) (P16) and back rail (P25). Insert 8 x cam nuts (H2) into panels (P2) (P3) (P16) and back rail (P25), using a Flat head screwdriver turn clockwise to lock.
- Page 17 Step 19 Two People You will need 34 x Nails Hammer Required (H6) No nail, holes for wall strap. (P10) (P2) (P25) (P1) (P4) (P3) Using a hammer, attach back panel (P10) to panels (P1) (P2) (P3) (P4) and (P25) with 36 x nails (H6).
- Page 18 Step 20 You will need 6 x Left runner 6 x Right runner (H10) tracks (H12 (P11) 36 x Screws Phillips head (H8) screwdriver (P12) Attach each one left runner (H10) to left drawer sides (P11) with 3 x screws (H8), tighten with a Phillips head screwdriver.
- Page 19 Step 22 (P11) You will need (P15) (P12) Flat head 36 x Small cam nuts (H4) screwdriver (P17) (P18)/(P19) (P20)/(P21)/(P22) Attach drawer sides (P11) & (P12) and drawer rail (P15) to drawer front (P17). Insert 6 x small cam nuts (H4) into drawer sides (P11) & (P12) and drawer rail (P15), turn clockwise to lock.
- Page 20 Step 25 Insert drawers into cabinet carefully as shown. Slide drawer runners into position gently to avoid damaging runners. Note:Follow the correct order of these six drawers as shown. (P18) (P20) (P17) (P22) (P19) (P21) fantasticfurniture.com.au Page 20...
- Page 21 Step 26 We strongly advise that you use the wall strap You will need provided to prevent the unit toppling. 2 x Flat 2 x Wall straps washers (H15) (H14) 2 x Screws Phillips head (H13) screwdriver (P1) Use a Phillips head screwdriver, screw (H13) to fix wall strap (H14) on top panel (P1) as shown. fantasticfurniture.com.au Page 21...
- Page 22 Two People Step 27 You will need Seek advice from a qualified trades person on how to attach this wall strap to Required your specific wall. 2 x Flat Phillips head washers (H15) screwdriver Screw and wall plug are Wall not included.
-
Page 23: Job Complete
Step 28 Job complete! In the interest of our environment please dispose of all packaging thoughtfully. fantasticfurniture.com.au Page 23...
Need help?
Do you have a question about the NIVA and is the answer not in the manual?
Questions and answers