Table of Contents
Advertisement
Available languages
Available languages
Advertisement
Table of Contents

Related Manuals for GASLAND chef Pro GS606MS


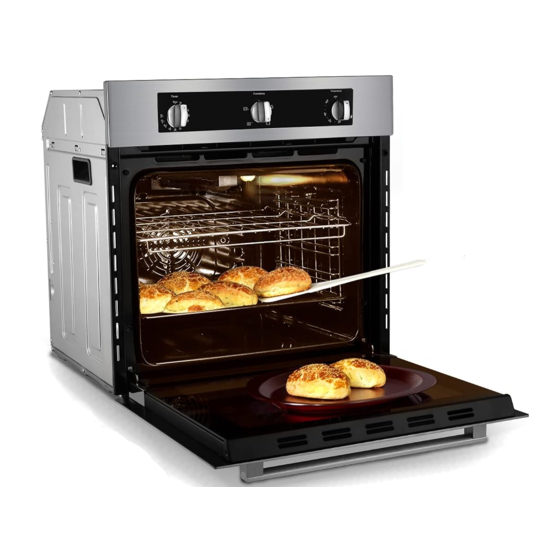
Summary of Contents for GASLAND chef Pro GS606MS
- Page 1 BUILT - IN GAS OVEN Installation Instructions Available Models Pro GS606MS/Pro GS606MB/Pro GS606DS/Pro GS606DB 1 (844) 538-7890 www.gaslandchef.com support@gaslandchef.com 8350 Patriot Blvd STE B, N. Charleston, SC 29418...
-
Page 2: Important - Please Read And Follow
Contrat principal 300264 CSA ANSI21.1-2018/CSA 1.1-2018 Appareil de cuisson au gaz domestique IMPORTANT - PLEASE READ AND FOLLOW • Before beginning, please read these instructions completely and carefully. • Do not remove permanently affixed labels, warnings, or plates from the product. This may void the warranty. - Page 3 • Installation and service must be performed by a qualified installer, service agency, or the gas supplier. WARNING NEVER use this appliance as a space heater to heat or warm the room. Doing so may result in carbon monoxide poisoning and overheating of the oven.
-
Page 4: Important Precautions And Recommendations
USER INSTRUCTIONS IMPORTANT PRECAUTIONS AND RECOMMENDATIONS After having unpacked the appliance, check to ensure that it is not damaged. In case of doubt, do not use it and consult your supplier or a professionally qualified technician. Packing elements (i.e. plastic bags, polystyrene foam, nails, packing straps, etc.) should not be left around within easy reach of children, as these may cause serious injuries. - Page 5 • Stand away from the oven when opening oven door. Hot air or steam which escapes can cause burns to hands, face, and/or eyes. • Never clean the oven with a high-pressure steam cleaning device, as it may provoke a short circuit. •...
-
Page 6: Control Panel
CONTROL PANEL Mechanical Timer Function Switch Thermostat Valve Switch Function Switch Digital Timer Thermostat Valve Switch CAUTION: Gas appliances produce heat and humidity in the environment in which they are installed. Ensure that the cooking area is well ventilated following national/local codes. - Page 7 Power on and clock interface displays, the corresponding clock flashing bar flashes, touch to set the clock Alarm clock function: Touch to make the corresponding flashing bar on the display window flash to the corresponding position . Touch to decrease or increase the time. After setting the time and flashing for 5 seconds, start timing, the flashing bar is on and the display interface shows the remaining time.
-
Page 8: How To Use The Gas Oven
HOW TO USE THE GAS OVEN ATTENTION: The oven becomes very hot during operation. ATTENTION: The oven door becomes very hot during operation. KEEP CHILDREN AWAY. WARNING: The door is hot, use the handle. VERY IMPORTANT The oven/broil shall be used always with the oven door closed. GENERAL FEATURES The gas oven is provided with two burners: a) Oven burner, mounted on the lower part of the oven (8500 BTU/hr) -
Page 9: Oven Thermostat
OVEN THERMOSTAT The numbers printed on the control panel (Fig.3) indicate the increasing oven temperature value (°F). To regulate the temperature, set the chosen number onto the knob indicator. The position BROIL serves only to turn on the broil burner. GAS OVEN SETTING Number printed on the control Corresponding temperature in °C... -
Page 10: Oven Cooking
NOTE: If the flame extinguishes, it can lights automatically. If it can’t lights, turn the oven control knob to position OFF, repeat the lighting procedure. VERY IMPORTANT NOTE: If it can’t be lighted after repeating for multiple times(3 times), it may be considered as a line fault. It is recommended to operate it after eliminate the line fault. -
Page 11: Function Switch
VERY IMPORTANT NOTE: If it can’t be lighted after repeating for multiple times(3 times), it may be considered as a line fault. It is recommended to operate it after eliminate the line fault. The oven cannot work without elec- tricity. Do always broil with oven door closed. - Page 12 A. Control Panel B. Oven Rack C. Dripping Pan or Baking Sheet D. Flame cover NOTE: Put the flame cover at the bottom, then baked. Fig.8 BROILING Very important: the broil burner must always be used with the oven door closed.
-
Page 13: Installation Instructions
INSTALLATION INSTRUCTIONS WARNING! THIS APPLIANCE HAS TO BE INSTALLED BY A QUALIFIED INSTALLER. Improper installation, adjustment, alteration, services, or maintenance can cause injury or property damage. Consult a qualified installer, service agent, or the gas supplier. IMPORTANT: The use of suitable protective clothing/gloves is recommend- ed when handling, installing of this appliance. -
Page 14: General Information
17 13 GENERAL INFORMATION 1. Installation must conform with local codes or, in the absence of local codes, with the National Fuel Gas Code, ANSI Z223.1-Latest Edition. WARNING!! This appliance shall not be used for space heating. This information is based on safety considerations. -
Page 15: Replacement Parts
For personal safety, this appliance must be properly grounded. Do not under any circumstances cut or remove the third (ground) prong from the power plug. REPLACEMENT PARTS Only authorized replacement parts may be used in performing service on the oven. Replacement parts are available from factory authorized parts distributors. Contact the nearest parts distributor in your area. - Page 16 17 15 IMPORTANT NOTE: THE BOTTOM OF CUTOUT SHALL BE AT LEAST 22” 5/8 (574.4 mm) FROM THE FLOOR. DO NOT INSTALL THE OVEN BENEATH THE WORK COUNTER. On the lower side, the oven must lay on a support standing the oven weight. Oven support surface MUST be solid.
- Page 17 Provide a hole for gas connection to 1/2” diameter pipe Provide hole fitting. for electrical connection in this area Area for electrical connection Fig.13 Gas line opening: Provide a suitable hole on the bottom of cutout. The centre of hole shall be 10″1/16 (255.8 mm) from the centre of cutout to the left side and 20″35/64 (522 mm) from the front corner of cutout to the back.
-
Page 18: Gas Connection
GAS CONNECTION Explosion Hazard WARNING Use a new CSA or UL approved gas supply line. Install a shut-off valve. Securely tighten all gas connections. Examples of a qualified person include licensed heating personnel, authorized gas company personnel, and authorized service personnel. Failure to do so can result in death, explosion, or fire. -
Page 19: Pressure Regulator
2. Pressure Regulator: a) All heavy duty, commercial type cooking equipment must have a pressure regulator on the incoming service line for safe and efficient operation, since service pressure may fluctuate with local demand. b) The oven is suitable for the use of natural gas. c) Manifold pressure should be checked with a manometer;... -
Page 20: Injectors Table
17 19 • In order to avoid property damage or serious personal injury , never use a Iighted match. If a leak is present, tighten joint or unscrew, apply more joint compound, tighten again and retest connection for leak. INJECTORS TABLE NOMINAL POWER Flow NATURAL GAS 4”... -
Page 21: Recommended Ground Method
If codes permit and a separate ground wire is used, it is recommended that a qualified electrician determine that the ground path is adequate. Check with a qualified electrician if you are not sure whether the oven is properly grounded. Do Not ground to a gas pipe. -
Page 22: Cleaning And Maintenance
17 21 CLEANING AND MAINTENANCE WARNING VERY IMPORTANT Before any operation of maintenance disconnect the appliance from the electrical mains supply. Do not use a steam cleaner because the moisture can get into the appliance thus make it unsafe. GENERAL RECOMANDATION •... -
Page 23: Replacing The Oven Light
Abrasive cleaning agents or scouring pads/cloths should not be used on the cavity surface. NOTE: Gasland chef will accept no responsibility for damage caused by chemical or abrasive cleaning. Let the oven cool down and pay special attention no to touch the hot heat- ing elements inside the oven cavity. -
Page 24: Removing The Oven Door
REMOVING THE OVEN DOOR To facilitate oven cleaning, it is possible to remove the door. Please follow the instructions carefully: – Open the door completely (Fig.16). – Lift up and turn the small levers situated on the two hinges,grip the door on the two external sides, shut it slowly but not completely (Fig.17). -
Page 25: For Your Safety
• Do not attempt to repair the internal workings of your oven. • Do remove the protective film before the first use. • Fire risk! Do not store flammable material in the oven. FOR YOUR SAFETY Under no circumstances should any external covers be removed for servicing or maintenance except by suitably qualified personnel. - Page 26 17 25 Problem Description Possible Reason Suggestion Put the grilling rack in the Grilling rack is not placed Baking effect is not ideal appropriate layer of the properly cavity and preheat the oven Oven lamp is not lighted Oven lamp broken Replace the oven lamp Control board damaged Replace the control board...
-
Page 27: Very Important Note
Gasland chef cannot be held responsible for possible inaccuracies due to printing or transcription errors in the present booklet. Gasland chef reserves the right to make all modifications to its products deemed necessary for manufacture or commercial reasons at any moment and without prior notice, without jeopardising the essential functional and safety characteris- tics of the appliances. - Page 28 1 (844)538-7890 www.gaslandchef.com...
-
Page 29: Instructions D'installation
FOUR À GAZ Instructions D'installation Modèles Disponibles Pro GS606MS/Pro GS606MB/Pro GS606DS/Pro GS606DB 1 (844) 538-7890 www.gaslandchef.com support@gaslandchef.com 8350 Patriot Blvd STE B, N. Charleston, SC 29418... - Page 30 Contrat principal 300264 CSA ANSI21.1-2018/CSA 1.1-2018 Appareil de cuisson au gaz domestique Important-Veuillez lire et suivre • Avant de commencer, lisez attentivement ces instructions. • Ne supprimez pas les étiquettes, les avertissements ou les assiettes collés en permanence du produit. Ceci est. •...
- Page 31 • L'installation et le service doivent être effectués par un personnel d'instal lation qualifié, Services, ou fournisseurs de gaz naturel. Attention! N'UTILISER pas cet appareil comme appareil de chauffage pour chauffer ou chauffer chambre Cela peut entraîner un empoisonnement au monoxyde de carbone et le four est en surchauffe.
-
Page 32: Instructions D'utilisation
Instructions d'utilisation Précautions importantes et Après avoir allumé l'appareil, vérifiez pour vous assurer qu'il est pas de dommag- Si vous avez des questions, s'il vous plaît ne pas utiliser et consulter votre fournisseur ou technicien professionnel qualifié. Éléments d'emballage (c'est-à-dire. Sacs en plastique, mousse de polystyrène, clous, bande d'emballage et ainsi de suite. - Page 33 • Très important! L'utilisation de vêtements de protection/gants appropriés est recommandé d'utiliser lors de la manipulation, de l'installation ou du nettoyage appareils. • Danger de brûlure! Le four et les accessoires de cuisson peuvent être devenu chaud pendant la chirurgie. Assurez-vous que l'enfant est resté à l'écart d'eux et avertissez-les en conséquence.
-
Page 34: Panneau De Configuration
Précautions importantes et Conseils pour l'utilisation Appareils électriques L'utilisation de tout appareil signifie qu'il doit être suivi une série de règles de base. En particulier: • Ne touchez pas l'appareil avec vos mains ou vos pieds humides; • N'utilisez pas l'appareil pieds nus; •... - Page 35 Bouton d 2 'alarme Minuterie mécanique Compteur de minutes (Fig.1) Circuit de commande de minuterie mécanique, lorsque le temps augmente, le chauffage supérieur le tuyau cesse de fonctionner, le temps de chronométrage maximum est de 120 minutes . Fig. 1 Attention importante: Ceci est juste une minuterie mécanique.
-
Page 36: Caractéristiques Générales
Note: Terminer les besoins fonctionnels pour travailler avec l'horloge, la fonction de fin doit être supérieure à l'heure de l'horloge. Si l'utilisateur en a besoin L'heure est de 30 minutes et l'heure d'horloge actuelle est de 12h00, l'heure de fin doit être réglée sur 12h30. Paramètres d'heure de synchronisation par défaut: Appuyez et maintenez Rendre 3 seconds dans l'état de synchronisation par défaut de 2 heures. - Page 37 Utilisez le four premiere fois Il est recommandé de suivre ces instructions: – Comme décrit dans ce chapitre, l'intérieur du four est agencé en plaçant un support de fil “Nettoyage et entretien”. – Insérer des étagères et des plateaux. – Ouvrez le four à la température maximale (position MAX ) Pour éliminer la possibilité...
- Page 38 Allumage du brûleur du four Le thermostat permet le contrôle automatique de la température. La livraison de gaz au brûleur du four est contrôlée par un robinet thermostatique bidirectionnel (four) et brûleur rôti) avec un dispositif de rupture de flamme. Le fonctionnement du brûleur du four d'allumage est le suivant 1) Ouvrez la porte du four à...
-
Page 39: Allumage Du Four
Allumage du four Le four produit de la lumière infrarouge pour la cuisson. Le fonctionnement du four d'allumage est le suivant: 1) Ouvrez la porte du four à un niveau complet. Attention: danger d'explosion! Pendant ce temps, la porte du four doit être ouverte Action. 2) Tournez le bouton position ,Fig.4. - Page 40 Utilisez rortysley Appuyez sur la figure ci-dessus pour installer les composants de l'arbre, démar- rez rotasserie fonction (Fig.6 and Fig.7). Fig.5 Fig.6 Fig.7 A. Équipe de contrôle B. Orvin Lack C. Plaque d'égouttement ou plaque de cuisson D. Capot de flamme NOTE: Mettez le couvercle de la flamme à...
- Page 41 Installation Instructions ATTENTION! Cet appareil doit être installé par un programme d'installation qualifié. Une installation, un ajustement, un changement, un service ou une mainte- nance inadéquats peuvent causer des blessures ou des dommages matéri- els. Consultation a installateurs qualifiés, agents de service ou fournisseurs de gaz.
-
Page 42: Information Générale
17 13 INFORMATION GÉNÉRALE 1. L'installation doit être conforme aux spécifications locales ou Il n'y a pas de lois et de règlements locaux, pas de lois et de règlements nation aux sur ANSI Z223.1-Latest Edition. ATTENTION!! Cet appareil ne doit pas être utilisé pour le chauffage de l'espace. Ceci est l'information est basée sur des considérations de sécurité. - Page 43 Ne coupez pas ou ne supprimez en aucun cas le troisième (sol) retiré de la prise d'alimentation. Remplacer les pièces Seules les pièces de rechange autorisées peuvent être utilisées pour l'exécution service sur le four. Les pièces de rechange sont disponibles distributeur de pièces sous licence d'usine.
- Page 44 17 15 Note importante: le fond de l'incision doit être Au moins 22 pouces du sol 5/8 (574,4 mm). N'installez pas le four sous le travail compteur. Sur le côté inférieur, le four doit s'allonger sur le support le poids du four. La surface de support du four doit être solide.
- Page 45 Fournir un trou Connexion de gaz pour 1/2” tube de diamètre Fournir des trous en forme. pour l'électricité connecté à cette zone La zone est électrique connexion Fig.13 Ligne de gaz ouverte: Fournir un trou approprié en bas chet. Le centre du trou devrait être du centre 10"1/16 (255,8 mm incision gauche 20"35/64 (522 de l'angle avant de l'incision à...
- Page 46 Gas connection Danger d'explosion WARNING Utilisez la nouvelle approbation CSA ou UL ligne d'ali- mentation en gaz. Installez la vanne d'arrêt. Serrer tous les gaz en toute sécurité Connexion. Exemple qualifié les personnes comprennent lesper- sonnes autorisées personnel de chauffage, autorisation personnel de la compagnie de gaz naturel, ainsi que personnel de service autorisé.
- Page 47 2. Régulateur de surf Apyez: a) Tous les équipements de cuisson lourds et commerciaux doivent avoir un régulateur de surf appuyez opérer de manière sûre et efficace sur les lignes de service entrantes car le service apperyezSurre peut fluctuer avec les besoins locaux.
-
Page 48: Test De Fuite
17 19 5. Test de fuite: IMPORTANT: L'essai de fuite électrique doit être effectué de la manière suivante: • Une fois la connexion de gaz finale terminée, ouvrez la vanne de gaz manuelle, tous les tests tuyau d'alimentation en gaz et raccords pour fuite de gaz avec de l'eau savonneuse solution. -
Page 49: Attention Très Important
ATTENTION Très IMPORTANT Avant toute opération et maintenance déconnecter l'équipement de l'équi- pement alimentation électrique. Si le code le permet et utilise un sol séparé, il est recommandé a l'électric- ien qualifié détermine que le trajet au sol est suffisant. Si vous n'êtes pas sûr que le four est normal, vérifiez avec un électricien qualifié... -
Page 50: Nettoyage Et Entretien
17 21 Nettoyage et entretien WARNING Très IMPORTANT Avant toute op ération de maintenance, déconnectez l'appareil du alimen- tation électrique. N'utilisez pas de nettoyant à vapeur parce que l'eau peut entrer par conséquent, l'appareil le rend dangereux. Répétez généralement • Important: Tout ce qui est fait avant l'opération et la maintenance est déconnectée appareils électriques de l'alimentation électrique. -
Page 51: Porte Du Four
Les agents de nettoyage abrasifs ou les tampons de récurage/chiffons ne doivent pas être utilisés sur les cavités surface. NOTE: Gasland chef ne sera pas responsable des dommages provoqué par un nettoyage chimique ou abrasif. Laissez le four refroidir, en accordant une attention particulière à ne pas toucher le chauffage par la chaleur éléments de la cavité... - Page 52 Retirez la porte du four Pour faciliter le nettoyage du four, il est possible d'enlever la porte. S'il vous plaît suivez attentivement les instructions: – Ouvrez complètement la porte(Fig.16). – Soulevez et tournez le petit levier sur les deux charnières et saisissez les portes sur les deux charnières extérieur, fermez-le lentement, mais pas complètement fermé...
-
Page 53: Pour Votre Sécurité
• Ne mettez pas les pièces d'émail chaud dans l'eau. Laissez-les se calmer d'abord. • Ne laissez pas le vinaigre, le café, le lait, l'eau salée, le citron ou le jus de tomate à l'intérieur Contact avec les pièces d'émail (c'est-à-dire. Dans le four). •... - Page 54 17 25 Description du problème Raisons possibles Suggestions Mettez le grill dedans L'effet de cuisson n'est Grill non placé D'accord couche appropriée pas idéal cavité et préchauffer le four Les lumières du four ne La lumière du four est Remplacer les lumières du s'allumen cassée four...
-
Page 55: Service Après-Vente
Gasland chef ne peuvent pas être tenus responsables d'éventuelles inexactitudes en raison d'erreurs d'impression ou de transcription ce livret. Gasland chef se réserve le droit d'apporter toutes les modifications à son produit, qu'il considère nécessaires à la fabrication ou pour des raisons commerciales à... - Page 56 1 (844)538-7890 www.gaslandchef.com...
Need help?
Do you have a question about the Pro GS606MS and is the answer not in the manual?
Questions and answers