Advertisement
Getting Started Documentation SIMRC 1050 Carrier
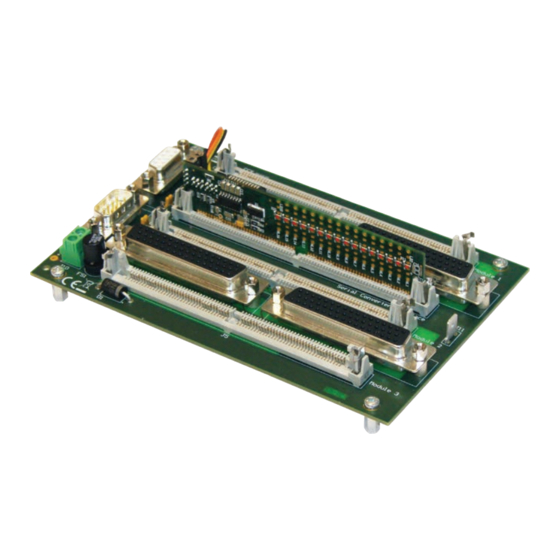
Hardware Installation
1. Install the SIMRC module 1080 first, refer SIMRC_1050D.pdf, page 3.
Before you insert the module, remove jumpers 5 / 6 / 7.
Set all its address switches to OFF.
Set jumpers to RS232.
2. Install the SIMRC modules 1 or 2 or 3 in any 1050 module connector 1 to 3
Before you insert the module, remove jumpers 5 / 6 / 7.
Set each module address to a unique address.
Set jumpers to I2C.
3. Connect a RS232 cable between PC COM port and the 1050 carrier with the
following wiring (refer diagram on page 4 of the SIMRC_1050D.pdf):
4. Connect 5 VDC power supply to the 1050 carrier, connector J6, refer diagram on
page 4 o f the SIMRC_1050D.pdf
5. Verify your settings with the SIMRC Soft Front Panel software.
Getting Started SIMRC 1050 Carrier, March 2008, MvB
PC COM
1050 J5
TX
(3) ------- (3)
RX
(2) ------- (2)
GND (5) ------- (5)
page 1 of 2
Advertisement
Table of Contents

Related Manuals for Pickering SIMRC 1050


Summary of Contents for Pickering SIMRC 1050
- Page 1 4. Connect 5 VDC power supply to the 1050 carrier, connector J6, refer diagram on page 4 o f the SIMRC_1050D.pdf 5. Verify your settings with the SIMRC Soft Front Panel software. Getting Started SIMRC 1050 Carrier, March 2008, MvB page 1 of 2...
- Page 2 Refer Manual Section 4 – PROGRAMMING, RS-232 Operation, page 4.5. A programming example is listed on page 4.10. Verification of your SIMRC configuration Use the SFP or any Windows Terminal Emulation (such as HyperTerminal) to communicate with the SIMRCs. Getting Started SIMRC 1050 Carrier, March 2008, MvB page 2 of 2...
Need help?
Do you have a question about the SIMRC 1050 and is the answer not in the manual?
Questions and answers