Table of Contents
Advertisement
Quick Links
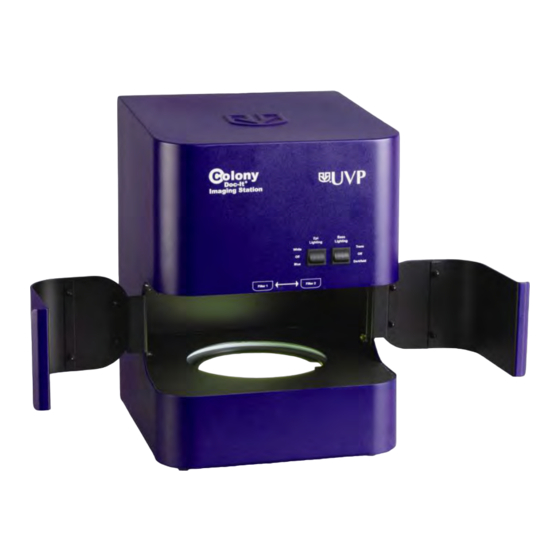
ColonyDoc-It™ Imaging Station
Instruction Manual
UVP, LLC
Ultra-Violet Products Ltd.
2066 W 11th Street, Upland, CA 91786
Unit 1, Trinity Hall Farm Estate
Tel: (800) 452-6788 / (909) 946-3197
Nuffield Road, Cambridge CB4 1TG UK
Fax: (909) 946-3597
Tel: +44(0)1223-420022 / Fax: +44(0)1223-420561
Email: info@uvp.com
Email: uvp@uvp.co.uk
Web site: uvp.com
81-0294-01 Rev. E
Advertisement
Table of Contents

Related Manuals for UVP ColonyDoc-It


Summary of Contents for UVP ColonyDoc-It
- Page 1 ColonyDoc-It™ Imaging Station Instruction Manual UVP, LLC Ultra-Violet Products Ltd. 2066 W 11th Street, Upland, CA 91786 Unit 1, Trinity Hall Farm Estate Tel: (800) 452-6788 / (909) 946-3197 Nuffield Road, Cambridge CB4 1TG UK Fax: (909) 946-3597 Tel: +44(0)1223-420022 / Fax: +44(0)1223-420561 Email: info@uvp.com...
- Page 2 ColonyDoc-It Imaging Station...
- Page 3 END USER LICENSE AGREEMENT PLEASE READ THE FOLLOWING AGREEMENT CAREFULLY This Agreement is between UVP, LLC of 2066 West 11th Street, Upland, California 91786 (hereinafter “Licensor”) and the end user of UVP software (hereinafter “Licensee”). Licensor has developed and offers to Licensee on a non-exclusive basis pursuant to the terms and conditions set forth hereinafter, the following software, including related copyrighted instructional materials, (collectively referred to hereafter as “The Software”):...
- Page 4 ColonyDoc-It Imaging Station create warranties, and/or conditions, or in any way increase the scope of this limited warranty. Licensee assumes the entire cost of all necessary servicing, repair or correction after the ninety (90) days. Some jurisdictions do not allow the exclusion of implied warranties, so the above exclusion may not apply to you.
-
Page 5: Table Of Contents
Table of Contents Introduction ....................................7 Components ..................................... 7 System Requirements................................8 System Specifications ................................8 Installing the ColonyDoc-It ................................ 9 Installing the Hardware ............................... 9 Installing the Software .............................. 11 Registering the Software ............................11 Counting Colonies .................................. 13 Quick Capture ................................ - Page 6 ColonyDoc-It Imaging Station Usage ..................................44 Servicing the ColonyDoc-It ..............................45 Cleaning and Care ..............................45 Replacing Switches ..............................46 Replacing Fuses ............................... 46 Ordering Replacement Parts and Accessories ......................46 Troubleshooting ................................ 46 Return Service Procedure ............................47 Technical Support ..............................48...
-
Page 7: Introduction
ColonyDoc-It Imaging Station Introduction This manual covers the installation and user instructions for the ColonyDoc-It Imaging Station. The innovative, compact design enables users to process automated, fast and accurate colony counting. The high resolution digital color camera allows users to capture white light and fluorescent marked colonies and a wide array of samples. -
Page 8: System Requirements
ColonyDoc-It Imaging Station System Requirements Operating System: Windows XP Professional with Service Pack-2 (32 bit only), Vista (32 bit only), Windows 7 (32 bit only) Internet Explorer 6.0 or higher (To determine the version of Internet Explorer, open Internet Explorer and click on Help >... -
Page 9: Installing The Colonydoc-It
Turn on the ColonyDoc-It by switching the I/0 switch to I located at the back of the station. Plug one end of the USB cord to the back of the ColonyDoc-It and the other end into a USB port in the computer. Removing the Doors... - Page 10 ColonyDoc-It Imaging Station Installing the Filter Note: Filters come as an optional accessory so this step is only necessary if an optical filter will be used with the system. The filter trays are located in the filter box attached to the ceiling of the unit. To access the trays:...
-
Page 11: Installing The Software
To immediately activate the software through the internet, choose On the fly activation. If the computer is not connected to the internet, please follow the instructions for Offline activation or call UVP to register the software. Click Next to continue. - Page 12 ColonyDoc-It Imaging Station Complete all required information on the form. Fill out the Serial Number located on the CD. The number should be four sets of six numbers. Click onto Get Activation No. and then click onto Activate when the Activation Number appears in the box.
-
Page 13: Counting Colonies
ColonyDoc-It Imaging Station Counting Colonies Quick Capture Place the Petri dish to be counted on the transillumination surface. Select the appropriate lighting option for the sample. If unsure, turn the selector switch (located on the front of the colony counter) to Base Lighting > Trans and remove the black plate (if present). The Trans lighting option will apply to most applications. - Page 14 Template counting allows users to create counting templates for frequently counted Petri dish plates. The manual count process must be performed before template settings can be established. TIP: The ColonyDoc-It doors can be easily removed if fluorescent colonies will not be counted. Go to the Removing ColonyDoc-It Doors section in this manual for instructions.
-
Page 15: Automatic Counting
ColonyDoc-It Imaging Station Lighting Tips: There are four options for lighting the Petri dish. Epi Lighting options include White light and Blue light and these sources light the Petri dish from the top. Base Lighting options include Trans and Darkfield and these sources light the Petri dish from the bottom Blue light is used to excite GFP stained colonies. -
Page 16: Manual Counting
ColonyDoc-It Imaging Station The automated count will be displayed on the left hand side of the screen. Colonies can be filled in with red (as depicted here) or outlined. Colonies can also be numbered or annotated using multiple colors. Go to the... - Page 17 ColonyDoc-It Imaging Station Step 1: Select Classes The window that appears after choosing Manual Count is the Manual Count Colony Wizard. It contains two tabs. The first tab is Step 1 of 2: Select Classes, the second tab is Step 2 of 2: Finish.
- Page 18 ColonyDoc-It Imaging Station Sometimes applying Background Correction to an image improves the count. To apply background correction click onto the Background Correction button. The image to the left depicts the resulting flattened image. The Select Classes tab allows users to select the number of classes and colonies in the Petri dish sample.
- Page 19 ColonyDoc-It Imaging Station Once the first colony is selected, the new image in the Step 1 of 2: Select classes window will show a black background along with all of the colonies that contain the same color as the point identified in the Analysis Details window.
-
Page 20: Creating Templates
ColonyDoc-It Imaging Station Creating Templates Templates allow the user to set colony counting parameters so that plates with similar properties are counted quickly and consistently. To set a template for any Petri dish, choose Start Colony Count (or Restart Colony Count if the Petri dish has been counted before) in the Colony Count module, then select the Manual Count function. -
Page 21: User Defined Template Counting
ColonyDoc-It Imaging Station If the shape and size sliders are changed to capture additional colonies, click Create template in the Templates section of the window to save the new settings. Select Finish to complete the count and save the template. -
Page 22: Fluorescent Colony Counting
Fluorescent Colony Counting Ensure that the doors are attached to the ColonyDoc-It or turn off the surrounding lights. Turn the Epi Lighting switch on the ColonyDoc-It to Blue. Insert the Green Fluorescent Protein (GFP) emission filter into either tray (refer to the... - Page 23 ColonyDoc-It Imaging Station Finally, choose to count the colonies automatically, manually, or with a template. Refer to the Automatic Count, Manual Count, or Template Count instructions in this manual for additional information.
-
Page 24: Zone Analysis
ColonyDoc-It Imaging Station Zone Analysis Zone analysis provides users with zone sizing information useful for applications such as inhibition zone analysis. Before proceeding through the zone analysis process, ensure that an image of the Petri dish has been captured and is ready for analysis. See instructions on Quick Capture in this manual for more information on how to capture an image. - Page 25 ColonyDoc-It Imaging Station Step 1: Select classes The window that appears after choosing Manual Count is the Manual Count Colony Wizard. It contains two tabs. The first tab is Step 1 of 2: Select classes, the second tab is Step 2 of 2: Finish.
- Page 26 ColonyDoc-It Imaging Station The Select Classes tab allows users to select the number of classes and zones in the Petri dish sample. To analyze the desired zones, ensure that the Add Points button is highlighted in yellow and click on a zone to be counted in the original image of the Petri dish.
- Page 27 ColonyDoc-It Imaging Station Step 2: Finish The software will automatically move to the second tab Step 2 of 2: Finish after Count is selected in Step 1 of 2: Select classes. To add or subtract zones, change the slider buttons for shape...
-
Page 28: Renumbering Colony/Zone Values
ColonyDoc-It Imaging Station Renumbering Colony/Zone Values To enable easier statistical reporting of each colony or zone, the values assigned to each colony or zone may be renumbered. To renumber the values assigned to each colony or zone click Recompute Colony Labels under the Grid Analysis Tools. -
Page 29: Spiral Plate Counting
ColonyDoc-It Imaging Station Spiral Plate Counting To perform a spiral plate count click onto the Spiral checkbox and then select Start Colony Count. First click onto Spiral Next, select from the Automated Count, Manual Count or User Defined Template Count. - Page 30 ColonyDoc-It Imaging Station To view the resulting Data Table analysis for the spiral plate count, click onto the + sign (expanded report shown here after clicking the + sign). The values listed will provide the number of colonies found in each quadrant and section of the counted plate.
-
Page 31: Editing Colonies
ColonyDoc-It Imaging Station Editing Colonies Add Colonies Users may add colonies by performing the initial count (Automated Count, Manual Count, or User Defined Template Count), and adding colonies manually. To add colonies, ensure that the Add Colonies tab in the Colony Count module is highlighted in yellow. -
Page 32: Delete Colonies
ColonyDoc-It Imaging Station To use a larger circle to highlight the colony, go to the Analysis Display Settings. A new window will open. Browse to Main Settings > Analysis > Colony Count. In the Add Tool section of the window, use the drop... -
Page 33: Manual Split Colonies
ColonyDoc-It Imaging Station The colony circle (filled in or outlined) will now disappear. The Total colonies count will change to remove the colonies deleted. Deleted Colony Manual Split Colonies Users may split colonies by performing the initial count (Automated Count, Manual Count, or User Defined Template Count), and splitting colonies manually. -
Page 34: Auto Split Colonies
ColonyDoc-It Imaging Station Draw lines through two or more colonies that are close together and treated as one. Use the pointer and, while holding the left mouse button down, move from one edge of the colony to the other. The Total colonies count will change to add new colonies identified by the split. -
Page 35: Merging Colonies
ColonyDoc-It Imaging Station Merging Colonies Users may merge colonies by performing the initial count (Automated Count, Manual Count, or User Defined Template Count), and merging colonies manually. Colonies should be merged when one colony is treated as two separate colonies by the software. Colonies will only be merged if they are less than 4 pixels apart. -
Page 36: Using The Software
ColonyDoc-It Imaging Station Using the Software Changing Filter Settings To reduce user initial set-up time, filters were created to count “true” colonies and remove inherent defects from the sample plate that would (without the filters) be included in the total colony count. The filters may prevent a colony from being counted based on some critical parameters. -
Page 37: Preferences
ColonyDoc-It Imaging Station Preferences Open the Preferences window from File > Preferences. This window allows users to set new defaults for the display options, label color, annotation, camera template settings and miscellaneous functions such as annotation. To change the Label Type, from the Analysis >... - Page 38 ColonyDoc-It Imaging Station To change the Circle Radius, click the drop down arrow and select from the numbers to change circle pixel radius. The Cameras > Canon Camera preferences window allows users to save modified template settings after disconnecting. Choose from: ...
-
Page 39: Toolbars
ColonyDoc-It Imaging Station The Logging preferences window allows the user to define the log file path and the log level. To change the Log File Path, click … and locate a new directory. To change the Log Level, click the drop down arrow and select from the list. -
Page 40: Reporting Functions
ColonyDoc-It Imaging Station Measure Length: Allows users to draw a line and measure the distance between any two points on the image, units depend on spatial calibration Measure Angle: Allows users to draw an angle and measure the degree value contained in that angle ... -
Page 41: Colonies
ColonyDoc-It Imaging Station Total area of the class on the sample (in pixels) Percentage of area of the class on the sample Mean area of the class (in pixels) Standard deviation of the area Minimum area (in pixels) ... -
Page 42: Distribution
ColonyDoc-It Imaging Station In the second window, the Property is listed alongside the Area. Several numerical values are listed which include: Minimum area (pixels) Colony with the minimal area Maximum area (pixels) Colony with the maximum area ... - Page 43 ColonyDoc-It Imaging Station The second tab shows Colonies. The third tab shows Statistics.
-
Page 44: Supporting 21 Cfr Part-11 Compliance
The rules delineate the conditions under which the US-FDA considers electronic records and electronic signatures equivalent to paper records and paper signatures. The instructions for compliance really span the entire organization and its practices. LS software by UVP is one piece that rightly fits into the bigger picture and supports compliance. -
Page 45: Servicing The Colonydoc-It
Servicing the ColonyDoc-It Cleaning and Care Use 70% Isopropanol Alcohol to clean the ColonyDoc-It external surfaces, base, and doors. Clean the ColonyDoc-It twice a day, before and after every use. Cleaning the Diopter Weekly clean the diopter with a soft photographic lens cleaning cloth dampened with lens cleaning solution. -
Page 46: Replacing Switches
Use a screwdriver to turn the fuse clockwise to lock. Ordering Replacement Parts and Accessories Contact UVP or authorized distributor for replacement parts. For replacement parts or components not shown here, please call UVP Customer Service or place of purchase. -
Page 47: Return Service Procedure
Please contact our Customer Service Department for a Returned Goods Authorization (RGA). No credit will be issued or allowed until UVP has had sufficient time to inspect the product and determine corrective action. Returns must be made within 30 days of issuance of the RGA number and product must be in original packaging with all manuals and instructions. -
Page 48: Technical Support
Warranty UVP, LLC warrants all of its products (except tubes, grids and filters which is 90 days) to be free from defects in material and workmanship for a period of one (1) year from the date of purchase. All transilluminators carry a two (2) year warranty.
Need help?
Do you have a question about the ColonyDoc-It and is the answer not in the manual?
Questions and answers