Subscribe to Our Youtube Channel
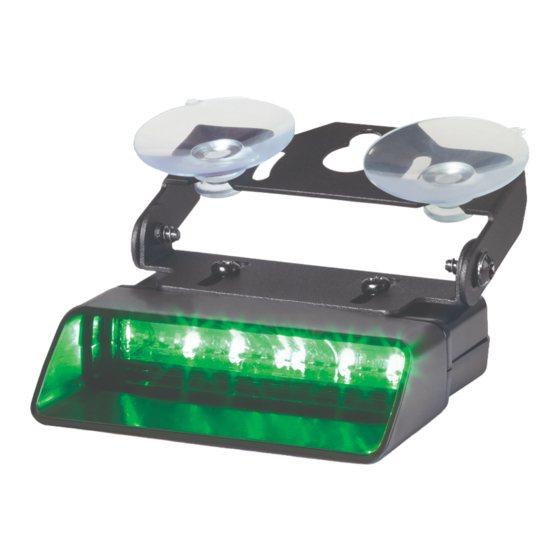
Summary of Contents for Federal Signal Corporation XStream XSM Series
- Page 1 XStream Interior Light ® Models XSMxx-xxx Installation and Service Instructions 25500381 Rev A5 0822 Printed in U.S.A. © Copyright 2017-2022 Federal Signal Corporation...
-
Page 2: Safety Messages
Safety Messages Safety Messages Safety Messages to Installers and Users of Warning Light Equipment People’s lives depend on your proper installation and operation of Federal Signal products. It is important to read and follow all instructions shipped with this product and the original product. Listed below are some other important safety instructions and precautions you should follow: •... -
Page 3: Product Overview
Product Overview • After testing is complete, provide a copy of these instructions to the instructional staff and all operating personnel. • File these instructions in a safe place and refer to them when maintaining and/or reinstalling the product. Failure to follow all safety precautions and instructions may result in property damage, serious injury, or death. - Page 4 Unpacking the Product Table 2 XStream Dual Kit Contents* ® Qty. Description Part Number Visor, Long Dual 861301424 Visor, Medium, Dual 861301924 Visor, Short, Dual 861301925 Screw, #8, 48-2, Plastite Equivalent, 6-Lobe, Steel, 70000705-05 Black, Zinc Screw, #10, Type B, Pan Head,TORX Steel, Black, Zinc 7011246-06 Lockwasher, #10, Internal Tooth, Steel 7075A014...
- Page 5 Installing the Light Heads Figure 2 XStream bracket-mounting Visor Pivot Bracket #8 Pan Head Screw (2) #10 Pan Head Screw (2) Bail Bracket Lockwasher (2) Installing the Light Heads AIRBAG DEPLOYMENT: Do not install equipment or route wiring in the deployment path of an airbag.
- Page 6 Mounting the Light Head in a Vehicle To install the light heads: Optional: Set a light head to control the flash patterns of one or more light heads in the XStream system. ® Mount the XStream system to the vehicle. See Mounting the Light Head in a Vehicle below.
- Page 7 Wiring and Programming the Light Mounting the Light with the Bracket To mount the light with a bracket: Select a mounting location for the light and best orientation of the brackets. Attach the appropriate visor to the light head. Press the visor firmly to snap it into place.
- Page 8 Configuring the Light Color Designations The color codes in the model number correspond to the colors listed below: For example Model XSM1-BRW COLOR1 = (Blue) COLOR2 = (Red) COLOR3 = (White) Code List: = Blue, = Red, = White, = Amber, = Green Configuring the Light Two recessed switches in the side of the housing enable you to configure how the...
- Page 9 Configuring the Light USE THE DIMMING/LOW POWER FUNCTION PROPERLY: Enabling the Low Power function in the light bar may cause the light output to fall below certain light output standards and guidelines for emergency warning lights. Use extreme caution when using this function. Ensure that the ambient light conditions are low enough that you are seen and that the reduction of glare from the light bar is safer than full light output in the situation.
- Page 10 Instructions to Use with Flash Pattern Helper Table 6 S2 Color Modes Color Single Head Dual Head 1 Dual Head 2 Description Mode Color 1, 2, 3 Color 1, 2, 3 Color 1, 2, 3 Heads flash COLOR1, COLOR2, and COLOR3 Color 1 Color 1 Color 1...
-
Page 11: Getting Technical Support
You can also use a high quality automotive paste cleaner/wax that is non-abrasive. Getting Technical Support For technical support, please contact: Federal Signal Corporation Phone: 1-800-433-9132 Email: empserviceinfo@fedsig.com Installation and Service Instructions Federal Signal www.fedsig.com... -
Page 12: Limited Warranty
This product is subject to and covered by a limited warranty, a copy of which can be found at www.fedsig.com/SSG-Warranty. A copy of this limited warranty can also be obtained by written request to Federal Signal Corporation, 2645 Federal Signal Drive, University Park, IL 60484, email to info@fedsig.com or call +1 708-534-3400.


Need help?
Do you have a question about the XStream XSM Series and is the answer not in the manual?
Questions and answers