
Related Manuals for Miele KM 7720 FR


Summary of Contents for Miele KM 7720 FR
- Page 1 Operating and Installation Instructions Induction Cooktops To prevent accidents and machine damage, read these instructions before installation or use. en-US, CA M.-Nr. 12 155 090...
-
Page 2: Table Of Contents
Cooking zone data ....................19 Before first use ....................25 Cleaning the cooktop for the first time..............25 Turning on the cooktop for the first time ............. 25 Miele@home ......................26 Con@ctivity......................29 How it works ...................... 32 Noises........................32 Power management system................ - Page 3 Contents Wipe protection ....................47 Demo mode......................47 Displaying the cooktop data ................48 Safety features....................49 System lock/Safety lock..................49 Safety shut-off..................... 50 Overheating protection..................51 Programming ..................... 52 Cleaning and care ..................... 56 Frequently Asked Questions ................58 Messages in the display..................
-
Page 4: Important Safety Instructions
“Installation”, as well as in the “IMPORTANT SAFETY INSTRUCTIONS”. Miele cannot be held liable for injury or damage caused by non- compliance with these instructions. Keep these instructions in a safe place and pass them on to any future owner. - Page 5 IMPORTANT SAFETY INSTRUCTIONS Safety with children Do not leave children unattended: Children should not be alone or unsupervised in the area where the appliance is installed. Do not al- low them to sit or stand on the appliance. Be sure to supervise any children in the vicinity of the cooktop, and do not let them play with it.
- Page 6 Unauthorized installation, maintenance, and repairs can cause considerable danger for the user. Installation, maintenance, and re- pairs must only be carried out by a Miele authorized technician. Damage to the cooktop can compromise your safety. Check the cooktop for visible signs of damage. Do not use the cooktop if it is damaged.
- Page 7 Do not open the casing of the cooktop under any circumstances. Any repairs not performed by a Miele authorized service techni- cian will void the warranty. Defective components should be replaced by Miele original parts only.
- Page 8 Switch it off immediately. Disconnect the cooktop from the electrical power supply. Contact Miele Service. If the cooktop is installed behind a cabinet door, do not close the door while the cooktop is in operation.
- Page 9 IMPORTANT SAFETY INSTRUCTIONS Correct use The cooktop gets hot when in use and remains hot for a while af- ter being turned off. There is a potential hazard until the residual heat indicator goes out. Never leave the appliance unattended at high heat settings – Boilover causes smoking and greasy spillovers that may ignite.
- Page 10 IMPORTANT SAFETY INSTRUCTIONS If the cooktop is turned on or accidentally turned on or if it is still hot, metal objects on the cooktop can heat up. Other items may melt or catch fire. Damp lids can become attached to the cooktop by suction.
- Page 11 IMPORTANT SAFETY INSTRUCTIONS Pots and pans with bases with pronounced edges or ridges can scratch the ceramic surface. Only use pots and pans with smooth bases. Lift pans into position on the cooktop. Sliding them into place can cause scuffs and scratches.
- Page 12 IMPORTANT SAFETY INSTRUCTIONS Do not use 2 items of cookware on a cooking zone or extended zone at the same time. If the cookware only partially covers a cooking zone, the handle could become very hot. Always place cookware in the middle of the cooking zone. ...
- Page 13 (see relevant section). Miele will guarantee to supply functional parts for a minimum of 10 years and up to 15 years following the discontinuation of your cooktop.
-
Page 14: Caring For The Environment
Consult with local authorities, dealers or Miele in order to dispose of and recycle electrical and electronic appliances. Miele assumes no responsibility for deleting any personal data left on the appliance being disposed. -
Page 15: Overview
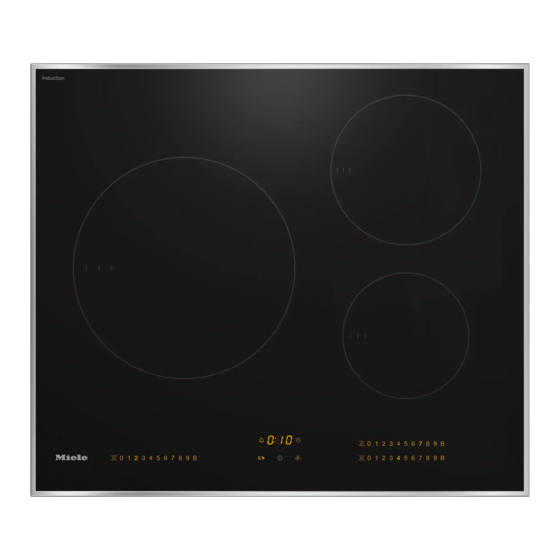
Overview Cooktop KM 7720 FR a Cooking zone with TwinBooster b Cooking zone with TwinBooster c Cooking zone with TwinBooster d Controls and indicators... - Page 16 Overview KM 7730 FR a Cooking zone with TwinBooster b Cooking zone with TwinBooster c Cooking zone with TwinBooster d Cooking zone with TwinBooster e Controls and indicators...
- Page 17 Overview KM 7740 FR a Cooking zone with TwinBooster b Cooking zone with TwinBooster c Cooking zone with TwinBooster d Cooking zone with TwinBooster e Cooking zone with TwinBooster f Controls and indicators...
-
Page 18: Controls And Display
Overview Controls and display a Stop & Go sensor control For stopping/starting a cooking process in progress b Cooktop On/Off sensor control c Wipe protection sensor control For locking the sensor controls d PowerFlex cooking zones sensor control For manual connection/disconnection of PowerFlex cooking zones e Keeping warm sensor control For activating/deactivating the Keeping warm function f Numerical display sensor controls... -
Page 19: Cooking Zone Data
Overview Cooking zone data KM 7720 FR Cooking Max. rating Linked Ø in inches (cm) zone cooking in watts for 208 V zone 7"–11" Normal 2,400 (18–28 cm) TwinBooster, level 1 2,750 TwinBooster, level 2 3,350 5 1/2"–7 1/2" Normal 1,700 (14–19 cm) TwinBooster, level 1 2,300 TwinBooster, level 2... - Page 20 Overview KM 7720 FR Cooking Max. rating Linked Ø in inches (cm) zone cooking in watts for 240 V zone 7"–11" Normal 2,600 (18–28 cm) TwinBooster, level 1 3,000 TwinBooster, level 2 3,700 5 1/2"–7 1/2" Normal 1,850 (14–19 cm) TwinBooster, level 1 2,500 TwinBooster, level 2 3,000...
- Page 21 Overview KM 7730 FR Cooking Max. rating Linked Ø in inches (cm) zone cooking in watts for 208 V zone 7"–11" Normal 2,400 (18–28 cm) TwinBooster, level 1 2,750 TwinBooster, level 2 3,350 4"–6 1/2" Normal 1,300 (10–16 cm) TwinBooster, level 1 1,550 TwinBooster, level 2 2,000...
- Page 22 Overview KM 7730 FR Cooking Max. rating Linked Ø in inches (cm) zone cooking in watts for 240 V zone 7"–11" Normal 2,600 (18–28 cm) TwinBooster, level 1 3,000 TwinBooster, level 2 3,700 4"–6 1/2" Normal 1,400 (10–16 cm) TwinBooster, level 1 1,700 TwinBooster, level 2 2,200...
- Page 23 Overview KM 7740 FR Cooking Rating Linked Ø in inches (cm) zone cooking in watts for 208 V zone 4"–6 1/2" Normal 1,300 (10–16 cm) TwinBooster, level 1 1,550 TwinBooster, level 2 2,000 6 1/2"–9"16–23 cm Normal 2,100 (16–23 cm) TwinBooster, level 1 2,750 TwinBooster, level 2 3,350...
- Page 24 Overview KM 7740 FR Cooking Rating Linked Ø in inches (cm) zone cooking in watts for 240 V zone 4"–6 1/2" Normal 1,400 (10–16 cm) TwinBooster, level 1 1,700 TwinBooster, level 2 2,200 6 1/2"–9"16–23 cm Normal 2,300 (16–23 cm) TwinBooster, level 1 3,000 TwinBooster, level 2 3,700...
-
Page 25: Before First Use
Before first use Please adhere the extra appliance Turning on the cooktop for the data plate (supplied) in the space pro- first time vided in the “After sales service” sec- Metal components are protected by a tion of this manual. conditioning agent. -
Page 26: Miele@Home
Before first use Miele@home availability Miele@home The ability to use the Miele app de- Prerequisite: home WiFi network pends on the availability of the Miele@home service in your country. Your cooktop is equipped with an inte- grated WiFi module. The cooktop can... - Page 27 Connecting via WPS Prerequisite: you must have a WPS Connecting via the app (WiFi protected setup) compatible The Miele app can be used to connect router. to your network. Switch the cooktop on. Install the Miele app on your mobile device.
- Page 28 Before first use Canceling the process Touch any sensor control. Resetting settings Resetting is not required when replac- ing the router. Switch the cooktop on. Touch the 0 sensor control on any of the numerical displays. Touch the 0 and 9 sensor controls at the same time for 6 seconds.
-
Page 29: Con@Ctivity
Con@ctivity is the direct communication the cooktop and ventilation hood using system between your cooktop and a your home WiFi network or a direct WiFi Miele Ventilation Hood. Con@ctivity en- connection. ables the ventilation hood to operate automatically depending on the operat- Con@ctivity via the home WiFi net- ing status of a cooktop. - Page 30 Before first use Con@ctivity via a direct WiFi connec- With a direct WiFi connection, it is not tion (Con@ctivity 3.0) possible to connect the cooktop and the ventilation hood to a home net- You can find the necessary informa- work. If this is desired later, the direct tion on connecting the ventilation WiFi connection between the cooktop hood in the associated operating and...
- Page 31 Before first use Canceling the process Touch any sensor control. Resetting settings Resetting is not required when replac- ing the router. Switch the cooktop on. Touch the 0 sensor control on any of the numerical displays. Touch the 0 and 9 sensor controls at the same time for 6 seconds.
-
Page 32: How It Works
How it works An induction coil is located under each Noises cooking zone. The coil creates a mag- When you use an induction cooking netic field that reacts directly with the zone, the following noises may occur, base of the pan and heats it up. The depending on the type and shape of the cooking zone itself is heated up indi- cookware bottom:... -
Page 33: Power Management System
How it works If a cooking zone gives power to an- Power management system other zone, this can have the following The cooktop has a maximum total per- effects: mitted power consumption which can- - The power level is reduced. not be exceeded for safety reasons. -
Page 34: Cookware
Cookware Suitable cookware No cookware/unsuitable cook- ware display - Stainless steel with a magnetic base The set power level flashes in the nu- - Enameled steel merical display for the cooking zone if - Cast iron - the cooking zone has been switched The composition of the pan bottom can on without cookware in place, or if affect the evenness of the cooking re-... - Page 35 Cookware - Please note that the pot or pan diam- Tips eter quoted by manufacturers often - To make optimum use of the cooking refers to the maximum diameter or zones, choose cookware with a suit- diameter of the top rim. The diameter able base diameter (see “Overview –...
-
Page 36: Energy Saving Tips
Energy saving tips - Use a lid whenever possible to mini- mize heat loss. - For small quantities, select a small pan. A small pan on a small cooking zone uses less energy than a large, only partially filled pan on a large cooking zone. -
Page 37: Setting Ranges
Setting ranges The cooktop is programmed with 9 power levels at the factory. If you wish to fine- tune a setting, you can extend the power-level range to 17 power levels (see “Pro- gramming”). Setting range Factory setting Extended setting (9 power levels) (17 power levels) Melting butter 1–2... -
Page 38: Operation
Operation Operation Malfunction can occur due to dirty and/or covered sensor controls. This ceramic cooktop is equipped with electronic sensor controls which react If the sensor controls are dirty or covered this could cause them to fail to finger contact. For safety reasons, in order to switch the appliance on, the to react, to activate a function, or On/Off ... -
Page 39: Switching The Cooktop On
Operation Switching off a cooking zone/ Fire hazard due to overheated the cooktop food. Unattended food can overheat and To switch off a cooking zone, touch ignite. the 0 sensor control on the numerical Do not leave the cooktop unattended display for that cooking zone. -
Page 40: Setting The Power Level - Extended Power Level Range
Operation Setting the power level – ex- tended power level range Touch the numerical keybank be- tween two number sensors. The numbers to the left and right of the interim level light up brighter than the other sensor controls. Example: If you have set power level 7., the num- bers 7 and 8 will be brighter than the... -
Page 41: Auto Heat-Up
Operation Auto heat-up Continued cook- Heat-up time ing level* [min:sec] When Auto heat-up has been activated, the cooking zone switches on automati- approx. 0:15 cally at the highest setting and then approx. 0:15 switches to the power level (continued cooking level) which you have previ- approx. -
Page 42: Booster
Operation Activating TwinBooster Booster When the Booster function is activated, Level 1 the power is boosted so that large Place the cookware on the cooking quantities can be heated up quickly, zone you want to use. e.g., when boiling water for cooking ... -
Page 43: Keeping Warm
Operation Activating/deactivating the Keeping Keeping warm warm function The Keeping warm function is for Touch the sensor control for the keeping food warm when it has just cooking zone you wish to use. been cooked and is still hot. It is not for reheating food that has gone cold. -
Page 44: Timer
Timer Kitchen timer The cooktop has to be switched on if you wish to use the timer. The timer is set using the numerical dis- play for the left or front left cooking The timer can be used for the following zone (depending on model). -
Page 45: Safety Shut-Off
Timer touch the sensor control repeat- Safety shut-off edly until the indicator light for the You can set a time after which the desired cooking zone pulsates. cooking zone will reduce automatically to power level 1. This function can be Changing the shut-off time used on all cooking zones at the same ... -
Page 46: Using Both Timer Functions At The Same Time
Timer Using both timer functions at the same time If you use both functions simultane- ously, the shortest time is always dis- played. The sensor control (kitchen timer) or the indicator light of the cook- ing zone with the shortest time pul- sates. -
Page 47: Additional Functions
Additional functions Stop & Go Wipe protection When Stop & Go is activated, the power The cooktop sensor controls can be level of all cooking zones in use is re- locked for 20 seconds, e.g., to remove duced to power level 1. soiling. The sensor control is not The cooking zone power levels and the locked. -
Page 48: Displaying The Cooktop Data
Additional functions Displaying the cooktop data The model identifier and software ver- sion of the cooktop can be displayed. There must not be any cookware on the cooking zones. Model identifier/serial number Switch the cooktop on. Touch the 0 sensor control on any of the numerical displays. -
Page 49: Safety Features
Safety features Activating the system lock System lock/Safety lock Touch the sensor control for Your cooktop is equipped with a system 6 seconds. lock and a safety lock to prevent the cooktop and the cooking zones being The seconds can be seen counting switched on or any settings being al- down in the timer display. -
Page 50: Safety Shut-Off
Safety features Safety shut-off Power level* Maximum operating time [h:min] Sensor controls are covered Safety setting Your cooktop will turn off automatically if one or several of the sensor controls 10:00 8:00 5:00 remain covered for longer than 10 sec- onds, for example, by finger contact, 10:00 7:00 4:00... -
Page 51: Overheating Protection
If, despite removing the cause, the - The set power level will be reduced. overheating protection mechanism trig- gers again, contact Miele Customer - The cooking zone turns off automati- Service. cally. will flash alternately with in the timer display. -
Page 52: Programming
Programming You can adapt the programming of the Setting the code cooktop to your personal needs. Sev- While the code is visible in the display eral settings can be changed in succes- (e.g., :), touch the sensor con- sion. trol repeatedly until the number for the code you want appears in the dis- After accessing programming mode, play or touch the appropriate number... - Page 53 Programming Settings Program Code P:01 Demo mode C:00 Demo mode off C:01 Demo mode on P:03 Factory default C:00 Do not restore factory default set- tings C:01 Restore factory default settings P:04 Number of cooking zone power C:00 9 power levels + Booster levels C:01 17 power levels + Booster...
- Page 54 C:03 Connection possible via WPS push button C:04 WiFi reset to default ( C:00 C:05 Direct WiFi connection of cooktop and ventilation hood without Miele app (Con@ctivity 3.0) P:12 Sensor controls reaction speed C:00 Slow C:01 Normal C:02 Fast...
- Page 55 Programming Settings Program Code P:25 Keeping warm temperature C:00 120°F (50°C) 130°F (55°C) C:01 C:02 140°F (60°C) 150°F (65°C) C:03 C:04 160°F (70°C) 170°F (75°C) C:05 C:06 175°F (80°C) 185°F (85°C) C:07 C:08 195°F (90°C) Programs not shown here have no allocation. The factory default setting is shown in bold.
-
Page 56: Cleaning And Care
Cleaning and care Allow the cooktop to cool down be- Risk of burning or scalding due fore cleaning. to hot cooking zones. The cooking zones will be hot after Clean the cooktop after every use. use. Dry the cooktop thoroughly after ev- Turn off the cooktop. - Page 57 The seal between the ceramic sur- and aluminum residues (spots with a face and the frame could be dam- metallic appearance) can be removed aged. using the Miele Ceramic and Stain- Do not use pointed objects for clean- less-Steel Cooktop Cleaner. ing. ...
-
Page 58: Frequently Asked Questions
Frequently Asked Questions With the help of the following guide minor faults in the performance of the ma- chine, some of which may result from incorrect operation, can be remedied with- out contacting the Service Department. This guide may help you to find the reason for the fault, and how to correct it. Messages in the display Problem Possible cause and solution... - Page 59 Make sure it has not been blocked by an object. the timer display. Remove the obstruction. If this fault message continues to appear in the display, contact Miele Customer Service. In the timer display, E- The fan is blocked or defective. digit, e.g., E-0, flashes ...
-
Page 60: Unexpected Behavior
Frequently Asked Questions Unexpected behavior Problem Possible cause and solution The power level se- There is no dishware on the cooking zone, or the lected is flashing. dishware is unsuitable. Use suitable cookware (see “Induction – Cook- ware”). Power level 9 is auto- Operating both zones at power level 9 exceeds the matically reduced if you permitted maximum power for the two zones. -
Page 61: Unsatisfactory Results
There is no power to the cooktop. zones cannot be turned Check if the breaker has tripped. Contact a quali- fied electrician or Miele Customer Service (for the minimum fuse rating, see data plate). There may be a technical fault. -
Page 62: Optional Accessories
Optional accessories Miele offers a range of useful acces- Cleaning and care products sories, as well as cleaning and condi- Ceramic and stainless steel cleaner tioning products for your appliance. 250 mL These products can be easily ordered Removes heavy soiling, lime scale, and from the Miele webshop. -
Page 63: Customer Service
Miele dealer or Miele Customer Service. You can book a Miele Service Call online at www.miele.com/service. Contact information for Miele Customer Service can be found at the end of this document. Please quote the model identifier and serial number of your appliance (SN) when contacting Miele Customer Service. -
Page 64: Installation
*INSTALLATION* Installation IMPORTANT SAFETY INSTRUCTIONS - INSTALLATION Risk of damage caused by incorrect installation. Incorrect installation can damage the cooktop. The cooktop must only be installed by a qualified specialist. Risk of electric shock from voltage. Incorrect connection to the power supply may result in an electric shock. The cooktop must be connected to the electrical supply by a qualified electri- cian only. -
Page 65: Safety Distances
*INSTALLATION* Installation Safety distances Safety distance above the cooktop The safety distance specified by the manufacturer of the ventilation hood must be maintained between the cook- top and the ventilation hood above it. If combustible objects are installed above the cooktop (e.g., a suspended rack), a minimum safety distance of 19 3/4"... - Page 66 *INSTALLATION* Installation Safety clearances to the sides and back of the cooktop Ideally the cooktop should be installed with plenty of space on either side. The minimum distance shown below must be maintained between the back of the cooktop and a tall unit or wall. The minimum distance , ...
- Page 67 *INSTALLATION* Installation Minimum safety distance underneath the cooktop To ensure sufficient ventilation to the cooktop, a minimum safety distance must be left between the underside of the cooktop and any oven, intermediate shelf, or drawer. The minimum safety distance KM 7720 FR, between the underside of the KM 7730 FR KM 7740 FR...
- Page 68 *INSTALLATION* Installation Safety distance from the wall covering If a wall covering is installed, a minimum safety distance must be maintained be- tween the countertop cut-out and the covering, since high temperatures can dam- age these materials. If the covering is made of a combustible material (such as wood), the minimum safety distance ...
-
Page 69: Installation Notes
*INSTALLATION* Installation Tiled countertop Installation notes Seal between cooktop and counter- Grout lines and the shaded area un- der the cooktop frame must be smooth and even. If they are not, the cooktop will not sit flush with the countertop and the sealing strip underneath the cook- ... -
Page 70: Installation Dimensions
*INSTALLATION* Installation Installation dimensions The superscript numbers after the cut-out dimensions are the tolerances for the cut-out. KM 7720 FR a Front b Flexible metal hose with power cords, L = 4' (1,200 mm) - Page 71 *INSTALLATION* Installation KM 7730 FR a Front b Flexible metal hose with power cords, L = 4' (1,200 mm) c Spacer plate (only necessary if a protective base is installed)
- Page 72 *INSTALLATION* Installation KM 7740 FR a Front b Flexible metal hose with power cords, L = 4' (1,200 mm)
-
Page 73: Installation
*INSTALLATION* Installation flush with the countertop on all sides. Installation This is important to ensure an effec- Create the countertop cut-out. Re- tive seal all round. member to maintain the minimum safety distances (see “Installation” – Do not use any additional sealant “Safety distances”). -
Page 74: Electrical Connection
It is impera- Miele cannot be held liable for any tive that this basic safety require- damage arising as a result of such ment be met. If there is any doubt, work. - Page 75 *INSTALLATION* Installation Connection Make sure that the power outlet is ac- cessible after the installation of the ap- Ensure that the connection data on pliance. the data plate (voltage, frequency, and fuse rating) match those of your Further information can be found on the electrical supply.
-
Page 76: Declaration Of Conformity
Information FCC Rules and contains licence-ex- empt transmitter(s)/receiver(s) that com- Induction Cooktop ply with Innovation, Science and Eco- Unique Identifier: Miele Model: nomic Development Canada’s licence- KM7720; KM7730; KM7740 exempt RSS Standard(s). Operation is subject to the following Responsible Party two conditions: Miele, Inc. - Page 79 Customer Service. U.S.A. Canada Miele, Inc. Importer Miele Limited National Headquarters 9 Independence Way Headquarters and Miele Centre Princeton, NJ 08540 161 Four Valley Drive www.mieleusa.com Vaughan, ON L4K 4V8 www.miele.ca Customer Support Phone: 888-99-MIELE (64353) Customer Care Centre info@mieleusa.com...
- Page 80 KM 7720 FR, KM 7730 FR, KM 7740 FR en-US, CA M.-Nr. 12 155 090 / 02...
Need help?
Do you have a question about the KM 7720 FR and is the answer not in the manual?
Questions and answers