
Subscribe to Our Youtube Channel
Related Manuals for Electrolux Professional Wascator FOM71 CLS


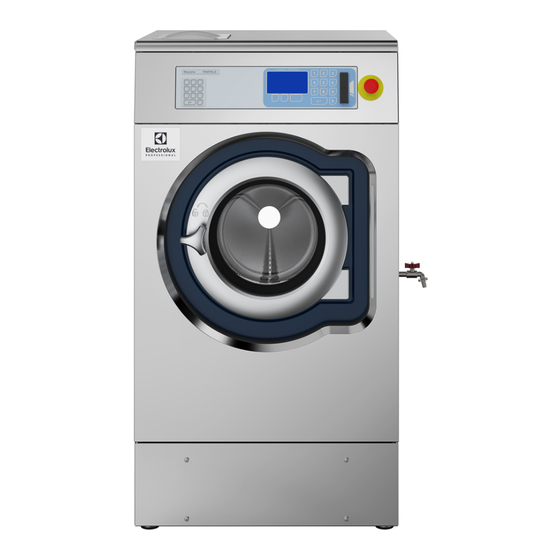
Summary of Contents for Electrolux Professional Wascator FOM71 CLS
- Page 1 Operating manual Wascator FOM71 CLS 438 9094-01/EN Original instructions 2020.01.16...
-
Page 3: Table Of Contents
Contents Contents Safety precautions ..................5 Procedure for use ..................7 Preparations .................... 8 Detergent supply ..................8 The ”Move back” key ................9 To start the wash program ..............9 To start a wash program from the program library ....... 13 Program description ................ - Page 4 Safety Precautions Only use detergent intended for water-wash of textiles. Never use dry cleaning agents. The machine's door lock must under no circumstances be bypassed. If the machine develops a fault, this must be reported to the person in charge as soon as possible. This is important both for your safety and that of others.
-
Page 5: Safety Precautions
Safety Precautions CAUTION The machine is only intended for water-wash use. Do not hose down the machine with water. In order to prevent damage to the electronics (and other parts) that may occur as the result of condensation, the machine should be placed in room temperature for 24 hours before being used for the first time. - Page 6 Note Weight calibration (only Wascator FOM71 CLS) If the value in the display shows more than ±0.1 kg, reset scale to zero. Level calibration Check and calibrate if a longer test serie is to commence. Note Some of the display texts and functions may not appear on your...
-
Page 7: Procedure For Use
Procedure for use Procedure for use This machine is controlled by a microprocessor-based program control unit. There are many advantages to this equipment, including: • timing, levels and temperatures are controlled with great precision and flexibility • detailed information on wash programs, machine status and operations, wash times and temperatures can be accessed in plain language on the large display screen • it is possible for the user to create new wash programs, and to adapt programs precisely on the basis of experience and to suit various types... -
Page 8: Preparations
Procedure for use Preparations • Sort the load, paying attention to the textile care labels on the items. Empty all pockets and do up zip fasteners. • Open the machine door, check that the drum is empty, load the items into the machine and close the door. Detergent supply Compartment 1 – pre wash, powder or liquid detergent 5343 Compartment 2 –... -
Page 9: The "Move Back" Key
Procedure for use The ”Move back” key The ”Move back” function If you find you are in the Each press of the ”Move back” key moves you wrong place, or if you want back one menu, in reverse order. By pressing this to undo earlier key presses: key repeatedly you can return to this menu at any time:... - Page 10 Procedure for use RUN A WASH PROGRAM Here you can select programs from the program libraries. See the section ENTER A PROGRAM NUMBER: entitled ”To start a wash program from the program library”. SELECT FROM LIBRARY Displayed here will be the number of the most frequently used program.
- Page 11 Procedure for use RUN A WASH PROGRAM Program name ENTER A PROGRAM NUMBER: Delayed start time (hrs:mins) If you want to see the NORMAL 95°C description of the program: TEXT START Pressing ”Text” displays more information 3582 The text displayed is a description of the wash Press TEXT.
- Page 12 Procedure for use The following information is To terminate a program before it has finished displayed during the wash • Select RAPID ADVANCE and press SELECT. program: Advance to ”END OF PROGRAM” and press SELECT. Current program step • Wait until ”THE DOOR IS OPEN” appears on the Time left for this program step display.
-
Page 13: To Start A Wash Program From The Program Library
Procedure for use To start a wash program from the program library What is the program library? RUN A WASH PROGRAM The program library lists all wash programs, both If this menu is not currently OPTIONS MENU user and standard programs, showing their pro- displayed: gram numbers and a description, for example: MAKE YOUR CHOICE WITH... -
Page 14: Program Description
Procedure for use Program description The following programs are fixed programmes in memory. Prgr.no. Name Contents/Application Start-up program If the machine has been idle more than two hours, this program should be run before any other program is run. Level check Check with the ruler inside the drum Program fills machine with water to... - Page 15 Procedure for use RUN A WASH PROGRAM ENTER A PROGRAM NUMBER: Select library via menu You can also select the program library via the option ”OPTIONS MENU”. Then select ”WASH To select a program from the SELECT FROM LIBRARY PROGRAM LIBRARY”. PCU program library: Press CLS.
- Page 16 Procedure for use RUN A WASH PROGRAM Program name ENTER A PROGRAM NUMBER: Delayed start time (hrs:mins) NORMAL 95°C If you want to see the des- TEXT START Pressing ”Text” displays more information cription of the program: 3582 The text displayed is a description of the wash Press TEXT TEXT program selected.
-
Page 17: To Change Parameters In The Current Program Step
Procedure for use To change parameters in the current program step 991 NORMAL 95°C You can alter the following program steps: PROGRAM STEP: MAIN WASH Prewash, Main wash, Rinse, Drain, Soak STEP TIME: 720 SEC SET TEMPERATURE: 85 C Length of program step (max. 9998 seconds), ACTUAL TEMPERATURE: 21 C REMAINING TIME:... -
Page 18: Rapid Advance
Procedure for use Rapid advance To terminate a program before it has finished • Select RAPID ADVANCE and press SELECT. Advance to ”END OF PROGRAM” and press 991 NORMAL 95°C SELECT. PROGRAM STEP: MAIN WASH • Wait until ”THE DOOR IS UNLOCKED” appears STEP TIME: 720 SEC SET TEMPERATURE: 85 C on the display. -
Page 19: Show Weight
Procedure for use For machines with weighing equipment installed only! Show weight Show weight 991 NORMAL 95°C The actual weight is shown in large digits on the display (weight display mode). PROGRAM STEP: MAIN WASH STEP TIME: 720 SEC SET TEMPERATURE: 85 C If the weighing equipment is not connected, the error ACTUAL TEMPERATURE:... -
Page 20: No Water Reduction
Procedure for use For machines with weighing equipment installed only! No water reduction No water reduction This function is not 991 NORMAL 95°C The wash load is weighed during the program and the valid for this machine. water level is adjusted automatically according to its PROGRAM STEP: MAIN WASH STEP TIME:... -
Page 21: Manual Functions
Procedure for use Manual functions Manual operation during a program Two types of manual operation 991 NORMAL 95°C There are two types of manual operation, which PROGRAM STEP: MAIN WASH STEP TIME: 720 SEC should not be confused: SET TEMPERATURE: 85 C ACTUAL TEMPERATURE: 21 C... - Page 22 Procedure for use Water/drain Note! MANUAL FUNCTIONS For this function, all of the menus will not be WATER/DRAIN COLD WATER available on machines with one I/O board. MIXED WATER HOT WATER COLD HARD WATER WATER FROM TANK 1 WATER FROM TANK 2 LEVEL: 63 UNITS Water level in drum OPEN...
- Page 23 Procedure for use High extract To limit the program’s highest extraction speed This function allows you to modify the highest MANUAL FUNCTIONS extraction speed allowed during the program. HIGH EXTRACT Example: COLD WATER CURRENT MAXIMUM EXTRACT SPEED: 1000 RPM Assume that the highest speed in the program is SELECT NEW EXTRACT SPEED: 1000 rpm and that you have set 700 rpm as the Maximum extraction speed in current...
- Page 24 Procedure for use Motor Motor to rotate after program has ended MANUAL FUNCTIONS If you answer Yes (Y): MOTOR The motor will continue to rotate in alternative di- MOTOR ON AFTER WASH rections after the program has ended. This prevents EXIT creasing of the load.
- Page 25 Procedure for use Detergent/flush Note! MANUAL FUNCTIONS DETERGENT/FLUSH For this function, all of the menus will not be FLUSH WATER POWDER SIGNAL 1 available on machines with one I/O board. POWDER SIGNAL 2 POWDER SIGNAL 3 POWDER SIGNAL 4 POWDER SIGNAL 5 OPEN 3684 Detergent signals and water flushing...
-
Page 26: Pause
Procedure for use Pause Two ways of pausing during a wash program Note that you must be in normal wash mode to be 991 NORMAL 95°C able to pause in this way. If, for example, you are using ”Manual Functions”, you will have to exit that PROGRAM STEP: MAIN WASH STEP TIME:... -
Page 27: Text
Procedure for use Text Pressing ”Text” displays more information The text displayed is a description of the wash 991 NORMAL 95°C program selected. This text description is inserted PROGRAM STEP: MAIN WASH when a new wash program is created. STEP TIME: 720 SEC SET TEMPERATURE: 85 C... -
Page 28: Select New Wash Program
Procedure for use Select new wash program 991 NORMAL 95°C To change the wash program after program PROGRAM STEP: MAIN WASH operation has commenced STEP TIME: 720 SEC SET TEMPERATURE: 85 C You can change to a different wash program at any ACTUAL TEMPERATURE: 21 C REMAINING TIME:... -
Page 29: Auto Restarts
Procedure for use Auto restarts What is Auto restart? Auto restart means that the same program will be repeated one or more times, according to the 991 NORMAL 95°C number set. The program will restart immediately, PROGRAM STEP: MAIN WASH and the door will remain locked. -
Page 30: Change °F/°C
Procedure for use Change °F/°C To change temperature scale °F/°C 991 NORMAL 95°C This function changes the temperature scale used for all temperatures displayed during the wash PROGRAM STEP: MAIN WASH STEP TIME: 720 SEC program. SET TEMPERATURE: 85 C ACTUAL TEMPERATURE: 21 C REMAINING TIME:... -
Page 31: Manual Mode
Procedure for use Manual mode Manual operating when no program is running Two types of manual operation If this menu is not currently RUN A WASH PROGRAM displayed: There are two types of manual operation, which OPTIONS MENU Press a repeatedly. should not be confused: MAKE YOUR CHOICE WITH • Manual operation when no program is... - Page 32 Procedure for use MANUAL MODE MAKE A CHOICE: MOTOR/DOOR WATER/DRAIN HEATING DETERGENT/FLUSH Manual operation when no program is EXIT running SELECT Motor/door (see section ”Motor/door”) 3679 Lock/unlock door. Switch motor on/off (normal drum action). MOTOR/DOOR Water/drain (see section ”Water/drain”) WATER/DRAIN Operation of drain valve and all water valves.
- Page 33 Procedure for use Motor/Door Lock the door and start the motor MANUAL MODE DOOR LOCK ON MOTOR/DOOR If you answer Yes (Y): DOOR LOCK ON MOTOR ON The door will be locked. Note that you must EXIT always lock the door before you can operate the machine manually.
- Page 34 Procedure for use Water/drain Note! MANUAL MODE WATER/DRAIN For this function, all of the menus will not be DRAIN CLOSED COLD WATER available on machines with one I/O board. MIXED WATER HOT WATER HARD WATER WATER FROM TANK 1 WATER FROM TANK 2 LEVEL: 63 UNITS OPEN 3688...
- Page 35 Procedure for use Heating MANUAL MODE HEATING DRAIN CLOSED SELECT SET TEMPERATURE Temperature selected 0°C ACTUAL TEMPERATURE 24°C Actual temperature START 3689 Use the numeric keys to enter the temperature the water is to be heated to. Press START. START Heating will now begin.
- Page 36 Procedure for use Detergent/flush Note! MANUAL MODE For this function, all of the menus will not be DETERGENT/FLUSH FLUSH WATER POWDER SIGNAL 1 available on machines with one I/O board. POWDER SIGNAL 2 POWDER SIGNAL 3 POWDER SIGNAL 4 POWDER SIGNAL 5 OPEN 3684 Detergent signals and water flushing...
-
Page 37: Statistics
Procedure for use Statistics To select Statistics If this menu is not currently RUN A WASH PROGRAM displayed: OPTIONS MENU Press a repeatedly. MAKE YOUR CHOICE WITH AND PRESS SELECT WEIGHT, KG: 000,0 SELECT 3589 Press b to highlight ”OPTIONS MENU”. RUN A WASH PROGRAM OPTIONS MENU SELECT... - Page 38 Procedure for use The Statistics function The Statistics function gives you access to the following information: STATISTICS TOTAL RUN TIME HOURS: TOTAL TIME RUN HOURS TOTAL TRIP RUN TIME HOURS HOURS SINCE LAST SERVICE Shows the total operating time for the machine LAST 5 ERROR CODES PROGRAM HOUR 08 NO HEATING...
-
Page 39: Resetting Statistic Registers
Procedure for use Resetting statistic registers Statistics registers which can be reset to zero If this menu is not currently The following registers in the statistics function can RUN A WASH PROGRAM displayed: be cleared (reset to zero): OPTIONS MENU Press a repeatedly. - Page 40 Procedure for use MENU MAKE A CHOICE: WASH PROGRAM LIBRARY PROGRAMMING MODE SETTINGS 1 The service program may only be MEMORY CARD SERVICE MODE used by authorised personnel, be- STATISTICS SELECT cause most safety interlocks are disabled. 3685 Press b..four times..WASH PROGRAM LIBRARY PROGRAMMING MODE SETTINGS 1...
- Page 41 Procedure for use Time counter, hours after last service Both counters can be reset in SERVICE MODE the same way. MAKE A CHOICE:WATER SERVICE PROGRAM CLEAR TRIP HOUR COUNTER CLEAR SERVICE COUNTER CLEAR WASH PROGRAM COUNTER IN CLS CLEAR WASH PROGRAM COUNTER IN SMC SCALE ADJUSTMENTS SELECT Press b so that CLEAR...
- Page 42 Procedure for use Number of washes for program in timer or memory card You can reset program in SERVICE MODE both timer and the memory MAKE A CHOICE:WATER card (if inserted). SERVICE PROGRAM CLEAR TRIP HOUR COUNTER CLEAR SERVICE COUNTER CLEAR WASH PROGRAM COUNTER IN CLS CLEAR WASH PROGRAM COUNTER IN SMC SCALE ADJUSTMENTS Press b so that CLEAR...
- Page 43 Procedure for use CLEAR COUNTER FROM PROGRAM NUMBER: TO PROGRAM NUMBER: TO END: TO PROGRAM NUMBER = 0 EXIT 4046 Enter digits corresponding to the program number (inclu- sive) up to which you wish to clear the total counter. ERASE Press ERASE.
- Page 44 Procedure for use For machines with weighing equipment installed only! Scale adjustments Scale adjustments The following functions are accessed via the SERVICE PROGRAM SCALE ADJUSTMENTS menu: MAKE A CHOICE:WATER Reset scale to zero (see section ”Reset scale to SERVICE PROGRAM zero”) CLEAR COUNTER CLEAR SERVICE COUNTER Used to make the weighing equipment display 0 CLEAR WASH COUNTER IN CLS...
- Page 45 Procedure for use For machines with weighing equipment installed only! Reset scale to zero Reset scale to zero SERVICE PROGRAM ”Reset weighing equipment” is used to make the MAKE A CHOICE: weighing equipment display 0 when the machine RESET SCALE TO ZERO has no load in it.
- Page 46 Procedure for use For machines with weighing equipment installed only! Reset tare to zero Reset tare to zero SERVICE PROGRAM If your attempt to clear the tare parameter fails at this MAKE A CHOICE: point, you will see an error message equivalent to: “FAI- RESET SCALE TO ZERO RESET TARE TO ZERO LED.
- Page 47 Procedure for use For machines with weighing equipment installed only! Tare scale Tare scale SERVICE PROGRAM This function involves first loading the drum with, MAKE A CHOICE: for example, a container, then taring (resetting) RESET SCALE TO ZERO the weighing equipment so that the weight of the RESET TARE TO ZERO TARE SCALE container will not be included when calculating net...
- Page 48 Procedure for use For machines with weighing equipment installed only! Set tare to a certain value Set tare to a certain value SERVICE PROGRAM This function lets you enter a value for the tare para- MAKE A CHOICE: meter, i.e. a weight value which the weighing equip- RESET SCALE TO ZERO ment will disregard when showing a net weight on RESET TARE TO ZERO...
- Page 49 Procedure for use For machines with weighing equipment installed only! Read tare value Read tare value SERVICE PROGRAM This function lets you check the value currently stored MAKE A CHOICE: as the tare parameter. RESET SCALE TO ZERO RESET TARE TO ZERO TARE SCALE SET TARE TO A CERTAIN VALUE READ TARE VALUE...
- Page 50 Procedure for use For machines with weighing equipment installed only! Calibrate the scale Please note: SERVICE PROGRAM This function is used only on installation of a new MAKE A CHOICE: scale unit. RESET SCALE TO ZERO RESET TARE TO ZERO TARE SCALE SET TARE TO A CERTAIN VALUE READ TARE VALUE CALIBRATE THE SCALE...
- Page 51 Procedure for use For machines with weighing equipment installed only! Calibration weight SCALE ADJUSTMENTS A weight of between 40 kg and 400 kg should be CALIBRATE THE SCALE used as a calibration weight. Put the calibration FILL DRUM WITH CALIBRATION WEIGHT The higher the weight (within these limits), the better ENTER WEIGHT IN HG AND weight in the drum.
- Page 52 Procedure for use For machines with weighing equipment installed only! SCALE ADJUSTMENTS CALIBRATE THE SCALE DONE! PRESS SELECT Calibration mode/normal mode To gain access to the calibration switch in the sca- SELECT le unit, the top panel has to be taken off. Remove the four screws on the scale unit cover.
- Page 53 Procedure for use For machines with weighing equipment installed only! Zero calibration Zero calibration The “Zero calibration” function is used to increase the SERVICE PROGRAM accuracy of the weighing equipment. This should be done once a month. MAKE A CHOICE: RESET SCALE TO ZERO If this calibration has not succeeded you will see an RESET TARE TO ZERO TARE SCALE...
- Page 54 Procedure for use For machines with weighing equipment installed only! Read version number Read version number SERVICE PROGRAM MAKE A CHOICE: In the event of a fault in the weighing equipment RESET SCALE TO ZERO (which cannot be put right) make a note of the ver- RESET TARE TO ZERO sion number accessed via this function before you TARE SCALE...
-
Page 55: Memory Card
Procedure for use Memory card General introduction A memory card is a plastic card, the size of a credit card, with an electronic memory chip inside it. This memory card is capable of storing 10 to 15 wash programs of normal size. If the programs are mostly small ones, more of them can be stored, whereas larger programs will reduce the number which can be held by the memory card. -
Page 56: To Select The "Memory Card" Function
Procedure for use To select the ”Memory card” function Card reader Insert the memory card with the chip first, to the left, into the machines card reader. 4115 If this menu is not currently RUN A WASH PROGRAM displayed: OPTIONS MENU Press a repeatedly. - Page 57 Procedure for use ”The ”Memory card” functions MEMORY CARD Execute wash program from memory card (see section ”Execute wash program from EXECUTE WASH PROGRAM FROM MEMORY CARD memory card”) COPY PROGRAM FROM MEMORY CARD TO CLS COPY PROGRAM FROM CLS TO MEMORY CARD A wash program can be run from the memory DELETE PROGRAM IN MEMORY CARD card, without first being copied to the machine.
-
Page 58: Execute Wash Program From Memory Card
Procedure for use Execute wash program from memory card To run a program from the memory card MEMORY CARD In broad terms, the program control unit has two different memories. One is a ”program memory” EXECUTE WASH PROGRAM FROM MEMORY CARD where all its wash programs are stored, the other is COPY PROGRAM FROM MEMORY CARD TO CLS COPY PROGRAM FROM CLS TO MEMORY CARD... -
Page 59: Copy Program From Memory Card To Cls
Procedure for use Copy program from memory card to CLS What is a restricted-use program? MEMORY CARD A wash program which has been created on a PC can be made a ”restricted-use” program. This EXECUTE WASH PROGRAM FROM MEMORY CARD means that: COPY PROGRAM FROM MEMORY CARD TO CLS COPY PROGRAM FROM CLS TO MEMORY CARD... - Page 60 Procedure for use MEMORY CARD COPY PROGRAM FROM MEMORY CARD TO CLS Choose 1 or 2: NOW YOU CAN CHANGE NUMBER: 1 If you want to give the JUST PRESS SELECT IF NUMBER IS OK program a different pro- gram number (from the SELECT one it had on the memory 4046...
-
Page 61: Copy Program From Cls To Memory Card
Procedure for use Copy program from CLS to memory card What happens when a program is copied? MEMORY CARD Both the memory card and the program control unit have memory chips capable of storing wash EXECUTE WASH PROGRAM FROM MEMORY CARD programs. - Page 62 Procedure for use MEMORY CARD Choose 1 or 2: COPY PROGRAM FROM CLS TO MEMORY CARD 1 If you want to give the NOW YOU CAN CHANGE NUMBER: program a different pro- JUST PRESS SELECT IF NUMBER IS OK gram number (from the SELECT one it had on the machi- ne):...
-
Page 63: Delete Program In Memory Card
Procedure for use Delete program in memory card What is a restricted-use program? A wash program which has been created on a MEMORY CARD PC can be made a ”restricted-use” program. This means that: EXECUTE WASH PROGRAM FROM MEMORY CARD COPY PROGRAM FROM MEMORY CARD TO CLS • The program cannot be deleted or copied to the COPY PROGRAM FROM CLS TO MEMORY CARD... -
Page 64: Clear Memory Card
Procedure for use Clear memory card What is a restricted-use program? A wash program which has been created on a MEMORY CARD PC can be made a ”restricted-use” program. This means that: EXECUTE WASH PROGRAM FROM MEMORY CARD COPY PROGRAM FROM MEMORY CARD TO CLS • The program cannot be deleted or copied to the COPY PROGRAM FROM CLS TO MEMORY CARD Note that restricted-use... -
Page 65: Maintenance
Maintenance Maintenance Daily • Clean the door seal and remove detergent residue. • Check that the door does not leak. • Clean the detergent compartment and wipe down the machine with a damp cloth. • Check that the drain valve does not leak. • Start the machine and check that the door re m ains locked while the machine is operating. Fast forward the machine to the stop position and check that the door cannot be opened until the program is completed. Machine with scale • Check that panels are mounted. -
Page 66: Calibration Of Level Control System
Calibration of level control system Calibration of level control system The level control system can be individually and manually calibrated. The calibration starts at the level at the bottom of the inner drum. The calibra- tion can be made up to 250 mm from the bottom of the inner drum. A ruler is supplied with the machine where the water level above the inner drum can be read. - Page 67 Calibration of level control system • The ruler has two different scales, one in mm and one in RU units (exactly 2 mm/RU units). The calibration shall be made in at least five level steps, and the first step when the water just enters the inner drum. More calibration steps can be made if requested. - Go down to ”Options menu”...
- Page 68 Calibration of level control system SERVICE PROGRAM MAKE A CHOICE: CLEAR TRIP HOUR COUNTER CLEAR SERVICE COUNTER CLEAR WASH PROGRAM COUNTER IN CLS CLEAR WASH PROGRAM COUNTER IN SMC SCALE ADJUSTMENTS CALIB. OF LEVEL SENSOR EXIT SELECT • ”Service Mode” menu is now shown on the display.
- Page 69 Calibration of level control system • Close the door. • Go down to ”Calibration of level sensor” • Press ”Select” LEVEL CALIBRATION FILL WATER TO DESIRED LEVEL LEVEL: 0 SCU OPEN • Press ”Open” to fill water until the water reaches the botton of the inner drum where the ruler is placed. • Press ”OK” • Enter the value read on the ruler in RU units (The first setting is 0=level in drum. • Press ”OK” • Press ”Open” to fill more water. • Press ”OK” • Enter the value read on the ruler in RU units. (If wrong value is entered, press ”CLR”.
- Page 70 Calibration of level control system LEVEL CALIBRATION OLD CALIBRATION WILL BE OWERWRITTEN ARE YOU SURE? PRESS OK ELSE PRESS ANY OTHER KEY • Press ”OK” • Go down to ”Exit” • Press ”Select”...
-
Page 71: Calibration Of The Scale (Weight Function)
Calibration of the scale (weight function) Calibration of the scale (weight function) Zero adjustment of the scale (weight function) The scale itself is calibrated from factory and no adjustment should be necessary unless some scale parts need to be changed. However a zero adjustment needs to be done as the total weight of the machine needs to be programmed into the scale. -
Page 72: Calibration Of The Reference Machines Wascator Fom71Cls
Calibration of the reference machines Wascator FOM 71 CLS Calibration of the reference machines Wascator FOM 71 CLS Checklist for calibration of Wascator FOM 71 CLS Some of the checkpoints results in exposure to dangerous line voltages or rotating parts and must be carried out only by authorized personnel. This approval inspection shall be performed at least once a year. -
Page 73: Cheks To Be Made
Calibration of the reference machines Wascator FOM 71 CLS Checks to be made 1. Heating element power ***WARNING*** Remove the front panel and measure the cold resistance of the heating elements. The elements shall be at ambient temperature and the machine should not have been run for at least 5 hours. - Page 74 Calibration of the reference machines Wascator FOM 71 CLS 7. Leakage at drain and inlet valve Check for leakage at drain and inlet valves. Run weight check program. Weight 18 kgs. Pause the machine for 15 minutes. After 15 minutes the weight shall not be changed. 8.
- Page 75 Calibration of the reference machines Wascator FOM 71 CLS 12. Temperature control Use temperature control program 994. Put a temperature probe through the upper door gasket into the bath or use the laboratory temperature measure- ment system (must be calibrated separately in advance). Read the temperatu- res at 25°, 40°, 60°...
-
Page 76: Door Opening For Test Sample Wascator Fom71Cls
Door opening for test sample Wascator FOM71 CLS Door opening for test sample Wascator FOM71 CLS Open door during wash cycle It is possible to open the door during a wash cycle in order to take out test samples. But to be able to do so some criteria have to be fullfilled. - Page 77 CALIBRATION PROTOCOL Wascator FOM 71CLS Document number: ..................Page: 1(3) Machine location: ......................Calibration made by: ....................... Date: ........ Previous calibration date: ........Signature: .......................... Machine data: Measurement equipment: Wascator FOM 71CLS ..................Type ........................Ser. No.........................
- Page 78 Document number: page 2 (3) Mandatory Measured After adjust 1. Heating element power R1 ohm 230V: 28.5-29.7, 240V: 30.9-32.2 ohm R2 ohm R3 ohm 2. Visual heating element inspection. Visual 3. Line voltage. L1-L2 L1-L3 L2-L3 4. Levelling of the machine. lf-lr <...
- Page 79 Document number: page 3 (3) Mandatory Measured After adjust 9. Water level. 130±5 mm Linearity 100, 130, 160 and 200 mm. 160±5 mm 200±5 mm 10 kg ± 0.1 10. Weight check 10±0.1 kg 20 kg ± 0.1 20±0.1 kg 11.
- Page 81 Skrotning av maskin När maskinen inte längre skall användas måste den lämnas till en återvinningsstation för destruktion. Många detaljer i maskinen går att återanvända, men den innehåller även annat material som måste tas om hand på ett korrekt sätt. Lämna därför aldrig maskinen eller delar av maskinen i hushållsavfallet, eftersom det kan leda till hälsorisker eller skador på...
- Page 82 Electrolux Professional AB 341 80 Ljungby, Sweden www.electrolux.com/professional Share more of our thinking at www.electrolux.com...
Need help?
Do you have a question about the Wascator FOM71 CLS and is the answer not in the manual?
Questions and answers