Advertisement
Quick Links
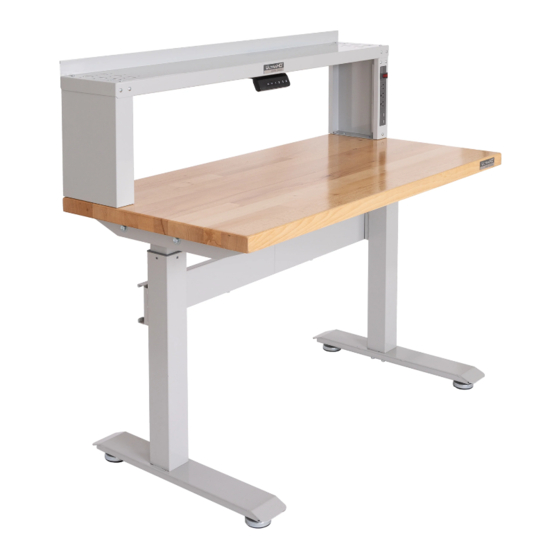
UltraHD® Dual Motor Electric Height Adjustable Workbench (Model No. 20200)
Power ON the workbench:
When the workbench is plugged
in, you will hear a "Beep" sound.
The Controller will then show the
current height of the workbench.
The number indicated on the
display may be different to the
actual height, it will need to be
reset.
How to Reset
Press and HOLD the
to press and HOLD for about 5 seconds until you see a number (ie. 29.6) on the display AFTER it
shows "rst" and makes the "beep-beep" sound.
How to Adjust the Height
Press and HOLD either the
How to Save the Height in Memory
There are 3 available memory heights you can save - 1, 2 & 3. Adjust the workbench to your
desired height and press the "S" button to display "S-". Then press any of one the 1, 2 or 3 number
button. When a memory is saved, you will hear "beep-beep" sound.
By repeating the same steps, you can save or override an old saved memory with a new height.
How to Lock/Unlock the Controller
First adjust the workbench height to your desired lock height. Then press and HOLD the
buttons together for about 5 seconds until "Loc" is displayed.
At this moment, the Controller is locked and the workbench height can't be adjusted.
In order to unlock, press and HOLD the
number (previously locked height) is displayed.
Power Save Mode
If there is no action for 1 minute, the workbench will enter the power-saving mode. The display
on the Controller will be turned off. Press any button on the Controller to wake the workbench
from "Power Save Mode".
Please see reversed side for the complete list of error codes and troubleshooting steps for
Quick Reference Guide
DISPLAY
button until the workbench reaches it reaches the lowest height. Continue
or
to adjust to your desired height of the workbench.
and
this workbench.
MEMORY 1/2/3
UP/DOWN
buttons together for about 5 seconds until a
SAVE MEMORY
and
Advertisement

Related Manuals for Seville Classics UltraHD 20200


Summary of Contents for Seville Classics UltraHD 20200
- Page 1 UltraHD® Dual Motor Electric Height Adjustable Workbench (Model No. 20200) Quick Reference Guide Power ON the workbench: When the workbench is plugged in, you will hear a "Beep" sound. The Controller will then show the current height of the workbench. The number indicated on the display may be different to the actual height, it will need to be...
- Page 2 UltraHD® Dual Motor Electric Height Adjustable Workbench (Model No. 20200) Quick Reference Guide Error Code List Code Meaning Action Re-plug the power supply. If the alert does not clear, please Self-Check Fail - Standby Mode Error contact Customer Service. Re-plug the power supply. If the alert does not clear, please Self-Check Fail - Main Power Error contact Customer Service.
- Page 3 ASSEMBLY INSTRUCTIONS UltraHD 20200 Dual Motor Electric Height Adjustable Workbench 48" W x 24" D x 28" - 42" H (1.21m x 0.61 m x 0.71 - 1.06 m) WARNING: Workbench Maximum Loading Capacity is 264 lbs. / 120 kgs.
- Page 4 #2-A #27-C #2-B #7-A #27-B #59-A #7-B #6-B Get help with assembly and report damaged or missing parts. Email: Support@SevilleClassics.com Telephone: 1 (800) 323-5565 Hours (M-F): 8:30 AM - 4:30 PM (PST)
-
Page 5: Parts List
PARTS LIST Please check the parts carefully according to the parts list. If you are missing any parts, please contact our customer service department. Note: Control Box Comes Attached. (#3) Solid Wood Top x 1 PC (#2) Support Beam x 1 PC (#2-A) Left Support Bracket x 1 PC (#2-B) Right Support Bracket x 1 PC (#7-A) Left Leg x 1 PC... - Page 6 PARTS LIST Please check the parts carefully according to the parts list. If you are missing any parts, please contact our customer service department. Note: Power Strip with 3 AC Outlets & 2 USB Ports Attached. (#5) Tool Rack Shelf - Right Side Panel x 1 PC (#10) Controller x 1 PC (#11) Power Cord x 1 PC (#6-B) Leveling feet x 4 PCS...
- Page 7 PARTS LIST Please check the parts carefully according to the parts list. If you are missing any parts, please contact our customer service department. (#14) Screw (M4x10L) x 16 PCS (#27-C) M6 Flat Washer x 10 PCS (#72) Cable Clip x 2 PCS (#71) Wood Screw (M4x15L) x 2 PCS (#73) Cable Tie x 3 PCS (#25) Wrench x 1 PC...
- Page 8 UltraHD® Dual Motor Electric Height Adjustable Workbench (Model No. 20200) *NOTE: We recommend using TWO people to assemble the workbench. Step 1: Take Solid Wood Top (#3) from the box. Position the Solid Wood Top (#3) within the box so that the holes for the screws become exposed, keep the top of the wood in the box to prevent scratching during the setup process.
- Page 9 UltraHD® Dual Motor Electric Height Adjustable Workbench (Model No. 20200) *NOTE: We recommend using TWO people to assemble the workbench. Step 3: Install Rubber Buffers (#69) on Support Beam (#2). Now that the Support Beam (#2) has been installed. Flip the Support Beam (#2) around so that the base is facing upward and take 10 pieces of the Rubber Buffers (#69), simply tighten them on the corresponding oval-...
- Page 10 UltraHD® Dual Motor Electric Height Adjustable Workbench (Model No. 20200) *NOTE: We recommend using TWO people to assemble the workbench. Step 5: Install the legs (#7-A & #7-B). Place Leg (#7-A) on the left hand side of the Support Beam (#2), adjust the position of the leg, ensuring that the holes on both the beam and leg line up.
- Page 11 UltraHD® Dual Motor Electric Height Adjustable Workbench (Model No. 20200) *NOTE: We recommend using TWO people to assemble the workbench. #6-B Step 7: Install the Leveling Feet (#6-B). Take 4pcs of Leveling Feet (#6-B) and place 2 on each corresponding location on the Feet (#8.) Now use Wrench (#25) to fasten them in place, turning in a clockwise motion.
- Page 12 UltraHD® Dual Motor Electric Height Adjustable Workbench (Model No. 20200) *NOTE: We recommend using TWO people to assemble the workbench. #27-B Step 9: Install Bottom Connection Bar (#1) Place and align the Bottom Connection Bar (#1) on the back side of the legs (please see the left image to find corresponding location), use 4pcs Flat Washer (#27-B) and 4pcs Hex Bolt (#40) to secure the bar in place.
- Page 13 UltraHD® Dual Motor Electric Height Adjustable Workbench (Model No. 20200) *NOTE: We recommend using TWO people to assemble the workbench. Step 10: Install Tool Rack Shelf Top Panel (#9) and Left Side Panel (#4). Remove Tool Rack Shelf Top Panel (#9) and its Left Side Panel (#4) from the box, and tighten them together with 5pcs of M4 x 10L Screws (#14).
- Page 14 UltraHD® Dual Motor Electric Height Adjustable Workbench (Model No. 20200) *NOTE: We recommend using TWO people to assemble the workbench. Step 12: Install the Tool Rack Shelf on the workbench. Place the completed Tool Rack Shelf on the workbench as shown on the left, and align the holes on the Solid Wood Top (#3) to the holes on the base of the Tool Rack Shelf Left and Right Side Panels (#4 &...
- Page 15 UltraHD® Dual Motor Electric Height Adjustable Workbench (Model No. 20200) *NOTE: We recommend using TWO people to assemble the workbench. Step 13: Install Power Cord (#11) and Controller (#10). Please refer to STEP 8 for installing Power Cord (#11) and Insert the Power Cord (#11) on to the control box (pre-installed).
-
Page 16: Save Memory
UltraHD® Dual Motor Electric Height Adjustable Workbench (Model No. 20200) *NOTE: We recommend using TWO people to assemble the workbench. UP/DOWN DISPLAY MEMORY 1/2/3 SAVE MEMORY ARROW Power ON the workbench: When the workbench is plugged in, you will hear a "Beep" sound. The Controller will then show the current height of the workbench. - Page 17 UltraHD® Dual Motor Electric Height Adjustable Workbench (Model No. 20200) *NOTE: We recommend using TWO people to assemble the workbench. UltraHD® Wood Top Care Our solid wood tops are made with real wood, and while great care is taken to ensure consistent top color and graining, there may be natural variations between finished products.
- Page 18 UltraHD® Dual Motor Electric Height Adjustable Workbench (Model No. 20200) *NOTE: We recommend using TWO people to assemble the workbench. Error Code List Code Meaning Action Re-plug the power supply. If the alert does not clear, please Self-Check Fail - Standby Mode Error contact Customer Service.
-
Page 19: Contact Information
If you are missing any parts, have any questions, or need additional assistance in assembly, please contact our bilingual (English and Spanish) customer service department at: Seville Classics, Inc. 19401 Harborgate Way Torrance, CA 90501 USA Telephone: (800) 323-5565 within USA... - Page 20 UltraHD® Line UltraHD® 4-Drawer Rolling Cabinet UltraHD® 6-Foot Height Adjustable Workbench Model No. 20205 (Granite) Model No. 20292 (Granite) Model No. 20293 (Graphite) UltraHD® Wall Cabinet with Open Shelf UltraHD® 2-Door Rolling Workbench Model No. 20230 (Granite) Model No. 20262 (Granite) Model No.
Need help?
Do you have a question about the UltraHD 20200 and is the answer not in the manual?
Questions and answers