
Related Manuals for Waltron 9032X


Summary of Contents for Waltron 9032X
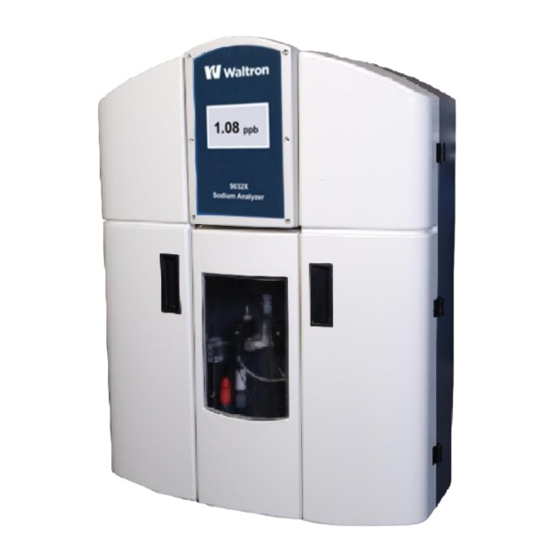
- Page 1 EXPERTS IN WATER CHEMISTRY SINCE 1903 9032X Sodium Analyzer User Manual Revision 101-043-B.1...
- Page 2 Calibration slope values and detailed description of problem. Waltron’s technical expertise and extensive experience provides personalized solutions to the water quality industry. It is Waltron’s commitment to provide the customer with timely and accurate technical service and support. Waltron fully expects the customer to be satisfied with the quality, performance, and cost of this product.
- Page 3 Keep analyzer chemicals away from heat and extreme temperatures. Reagent powders must be kept dry. Follow all regulations and warning labels when disposing of chemicals. Do not mix chemicals. To obtain analyzer safety information or Safety Data Sheets (SDS), please contact Waltron or logon to www.waltron.net .
- Page 4 If, within one year from the date of shipment, the customer experiences any equipment defects or is not satisfied with the analyzer manufacturing, Waltron will repair, or at its option, replace any defective part(s) free of charge. This warranty requires that the defective part(s) be returned to Waltron with shipping charges prepaid.
- Page 5 9032X Checklist of Materials In order to ensure customer satisfaction, Waltron does its best to provide adequate and timely packaging and shipping services. Please perform the following after receiving a shipment: Inspect all shipping containers upon receipt and record any visible damage. If there are any outward signs of damage, please retain all containers and packages for inspection by carrier.
-
Page 6: Table Of Contents
9032X Table of Contents INTRODUCTION ......................8 GENERAL ......................8 MAIN FEATURES ....................8 SYSTEM DESCRIPTION & ARCHITECTURE............9 1.3.1 WET SECTION UNIT ..................10 1.3.2 PRE-AMPLIFIER ..................... 11 1.3.3 TRANSMITTER UNIT ..................11 INSTALLATION ......................11 MOUNTING OF ANALYZER ................11 2.1.1... - Page 7 9032X 5.5.2 MONTHLY ..................... 44 SHUT-DOWN PROCEDURE - (Prolonged Shut-Down, 1+ months) ....45 5.6.1 STORAGE OF ELECTRODES ................46 pH EFFECTS......................46 SPARE PARTS ......................46 TROUBLE-SHOOTING ....................48 SPECIFICATIONS ......................50 APPENDIX ......................... 52 10 APPENDIX Panel Mount ................... 53...
-
Page 8: Introduction
Sampling points for power generation include mixed bed outlets, extraction pump discharge, boiler feed, boiler drum and steam. The measurement range of the 9032X analyzer spans from 0.01ppb to 10ppm. 1.2 MAIN FEATURES Features of the 9032X Sodium Analyzer unit include: 1. -
Page 9: System Description & Architecture
9032X 1.3 SYSTEM DESCRIPTION & ARCHITECTURE The 9032X Sodium analyzer system is comprised of the following: 1. Wet-Section (Sensor Unit) a. Reagent solution containers b. Hydraulic panel consisting of constant head, flowcell, tubing, thermistor and 3 solenoid valves c. Sodium and reference electrodes d. -
Page 10: Wet Section Unit
9032X 1.3.1 WET SECTION UNIT The 9032X Sodium system is capable of monitoring sodium concentrations in sample feed. Three solenoid valves are used to select between analyzing the sample, calibration solution 1 (CAL1), calibration solution 2 (CAL2) and grab sample. -
Page 11: Pre-Amplifier
9032X 1.3.2 PRE-AMPLIFIER The 9032X Sodium analyzer requires a pre-amplifier unit which amplifies and converts the voltage output from the electrodes into proportionate current. Thermistor output is also fed to transmitter unit via pre-amp section. The pre-amplifier houses the wiring connection terminals from electrodes. -
Page 12: Location And Layout
2.1.1 LOCATION AND LAYOUT Mount the analyzer in a clean, vibration-free area avoiding direct radiant heat, sunlight and drafts. Avoid areas containing chlorinating equipment. The 9032X Sodium analyzer default design has the two main sections (transmitter and wet section) combined as a single unit. -
Page 13: External Piping Connections
9032X 2.3 EXTERNAL PIPING CONNECTIONS Sample Inlet ¼” ID Buffered Sample Swagelok Drain Outlet ” ID Sample Overflow Drain Outlet ” ID Figure 5. The bottom of the wet section case, with the sample inlet and drain connections shown. 2.4 ELECTRODE INSTALLATION 2.4.1 PROBE CONNECTIONS... -
Page 14: Gel Filled Reference Electrode (Alternate)
9032X 2.4.2 GEL FILLED REFERENCE ELECTRODE (ALTERNATE) Wires coming Quick connect from Pre-Amp electrode connection Sodium Reference (Measuring) Electrode Electrode Probe positioning clamp (finger tighten) Flowcell Adjust tip 5-10mm into sample The Gel filled reference electrode has an inner element consisting of a gel solution... -
Page 15: Automatic Kcl Refill System (Optional)
9032X 2.4.3 AUTOMATIC KCL REFILL SYSTEM (OPTIONAL) End of internal air tubing Bottle Clamp KCL Solution Reservoir Bottle Refillable Reference Internal air tubing Electrode with (inner) Side-arm Connection for KCL Transfer Tubing Tubing (outer) Figure 7. Layout of the Automatic KCl Refill System. -
Page 16: Probe Installation Procedures
9032X 2.4.4 PROBE INSTALLATION PROCEDURES 1. Remove the protectors from the tip of each electrode 2. Connect electrodes to wires from Pre Amplifier. Be sure to match the correct wires to the correct probe. Wires are marked “M” for measuring and “R” for Reference. -
Page 17: Electrical Connections
9032X 2.5 ELECTRICAL CONNECTIONS 2.5.1 WET SECTION UNIT Figure 9. The wet section layout and connections. -
Page 18: Pre-Amp Unit
9032X 2.5.2 PRE-AMP UNIT Figure 10. Pre-amplifier located behind the grab sample bottle The pre-amplifier unit has 3 connection terminals (J1, J2, J3) shown below: Figure 11. Pre-amplifier layout. Pin 1 of all the connectors is shown in black. -
Page 19: Transmitter Unit
9032X The following cables/connections are used in pre-amp system: 1. Multicore cable (8-Core) for interfacing the transmitter unit with pre-amp at J3. Pin 1 (Black Wire) Pin 2 (White/Black Wire). Pin 3(Red Wire) Pin 4(White Wire) Pin 5(Red/Black Wire) Pin 6(Green Wire) - Page 20 9032X Touchscreen 4-20 mA RS485 Output Alarm Flow Switch Relays (Optional) Power Solenoid Supply Valves 1,2,3 Power Pre-Amplifier Figure 12. The layout and connections for the transmitter case. Before connecting the analyzer to the main power supply check that there is correct voltage at the mains.
- Page 21 9032X Connecting the Pre-amplifier Output to Transmitter: The 8-Core PVC shielded cable coming as an output from the pre-amplifier is connected to the main board J4 as follows: Pin 1 (Black Wire) Pin 2 (White/Black Wire). Pin 3 (Red Wire)
- Page 22 9032X Connecting the Solenoids to Transmitter: Contacts for the solenoid valves are located on the CPU card J5 as shown in Figure 12 and printed on the board as “ELECTROVALVE”. Wiring is as follows: Pin 1: + EV1 – Solenoid Valve 1 (Calibration Standard 1 [100ppb]) – Red Pin 2: - EV1 –...
-
Page 23: Analyzer Operation
Drain Figure 15. Sample flow during normal operation. The 9032X Sodium analyzer system is comprised of a stainless steel backplate. The internal hydraulic components and pipe work are mounted directly onto the metal backplate. Sample enters through the inlet compression fitting at the bottom of the case and first passes through the sample flow switch before going to the heat exchanger. - Page 24 9032X vapor buffer is added to the sample in order to raise the pH value. After the sample and vapor reagent are mixed, the solution is sent to the flowcell where it comes into contact with the sodium and reference electrodes.
-
Page 25: Alarms
3.2 ALARMS Sample Concentration Alarms When the 9032X Sodium system is in normal operation mode one alarm operates as a “low” alarm and the other operates as a ‘high’ alarm. Alarm 1 (A1) operates as a LOW alarm and is activated when the sodium level decreases below the set value. Alarm 2 (A2) operates as a HIGH alarm and is activated when the sodium level increases above the set value. -
Page 26: Software Structure Map
9032X 3.4.1 SOFTWARE STRUCTURE MAP 3.4.2 MAIN MENU – USER MODE The default display when the analyzer is online is the Main Menu in User Mode. In User Mode the user is able to access only the COMMANDS window and the DISPLAY window... -
Page 27: Commands Window
9032X 3.4.3 COMMANDS WINDOW Use the touch screen to open the Commands Window to run grab samples or calibrations. 3.4.3.1 GRAB SAMPLE The GRAB SAMPLE cycle is helpful in that it can be used as a bench test or QA/QC check. - Page 28 9032X When GRAB SAMPLE is initiated, solenoid 3 is activated and the grab sample solution is brought into the system. All the other solenoids are de-activated and the recorder outputs will continue to hold their last measured value obtained during normal measurement.
- Page 29 CF. The frequency of calibrations depends on the operating conditions and electrode conditions. Waltron recommends performing a 2-Point calibration at least once a week to eliminate drift due to changing electrode response. Description of 2-Pt Calibration Process: 1.
- Page 30 9032X 3. Solenoid valve #1 is then opened again and CAL1 solution flows through system for 10 minutes; final millivolt output for CAL1 (m1) reading is taken and stored into memory. 4. Solenoid valve #2 (CAL2) is opened for 10 minutes to rinse out system and update with 1ppm solution.
- Page 31 9032X Enter in the expected concentration of the sample and press “ENT.” You will then see the entered value in the “Process cal. value” window. If you wish to make changes to the entered value, press the number “XX.X ppb” to edit the value and hit “ENT”...
-
Page 32: Display Window
9032X To abort the operation: From the Commands window, press the “ABORT OPERATION” button. 3.4.4 DISPLAY WINDOW The display window will give you access to useful tools for troubleshooting. The display window will show you the current analyzer reading graphically in mV as well as other useful information. - Page 33 9032X Electrode: Displays user inputted value for electrode identification (useful for recording date of electrode replacement, etc) 3.4.4.1 Checks Window The “CHECKS” function allows you to perform maintenance diagnostics on the three way solenoid valves, the three alarm relays, and the 4-20mA output.
- Page 34 9032X From the Main Menu, press the “DISPLAY” button. Then press the “DATALOG” button. 3.4.4.2.1 Results Datalog Results of your concentration readings by time and date are recorded in the Results Datalog. Data is stored for up to 30 days at a sampling rate of 1 sample every 10 minutes.
- Page 35 9032X 3.4.4.2.2 Grab Sample Datalog Results of your grab samples are saved within the Grab samples Datalog. The Datalog will show the results of the last 10 grab samples rounded off to the nearest whole ppb. 3.4.4.2.3 Alarms Datalog The last 10 alarms are saved under the Alarms Datalog with red text. The user may press on the red text to turn it green to indicate the alarm has been addressed.
-
Page 36: Main Menu - Service Mode
9032X 3.4.4.2.4 Calibrations Datalog Results of the last 10 calibrations are stored in the Calibration Datalog. Each result is recorded with the Time and Date the calibration occurred, Strength (or slope), Outcome (pass or fail), and mV1 and mV2 (the readings in mV of the low and high calibration standards). - Page 37 9032X After service has been selected, then press on the “****” to open the keypad. Enter “6699” on the keypad and press “ENT.” After the correct password is entered the “CONFIGURATION” and “SERVICE” buttons will become available. 3.4.5.1 Configuration Window – Service Mode The Configuratin Window will give you access to calibration setup and general settings.
- Page 38 Week frequency = 4 will set calibration for every 4 weeks. If you wish to turn automatic calibration off, set Wee frequency = 0. Waltron recommends week frequency = 1 for optimal performance of your analyzer.
-
Page 39: Service Menu
9032X Low conc.alarm: set the alarm limit for low concentration of sodium sample High conc.alarm: set the alarm limit for high concentration of sodium sample Measure range: set the measurement range Temp.range: enter the upper limit of your temperature range Time &... -
Page 40: Auto Calibration
Average factor: increasing the average factor will increase noise dampening and decrease response time of the analyzer. Waltron recommends Average factor = 30 Sensor data: this is a free text field up to 12 characters. The user may input the date of exchange of a new sensor, the name of a sensor, etc. -
Page 41: Troubleshooting - Calibration Fail
9032X (“slope”) from a 2-Pt calibration is below 83 or greater than 110. This could be caused by a number of factors (See next section - Troubleshooting). NOTE: During single and two point calibrations sample needs to be delivered to analyzer at flow rate of 150-400ml/min. -
Page 42: Standard Solutions
Ventilate the area well to evaporate any remaining liquid and dispel vapor. Effluent from the analyzer contains diisoproplyamine (if this buffer is used). Contact with it should also be avoided. 5.2 STANDARD SOLUTIONS Waltron offers Sodium Standard, 100 ppb, in a 1 gallon container. Part Number N1234-540. -
Page 43: Etching Solution
5.4 REFERENCE ELECTRODE FILL SOLUTION (For Use with N3010-174) Waltron offers a stock solution of 3.5 KCL Ref. Electrode Filling Solution in a 2oz. size. Part Number N1234-548. This solution is required for refilling the calomel reference electrode. This solution should be stored in a tightly sealed plastic bottle. -
Page 44: Scheduled Servicing
9032X 5.5 SCHEDULED SERVICING The following procedures are guides to the maintenance requirements of the monitor. The procedure chosen depends on the particular installation and sample conditions. 5.5.1 WEEKLY If the monitor is continuously running at high concentrations, greater than 100ppb, a weekly Single Point Calibration is recommended. -
Page 45: Shut-Down Procedure - (Prolonged Shut-Down, 1+ Months)
9032X o Prepare two plastic beakers, one containing about 50ml of etching solution, the other about 200ml high purity water. o Dip the electrode in the etching solution for 60 (5) seconds; then rinse in high purity water. Caution. It is important not to exceed the etching time or the performance of the electrode may be permanently degraded. -
Page 46: Storage Of Electrodes
9032X o Switch off the main power supply to the Transmitter Unit. 5.6.1 STORAGE OF ELECTRODES Fill the storage bottle, supplied with the sodium electrode, with 5M sodium solution. Push the bottle over the end of the electrode and tighten the cap. For the refillable reference electrodes, fill the storage bottle with the refillable solution and push the bottle over the end of the electrode and tighten. - Page 47 AC Power Terminal Box, 9001 P1000-066 Grab Sample Bottle P1000-076 Connector for Grab Sample Bottle P1000-121 Cable Gland Fitting, Flowcell 9032 P2000-041 Reagent Buffer Bottle, 9032 P1000-001 Solenoid valve bracket P2000-046 Heat Exchanger Assy, 9032 P2000-002 Vessel Assy, Constant Head, 9032X...
-
Page 48: Trouble-Shooting
9032X 7 TROUBLE-SHOOTING Troubleshooting 9032X Problem Possible Cause(s) Solution(s) Calibration Fail Empty or Contaminated Check to make sure Standards Solutions calibration standard bottles Container(s) are full, check calibration tubing to make sure it is not pinched. Replace calibration standard with fresh solution and try again. - Page 49 9032X performance. Calibration Fail Strength is close to zero. Make sure both containers of standard are full of solution. Calibration Fail Strength is close to zero. Ensure there is flow of standard solution through flow cell. Calibration Fail Strength is close to zero.
-
Page 50: Specifications
9032X Current outputs (4-20mA) Disconnected wiring at Check output set-up to not functioning correctly. transmitter or along wire make sure values are path. DCS/recording entered properly. Run system not set up properly. Diagnostics – O/Pma Check Bad CPU board. cycle and check output coming directly from transmitter. - Page 51 9032X Pressure: 5-30psig Composition: Sample should be filtered to 60 microns, free of film forming compounds Power Less than 20VA Consumption: Sample Inlet ¼” Swagelok Fitting: Sample Outlet Barbed fitting for 3/8” ID hose connection Fitting:...
-
Page 52: Appendix
-180.83 2 ppm -163.02 5 ppm -139.47 10ppm -121.67 Approximate electrode mV outputs for calibrations using Waltron Electrodes: Refillable Reference Electrode Gel-Filled Reference Electrode mV 1 (100 ppb) mV 2 (1 ppm) mV 1 (100 ppb) mV 2 (1 ppm) -
Page 53: Appendix Panel Mount
9032X 10 APPENDIX Panel Mount This Appendix shows the schematics of the Panel Mount Bracket option for the transmitter case.
Need help?
Do you have a question about the 9032X and is the answer not in the manual?
Questions and answers