Table of Contents
Advertisement
Quick Links
Advertisement
Table of Contents

Related Manuals for Serpent SRX8 GT


Summary of Contents for Serpent SRX8 GT
-
Page 2: Table Of Contents
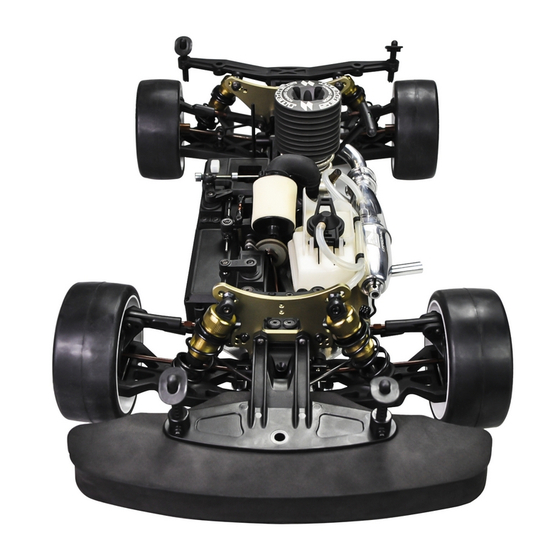
Read this first! The Serpent SRX8 GT ‘23 is a state of the art 1/8 scale 4wd GT which will give you the true Serpent racing - This is a highly technical hobby product, intended to be used in a safe racing environment. This car experience. - Page 3 how to use the manual lines DESCRIpTION ICONS DESCRIpTION Each step contains a variety of numbers, lines, and symbols. The numbers represent the order in Each step contains a variety of symbols described below. which the parts should be assembled. The lines are described below. Step number;...
-
Page 4: Rr Diff Assembly
fR/RR diff assembly STEp 1 STEp 2 DIff bag fr/rr Add just enough oil to cover the M3x4 Note the correct large gear before assembling the pin location. small satellite gears and cross pins. Use the silicone oil supplied in the 2.5x13 kit. - Page 5 STEp 3 STEp 4 Fill the differential with silicone oil 1 mm above the crosspin, do NOT overfill. Use the M3x12 silicone oil supplied in the kit. For the correct cst value please check the default setupsheet. OIL LEVEL AMOUNT OF OIL IN THE DIFFS Use a digital scale to measure the exact amount of oil in the diff.
-
Page 6: Gearbox Assembly
gearbox assembly STEp 5 STEp 6 BaG 1 M2.5x10 M4x4 M2.5x6 M4x4 M2.5x10 M3x6 1- The M2.5x10 screws Note the correct default Note the correct gearbox adjust the SHIFT POINT. As M2.5x10 screws adjusting assembly default adjustment screw point. them untill the screws will be be leveled with the hole as in the right pictures. - Page 7 STEp 7 STEp 8 BaG 2 8x11x0.2 8x14x4 Flanged 8x14x4 Flanged 8x11x0.2 8x11x0.1 8x16x5 8x16x4 M3x18 M3x8 Flanged M3x8 2.5x8 2.5x8 2.5x8 M3x8 M3x18 Flanged 8x11x0.1 8x11x0.2 8x14x4 Flanged 8x16x5 8x16x4...
-
Page 8: Central Assembly
central assembly STEp 9 M3x6 M4x8 M3x6 M3x8... - Page 9 STEp 10 STEp 11 11.1 11.2 M3x12 M3x6 10 mm M3x6 4x8x3 3x6x0.5 M3x3 Note the throttle linkage assembly M3x3 M3x3 M3x12 M3x6 M3x6 3x6x0.5 4x8x3...
-
Page 10: Rear Assembly
REaR aSSEmBly STEp 12 STEp 13 BaG 3 M3x10 M3x10 REAR ANTISQUAT INSERTS CHART M4x10 M4x12 M3x10 M4x12 M4x10... - Page 11 STEp 14 14.1 INDRIVE BRACKETS CHART M5x4 Assemble the indrive bracket accordingly to the diff insert 5x13x4 assert mouted in the step 18. LOW MID LOW MID HIGH HIGH 8x16x5 8x11x0.2 14.2 After building the differential with new gears, new differential case and bearings, the diff may feel a little tight.The connected parts need at least an hour run-time to create a perfect match.
- Page 12 STEp 15 STEp 16 BaG 4 15.1 Tighten anti-roll bar cap until there is no play, and it moves freely. ANTIROLL BAR ROD LENGTH 34 mm M4x10 15.2 M2.5x6 REAR TOE IN INSERTS CHART M2.5x6 M2.5x6 M4x10...
- Page 13 STEp 17 STEp 18 BaG 5 17.1 M2.5x4 5X8X2.5 Flanged 17.2 M3X3 13x16x0.1 M3X3 M3X3 M4X20 DIFF INSERTS CHART HIGH HIGH M3x3 M2.5x4 M4x20 5X8X2.5 Flanged 13x16x0.1...
- Page 14 STEp 19 19.1 19.2 M3x8 M3x8 M3x18 M3x22 M3x8 M3x22 M3x18...
- Page 15 STEp 20 BaG 6 20.1 20.2 M3x8 Note the correct 3x13 coupler assemby. 20.3 8x16x5 3x17 M3x8 13x19x4 8x11x0.1 M5x4 REAR UPRIGHT ROLL CENTER INSERTS CHART 1.25mm NARROW WIDE REAR DEFAULT WHEELBASE SHIMS Nylock Nut M3 2.5mm 3x17 3x13 M5x4 M3x8 Nylock Nut M3 8x11x0.1 8x16x5 13x19x4...
- Page 16 STEp 21 21.1 REAR CAMBERLINK LENGTH 16.3 mm 21.2 M3x22 REAR CAMBERLINK DEFAULT POSITION Nylock Nut M3 3.2x7x0.5 M3x14 M3x14 Nylock Nut M3 M3x22 3.5x7x0.5...
-
Page 17: Front Assembly
front aSsEmBly STEp 23 STEp 22 BaG 7 M3x10 M3x10 M4X10 FRONT REAR INSERTS M4x12 M3x10 M4x10 M4x12... - Page 18 STEp 24 24.1 24.2 INDRIVE BRACKETS CHART Assemble the indrive bracket accordingly to the diff insert assert mouted in the step 18. LOW MID LOW MID HIGH HIGH 5x13x4 M5x4 8x16x5 8x11x0.2 After building the differential with new gears, new differential case and bearings, the diff may feel a little tight.The connected parts need at least an hour run-time to create a perfect match.
- Page 19 STEp 26 STEp 25 BaG 8 25.1 25.2 Tighten anti-roll bar cap until there is no play, and it moves freely. M2.5X6 M4x10 ANTIROLL BAR FRONT SUSPENSION ROD LENGTH KICKUP INSERTS 34 mm M2.5X6 M2.5x6 M4x10...
- Page 20 STEp 27 STEp 28 27.1 5X8X2.5 Flanged 27.2 M3x3 M3x3 M3x12 13x16x0.1 DIFF INSERTS CHART M3x16 HIGH HIGH M3x3 M4x20 M3x3 M3x12 M3x16 5X8X2.5 Flanged M4x20 13x16x0.1...
- Page 21 STEp 29 BaG 9 29.1 STEERING ARMS M3x10 Steering arm 3x13 2 is included 13x19x4 in the kit. 3x17 8x16x5 Note the correct M5x4 coupler assemby. 8x11x0.1 29.2 29.3 CASTER INSERTS Caster angle is easily adjustable changingf the caster insters showed below from 0 to M3x14 10 degrees of caster.
- Page 22 STEp 30 30.1 FRONT CAMBERLINK LENGTH 13.7 mm 30.2 M3x18 Flanged FRONT CAMBERLINK DEFAULT POSITION 3.2x7x0.5 Nylock Nut M3 M3x14 M3x14 Nylock Nut M3 M3x18 Flanged 3.5x7x0.5...
-
Page 23: Steering Assembly
STEERING aSSEmBly STEp 31 STEp 32 BaG 10 31.1 31.2 32.1 M3x12 M3x12 17 mm STEERING TRACKROD LENGTH 3x6x0.5 3x6x0.5 32.2 M3x20 M3x20 Nylock Nut M3 The servo saver spring should preloaded 4.5mm. Also notice the correct orientation of the collar. Nylock Nut M3 4.5 mm M2x10 M2x10... - Page 24 STEp 34 STEp 33 BaG 11 M3x12 M4x8 M3x20 Note correct orientation of Note correct position the outer steering balljoints. of the conical shim. M4x8 6x10x3 M3x20 Nylock Nut M3 3x7.5x1 Nylock Conical Nut M3 3x7.5x1 6x10x3 3x7.5x1 Conical 3x7.5x1 Nylock Nut M3 Flanged Nylock Nut...
- Page 25 STEp 35 STEp 36 M3x3 M3x12 M3x3 Nylock Nut M3 M3x12 M3x8 M3x3 M3x12 Nylock Nut M3 M3x8 M3x12...
-
Page 26: Clutch Assembly
clutch assembly STEp 37 STEp 38 BaG 12 38.1 Before to assemble clutch shoes, carefully remove the red area and smoothen the cut surface in order to have four clutch shoes with the same shape. 38.2 1- To align the clutchgears with the 2-speed gears, it may be needed to use shim(s) 6x8x0.5mm (for 6mm shaft) or 7x8x0.5 (for 7mm shaft) behind the cone. - Page 27 STEp 39 STEp 40 40.1 Note the orientaion of the gears 40.2 Place 5x8x0.1 and/or 5x8x0.3 shims to achieve a small amount of end play. For adjusting the default clutch spring tension: 1- Screw in the adjusting nut all the way. 2- Unscrew it one and a half turns.
- Page 28 STEp 41 M3x14 M3x14 M5x12 Flanged M4x6 M3x14 M4x6 M5X15 Flanged...
-
Page 29: Radio Assembly
raDIO aSSEmBly STEp 42 STEp 43 BaG 13 M3x8 M3x16 M3x8 M3x8 M2.2x6 Flanged M3x8 M3x8 M2x6 M2x6 M3x16 Flanged Use enough servo spacers so both servos are flush with the bottom of the radiotray posts. This will prevent the servo to touch the chassis under torsion –... - Page 30 STEp 44 STEp 45 45.1 M3x12 Use tape to mount the battery to the plastic support. 45.2 M3x10 M3 Plastic Nut Flaged M3 Plastic Nut M3x12 M3x10 Flanged...
- Page 31 STEp 46 46.1 46.2 M2x10 M2x10...
- Page 32 STEp 47 STEp 48 6.5 - 7 mm STEERING LINK LENGTH Between differnet servo brands there could be slight differences. Nylock Nut M3 Check how many teeth your servo spline has (23, 24 or 25) and use the right lever. 3x7.5x1 Conical M4x10 M4x10 M4x10...
- Page 33 STEp 49 STEp 50 49.1 M3x6 Check how many teeth 3x6x0.5 your servo spline has (23, 24 or 25) and use 4x8x3 M3x6 3x7.5x1 the right lever. Conical 4x8x3 49.2 M3x3 Nylock Nut M3 M3x3 3x6x0.5 M3x6 Nylock Nut M3 4x8x3 3x7.5x1 Conical...
-
Page 34: Shocks Assembly
shocks aSSEmBly STEp 51 STEp 52 STEp 53 SHOCK BaG 51.1 2.5x6x0.5 1- Fill up with sillicone oil fully using the silicone oil supplied in the kit. For the correct cst value Insert the o-ring please check the default setupsheet. inside the spring collar. - Page 35 STEp 54 STEp 55 STEp 56 M2.3x4 54.1 1-Bleed: push the shock-rod all the way in slowly, to allow excessive oil to escape. 2- With shockrod fully in, close fullu the shock cap. Push the membrane into the shock cap. Assemble the spring and spring- cup (align correctly) to complete 54.2...
- Page 36 STEp 57 STEp 58 M3x25 M4x16 M4x18 FRONT SHOCKS M3x12 Nylock Nut DEFAULT POSITION M3 Flanged M4x16 Nylock Nut M3 M3x25 M3x12 M4x18 Flanged...
- Page 37 STEp 59 STEp 60 M3x25 M4x16 M4x18 M3x12 Nylock Nut REAR SHOCKS M3 Flanged DEFAULT POSITION M4x16 Nylock Nut M3 M3x25 M3x12 M4x18 Flanged...
-
Page 38: Final Assembly
final aSSEmBly STEp 61 STEp 62 BaG 14 61.1 61.3 M3x12 M3x12 Flanged Flanged M5x4 62.2 M3x6 M3x10 M3x10 M5x4 M3x6 M3x12 Flanged M3x10... - Page 39 STEp 63 STEp 64 BaG 15 Nylock Nut M3 Nylock Nut M3 Flanged Nylock Nut M3 M3x12 M3x10 M3x12 Nylock Nut M3 Nylock Nut M3 M3x10 M3x12 Nylock Nut M3 Flanged...
- Page 40 STEp 65 STEp 66 2x14 2x14 M2x10 Nylock Nut M3 M3x10 M2x10 M3x10 M2x10 M2x10 2x14 M3x10 Nylock Nut M3 M3x10...
- Page 41 STEp 67 2x14 2x14 M2x10 M2x10 2x14 M2x10...
- Page 42 STEp 68...
-
Page 43: Exploded Views
EXplODED VIEWS index Differentials exploded view GEaRBOX exploded view mID exploded view REaR exploded view fRONT exploded view STEERING exploded view RaDIO exploded view ClUTCH exploded view SHOCKS exploded view engine and exhaust final 1 exploded view fINal 2 EXplODED VIEW... - Page 44 601281 opt 601067 600214 600421 110502 110211 110502 601062 601062 601060 601280 opt 600214 601250 HTD diff set 44T SRX8 GT V2 601281 Diff outdrive (2) V2 601251 HTD diff gear 44T SRX8 GT V2 601280 HTD diff X-shaft alu SRX8...
- Page 45 GEaRBOX exploded view 110228 601249 110104 903728 110502 110118 110227 110432 903727 110431 110200 110508 110199 903727 601249 903729 601248 110118 110104 110228 903728 903732 opt 903733 opt 903734 110122 903731 1394 903636X opt 903637X opt 903638X 1394 110432 903636X 2-speed gear 61T SL8 XLI V2 903771 2-speed gear set (6) XLI Gen2 903732...
- Page 46 110122 600829 110167 600226 600748 601241 601267 opt 110101 601042 Brake lever fr / rr alu SRX8 GT 601268 Chassis inserts carbon SRX8 GT 601266 Chassis set 4mm SRX8 GT 601293 Brakedisk pro (2) SRX8 601267 Chassis 4mm SRX8 GT...
- Page 47 601152 Upright magnesium SRX8 GT (2) 600237 Antiroll bar rear 2.3mm 600852 Wheelhexagon +1mm light (2) SRX8 601250 HTD diff set 44T SRX8 GT V2 600238 Antiroll bar rear 2.5mm 600890 Wishbone insert carbon RR Upper SRX8 (2) 601252 HTD diff pinion 12T SRX8 GT V2 600239 Antiroll bar rear 2.7mm...
- Page 48 600240 Antiroll bar front 2.3mm 600852 Wheelhexagon +1mm light (2) SRX8 601049 Shock Tower FR Straight arm SRX8 601250 HTD diff set 44T SRX8 GT V2 600242 Antiroll bar front 2.7mm 600881 Antiroll bar front 3.0 mm 600821 Wheelhexagon +1mm (2) SRX8...
- Page 49 1321 110402 110402 110116 600330 601012 601023 600812 600896 opt 600753 110441 110188 110104 110127 110441 110127 110101 601044 Transmission brace rr alu SRX8 GT (2) 601043 Transmission brace fr alu SRX8 GT 601157 Steering post alu SRX8 GT (2)
- Page 50 110104 110104 110127 601260 601262 601259 601263 601259 601261 110102 601259 110102 110102 600126 110109 903559 601045 Servo lever throttle 23T alu SRX8 GT 601046 Servo lever throttle 24T alu SRX8 GT 601047 Servo lever throttle 25T alu SRX8 GT...
- Page 51 clutch exploded view #601163 ADJUSTABLE GT CLUTCH SET 110424 110500 601175 601166 opt 903643 opt 903644 903640 opt 903645 opt 903641 903642 opt 110500 601164 110423 909516 110178 6582 601168 601169 opt 601165 903647 903796 opt 6583 903640 Centax gear-pinion alu 18T XLI 903645 Centax gear-pinion alu 25T XLI 903796...
- Page 52 600599 opt 600600 opt 110456 600184 601255 601253 Shock set (2) SRX8 GT V2 600597 Spring Fr/Rr Red 811GT 18lbs (2) 600357 Membrane webbed silicone (4) 600817 Shock piston 5 holes (4) SRX8 601071 Shock piston angled 1.3mm 8holes 600598 Spring Fr/Rr Purple 811GT 21lbs...
- Page 53 110178 601031 601160 opt 600773 110148 601030 601159 opt 600740 110122 110106 110174 601159 Enginemount bottom magnesium SRX8 GT (2) 601160 Enginemount top magnesium SRX8 GT (2)
- Page 54 final 1 exploded view 110145 601253 600411 110112 600184 110441 601014 110143 600282 opt 600115 600835 600768 600335 110197 601253 110112 600335 600769 600184 110194 600184 110197 600768 600835 110143 600282 opt 601014 110194 110441 600769 110112 601017 110197 600184 110143 110183 601017...
- Page 55 600297 opt 600614 600222 110183 110402 601029 600297 opt 600222 110183 110127 600263 600297 Wheel-nut 17mm flanged/light (4) 601269 Aero bumper set SRX8 GT 601050 Bumperplate carbon set SRX8 GT 601276 Side bodymount set SRX8 GT 601051 Bodypost brace carbon fr/rr SRX8 GT...
-
Page 56: Team Serpent Network
TEam SERpENT NETWORK SRX8 GT ‘23 SPARE PARTS SRX8 GT ‘23 OPTIONALS PARTS SERPENT TOOLS SERPENT MERCHANDISING... - Page 57 SERPENT WEBSITE AND BLOG www.serpent.com www.teamserpent.com www.dragon-rc.com SERPENT PROMO PAGES http://promo.serpent.com SERPENT SOCIAL MEDIA www.facebook.com/SerpentMRC...
- Page 58 Manual SRX8 GT ‘23 #83626-1...
Need help?
Do you have a question about the SRX8 GT and is the answer not in the manual?
Questions and answers