Table of Contents
Advertisement
Advertisement
Table of Contents

Related Manuals for HP ENVY 27


Summary of Contents for HP ENVY 27
- Page 1 HP ENVY 27 27-inch IPS Monitor User Guide...
- Page 2 Microsoft and Windows are U.S. registered trademarks of Microsoft Corporation, ENERGY STAR® and the ENERGY STAR® mark are registered U.S. marks. The only warranties for HP products and services are set forth in the express warranty statements accompanying such products and services. Nothing herein should be construed as constituting an additional warranty.
- Page 3 About This Guide This guide provides information on setting up the monitor, installing drivers, using the on-screen display menu, troubleshooting and technical specifications. WARNING: Text set off in this manner indicates that failure to follow directions could result in bodily harm or loss of life. CAUTION: Text set off in this manner indicates that failure to follow directions could result in damage to equipment or loss of information.
- Page 4 About This Guide ENWW...
-
Page 5: Table Of Contents
Table of contents Product Features ..........................1 HP ENVY 27 27-inch IPS Monitor ..................... 1 Accessories ..........................2 Optional Accessories ....................2 Safety and Maintenance Guidelines ....................3 Important Safety Information ..................... 3 Safety Precautions ........................4 Maintenance Guidelines ......................4 Cleaning the Monitor .................... - Page 6 Identifying Monitor Conditions ....................20 Power-Saver Feature ......................21 Troubleshooting ..........................22 Resolving Common Issues ...................... 22 Getting Support from the HP website ..................23 Preparing to Call Technical Support ..................23 Locating the Rating Label ......................24 Technical Specifications ........................25 ENVY 27 27-inch IPS Monitor ....................
-
Page 7: Product Features
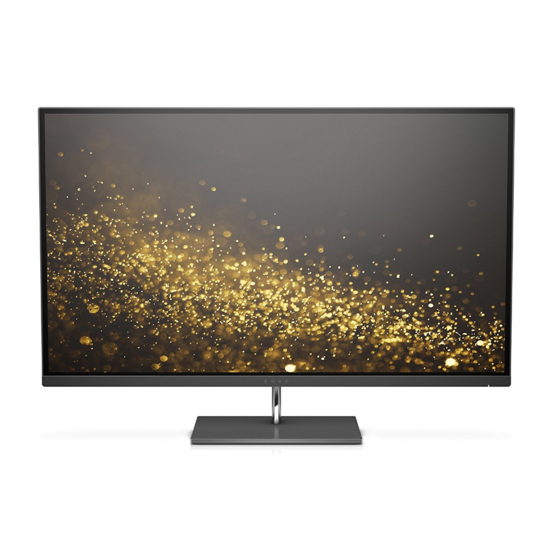
HP ENVY 27 27-inch IPS Monitor Figure 1-1 HP ENVY 27 27-inch IPS Monitor The HP ENVY 27 27-inch IPS Monitor has an active matrix, thin-film transistor (TFT) screen with an LED backlight and the following features: • Large 27-inch/68.6 cm diagonal display with 1920 x 1080 at 60Hz, plus full-screen support for lower resolutions •... -
Page 8: Accessories
• Plug and Play capability, if supported by your operating system • On-screen display (OSD) adjustments for easy setup and screen optimization (available in English, Simplified Chinese, Traditional Chinese, French, German, Italian, Spanish, Dutch, Japanese, and Portuguese) • Power Saver to reduce energy consumption •... -
Page 9: Safety And Maintenance Guidelines
Do not pull on a cord or cable. When unplugging from the electrical outlet, grasp the cord by the plug. To reduce the risk of serious injury, see the HP Safety and Comfort Guide on the HP website at http://www.hp.com/ergo or on the documentation CD. -
Page 10: Safety Precautions
NOTES: Monitors with a “burned-in-image” are not covered under the HP warranty. • Slots and openings in the cabinet are provided for ventilation. These openings must not be blocked or covered. -
Page 11: Shipping The Monitor
Shipping the Monitor Keep the original packaging box in a storage area. You might need it later if you move or ship the monitor. To prepare the monitor for shipping: Disconnect the power and video cables from the monitor. Lay the monitor on a flat and even surface with the bottom side of the monitor extending over the edge of the surface. -
Page 12: Setting Up The Monitor
Setting Up the Monitor Unpacking the Monitor Make sure all contents are included. Store the packing box. Turn off the computer and other attached devices. Prepare a flat area to assemble the monitor. NOTE: Use only the power cord and adapter provided with this monitor. Installing the Base Stand Place the monitor on a flat and even surface with the bottom side of the monitor extending over the edge of the surface. -
Page 13: Connecting Video Source Cables
Connecting Video Source Cables CAUTION: Before connecting the cables to the monitor, ensure that the computer and the monitor are powered off. The video source is determined by the video cable used. The monitor automatically determines which inputs have valid video signals. The inputs can be selected by pressing the source button on the front of the monitor. -
Page 14: Connecting The Hdmi Cable
Figure 3-3 Connecting the VGA video and audio cables HDMI SPDIF Connecting the HDMI Cable Connect one end of the HDMI cable to the back of the monitor and the other end of the cable to the input device. The HDMI cable is provided. Figure 3-4 Connecting the HDMI Cable HDMI... -
Page 15: Connecting Audio Output Devices
Connecting Audio Output Devices Connecting a Subwoofer Connect one end of the audio cable to the back of the monitor and the other end of the cable to the audio output device. Figure 3-5 Connecting a Subwoofer HDMI SPDIF Connecting a Digital Audio Device Connect one end of the SPDIF cable to the back of the monitor and the other end of the cable to the audio output device. -
Page 16: Connecting A Headphone
Connecting a Headphone Connect the headphone cable to the right side of the monitor. Figure 3-7 Connecting the Headphone HDMI SPDIF Managing the Cables A cable management comes with the package. Install the cable management clip on the stand, then insert the cables into the clip. Figure 3-8 Managing the Cables HDMI... -
Page 17: Connecting The Power Cord
Connecting the Power Cord Follow all electrical and power warnings. WARNING: To reduce the risk of electric shock or damage to your equipment: Do not disable the power cord grounding plug. The grounding plug is an important safety feature. Plug the power cord into a grounded (earthed) electrical outlet. Be sure that the grounded power outlet you plug the power cord into is easily accessible to the operator and located as close to the equipment as possible. -
Page 18: High-Bandwidth Digital Content Protection (Hdcp)
Monitors in use for 24 hours per day that result in image retention damage are not covered under the HP warranty. To avoid image retention damage, always turn off the monitor when it is not in use or use the power management setting, if supported on your system, to turn off the display when the system is idle. -
Page 19: Activating Beats Audio
The monitor automatically scans the signal inputs for an active input and uses that input for the display. If two inputs are active, the monitor will display the default input source. If the default source is not an active input, then the monitor displays the other input if it is active. You can change the default source in the OSD by pressing the Menu button and selecting Source Control >... -
Page 20: Operating The Monitor
NOTE: You might have to install the digitally signed monitor drivers (INF or ICM files) manually from the CD, in case of an installation error. See the “HP Monitor Software Information” file on the CD for instructions (in English only). -
Page 21: Control Buttons
Control Buttons Control buttons are located on the base of the monitor. Button Icon Description Beats Audio Enables Beats Audio technology. Menu Opens the OSD menu. Auto Adjust Press to activate the auto adjustment feature to optimize the screen image. Available only in VGA source. -
Page 22: Using The On-Screen Display (Osd)
Using the On-Screen Display (OSD) Use the On-Screen Display (OSD) to adjust the screen image based on your viewing preferences. To access the OSD: Make sure the monitor is on. To access the OSD menu, press the Menu button. The OSD Main Menu appears. To navigate through the Main or sub-menu, press the (Plus) button to scroll up, or the (Minus) button to scroll in reverse. - Page 23 Icon Main Menu Options Sub-menu Options Description Custom Color Selects and adjusts your own color scales: • R — Sets your own red color levels. • G — Sets your own green color levels. • B — Sets your own blue color levels. Quick View Select from the following modes: •...
- Page 24 Icon Main Menu Options Sub-menu Options Description Sharpness Adjusts the screen image to look sharper or soft. Video OverDrive Turns Video Overdrive on or off. The factory default is off. Dynamic Contrast Ratio Sets the Dynamic Contrast Ratio (DCR) setting on or off. The factory default setting is off.
- Page 25 Icon Main Menu Options Sub-menu Options Description Monitor Status Displays the operating status of the monitor each time the monitor is powered on. Select the location at which to display the status: • • Middle • Bottom • The factory default is Top. DDC/CI Support Allows the computer to control some OSD menu features such as Brightness, Contrast,...
-
Page 26: Identifying Monitor Conditions
Main Menu Options Sub-menu Options Description Serial Number Reports the serial number of the monitor. The serial number is needed if contacting HP technical support. FW Version Reports the firmware version of the monitor. Backlight Hours Reports the total hours of backlight operation. -
Page 27: Power-Saver Feature
• Monitor Going to Sleep — Indicates the screen display is entering a sleep mode. • Check Video Cable — Indicates a video input cable is not properly connected to the computer or monitor. • OSD Lockout — The OSD can be enabled or disabled by pressing and holding the Menu button on the front panel for 10 seconds. -
Page 28: Troubleshooting
Adjust the contrast and brightness controls. ghosting, shadowing issue. Make sure that you are not using an extension cable or switch box. HP recommends plugging the monitor directly into the graphic card output connector on the back of your computer. -
Page 29: Getting Support From The Hp Website
Lock LED found on most keyboards. The LED must either turn on or off after hitting the Caps Lock key. Getting Support from the HP website Before you contact customer service, see the HP Technical Support website at http://www.hp.com/ support. Select your country/region, and then follow the links to the support page for your monitor. -
Page 30: Locating The Rating Label
Locating the Rating Label The rating label on the monitor provides the product number and serial number. You might need these numbers when contacting HP about your monitor model. The rating label is on the bottom of the monitor. Chapter A... -
Page 31: Technical Specifications
Technical Specifications All specifications represent the typical specifications provided by HP’s component manufacturers; actual performance might vary either higher or lower. ENVY 27 27-inch IPS Monitor Table B-1: ENVY 27 Specifications Display Type: TFT LCD active matrix Viewable Image Size: 68.6 cm (27.0 in.) diagonal... -
Page 32: Preset Video Modes
Preset Video Modes The monitor automatically recognizes many preset video input modes that will appear properly sized and centered on the screen. Table B-2: Factory Preset Video Input Modes Preset Resolution Horizontal Frequency (kHz) Vertical Frequency (Hz) 640 x 480 31.469 59.94 720 x 400... -
Page 33: Lcd Monitor Quality And Pixel Policy
50 cm (16 inches). For more information about your LCD Monitor and pixel policy, see the HP website at http://www.hp.com/support. To find pixel policy information on the HP website, type in "HP Pixel Policy”... -
Page 34: Agency Regulatory Notices
Agency Regulatory Notices Federal Communications Commission Notice This equipment has been tested and found to comply with the limits for a Class B digital device, pursuant to Part 15 of the FCC Rules. These limits are designed to provide reasonable protection against harmful interference in a residential installation. -
Page 35: Canadian Notice
For questions regarding the product, contact: Hewlett Packard Company P. O. Box 692000, Mail Stop 530113 Houston, Texas 77269-2000 1-800-HP-INVENT (1-800 474-6836) For questions regarding this FCC declaration, contact: Hewlett Packard Company P. O. Box 692000, Mail Stop 510101 Houston, Texas 77269-2000 (281) 514-3333 To identify this product, see the Part, Series, or Model number found on the product. -
Page 36: Power Cord Set Requirements
Chemical Substances HP is committed to providing our customers with information about the chemical substances in our products as needed to comply with legal requirements such as REACH (Regulation EC No1907/ 2006 of the European Parliament and Council). -
Page 37: Hp Recycling Program
HP Recycling Program HP encourages customers to recycle used electronic hardware, HP original print cartridges, and rechargeable batteries. For more information about recycling programs, go to the HP Planet Partners Recycling Program website at http://www.hp.com/recycle. Restriction of Hazardous Substances (RoHS)
Need help?
Do you have a question about the ENVY 27 and is the answer not in the manual?
Questions and answers