OHAUS i-DT33XW Instruction Manual
Hide thumbs
Also See for i-DT33XW:
- User manual (152 pages) ,
- Instruction manual (84 pages) ,
- Service manual (51 pages)
Advertisement
Available languages
Available languages
Quick Links
i-DT33P / i-DT33XW Indicator
USB Option
Instruction Manual
Indicador i-DT33P / i-DT33XW
Opción USB
Manual de Instrucciones
Indicateur i-DT33P / i-DT33XW
Option USB
Mode d'emploi
Anzeigegerät i-DT33P oder i-DT33XW
USB-Option
Bedienungsanleitung
Indicatore i-DT33P / i-DT33XW
Opzione USB
Manuale di istruzioni
i-DT33P / i-DT33XW Indicator
USB Option
사용자 매뉴얼
D3000 シリーズ
(i-DT33P / i-DT33XW)
USB オプション
取扱説明書
i-DT33P / i-DT33XW 仪表
使用说明书
USB 选件
Advertisement

Subscribe to Our Youtube Channel
Related Manuals for OHAUS i-DT33XW


Summary of Contents for OHAUS i-DT33XW
- Page 1 / i-DT33XW Indicator USB Option Instruction Manual Indicador i-DT33P / i-DT33XW Opción USB Manual de Instrucciones Indicateur i-DT33P / i-DT33XW Option USB Mode d’emploi Anzeigegerät i-DT33P oder i-DT33XW USB-Option Bedienungsanleitung Indicatore i-DT33P / i-DT33XW Opzione USB Manuale di istruzioni...
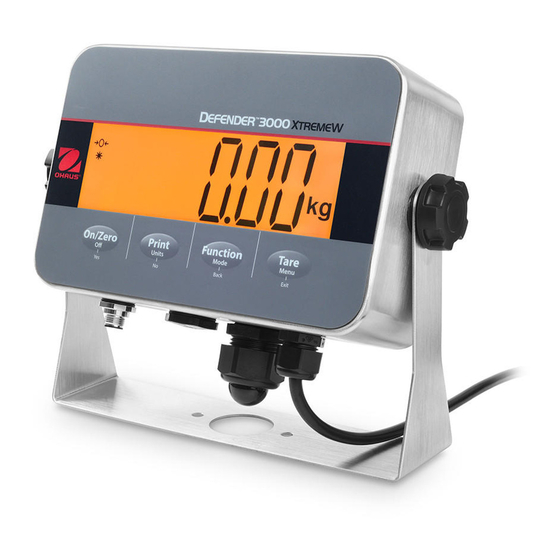
- Page 3 EN-1 INTRODUCTION ® This USB interface kit is for use with the Defender 3000 i-DT33P and i-DT33XW indicators. CAUTION: THE INSTALLATION AND CONNECTIONS SHOULD ONLY BE DONE BY AUTHORIZED AND QUALIFIED PERSONNEL, SUCH AS AN ELECTRICIAN. KIT CONTENTS Cable ...
-
Page 4: Interface Installation
EN-2 INTERFACE INSTALLATION Install the USB Interface kit to the indicator as the following. WARNING: BEFORE INSTALLATION, POWER OFF THE INDICATOR AND REMOVE ALL EXTERNAL AC POWER CONNECTIONS. i-DT33P Remove the battery cover in the direction of the arrow, and take out dry batteries if used. - Page 5 EN-3 Remove the sealing plug upwards. Take out the cable supplied. Connect one side to the main board connector (circled), and pass the other side through the side hole.
- Page 6 EN-4 Take out the USB board supplied. Connect the cable's another side to the connector on the USB board (circled). Then insert the USB board into the two card slots (circled) on both sides. USB board Take out the USB cable supplied and pass it through the hole where the sealing plug is removed (circled), and then connect its USB interface to the connector on the USB board (circled).
- Page 7 EN-5 Re-install the dry batteries if used, and close the battery cover. i-DT33XW Remove the six hex head bolts from the rear housing of the indicator.
- Page 8 EN-6 Release the strain relief for option connector (circled) including the watertight seal in it on the bottom of the indicator and remove the plug at the end of it. Watertight Seal(with One Hole) Plug Take out the cable and the USB board supplied and pin the upper left corner and the lower right corner of the board on the positioning column (circled), facing up.
- Page 9 EN-7 Connect one side of the cable to the connector on the USB board (circled) and the other to the indicator's main board connector (circled). Screw the two screws to the indicator's screw holes (circled). Make sure the USB board is tightly clamped by the screws.
- Page 10 EN-8 Take out the USB cable supplied and pass it through the strain relief for option connector. Make sure the watertight seal is attached to it, and then connect its USB interface to the connector on the USB board (circled). Watertight Seal (with One Hole) Strain Relief for Option Connector Note: If you install RS232 and the USB kit at the same time, please use the...
- Page 11 EN-9 Tighten the strain relief for option connector with the watertight seal in it (circled). Close the housing and re-install the bolts to finish installation.
- Page 12 SETUP USB Device Function The OHAUS Interface is preset to communicate using the following settings: 9600 baud, 8 bits, no parity, no handshake. Check the USB device parameters required for the printer or computer that is to be connected. See the computer or printer documentation if assistance is required.
-
Page 13: Contenido Del Kit
ES-1 INTRODUCCIÓN ® Este kit de interfaz USB se utiliza con los indicadores Defender 3000 i-DT33P e i-DT33XW. PRECAUCIÓN: LA INSTALACIÓN Y LAS CONEXIONES DEBEN SER REALIZADAS ÚNICAMENTE POR PERSONAL AUTORIZADO Y CUALIFICADO, COMO UN ELECTRICISTA. CONTENIDO DEL KIT Cable ... - Page 14 ES-2 INSTALACIÓN DE LA INTERFAZ Instale el kit de interfaz USB en el indicador de la siguiente manera. ADVERTENCIA: ANTES DE LA INSTALACIÓN, APAGUE EL INDICADOR Y RETIRE TODAS LAS CONEXIONES EXTERNAS DE ALIMENTACIÓN DE CA. i-DT33P Retire la tapa de la baterí a siguiendo la direcció n de la flecha y saque las pilas secas si las utiliza.
- Page 15 ES-3 Retire el tapón de sellado hacia arriba. Extraiga el cable suministrado. Conecte un lado al conector de la placa principal (cí rculo) y pase el otro lado a través del orificio lateral.
- Page 16 ES-4 Extraiga la tarjeta USB suministrada. Conecte el otro lado del cable al conector en la tarjeta USB (rodeado con un cí rculo). A continuación, inserte la tarjeta USB en las dos ranuras para tarjetas (rodeadas con un cí rculo) que hay a ambos lados.
- Page 17 ES-5 Vuelva a instalar las pilas secas, si se utilizan, y cierre la tapa de la baterí a. i-DT33XW Retire los seis pernos de cabeza hexagonal de la carcasa trasera del indicador.
- Page 18 ES-6 Afloje el conector del sujetacable para el elemento opcional (rodeado en el cí rculo) incluyendo el sello hermético que hay en la parte inferior del indicador y retire el tapón. Sello Hermético (con Un Orificio) Tapón Saque el cable y la tarjeta USB suministrada y fije la esquina superior izquierda y la esquina inferior derecha de la tarjeta a la columna de posicionamiento (rodeada por un cí...
- Page 19 ES-7 Conecte un lado del cable al conector de la tarjeta USB (rodeada con un cí rculo) y el otro al conector de la placa principal del indicador (rodeado con un cí rculo). Apriete los dos tornillos en los orificios para los tornillos del indicador (rodeados por un cí...
- Page 20 ES-8 Saque el cable USB suministrado y páselo a través del sujetacable del conector opcional. Asegúrese de que el sello hermético esté conectado a él y, a continuación, conecte su interfaz USB al conector de la tarjeta USB (rodeado por un cí rculo). Sello Hermético (con Un Orificio) Conector del Sujetacable para el Elemento Opcional...
- Page 21 ES-9 Apriete el conector del sujetacable para el elemento opcional con el sello hermético (rodeado por un cí rculo). Cierre la carcasa y vuelva a instalar los pernos para finalizar la instalación.
- Page 22 CONFIGURACIÓN Funcionamiento del Dispositivo USB La interfaz de OHAUS está preconfigurada para comunicarse con los siguientes ajustes: 9600 baudios, 8 bits, sin paridad, sin protocolo de enlace. Compruebe los pará metros del dispositivo USB necesarios para la impresora o el ordenador que se vaya a conectar.
-
Page 23: Contenu Du Kit
Ce kit d’interface USB est destiné à être utilisé avec les indicateurs Defender ® 3000 i-DT33P et i-DT33XW. MISE EN GARDE : L’INSTALLATION ET LES CONNEXIONS DOIVENT ÊTRE EFFECTUÉES UNIQUEMENT PAR DU PERSONNEL AGRÉÉ ET QUALIFIÉ, PAR EXEMPLE, UN ÉLECTRICIEN. - Page 24 FR-2 INSTALLATION DE L’INTERFACE Installez le kit d’interface USB sur l’indicateur comme suit. AVERTISSEMENT : AVANT L’INSTALLATION, ÉTEIGNEZ L’INDICATEUR ET DÉBRANCHEZ LE CÂBLE D'ALIMENTATION i-DT33P Retirez le couvercle de la batterie en suivant le sens de la flèche, et retirez les piles sèches le cas échéant.
- Page 25 FR-3 Retirez le bouchon d’étanchéité, en tirant vers le haut. Retirez le câble fourni. Raccordez un côté au connecteur de la carte principale (élément entouré) et faites passer l’autre côté à travers l’orifice latéral.
- Page 26 FR-4 Retirez la carte USB fournie. Raccordez l’autre côté du câble au connecteur de la carte USB (élément entouré). Insérez ensuite la carte USB dans les deux emplacements pour carte (éléments entourés) situés des deux côtés. Carte USB Prenez le câble USB fourni et faites-le passer à travers le trou du bouchon d’étanchéité...
- Page 27 FR-5 Remettez les piles sèches en place le cas échéant et fermez le couvercle du compartiment à piles. i-DT33XW Retirez les six boulons à tête hexagonale du boîtier arrière de l’indicateur.
- Page 28 FR-6 Ôtez le réducteur de tension du connecteur en option (élément entouré), ainsi que le joint étanche situé au bas de l’indicateur, et retirez le bouchon situé à l'extrémité. Joint étanche (avec un trou) Fiche Retirez le câble et la carte USB fournis et fixez le coin supérieur gauche et le coin inférieur droit de la carte sur la colonne de positionnement (élément entouré), face vers le haut.
- Page 29 FR-7 Raccordez un cô té du câ ble au connecteur de la carte USB (é lé ment entouré ) et l’autre côté au connecteur de la carte principale de l’indicateur (élé ment entouré ). Vissez les deux vis dans les orifices de l’indicateur (éléments entourés) prévus à...
- Page 30 FR-8 Retirez le câ ble USB fourni et faites-le passer à travers le ré ducteur de tension du connecteur en option. Assurez-vous que le joint d’étanchéité est fixé à celui-ci, puis connectez l'interface USB au connecteur de la carte USB (é lé ment entouré ). Joint étanche (avec un trou) Connecteur du réducteur de tension en option...
- Page 31 FR-9 Fixez le connecteur du réducteur de tension en option et le joint d’étanchéité situé à l’intérieur (élément entouré). Fermez le boîtier et remettez les boulons en place pour terminer l’installation.
- Page 32 PARAMÈTRES Fonction du périphérique USB L’interface OHAUS est préréglée pour communiquer selon les paramètres suivants : 9 600 bauds, 8 bits, sans parité , sans é tablissement de liaison. Vé rifiez les paramètres du périphérique USB requis pour l’imprimante ou l’ordinateur à...
- Page 33 DE-1 EINLEITUNG Dieses USB-Schnittstellen-Set ist für die Verwendung mit den ® Anzeigegeräten 3000 i-DT33P und i-DT33XW für Defender -Waagen vorgesehen. VORSICHT: DIE INSTALLATION UND DAS HERSTELLEN DER VERBINDUNGEN DÜRFEN NUR VON AUTORISIERTEM UND QUALIFIZIERTEM PERSONAL, BEISPIELSWEISE VON EINEM ELEKTRIKER, DURCHGEFÜHRT WERDEN.
- Page 34 DE-2 INSTALLIEREN DER SCHNITTSTELLE Installieren Sie das USB-Schnittstellen-Set wie nachstehend beschrieben im Anzeigegerät. WARNUNG: SCHALTEN SIE DAS ANZEIGEGERÄT VOR DER INSTALLATION AUS UND ENTFERNEN SIE ALLE EXTERNEN AC-STROMANSCHLÜSSE. i-DT33P Entfernen Sie die Batterieabdeckung in Pfeilrichtung und entnehmen Sie gegebenenfalls bereits im Gerät enthaltene Trockenbatterien. Drücken Sie das Ende der Ladeabdeckung (eingekreist) leicht in Pfeilrichtung und entfernen Sie sie vom Gerät.
- Page 35 DE-3 Entfernen Sie das Versiegelungselement in Aufwärtsrichtung. Entnehmen Sie das im Lieferumfang des Sets enthaltene Kabel aus der Verpackung. Verbinden Sie ein Ende dieses Kabels mit dem Anschluss an der Hauptplatine (eingekreist) und führen Sie das andere Ende durch die seitliche Öffnung.
- Page 36 DE-4 Entnehmen Sie die im Lieferumfang des Sets enthaltene USB-Platine aus der Verpackung. Verbinden Sie die andere Seite des Kabels mit dem Anschluss auf der USB-Platine (eingekreist). Stecken Sie dann die USB-Platine auf beiden Seiten in die beiden Kartenschlitze (eingekreist). USB-Platine Nehmen Sie das im Lieferumfang des Sets enthaltene USB-Kabel aus der Verpackung und fü...
- Page 37 DE-5 Falls Trockenbatterien verwendet werden, setzen Sie diese wieder ein; schließen Sie die Batterieabdeckung. i-DT33XW Entfernen Sie die sechs Sechskantschrauben an der Rückseite des Anzeigegerätes.
- Page 38 DE-6 Lösen Sie die Zugentlastung für den optionalen Konnektor (eingekreist) einschließlich des wasserdichten Versiegelungselementes an der Unterseite des Anzeigegerätes und entfernen Sie den Stopfen am Ende. Wasserdichtes Versiegelungselement (mit einer Öffnung) Stopfen Entnehmen Sie das im Lieferumfang des Sets enthaltene Kabel und die ebenfalls enthaltene USB-Platine aus der Verpackung und stecken Sie die linke obere Ecke und die rechte untere Ecke der Platine auf die hierfür vorgesehenen Positionierungsstifte (eingekreist).
- Page 39 DE-7 Verbinden Sie ein Ende des Kabels mit dem Anschluss auf der USB-Platine (eingekreist) und das andere Ende mit dem Anschluss auf der Hauptplatine des Anzeigegerätes (eingekreist). Schrauben Sie die beiden Schrauben in die Schraubenlöcher des Anzeigegerätes (eingekreist). Stellen Sie sicher, dass die Schrauben die USB-Platine ausreichend fest andrücken.
- Page 40 DE-8 Entnehmen Sie das im Lieferumfang des Sets enthaltene USB-Kabel aus der Verpackung und führen Sie es durch die Zugentlastung für den optionalen Konnektor. Stellen Sie sicher, dass das wasserdichte Versiegelungselement daran angebracht ist, und schließen Sie dann die USB-Schnittstelle an den Anschluss auf der USB-Platine an (eingekreist).
- Page 41 DE-9 Hinweis: Wenn Sie RS232 und das USB-Set gleichzeitig installieren, verwenden Sie bitte das mitgelieferte wasserdichte Versiegelungselement mit zwei Öffnungen. Führen Sie in diesem Fall das RS232-Kabel durch eine Öffnung des wasserdichten Versiegelungselementes und das Ethernet-Kabel durch die andere Öffnung. Wasserdichtes Versiegelungselement (mit zwei Öffnungen) Schrauben Sie die Zugentlastung für den optionalen Konnektor mit dem darin...
- Page 42 DE-10 SETUP USB-Gerätefunktion Die OHAUS-Schnittstelle ist für die Kommunikation folgendermaßen voreingestellt: 9600 Baud, 8 Bit, keine Parität, kein Handshake. Ermitteln Sie, welche USB-Geräteparameter für den anzuschließenden Drucker oder Computer erforderlich sind. Weitere Informationen hierzu finden Sie in der Dokumentation des Computers oder Druckers. Stimmen die Parameter nicht überein, müssen Sie entweder die Einstellungen des Anzeigegerätes, des...
-
Page 43: Contenuto Del Kit
IT-1 INTRODUZIONE ® Questo kit interfaccia USB deve essere utilizzato con gli indicatori Defender 3000 i-DT33P e i-DT33XW. PERICOLO: L'INSTALLAZIONE E I COLLEGAMENTI DEVONO ESSERE ESEGUITI SOLO DA PERSONALE AUTORIZZATO E QUALIFICATO, COME UN TECNICO ELETTRICO. CONTENUTO DEL KIT ... - Page 44 IT-2 INSTALLAZIONE DELL'INTERFACCIA Installare il kit interfaccia USB sull'indicatore come segue. AVVERTENZA: PRIMA DELL'INSTALLAZIONE, SPEGNERE L'INDICATORE E RIMUOVERE TUTTI I COLLEGAMENTI ESTERNI DELL'ALIMENTAZIONE ELETTRICA. i-DT33P Rimuovere il coperchio del vano batterie nella direzione della freccia ed estrarre le batterie a secco se utilizzate. Spingere leggermente l'estremità...
- Page 45 IT-3 Rimuovere il tappo di chiusura verso l'alto. Estrarre il cavo in dotazione. Collegare un lato al connettore della scheda principale (cerchiato) e passare l'altro lato attraverso il foro laterale.
- Page 46 IT-4 Estrarre la scheda USB in dotazione. Collegare l'altro lato del cavo al connettore sulla scheda USB (cerchiato). Quindi inserire la scheda USB nei due slot per schede (cerchiati) su entrambi i lati. Scheda USB Estrarre il cavo USB in dotazione e farlo passare attraverso il foro da cui è stato rimosso il tappo di chiusura (cerchiato), quindi collegare la sua interfaccia USB al connettore sulla scheda USB (cerchiato).
- Page 47 IT-5 Reinstallare le batterie a secco, se utilizzate, e chiudere il coperchio del vano batterie. i-DT33XW Rimuovere i sei bulloni a testa esagonale dall'alloggiamento posteriore dell'indicatore.
- Page 48 IT-6 Rilasciare il passacavo per il connettore opzionale (cerchiato), inclusa la guarnizione a tenuta stagna nella parte inferiore dell'indicatore, e rimuovere il tappo all'estremità dello stesso. Guarnizione a tenuta stagna(con un foro) Tappo Estrarre il cavo e la scheda USB in dotazione e fissare l'angolo in alto a sinistra e l'angolo in basso a destra della scheda sulla colonna di posizionamento (cerchiata), rivolta verso l'alto.
- Page 49 IT-7 Collegare un lato del cavo al connettore sulla scheda USB (cerchiato) e l'altro al connettore della scheda principale dell'indicatore (cerchiato). Avvitare le due viti nei fori delle viti dell'indicatore (cerchiate). Assicurarsi che la scheda USB sia serrata saldamente con le viti.
- Page 50 IT-8 Estrarre il cavo USB in dotazione e farlo passare attraverso il pressacavo per il connettore opzionale. Assicurarsi che la guarnizione a tenuta stagna sia collegata a essa, quindi collegare la sua interfaccia USB al connettore sulla scheda USB (cerchiata). Guarnizione a tenuta stagna (con un foro) Pressacavo per connettore opzionale Nota: Se si installano contemporaneamente la RS232 e il kit USB, utilizzare la...
- Page 51 IT-9 Serrare il pressacavo per il connettore opzionale con la guarnizione a tenuta stagna al suo interno per terminare l'installazione. Chiudere l'alloggiamento e reinstallare i bulloni per terminare l'installazione.
- Page 52 IT-10 CONFIGURAZIONE Funzione dispositivo USB L'interfaccia OHAUS è preimpostata per comunicare utilizzando le seguenti impostazioni: 9.600 baud, 8 bit, nessuna parità , nessun handshake. Controllare i parametri del dispositivo USB necessari per la stampante o il computer da collegare. Se è necessaria assistenza, consultare la documentazione del computer o della stampante.
- Page 53 KO-1 소개 ® 이 USB 인터페이스 키트는 Defender 3000 i-DT33P 와 i-DT33XW 인디케이터 용입니다. 위험: 적절한 교육을 받아 자격을 갖춘 공인된 기술자가 설치, 연결을 해야 합니다 키트 구성품 USB 보드 나사 (2) 방수씰 (2 구) USB 케이블 케이블 ...
- Page 54 KO-2 인터페이스 설치 아래와 같이 USB 인터페이스를 설치하세요. 위험: 설치 전 인디케이터의 전원을 끄고 모든 외부 전원 연결을 해제하세요. i-DT33P 화살표 방향으로 배터리 커버를 탈거하고 충전 배터리가 있다면 탈거합니다. 충전 커버의 끝부분(주황색 동그라미)을 화살표 방향으로 눌러서 탈거합니다.
- Page 55 KO-3 봉인 플러그를 위로 탈거합니다. 안쪽에 설치된 케이블을 꺼냅니다. 한 쪽은 메인 보드 커넥터(주황색 동그라미)에 연결하고 옆의 구멍으로 다른 한 쪽을 통과시킵니다.
- Page 56 KO-4 설치된 PC 보드를 꺼냅니다. 이더넷 보드에 있는 커넥터(주황색 동그라미)에 케이블의 다른 한 쪽을 연결합니다. 그 후 이더넷 보드를 양쪽 2 개의 슬롯(주황색 동그라미)에 삽입. USB board 설치된 USB 케이블을 꺼냅니다. 봉인 플러그를 제거한 구멍에 통과시키고 USB 인터페이스를 USB 보드(주황색 동그라미)의 커넥터에 연결합니다.
- Page 57 KO-5 배터리를 재장착(배터리가 수명을 다했다면 교체합니다)한 후, 배터리 커버를 닫아 설치를 마무리 합니다. i-DT33XW 인디케이터 후면 하우징에서 육각 볼트 6 개를 풀어줍니다.
- Page 58 KO-6 인디케이터 하단에 방수 씰을 포함한 커넥터의 변형 방지 장치(주황색 동그라미)를 해제하고 끝의 플러그를 분리합니다. 방수씰(1 구) 플러그 설치된 USB 보드를 꺼내서 보드의 왼쪽 상단 모서리와 오른쪽 하단 모서리(주황색 동그라미)부분을 기둥에 고정합니다.
- Page 59 KO-7 케이블 한쪽을 USB 보드(주황색 동그라미)의 커넥터에 연결하고 다른 쪽을 표시기의 메인보드 커넥터(주황색 동그라미)에 연결합니다. 나사 2 개를 인디케이터의 나사 구멍(주황색 동그라미)에 고정합니다. USB 보드가 나사로 단단히 고정되었는지 확인합니다.
- Page 60 KO-8 USB 케이블을 꺼내 변형 방지 장치에 케이블을 통과시키고 방수 씰을 부착한 다음 USB 인터페이스를 USB 보드의 커넥터(주황색 동그라미)에 연결합니다. 방수씰 (1 구) 변형방지장치(커넥터옵션) 참고: RS232 와 USB 키트를 동시에 설치할 경우 2 구 방수 씰을 사용해야 합니다. RS232 케이블은 방수씰의 한 구멍에 통과시키고 USB 케이블은 다른 구멍에 통과시키십시오.
- Page 61 KO-9 방수 씰이 들어 있는 커넥터 변형 방지 장치(주황색 동그라미)의 압력을 높입니다. 하우징을 닫고 볼트를 다시 장착하여 설치를 마칩니다.
- Page 62 KO-10 설정 USB 디바이스 기능 OHAUS 인터페이스는 9600 전송속도, 8 비트, 패리티 없음, 핸드셰이크 없음 설정을 사용하여 통신하도록 프리셋됩니다. 연결할 프린터 또는 컴퓨터에서 요구하는 USB 장치 파라미터를 확인하십시오. 도움이 필요한 경우 컴퓨터 또는 프린터 설명서를 참조하십시오. 파라미터가 일치하지 않으면 인디케이터, 컴퓨터, 프린터 설정을 변경해야 합니다.
-
Page 63: Kit Contents
JP-1 はじめに この USB インターフェイスキットは、D3000(i-DT33P および i-DT33XW)イン ジケータで使用するためのものです。 注意: インストールと接続は、サービスマンや電気技師などの認定さ れた資格のある担当者のみが実行する必要があります。 KIT CONTENTS ケーブル ネジ (2) USB ボー 防水封 (2 か所 USB ケーブル ド の穴あきタイ プ) - Page 64 JP-2 インターフェイスキットの取り付け 以下の説明の通りインターフェイスキットの取り付けを行います。. 注意: 取り付ける前に、インジケータの電源を切りAC電源接続をす べて取り外してください。 i-DT33P 矢印の方向にスライドさせてバッテリーカバーを取り外し、乾電池があれば それらを取り外します。 内側にあるカバーのツメを矢印の方向に押してカバーを取り外します。...
- Page 65 JP-3 シーリングプラグを上向きに取り外します。 付属のケーブルを使用します。 片側をメインボードコネクタ(丸で囲んだ部 分)に接続し、反対側を側面の穴に通します。...
- Page 66 JP-4 付属の USB ボードを使用します。 ケーブルのもう一方の側を USB ボードの コネクタに接続します(丸で囲んだ部分)。 次に、USB ボードを両側の 2 つ のカードスロット(丸で囲んだ部分)に挿入します。 USB ボード 付属の USB ケーブルを取り出し、シーリングプラグを外した穴に通してか ら、USB インターフェースを USB ボードのコネクタ(丸で囲んだ部分)に 接続します。...
- Page 67 JP-5 乾電池を使用している場合は再度取り付け、電池カバーを閉じて取り付けを 完了します。 i-DT33XW インジケータのハウジングの裏面から 6 本の六角ボルトを取り外します。...
- Page 68 JP-6 インジケータの下部にある防水シールを含むオプションコネクタ(丸で囲ん だ部分)のストレインリリーフを解除し、その端にあるプラグを取り外しま す。 防水封(1 ヵ所穴) プラグ 付属のケーブルと USB ボードを使用します。ボードの左上隅と右下隅を上向 きにしてポジショニングコラム(丸で囲んだ部分)に固定します。...
- Page 69 JP-7 ケーブルの片側を USB ボードのコネクタ(丸で囲んだ部分)に接続し、もう 一方の側をインジケータのメインボードコネクタ(丸で囲んだ部分)に接続 します。 2 本のネジをインジケーターのネジ穴(丸で囲んだ部分)にねじ込みます。 USB ボードがネジでしっかりと固定されていることを確認してください。...
- Page 70 JP-8 付属の USB ケーブルを取り出し、オプションコネクタのストレインリリーフ に通します。 防水封が取り付けられていることを確認してから、USB インタ ーフェイスを USB ボードのコネクタに接続します(丸で囲んだ部分)。 防水封(1 ヵ所穴) ストレインリリーフ Note: RS232 と USB キットを同時に取り付ける場合は、付属の 2 穴防水シールを ご使用ください。 RS232 ケーブルを防水シールの 1 つの穴に通し、イーサネット ケーブルを別の穴に通します。 防水封(2 ヵ所穴)...
- Page 71 JP-9 オプションコネクタのストレインリリーフを水密シール(丸で囲んだ部分) で締めます。 ハウジングを閉じ、ボルトを再度取り付けて取り付けを完了し ます。...
- Page 72 JP-10 設定 USB デバイス機能 オーハウスのインターフェイスは、9600 ボーレート、8 ビット、パリティな し、ハンドシェイクなしの設定を使用して通信するように事前設定されてい ます。 接続するプリンターまたはコンピューターに必要な USB デバイスの パラメーターを確認してください。 必要な場合は、コンピューターまたはプ リンターのドキュメントを参照してください。 パラメータが一致しない場合 は、インジケータ、コンピュータ、またはプリンタの設定を変更する必要が あります。 インターフェイスをインストールすると、インジケーターが USB デバイスイ ンターフェイスを認識し、関連する項目をメニューに追加します。 構成 USB ボードが接続されていない場合、サブメニューは表示されません。 no, yes Reset 300, 600, 1200, 2400, 4800, 9600, Baud Rate 19200,38400, 57600 7 Even, 7 Odd, 7 None, 8 None Parity Stop Bit 1 bit, 2 bit...
- Page 73 ZH-1 简介 本 USB 选件适用于 Defender 3000 i-DT33P 和 i-DT33XW 仪表。 ® 提醒:安装和连接只能由经过授权的合格人员(如电工)完成。 部件 螺丝 (2) 电缆 USB 主板 防水密封圈 USB 电缆 (两孔)...
- Page 74 ZH-2 选件安装 按照如下所示,将 USB 选件安装至仪表上。 警告:安装前,请关闭仪表电源并移除所有外部交流电源连接。 i-DT33P 按照箭头所示方向拆下电池盖,并取出电池(如有使用)。 按照箭头所示方向轻轻推动充电盖的末端(图中圆圈所示),并将其取出。...
- Page 75 ZH-3 向上拆下密封塞。 取出所提供的电缆。将一端连接至主板连接器(图中圆圈所示),另一端穿过 侧孔。...
- Page 76 ZH-4 取出所提供的 USB 主板。将电缆的另一端连接至 USB 主板上的连接器(图中 圆圈所示)。然后将 USB 主板插入两侧的两个卡槽(图中圆圈处)中。 USB 主板 取出所提供的 USB 电缆,将其穿过移除密封塞的孔(图中圆圈所示),然后再 将接口连接至 USB 主板上的连接器(图中圆圈所示)。...
- Page 77 ZH-5 请重新安装电池,并关闭电池盖。 i-DT33XW 从仪表后壳上移除 6 个六角螺栓。...
- Page 78 ZH-6 松开仪表底部的 PG 接头盖子(图中圆圈所示),包括其上防水密封圈,并移 除其末端的 PG 接头密封塞。 防水密封圈(一孔) PG 接头密封塞 取出所提供的电缆和 USB 主板,并将主板的左上角和右下角固定在定位柱(图 中圆圈所示)上,方向朝上。...
- Page 79 ZH-7 将电缆的一端连接至 USB 主板上的连接器(图中圆圈所示),并将另一端连接 至仪表主板连接器(图中圆圈所示)。 将两颗螺丝拧到仪表的螺孔中(图中圆圈所示)。确保螺丝紧紧固定住了 USB 主板。...
- Page 80 ZH-8 取出所提供的 USB 电缆,将其穿过 PG 接头盖子。确保其上安装防水密封圈, 然后将接口连接至 USB 主板上的连接器(图中圆圈所示)。 Watertight Seal (with One Hole) 防水密封圈(两孔) PG 接头盖子 注意:如果您要同时安装 RS232 和 USB 套件,请使用所提供的两孔防水密封圈。 将 RS232 电缆穿过防水密封圈的一个孔,并将 USB 电缆穿过另一个孔。 防水密封圈(两孔)...
- Page 81 ZH-9 拧紧带有防水密封圈的 PG 接头盖子(图中圆圈所示)。关闭外壳,重新安装 螺栓,完成安装。...
- Page 82 ZH-10 设置 USB 选件功能 将奥豪斯接口预设为以下通信设置:波特率 9600、8 位、无奇偶校验,无握手 信号。检查连接打印机和电脑时所需的 USB 参数。如需帮助,请参阅电脑或打 印机配置文档。如果参数不匹配,需要更改仪表、电脑或打印机的设置。 安装完选件板后,仪表会识别 USB 设备接口并将相关的项目添加到菜单。 配置 如果没有连接 USB 主板,将不会显示相关子菜单。 否,是 重置 300, 600, 1200, 2400, 4800, 9600, 波特率 19200,38400, 57600 7 位偶校验,7 位奇校验,7 位无校验,8 奇偶校验 位无校验 停止位 1 位,2 位 握手信号 无,...
- Page 84 Mit Niederlassungen weltweit/ Con uffici in tutto il mondo / 世界各地的办事处 www.ohaus.com *30696723* P/N 30696723 B © 2022 Ohaus Corporation, all rights reserved / todos los derechos reservados / tous droits ré servé s / Alle Rechte vorbehalten / Tutti i diritti riservati / 版权所 有...
Need help?
Do you have a question about the i-DT33XW and is the answer not in the manual?
Questions and answers