Table of Contents
Advertisement
3500-4500 Series
User's Guide
March 2007
www.lexmark.com
Lexmark and Lexmark with diamond design are trademarks of Lexmark International, Inc., registered in the United States and/or other countries.
All other trademarks are the property of their respective owners.
© 2007 Lexmark International, Inc.
All rights reserved.
740 West New Circle Road
Lexington, Kentucky 40550
Advertisement
Table of Contents
Troubleshooting

Subscribe to Our Youtube Channel
Related Manuals for Lexmark X3550


Summary of Contents for Lexmark X3550
- Page 1 User's Guide March 2007 www.lexmark.com Lexmark and Lexmark with diamond design are trademarks of Lexmark International, Inc., registered in the United States and/or other countries. All other trademarks are the property of their respective owners. © 2007 Lexmark International, Inc.
- Page 2 Refer service or repairs, other than those described in the user documentation, to a professional service person. This product is designed, tested, and approved to meet strict global safety standards with the use of specific Lexmark components. The safety features of some parts may not always be obvious.
-
Page 3: Table Of Contents
Using the Settings menu ... 23 Saving settings ... 25 Learning about the software...27 Using the printer software...27 Using the Lexmark Imaging Studio...27 Using the Solution Center...28 Using Printing Preferences...30 Opening Printing Preferences ... 30 Using the Printing Preferences tabs ... 30 Using the Save Settings menu ... - Page 4 Printing...39 Printing a document...39 Printing high-quality graphics...39 Printing a Web page...39 Printing photos or images from a Web page...40 Printing collated copies...41 Printing the last page first (reverse page order)...41 Printing transparencies...41 Printing envelopes...41 Printing cards...42 Printing multiple pages on one sheet...42 Printing files from a memory card or flash drive...43 Working with photos...44 Retrieving and managing photos...44...
- Page 5 Cleaning the print cartridge nozzles ... 72 Wiping the print cartridge nozzles and contacts ... 73 Preserving the print cartridges...74 Cleaning the scanner glass...74 Ordering supplies...74 Ordering print cartridges... 74 Ordering paper and other supplies ... 75 Using genuine Lexmark print cartridges...75 Refilling a print cartridge...76...
- Page 6 Recycling Lexmark products...76 Troubleshooting...77 Setup troubleshooting...77 Incorrect language appears on the display... 77 Power button is not lit ... 78 Software does not install ... 78 Page does not print ... 79 Cannot print from digital camera using PictBridge ... 80 Print troubleshooting...81...
- Page 7 Computer not connected ... 96 Could not detect a proof sheet ... 96 Error 1104... 96 Left Cartridge Error / Right Cartridge Error... 97 Left Cartridge Incorrect / Right Cartridge Incorrect... 97 Left Cartridge Missing / Right Cartridge Missing ... 97 Memory Failure...
-
Page 9: Finding Information About The Printer
Click View User's Guide (including Setup Troubleshooting). Click Yes. An icon of the User's Guide appears on your desktop, and the User's Guide appears on the screen. You can also find this document on the Lexmark Web site at www.lexmark.com. Run, and then type... - Page 10 The Help gives you instructions for using the software, if your printer connects to a computer. Lexmark Solution Center Description The Lexmark Solution Center software is included on your CD. It installs with the other software, if your printer connects to a computer. Customer support...
- Page 11 Limited Warranty Description Limited Warranty Information Lexmark International, Inc. furnishes a limited warranty that this printer will be free of defects in materials and workmanship for a period of 12 months after the original date of purchase. Record the following information (located on the store receipt and the back of the printer), and have it ready when you contact us so that we may serve you faster: •...
-
Page 12: Setting Up The Printer
Setting up the printer Checking the box contents Name Black print cartridge Color print cartridge Power cord Installation software CD for Windows Installation software CD for Macintosh Getting Started Quick Setup sheet Installation cable Description Cartridges to be installed into the printer. Note: Cartridge combinations vary depending on the product purchased. -
Page 13: Installing Another Language Control Panel
Installing another language control panel These instructions apply only if you received one or more additional language control panels with the printer. Lift and remove the control panel (if one is installed). Choose the correct control panel for your language. Align the clips on the control panel with the holes on the printer, and then press down. -
Page 14: Networking The Printer
Networking the printer For complete networking information, please refer to the Getting Started booklet that came with the product. Installing the printer on a network Follow the instructions for the networking method you want to use. Make sure the selected network is set up and working properly, and that all relevant devices are turned on. -
Page 15: Finding Your Mac Address
Align the edges of the internal wireless print server with the guides on the left and right, and then slide the wireless print server into the printer until it snaps into place. Make sure the antenna points up. Attach the adhesive label with the MAC address to the back of the printer. You will need this later to in order to network the printer. -
Page 16: Learning About The Printer
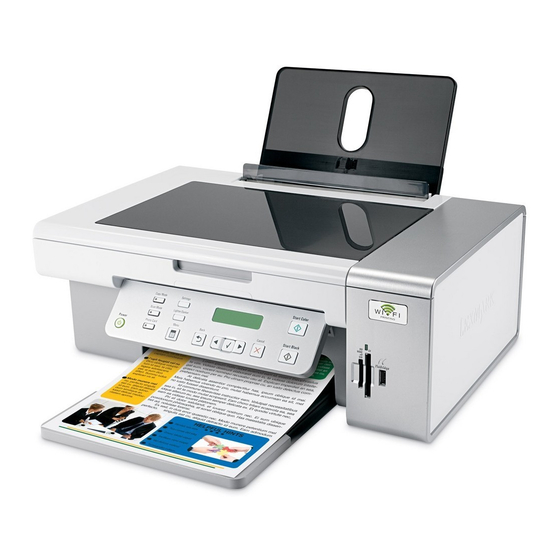
Learning about the printer Understanding the parts of the printer Use the Paper support Load paper. Wi-Fi indicator Check wireless status: • Off indicates that the printer is not turned on or that no wireless option is installed. • Orange indicates that the printer is ready for wireless connection, but not connected. •... -
Page 17: Using The Control Panel Buttons And Menus
Use the Scanner unit Print cartridge carrier Lexmark N2050 (internal wireless print server) Connect the printer to a wireless network. USB port Power supply with port Using the control panel buttons and menus Using the control panel The display shows: •... - Page 18 Press Copy Mode Access the copy default screen and make copies. Note: The mode is selected when the button light is on. Scan Mode Access the scan default screen and scan documents. Note: The mode is selected when the button light is on. Photo Card Access the photo default screen and print photos.
-
Page 19: Using The Copy Menu
Press Start Color Start a color copy, scan, or photo print job, depending on which mode is selected. Start Black Start a black-and-white copy, scan or photo print job, depending on which mode is selected. Using the Copy menu To access and navigate the Copy menu: From the control panel, press Copy Mode. -
Page 20: Using The Scan Menu
Use this Copies* Resize* Lighter / Darker* Quality* Paper Setup Repeat Image* Collate N-Up* Original Size* Original Type* * Temporary setting. For information on saving temporary and other settings, see “Saving settings” on page 25. Using the Scan menu To access and navigate the Scan menu: From the control panel, press Scan Mode. -
Page 21: Using The Photo Card Menu
Use this Quality* Adjust the quality of a scan. Original Size* Specify the size of the original document. * Temporary setting. For information on saving temporary and other settings, see “Saving settings” on page 25. Using the Photo Card menu If necessary, press Photo Card, or insert a memory card or a flash drive into the printer. -
Page 22: Using The Pictbridge Menu
Saving Paper Size, Paper Type, and Photo Size settings From the control panel, press Settings. Press repeatedly until Paper Setup appears. Press Press repeatedly until Paper Size appears. Press Press repeatedly until the size you want appears. Press Press to go to the Paper Type submenu. Press Press repeatedly until the setting type you want appears. -
Page 23: Using The Settings Menu
The message, PictBridge camera detected. Press display. Press repeatedly until the menu item you want appears. Press Press repeatedly until the submenu item you want or the setting you want appears. Press Note: Pressing selects a setting. An * appears next to the selected setting. To go into additional submenus and settings, repeat step 4 and step 5 as needed. - Page 24 Press Press repeatedly until the submenu item you want or the setting you want appears. Press Note: When you choose a value selection, an * appears next to the selected setting. To go into additional submenus and settings, repeat step 4 and step 5 as needed. If necessary, press repeatedly to return to the previous menus and make other selections.
-
Page 25: Saving Settings
Saving settings In a setting menu, an * appears next to the default setting. To change the setting: Press repeatedly until the setting you want appears. Press • To save most settings. An * appears next to the saved setting. •... - Page 26 Press Press repeatedly until Set Defaults appears. Press Press repeatedly until Use Current appears. Press...
-
Page 27: Learning About The Software
The Solution Center Printing Preferences The Toolbar Using the Lexmark Imaging Studio To open the Lexmark Imaging Studio Welcome screen, use one of these methods: Method 1 From the desktop, double-click the Lexmark Imaging Studio icon. Click the Lexmark Imaging Studio icon for the task you want to complete. -
Page 28: Using The Solution Center
Click View/Print Photo Library Transfer Photos Photo Greeting Cards Photo Packages Slideshow Poster From the bottom left corner of the Welcome screen, Click Setup and diagnose printer • • • • Setup and manage faxes Set printer fax settings for: •... - Page 29 To open the Solution Center, use one of these methods: Method 1 From the desktop, double-click the Lexmark Imaging Studio icon. Click Setup and diagnose printer. The Solution Center appears with the Maintenance tab open. The Solution Center consists of six tabs:...
-
Page 30: Using Printing Preferences
From here Advanced Note: For more information, click Help in the lower right corner of the screen. Using Printing Preferences Opening Printing Preferences Printing Preferences is the software that controls the printing function when the printer is connected to a computer. You can change the settings in Printing Preferences based on the type of project you want to create. -
Page 31: Using The Save Settings Menu
• Select Page Setup options. • Select Options to customize the toolbar appearance or select a different setting for printing photos. • Access links to the Lexmark Web site. • Access Help for additional information. • Uninstall the Toolbar. -
Page 32: Resetting Printer Software Settings To Defaults
Windows 2000 or Windows XP users only: Click Start Settings Printers or Printers and Faxes. Right-click the Lexmark 3500-4500 Series icon. Click Printing Preferences. Click the Save Settings menu. From the Restore section, select Factory Settings (Defaults). Windows Vista users only:... - Page 33 Click the Save Settings menu. From the Restore section, select Factory Settings (Defaults). Note: Factory default settings cannot be deleted.
-
Page 34: Loading Paper And Original Documents
Loading paper and original documents Loading paper Make sure: • You use paper designed for inkjet printers. • If you are using photo, glossy, or heavyweight matte paper, you load it with the glossy or printable side facing you. (If you are not sure which side is the printable side, see the instructions that came with the paper.) •... - Page 35 Load up to 10 envelopes 25 sheets of labels 50 transparencies Make sure • The print side of the envelopes faces you. • The stamp location is in the upper left corner. • The envelopes are designed for use with inkjet printers. •...
- Page 36 Load up to 10 iron-on transfers 25 greeting cards 25 index cards 25 photo cards 25 postcards 100 sheets of custom-size paper Make sure • You follow the loading instructions that came with the iron-on transfers. • The print side of the transfers faces you. •...
-
Page 37: Loading Original Documents On The Scanner Glass
Load up to 20 sheets of banner paper Loading original documents on the scanner glass You can scan and then print photos, text documents, magazine articles, newspapers, and other publications. You can scan a document for faxing. Make sure the computer and the printer are on. Open the top cover. - Page 38 Place the original document or item facedown on the scanner glass in the upper left corner. Close the top cover to avoid dark edges on the scanned image.
-
Page 39: Printing
Load paper. Open a Web page using Microsoft Internet Explorer 5.5 or later. If you want to check or change your print settings: From the toolbar area, click Lexmark Adjust the print settings. Click OK. Note: For additional print setting options, see “Using Printing Preferences” on page 30. -
Page 40: Printing Photos Or Images From A Web Page
Open a Web page with Microsoft Internet Explorer 5.5 or later. On the Toolbar, the number of photos valid for printing appears next to Photos. If no number appears next to Photos: From the Lexmark logo drop-down menu, select Options. Select the Advanced tab. Select a lower minimum photo size. -
Page 41: Printing Collated Copies
Printing collated copies If you print multiple copies of a document, you can choose to print each copy as a set (collated) or to print the copies as groups of pages (not collated). Collated Load paper. With a document open, click File Click Properties, Preferences, Options, or Setup. -
Page 42: Printing Cards
From the “I Want To” menu, select Print on an envelope. From the Envelope Size list, select the envelope size loaded. Select Portrait or Landscape orientation. Notes: • Most envelopes use landscape orientation. • Make sure the same orientation is also selected in the software application. Click OK. -
Page 43: Printing Files From A Memory Card Or Flash Drive
From the Print Layout tab, select N-up. Select the number of pages to print on each page. If you want each page image to be surrounded by a border, select Print Page Borders. Click OK. Click OK or Print. Printing files from a memory card or flash drive Notes: •... -
Page 44: Working With Photos
Photo Effects, Layout, Paper Size, Paper Type, Photo Size, and Quality. • For best results, use Lexmark Premium Photo Paper or Lexmark Photo Paper. • To prevent smudging, avoid touching the surface of a printed photo. For best results, remove each printed sheet individually from the paper exit tray, and allow the prints to dry at least 24 hours before stacking, displaying, or storing. -
Page 45: Inserting A Flash Drive
Warning: Do not touch cables, any network adapter, the memory card, or the printer in the area shown while actively printing, reading, or writing from a memory card. A loss of data can occur. Also, do not remove a memory card while actively printing, reading, or writing from a memory card. -
Page 46: Transferring Photos From A Memory Device To The Computer Using The Control Panel
Note: For a network connection, you must manually open the application and select the printer you wish to use. The Lexmark Imaging Studio software launches automatically on your computer. Click Automatically save all photos to “My Pictures”. -
Page 47: Transferring Selected Photos From A Memory Card Using The Computer
The Lexmark Imaging Studio software launches automatically on your computer. If you are using Windows XP, a “What do you want Windows to do?” screen appears. Click Transfer Photos to your computer using the Lexmark Imaging Studio. If you are using Windows 2000: From the desktop, double-click the Lexmark Imaging Studio icon. -
Page 48: Transferring Selected Photos From A Cd Or Flash Drive Using The Computer
The Lexmark Imaging Studio software launches automatically on your computer. If you are using Windows XP, a “What do you want Windows to do?” screen appears. Click Transfer Photos to your computer using the Lexmark Imaging Studio. If you are using Windows 2000: From the desktop, double-click the Lexmark Imaging Studio icon. -
Page 49: Printing Photos Using The Control Panel
Notes: • If photos on the memory card were taken on more than one date, selections will include Last Date and Date Range. • To choose a date range, press ranges are displayed by month and year starting with the most recent month. •... -
Page 50: Printing All Photos
Load photo paper with the glossy or printable side facing you. (If you are not sure which side is the printable side, see the instructions that came with the paper.) For more information, see “Loading paper” on page 34. Note: Make sure the paper matches the size you selected on the proof sheet. Press Start Color or Start Black to print your photos. -
Page 51: Printing Photos By Date Range
Press Start Color or Start Black. The print settings used on the print job are displayed one at a time on the second line of the display. Press Start Color or Start Black again. Printing photos by date range Load photo paper with the glossy or printable side facing you. (If you are not sure which side is the printable side, see the instructions that came with the paper.) For more information, see “Loading paper”... -
Page 52: Printing Photos From A Digital Camera Using Dpof
Printing photos from a digital camera using DPOF Digital Print Order Format (DPOF) is a feature available on some digital cameras. If your camera supports DPOF, you can specify which photos to print, how many of each, and print settings while the memory card is still in the camera. -
Page 53: Printing Photos Using The Computer
Note: To print photos or images from a Web page, see “Printing photos or images from a Web page” on page 40. Viewing / Printing photos from the Photo Library From the desktop, double-click the Lexmark Imaging Studio icon. Click View / Print Photo Library. -
Page 54: Printing Photos From A Media Device Using The Computer
Insert a CD or media device into the computer. If you are using Windows XP or Windows Vista, a “What do you want Windows to do?” screen appears. Click Transfer Photos to your computer using the Lexmark Imaging Studio. If you are using Windows 2000: From the desktop, double-click the Lexmark Imaging Studio icon. -
Page 55: Creating A Photo Slideshow
Click Create E-mail to create an e-mail message with your photo greeting card(s) attached. Creating a Photo Slideshow From the desktop, double-click the Lexmark Imaging Studio icon. Click Slideshow. Click and drag your selected photos to the preview pane at the right side of the screen. -
Page 56: Printing An Image As A Multiple-Page Poster
Click Print Now. Printing an image as a multiple-page poster Load paper. From the desktop, double-click the Lexmark Imaging Studio icon. From the Printing Creative Tasks area of the Welcome screen, click Poster. If you are scanning a photo: Place the photo facedown on the scanner glass. -
Page 57: Copying
Copying Note: If you want to customize copy settings, see “Using the Copy menu” on page 19. Making a copy Load paper. Load an original document facedown on the scanner glass. From the control panel, press Copy Mode. Press Start Color or Start Black. Adjusting copy quality Quality specifies the resolution used for the copy job. -
Page 58: Copying Photos
Copying photos Load photo paper with the glossy or printable side facing you. (If you are not sure which side is the printable side, see the instructions that came with the paper.) Place a photo facedown on the scanner glass in the upper left corner. For more information, see “Loading original documents on the scanner glass”... -
Page 59: Making A Copy Lighter Or Darker
Press Press repeatedly until Paper Setup appears. Press Press repeatedly until Paper Size appears. Press Press repeatedly until the size you want appears. Press Press repeatedly until Paper Type appears. Press Press repeatedly until either Automatic or Photo appears. Press Press Start Color or Start Black. -
Page 60: Repeating An Image On One Page
From the control panel, press Copy Mode. Press Press repeatedly until Collate appears. Press Press repeatedly until On appears. Note: You can collate copies only if you did not make any changes in the Resize menu. Press Start Color or Start Black. Note: If you are using the scanner glass, a message appears prompting you for additional pages. -
Page 61: Copying A Document Using The Computer
Press Start Color or Start Black. Copying a document using the computer Load an original document facedown on the scanner glass. From the desktop, double-click the Lexmark Imaging Studio icon. From the left pane of the Welcome screen, click Copy. Select the Document option. -
Page 62: Copying A Photo Using The Computer
Copying a photo using the computer Place the photo facedown on the scanner glass. From the desktop, double-click the Lexmark Imaging Studio icon. From the left pane of the Welcome screen, click Copy. Select Photo. Click Start. The photo appears in the right pane. -
Page 63: Scanning
Scanning Note: If you want to customize scan settings, see “Using the Scan menu” on page 20. Scanning a document Make sure the printer is connected to a computer, and both the printer and the computer are on. Load an original document facedown on the scanner glass. From the control panel, press Scan Mode. -
Page 64: Scanning A Document Using The Computer
Press Start Color or Start Black. Scanning a document using the computer Load an original document facedown on the scanner glass. From the desktop, double-click the Lexmark Imaging Studio icon. Click Scan. Select the Document option. Click Start. -
Page 65: Scanning Images For Editing
Make sure the printer is connected to a computer, and both the printer and the computer are on. Load an original document facedown on the scanner glass. From the desktop, double-click the Lexmark Imaging Studio icon. Click Scan. Select the Photo or Several Photos option. -
Page 66: Scanning Documents Or Images For E-Mailing
Scanning documents or images for e-mailing You can e-mail attached images using your default e-mail application. Load an original document facedown on the scanner glass. From the desktop, double-click the Lexmark Imaging Studio icon. Click E-mail. Select the Photo, Several Photos, or Document option. -
Page 67: Customizing Scan Settings Using The Computer
To reduce stray marks on color photos, click the check box, and then move the slider to the desired value. Click OK. The thumbnail is updated. Customizing scan settings using the computer From the desktop, double-click the Lexmark Imaging Studio icon. Click Scan. Click Custom Settings. -
Page 68: Faxing
You can scan a document to the computer and then fax it to someone using the software. Load an original document facedown on the scanner glass. From the desktop, double-click the Lexmark Imaging Studio icon. From the left pane of the Welcome screen, click Fax. -
Page 69: Receiving A Fax Automatically
Receiving a fax automatically From the desktop, double-click the Lexmark Imaging Studio icon. From the Settings area in the left pane of the Welcome screen, click Setup and manage faxes. From the “I Want To” menu, click Adjust speed dial list and other fax settings. -
Page 70: Maintaining The Printer
Maintaining the printer Changing print cartridges Removing a used print cartridge Make sure the printer is on. Lift the scanner unit. The print cartridge carrier moves and stops at the loading position, unless the printer is busy. Press down on the cartridge carrier lever to raise the cartridge carrier lid. Remove the used print cartridge. - Page 71 Press down on the cartridge carrier levers to raise the cartridge carrier lids. Insert the black cartridge or the photo cartridge in the left carrier. Insert the color cartridge in the right carrier. Close the lids. Close the scanner unit, making sure to keep your hands out from underneath the scanner unit. The control panel display will prompt you to load paper and press Note: The scanner unit must be closed to start a new scan, print, copy, or fax job.
-
Page 72: Achieving Better Print Quality
• Use the appropriate paper for the document. If you are printing photos or other high quality images, for best results use Lexmark Premium Photo Paper or Lexmark Photo Paper. • Use a paper that is a heavier weight or bright white. -
Page 73: Wiping The Print Cartridge Nozzles And Contacts
Press repeatedly until Clean Cartridges appears. Press A page prints, forcing ink through the print cartridge nozzles to clean them. Print the document again to verify that the print quality has improved. If print quality has not improved, try cleaning the nozzles up to two more times. Wiping the print cartridge nozzles and contacts Remove the print cartridges. -
Page 74: Preserving The Print Cartridges
Note: Make sure all ink or corrective fluid on a document is dry before placing the document on the scanner glass. Ordering supplies Ordering print cartridges Lexmark 3500-4500 Series models (except Lexmark 3580 and Lexmark 4580) Item Black cartridge Black cartridge... -
Page 75: Ordering Paper And Other Supplies
Item Color cartridge Black cartridge Photo cartridge Ordering paper and other supplies To order supplies or to locate a dealer near you, visit our Web site at www.lexmark.com. Notes: • For best results, use only Lexmark print cartridges. • For best results when printing photos or other high-quality images, use Lexmark photo papers. -
Page 76: Refilling A Print Cartridge
If you receive an Out of Original Lexmark Ink message, the original Lexmark ink in the indicated cartridge (s) has been depleted. If you believe you purchased a new, genuine Lexmark print cartridge, but the Out of Original Lexmark Ink message appears: Click Learn More on the message. -
Page 77: Troubleshooting
Troubleshooting • “Setup troubleshooting” on page 77 • “Print troubleshooting” on page 81 • “Copy troubleshooting” on page 86 • “Scan troubleshooting” on page 88 • “Jams and misfeeds troubleshooting” on page 90 • “Memory card troubleshooting” on page 92 •... -
Page 78: Power Button Is Not Lit
Power button is not lit These are possible solutions. Try one or more of the following: Press power button Make sure the printer is on by pressing Disconnect and reconnect the power cord Disconnect the power cord from the wall outlet, and then from the printer. Plug the cord all the way into the power supply on the printer. -
Page 79: Page Does Not Print
Reinstall the software Turn off and then restart your computer. Click Cancel on all New Hardware Found screens. Insert the CD, and then follow the instructions on the computer screen to reinstall the software. Reconnect power supply Press to turn the printer off. Disconnect the power cord from the wall outlet. -
Page 80: Cannot Print From Digital Camera Using Pictbridge
Check cartridges Remove the print cartridges. Make sure the sticker and tape have been removed. Reinsert the cartridges. Check printer default and pause settings Click: • In Windows XP (default Start menu): Start • In Windows XP (Classic Start menu): Start •... -
Page 81: Print Troubleshooting
Make sure the camera is a PictBridge-enabled digital camera Disconnect the camera. Connect a PictBridge-enabled digital camera to the PictBridge port. See the digital camera documentation to determine whether it is PictBridge-enabled. Check USB cable Use only the USB cable that came with the camera. Remove memory cards Remove any memory cards from the printer. -
Page 82: Improving Print Quality
Check paper • Use the appropriate paper for the document. If you are printing photos or other high quality images, for best results use Lexmark photo papers. • Use a paper that is a heavier weight or bright white. Select a higher print quality Depending on your print job, press Copy Mode, Scan Mode, or Photo Card. -
Page 83: Poor Text And Graphic Quality
Use a different brand of paper Each paper brand accepts ink differently and prints with color variations. If you are printing photos or other high-quality images, for best results use Lexmark Premium Photo Paper or Lexmark Photo Paper. Check paper condition Use only new, unwrinkled paper. -
Page 84: Poor Quality At The Edges Of The Page
Poor quality at the edges of the page These are possible solutions. Try one or more of the following: Check minimum print settings Unless you are using the borderless feature, use these minimum print margin settings: • Left and right margins: –... -
Page 85: Print Speed Is Slow
Make sure the paper size matches the printer setting From the software application, click File Click Properties, Preferences, Options, or Setup. Click Paper Setup. Check the paper size. Print speed is slow These are possible solutions. Try one or more of the following: Maximize computer processing speed •... -
Page 86: Ink Levels Seem To Go Down Too Quickly
Are you printing a large file? The ink levels displayed in the printer software are not updated during a print job; they represent the ink level at the beginning of a print job. The ink levels may seem inconsistent in the Printing Status window when you are printing a large file. -
Page 87: Poor Copy Quality
Poor copy quality • Blank pages • Checkerboard pattern • Distorted graphics or pictures • Missing characters • Faded print • Dark print These are possible solutions. Try one or more of the following: Check messages If an error message is displayed, see “Error messages” on page 94. Check ink Check the ink levels, and install a new print cartridge if necessary. -
Page 88: Partial Document Or Photo Copies
Partial document or photo copies These are possible solutions. Try one or more of the following: Check document placement Make sure the document or photo is loaded facedown on the scanner glass in the upper left corner. Check paper size Make sure the paper size being used matches the size you selected. -
Page 89: Scan Was Not Successful
Close all programs not being used. Change the scanning resolution to a lower value Load an original document facedown on the scanner glass. From the desktop, double-click the Lexmark Imaging Studio icon. From the left pane of the Welcome screen, click Scan. Click Custom Settings. -
Page 90: Partial Document Or Photo Scans
Click Custom Settings. Select a higher scan resolution. Click Start. Review steps to improve print quality See “Improving print quality” on page 72. Are you scanning from photo or glossy paper, a magazine, or a newspaper? If you are copying or scanning from photo or glossy paper, a magazine, or a newspaper, see “Removing wavy patterns from scanned photos, magazines, or newspapers”... -
Page 91: Paper Jam In The Paper Support
Press to turn the printer back on. Paper jam in the paper support Press to turn off the printer. Firmly grasp the paper, and gently pull it out. Press to turn the printer back on. Paper or specialty media misfeeds These are possible solutions if paper or specialty media misfeeds or skews, or if multiple sheets feed or stick together. -
Page 92: Banner Paper Jams
Check media loading • Verify that the specialty media is loaded correctly. For more information, see “Loading various paper types” on page 34. • Try loading one page, envelope, or sheet of specialty media at a time. Check printer default and pause settings Click: •... -
Page 93: Memory Card Cannot Be Inserted
Memory card cannot be inserted There are possible solutions. Try one or more of the following: Check memory card type Make sure that the type of memory card you are using can be used in the printer. For more information, see “Inserting a memory card”... -
Page 94: Error Messages
Error messages Alignment Error These are possible solutions. Try one or more of the following: Remove tape from print cartridge Remove the print cartridge. Make sure the sticker and tape have been removed. Reinsert the cartridge. Press to align the cartridge. For more information, see “Aligning print cartridges”... -
Page 95: Clear Carrier Jam
Reinsert the black (or photo) print cartridge. If the error: • Reappears, replace the black (or photo) print cartridge with a new one. • Does not reappear, reinsert the color print cartridge. If the error reappears, replace the color print cartridge with a new one. Clear Carrier Jam These are possible solutions. -
Page 96: Computer Not Connected
Reinstall the print cartridges. For more information, see “Installing print cartridges” on page 70 Close the scanner unit. Plug the power cord into the wall outlet. Press to turn the printer on. Reinstall the print cartridges. For more information, see “Installing print cartridges” on page 70. Computer not connected These are possible solutions. -
Page 97: Left Cartridge Error / Right Cartridge Error
Left Cartridge Error / Right Cartridge Error This message may also appear as Error 1205 (Left Cartridge) or Error 1206 (Right Cartridge). Remove the indicated print cartridge. Disconnect the power cord from the electrical outlet. Reconnect the power cord to the electrical outlet. If the button is not lit, press Reinsert the print cartridge. -
Page 98: No Images Have Been Selected
Select the After Dial setting From the desktop, double-click the Lexmark Imaging Studio icon. From the left pane of the Welcome screen, click Setup and manage faxes. Click Adjust speed dial list and other fax settings. Click the Dialing and Sending tab. -
Page 99: Photo Size Error. Photo Must Fit On Page
Photo size error. Photo must fit on page. There are one or more photos larger than the paper size you selected on the printer menu. Press to clear the error message. Press repeatedly until Paper Size appears on the display. Press Press repeatedly to select the paper size option that will fit your largest photo size. -
Page 100: Removing And Reinstalling The Software
D:\setup, where D is the letter of your CD-ROM drive. If the software still does not install correctly, visit our Web site at www.lexmark.com to check for the latest software. In all countries or regions except the United States, select your country or region. -
Page 101: Notices
This software and any accompanying documentation provided under this agreement are commercial computer software and documentation developed exclusively at private expense. Trademarks Lexmark and Lexmark with diamond design are trademarks of Lexmark International, Inc., registered in the United States and/or other countries. -
Page 102: Noise Emission Levels
The WEEE logo signifies specific recycling programs and procedures for electronic products in countries of the European Union. We encourage the recycling of our products. If you have further questions about recycling options, visit the Lexmark Web site at www.lexmark.com for your local sales office phone number. -
Page 103: Energy Star
The power consumption levels listed in the previous table represent time-averaged measurements. Instantaneous power draws may be substantially higher than the average. Values are subject to change. See www.lexmark.com for current values. Power Saver This product is designed with an energy-saving mode called Power Saver. The Power Saver Mode is equivalent to the EPA Sleep Mode. -
Page 104: End User License Agreement
A variable amount of ink will remain in the cartridge when replacement is required. After this single use, the license to use the print cartridge terminates, and the used cartridge must be returned only to Lexmark for remanufacturing, refilling or recycling. -
Page 105: Index
Photo Card 18 Power 17 Right arrow 18 Scan Mode 18 Select 18 Settings 18 Start Black 19 Start Color 19 buttons, Lexmark Imaging Studio Copy 27 E-mail 27 Fax 27 Photo Greeting Cards 27 Photo Packages 27 Poster 27 Scan 27... - Page 106 Photo Greeting Cards 27 Photo Packages 27 Scan 27 Slideshow 27 Transfer Photos 27 using 27 View / Print Photo Library 27 Lexmark Imaging Studio, using 27 loading banner paper 37 custom-size paper 36 documents on the scanner glass 37 envelopes 35...
- Page 107 transferring all photos using the computer 46 transferring selected photos using the computer 47 memory card cannot be inserted 93 memory card slots 16 memory card troubleshooting memory card cannot be inserted 93 nothing happens when memory card is inserted 93 memory full error message 97 moire patterns, removing from scanned images 66...
- Page 108 77 page does not print 79 power button is not lit 78 software does not install 78 smudging, preventing in photos 85 software Lexmark Imaging Studio 27 Printing Preferences 30 removing and reinstalling 100 Solution Center 28 Toolbar 31...
- Page 109 using 27 software does not install 78 software settings, printer resetting to defaults 32 Solution Center Advanced tab 30 Contact Information tab 29 How To tab 29 Maintenance tab 29 opening 29 Printer Status dialog 29 Troubleshooting tab 29 using 28 Toolbar printing a Web page 39 printing only the photos from a...
Need help?
Do you have a question about the X3550 and is the answer not in the manual?
Questions and answers