Arjo Tornado Technical Manual
Hide thumbs
Also See for Tornado:
- Assembly and installation instructions manual (37 pages) ,
- Assembly and installation instructions manual (36 pages) ,
- Instructions for use manual (40 pages)
Table of Contents
Advertisement
Quick Links
Advertisement
Table of Contents

Related Manuals for Arjo Tornado


Summary of Contents for Arjo Tornado
- Page 1 TECHNICAL MANUAL TECHNICAL MANUAL Tornado 6001314802_2EN • 12/2020...
- Page 2 Design Policy and Copyright ® and ™ are trademarks belonging to the Arjo group of companies. © Arjo 2020. As our policy is one of continuous improvement, we reserve the right to modify designs without prior notice.
-
Page 3: Table Of Contents
Contents PREFACE ........................... 8 1 SAFETY PRECAUTIONS ..................... 9 1.1 Important ......................9 1.2 In an emergency ....................9 1.3 Product liability ....................10 1.4 Isolator switch ....................10 1.5 Attention symbols ....................11 2 PRESENTATION ......................12 2.1 Intended use of the machine ................12 2.2 General ...................... - Page 4 4.3.2 Child safety ..................34 ..............34 4.3.4 Dosing method ................... 34 4.3.5 Sound on door closing ............... 35 4.3.6 Door type ................... 35 4.3.7 IR activation time ................35 4.3.8 Acoustic alarm ..................35 4.3.9 Feedback ................... 35 4.3.10 Temperature scale................35 4.3.11 Mains frequency ................
- Page 5 4.9.12 Disinfection A0 ................. 45 4.9.13 Dosage, chemical agent ..............45 4.9.14 Chemical action time ................ 46 4.10 Tank and water, lines 50-57 ................46 4.10.1 Tank level at rest ................46 ..............46 4.10.3 Mix ratio, water ................. 46 ................
- Page 6 5.1.3 Handling codes that require action before restarting the machine: ..60 5.2 Acknowledging an error message ..............60 5.3 Resetting the machine ..................60 5.4 Table of errors and possible actions ..............61 6 PREVENTIVE MAINTENANCE .................. 62 6.1 Periodic maintenance ..................62 6.1.1 Consumables ..................
- Page 7 6.9 Ventilator (Item 8) ..................... 78 ......79 ..........80 6.9.3 Checking fan function and connection (8.2) ........80 6.9.4 Checking check valve function (8.3) ..........80 6.9.5 Checking hoses to the ventilator (8.4) ..........80 6.10 Automatic door (Item 9) (Option) ..............80 6.10.1 Checking automatic door (9.1) ............
-
Page 8: Preface
Arjo. The information in this manual describes the machine as dispatched from Arjo. There may be differences due to customization for customers or countries. The machine is accompanied by the following documentation: •... -
Page 9: Safety Precautions
Run a program with disinfection before starting servicing work. If this is not possible, disinfect the machine with disinfectant before starting servicing work. • Spare parts must only be obtained from Arjo’s sales companies. 1.2 In an emergency • Switch off the main switch. -
Page 10: Product Liability
1.3 Product liability This product complies with European Community harmonised legislation. approval of Arjo negates Arjo’s product liability. 1.4 Isolator switch The machine must be equipped with a separate isolator switch in the feed power supply. The isolator switch must be easily... -
Page 11: Attention Symbols
1.5 Attention symbols There are warnings, instructions, and advice in this manual that require extra attention. The symbols and designs used are: Risk of injuries or machine damage. ESD-sensitive equipment. Live components. Hot surface. Risk of injury. Harmful corrosive substances. -
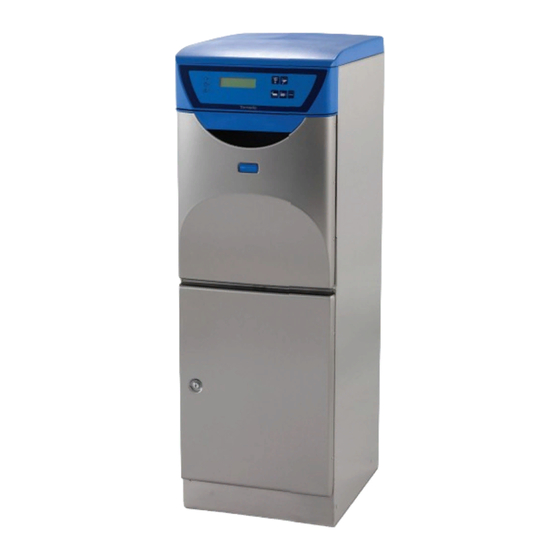
Page 12: Presentation
To meet the requirements of EN ISO 15883, the goods must be placed in the proper holder, recommended by Arjo. Goods being disinfected are exposed to 90°C for at least 6... -
Page 13: P&I Diagram
2.4 P&I diagram G 1/2" G 1/2" LS A B01A LS A B01B LS A B01C TIA/TIR Ø110 or 90mm. =OPTIONS Instrument funktioner enl. ISO 3511. Komponent märkning enl. IEC 750. Instrument functions acc. to. ISO 3511. Component marking acc. to IEC 750. Replace E01 and B20. -
Page 14: Internal Cooling (Optional)
2.5.2 Internal cooling (optional) Internal cooling takes water from the tank and the standard water supply. This method is not recommended according to EN ISO 15883. 2.6 Inspection hole 2.6.1 Positioning of FD1800 and FD1810 The inspection hole is located in the front right corner of the chamber. -
Page 15: Positioning Of Fd1805
2.6.2 Positioning of FD1805 The inspection hole is on the top of the chamber. Remove the bench top to get to the inspection hole. Figure 3. Inspection hole (1) -
Page 16: The Programs
2.7 The programs WARNING! The goods may be hot at the end of the program. If the temperature of the goods is above 60°C, the display shows U7. Programs, standard set: Economy program for lightly soiled goods. Normal program for normally soiled goods. Intensive program for heavily soiled goods. -
Page 17: Service Program
3 SERVICE PROGRAM 3.1 Function In the service program, maintenance and service personnel can set parameters which control the operation of the machine. These parameters are divided into the following groups: • Machine-independent settings • • Program selection • Interval disinfection •... -
Page 18: Accessing The Service Program
3.2 Accessing the service program Note! You must enter your access rights code before you can change anything in the program. If the numerical value cannot be changed or you do not have the access rights to change it. Note! You must be in line number mode to quit the service program. -
Page 19: Check Or Change A Numerical Value On A Line Without A Sub-Line Number
3.4 Check or change a numerical value on a line without a sub-line number • Press (increase line number) or (reduce line number) so the display shows the right line number. Holding down the button scrolls the value up or down for as long as the button is pressed. -
Page 20: Check Or Change A Numerical Value On A Line With A Sub-Line Number
3.5 Check or change a numerical value on a line with a sub-line number • Press (increase line number) or (reduce line number) so the display shows the right line number. Holding down the button scrolls the value up or down for as long as the button is pressed. -
Page 21: Quitting The Service Program
3.6 Quitting the service program If there is a numerical value on the display, press to return to the line number. Press at the same time and hold for 4 seconds. -
Page 22: Line Information
4 LINE INFORMATION 4.1 Line Line, Sub-line Parameter Setting, Setting, Authorization basic range Lines 00-09: Machine-independent variables Authorization code 0000-9999 Checking and retrieving 1 = Basic, settings 2 = Factory, 3 = Work Machine type 2 = FD1800, etc. Program version .00 = 00-99 (main version) Program version... - Page 23 Line, Sub-line Parameter Setting, Setting, Authorization basic range Door type 1 (1800/1805) 1 = Manual, 2 (1810) 2 = Automatic IR sensor interval Acoustic alarm 0 = Not active, 1 = Active Feedback activation 0 = Not active, Factory 1 = Active Feedback interval 0-255 Factory...
- Page 24 Line, Sub-line Parameter Setting, Setting, Authorization basic range Program name, buttons Intensive 3 + 5 program + Detergent Program selection button 4 8 00 = No program, 01-25 Program Program name, button 4 Program selection pedal 0-25 (FD1810) Program name selection Normal program pedal (FD1810) Program selection pedal +...
- Page 25 Line, Sub-line Parameter Setting, Setting, Authorization basic range Limit for inspection 9999 0-9999 requests Counter for inspection 0-9999 request Line 33: Dose size Dosing time, descaler 0-99 seconds Dosing time rinse-aid 0-99 seconds Dosing time, process agent 30 0-99 seconds Dosing time spray agent 0.0-9.9 seconds Line 34: Empty container alarm...
- Page 26 Line, Sub-line Parameter Setting, Setting, Authorization basic range Global external cooling time 120 0-180 sec Global extended cooling 0-180 sec (after process) Handling auto-disinfection 0 = None, 1 = Warning, 2 = Warning + autostart Auto-disinfection permitted Time 0-23 until Auto-disinfection permitted Time 0-23 until...
- Page 27 Line, Sub-line Parameter Setting, Setting, Authorization basic range Counter for error code Fnn 0-99 errors Lines 70-74: Program statistics Max. temperature 5-99°C Program time, last process 0-9999 seconds Program time, total 0-99999 seconds - Counter for number of 0-99999 processes Counter, program 1 0-9999 Counter, program nn...
- Page 28 Line, Sub-line Parameter Setting, Setting, Authorization basic range Activation rinse-aid Input: 0 = not low level active, 1 = active Activation rinse-aid empty Input: 0 = not active, 1 = active Activation, process agent, Input: 0 = not low level active, 1 = active Activation, process agent, Input: 0 = not...
- Page 29 Line, Sub-line Parameter Setting, Setting, Authorization basic range Activation pump rinse-aid Input: 0 = not active, 1 = active Activation, pump, Input: 0 = not process agent active, 1 = active Activation pump spray Input: 0 = not agent active, 1 = active Activation, extra element, Input: 0 = not steam generator...
- Page 30 Line, Sub-line Parameter Setting, Setting, Authorization basic range Connection, door open 1-99 Factory Connection of safety 1-99 Factory switch, door closing (FD1810) Connection pedal (FD1810) 14 1-99 Factory Line 99: Connection outputs Conn., pressure pump 1-99 Factory Conn., steam generator 1-99 Factory Conn., cold water...
-
Page 31: Machine-Independent Variables, Lines 00-09
4.2 Machine-independent variables, lines 00-09 4.2.1 Authorization code Note! You can always view all level A program lines without the access right code for other levels. The code only protects the programming from unauthorized changes. Line 0, Authorization level: ABC The machine has four authorization levels: •... -
Page 32: Program Version
4.2.4 Program version Line 3, sub-lines 01-04 Shows the program version of the chips on the computer board. The various sub-lines show: 01 = main version 02 = sub-version 03 = version 04 = protocol version The numerical value cannot be changed. 4.2.5 Serial Number Line 4 Shows the serial number of the machine. -
Page 33: Date
4.2.7 Date View and edit year, month and day. The three sub-lines show: 01 = year 02 = month 03 = day 4.2.8 Time View and edit hours and minutes. The two sub-lines show: 01 = hours 02 = minutes 4.2.9 Demo Note! Demo mode is for internal use only and must not be... -
Page 34: Start-Up Code
4.3.1 Start-up code Line 10, Authorization level C Used to choose whether a startup code is needed. 0 = Not active (no startup code needed) 1 = Active (startup code needed) Default value is 0. 4.3.2 Child safety Line 11, Authorization level BC Used to choose whether the child safety function is used. -
Page 35: Sound On Door Closing
4.3.5 Sound on door closing Line 14:1, Authorization level: C When this function is activated, a signal is heard when the door is being closed. The signal may be short (50 ms) or long (100 ms). 00 = no signal 01 = Signal 50 ms 02 = Signal 100 ms Default value is 1. -
Page 36: Mains Frequency
4.3.11 Mains frequency Line 19, Authorization level: C Adaptation to the frequency of the electricity supply network. Used to control the dosing pump so that dosing times are correct. 1 = 50 Hz 2 = 60 Hz Default value is 1. 4.3.12 Pump starting time Line 20, For future use 4.3.13 Temperature indication (red LED) -
Page 37: Program Selection, Line 30
4.4 Program selection, line 30 4.4.1 Program selection Function for determining which program is to be linked to the program selection buttons. The numbers of the programs are as follows. They can be linked to the various buttons: Default: Economy program for lightly soiled goods. Normal program for normally soiled goods. -
Page 38: Program Name
As standard, you can choose from the following program names for the buttons: • Economy program • Normal program • Intensive program • Normal + process agent • Intensive + process agent • Contact Arjo for further information about these programs. -
Page 39: Sub-Line Numbers
4.4.3 Sub-line numbers Each sub-line number corresponds to a button or a combination of buttons. Choose programs and program names for the buttons, based on the equipment of the machine. The sub-line numbers are as follows: Sub-line Function Comments Normally, 1 is programmed. Economy Program selection button program here. -
Page 40: Interval Disinfection, Line 31
4.5 Interval disinfection, line 31 4.5.1 Interval disinfection active Line 31, Sub-line 01, Authorization level: C Here you can activate or deactivate the interval disinfection function. 00 = Not active 01 = Active Default value is 00. 4.5.2 Interval disinfection programs Line 31, Sub-line 02, Authorization level: C Choose the program to be run on interval disinfection. -
Page 41: Processing Of Inspection Requests
4.6.1 Processing of inspection requests Line 32, Sub-line 01, Authorization level: C The function can be enabled or disabled in two ways: 00 = Function disabled 01 = A warning message appears on the display when an inspection is due. The machine can be run. 02 = A warning message appears on the display when an inspection is due. -
Page 42: Dosage, Line 33
4.7 Dosage, line 33 Here you can set the dosing time for the various detergents used during a process. The various sub-lines correspond to the following detergents: Sub-line 01 Dosing time for descaler. 0 - 99 seconds in one-second steps. Default value is 6. -
Page 43: Empty Container Alarm, Line 34
4.8 Empty container alarm, line 34 Here you can specify how the empty container alarms from the various containers are managed. The value consists of two or four digits: 00 = No alarm 01XX = 01 means that a warning will be given. The last two digits, the warning. -
Page 44: Lower Disinfection Temperature
4.9.4 Lower disinfection temperature Line 38, Authorization level: C The heating is switched on at this temperature. 80-95°C Default value is 91. 4.9.5 Upper disinfection temperature Line 39, Authorization level: C The heating switches off at this temperature. The upper disinfection temperature must be 2 degrees above the lower disinfection temperature and above the disinfection temperature. -
Page 45: Cooling Method
4.9.10 Cooling method 44:01 = Choose a method for cooling the washed items after disinfection. 0 = no cooling 1 = Internal cooling from tank (does not meet EN ISO 15883) 2 = Ventilator/external cooling with fan 3 = Extended cooling after process Default value is 2. -
Page 46: Chemical Action Time
4.9.14 Chemical action time Line 49, Authorization level: C Here you can specify the time for which the chemical agent will act without being able to remove the items from the machine. The door is kept locked for the set time. 0 - 600 seconds in one-second steps. -
Page 47: Addition Of Softened Water
4.10.5 Addition of softened water Line 54, Authorization level: C Specify whether soft water is to be added and if so where. 00 = No soft water is to be added. 01 = Soft water is to be added in the tank. 02 = Soft water is to be added in the steam generator. -
Page 48: Instruction For Last Error
4.11.2 Instruction for last error Line 61 Show the program line in the relevant program where the error occurred. 00 = Error not in the program 01 - 9999 = Program line This value cannot be changed. 4.11.3 Counter, total number of errors Line 62 Counter for the total number of errors since the machine was installed. -
Page 49: Program Statistics, Lines 70 - 74
4.12 Program statistics, lines 70 - 74 4.12.1 Max disinfection temperature Line 70 Highest temperature reached in the last program that was run. 80°C to 99°C This value cannot be changed. 4.12.2 Program time, last program Line 71 Program time in for the last program to be run. 00 - 9999 seconds This value cannot be changed. -
Page 50: Reading Inputs
4.13.2 Reading inputs All digital inputs can be read. The sub-line number corresponds to the number of the input, as follows (connection: line 98, activation; line 96): Input Function Low level, tank Intermediate level, tank High level, tank Leakage sensor Level, descaler/chemical agent Rinse-aid Level, process agent... -
Page 51: Controlling Outputs
4.13.3 Controlling outputs Note! For certain outputs to be activated, the door must be closed and locked. All digital outputs can be controlled. The sub-line number corresponds to the number of the output, as follows (connection: line 99, activation: line 97): Output Function Valve, cold water... -
Page 52: Flash, Lines 85-86
4.14 Flash, lines 85-86 Note! Chapter 4.14 only applies to the old index PCBA boards 503767205/503767279. New PCBA AH1038184/ AH1038184- Line 85 Saving... appears on the display and then Save OK. Error codes: Error code Description File does not exist socket 2 FLASH_Verify_Erase Error Error on erasing 3-12 Error saving Area! -
Page 53: Ad Calibration, Lines 87-88
4.15 AD calibration, lines 87-88 4.15.1 Calibrate with AD Line 87 The AD converter for the temperature sensor can be controlled and • port for internal sensors. • Select row 87 (Calibrate AD). • Press (up) or (down). The display shows AD nnn.n L.xxxx, where nnn.n is the current AD value and L indicates that this area is within the value. -
Page 54: Reset Standard Calibration
4.15.3 Reset standard calibration To reset the standard calibration for lines 87 and 88: Step Results 1. Select line 87. The display shows the current calibration, e.g. 200.526:900.796. 2. Press defaults?” Press both buttons simultaneously for three seconds. 3. Press After a few seconds, the standard calibration, e.g. -
Page 55: Inputs And Outputs, Line 96-99
4.16 Inputs and outputs, line 96-99 4.16.1 Activation, inputs This line number is used to tell the software which logical inputs are installed. Note! Some sub-line numbers are not included. They are reserved for future use. For each input, specify: 00 = input not installed 01 = input installed The sub-line numbers correspond to the following inputs:... -
Page 56: Activation, Outputs
4.16.2 Activation, outputs This line number is used to tell the software which logical outputs are installed. Note! Some sub-line numbers are not included. They are reserved for future use. For each output, specify: 00 = output not installed 01 = output installed The sub-line numbers correspond to the following outputs: Sub-line no. -
Page 57: Input Connections
4.16.3 Input connections This line number is used to tell the software which physical inputs are connected to each logical input in the program. Note! Some sub-line numbers are not included. They are reserved for future use. The sub-line numbers correspond to the following logical inputs: Sub-line no. -
Page 58: Connection Outputs
4.16.4 Connection outputs This line number is used to tell the software which physical outputs are connected to each logical output in the program. Note! Some sub-line numbers are not included. They are reserved for future use. The sub-line numbers correspond to the following logical outputs: factory: Sub-line no. -
Page 59: Error Indicators
5 ERROR INDICATORS 5.1 Error message For certain errors in the process, information about the cause of the error is given on the display on the front panel. The error messages must be acknowledged when the error has been put right. -
Page 60: Handling Codes That Require Action Before Restarting The Machine
5.1.3 Handling codes that require action before restarting the machine: Warning Meaning Descaler empty Fill to reset Rinse-aid empty Fill to reset Processing agent empty Fill to reset Spray agent empty Fill to reset Start attempt with door open Attempt to start with open door Battery error Backup battery on CPU card 5.2 Acknowledging an error message... -
Page 61: Table Of Errors And Possible Actions
5.4 Table of errors and possible actions WARNING! Only to be carried out by authorized staff. WARNING! The machine is connected to the electricity supply and some components are live. Error Possible cause/Action The display is black Check the circuit breaker The electronics unit is not working. -
Page 62: Preventive Maintenance
The maintenance interval will have to be determined in each individual case. Arjo recommends that the stated maintenance operations be performed at intervals according to the service table. -
Page 63: Service Table
6.1.2 Service table WARNING! Only to be carried out by authorized staff. WARNING! The machine is connected to the electricity supply and some components are live. The service table below shows recommended maintenance intervals. In addition to system testing, we recommend that appropriate cleaning tests and temperature validation are performed according to EN ISO 15883. - Page 64 Measure Each Every other Time* year/10,000 year/20,000 (minutes) cycles cycles Process tank Clean as required. • Check and clean the level sensor. • Check that the valves are working and that the • connections are not leaking. Clean as required. Steam Generators Check the connections to the steam generator for •...
-
Page 65: General (Item 1)
6.2 General (Item 1) 6.2.1 Checking electrical cables and connection points (1.1) The purpose of checking the cabling and connection points is primarily to avoid personal injury as well as damage to the machine itself. Check that the power cord to the electrical unit is intact, free of errors and installed as per the instructions. -
Page 66: Checking Fuses (1.1.1)
6.2.2 Checking fuses (1.1.1) WARNING! Only to be carried out by authorized staff. WARNING! The machine is connected to the electricity supply and some components are live. WARNING! Show precaution, as some components are sensitive to ESD. The disinfector has the following four fuses: •... -
Page 67: Checking The Cooling Fan (1.2)
Check the fuses as follows: • Switch off the isolator switch of the machine. • Pull out the panel and remove the cover. • Switch on the isolator switch of the machine. • Check that the Voltage is present and is within tolerance thresholds; the fuses are intact. -
Page 68: Checking Error Codes And Number Of Processes (1.6)
6.2.7 Checking error codes and number of processes (1.6) The number of processes and error codes are read in the service program. • The number of processes is found on service line 73. • The number of error codes is found on service line 62. 6.3 The chamber (Item 2) 6.3.1 Checking rotating nozzles (2.1) This inspection is done to prevent a slower rotation speed on the... -
Page 69: Removing A Rotating Nozzle (2.1.1)
6.3.2 Removing a rotating nozzle (2.1.1) • Option 1. between the nozzle and the rotating nozzle. Then unscrew the nozzle by hand. Figure 5. Dismantling, option 1 • Option 2 Hold the nozzle and unscrew the nozzle head. Then insert a screwdriver into the nozzle and position the nozzle. -
Page 70: Checking Nozzle Attachments And Hose Connections For The Nozzles (2.3)
6.3.4 Checking nozzle attachments and hose connections for the nozzles (2.3) This is done to minimize the risk of leakage from the chamber and from the hose system’s connections to the nozzles at the back and on the side of the chamber. Failure to perform inspections can result in leakage. -
Page 71: Internal Cleaning Of The Chamber (2.8)
6.3.9 Internal cleaning of the chamber (2.8) WARNING! Concentrated descalers in the steam generator or steam boiler can be damaging for the machine. This removes the coating that has formed in the chamber. If it is not removed, additional dirt and debris can quickly build up in the chamber. -
Page 72: Checking Inlet Valves (3.3)
6.4.3 Checking inlet valves (3.3) WARNING! All supply lines must be closed when working on the pipe system. In order to ensure a proper supply of water, the valves at the water connection points must be inspected every year. If this is not done, cause operational disturbances. -
Page 73: Checking The Steam Generator Function (4.2)
6.5.2 Checking the steam generator function (4.2) WARNING! Only to be carried out by authorized staff. WARNING! Before starting work, make sure that the machine is disconnected from the electric power supply. WARNING! Hot water. Check that the steam generator generates steam and the chamber heats up. - Page 74 6.5.2.1 Cleaning the steam generator If the water is hard (above about 6 dH) there is a risk of limescale deposits forming on the elements of the steam generator. The elements should be checked and cleaned once or twice a year. •...
-
Page 75: Main Pump (Item 5)
6.6 Main pump (Item 5) The main pump is a very important component for the machine’s function as it directly affects the cleaning result. If you suspect a problem or a reduction in function for this component, replace it immediately. 6.6.1 Checking the main pump (5.1) Check the mounting for the pump so that it is secure. - Page 76 6.7.2.1 Setting dosage amounts WARNING! Only to be carried out by authorized staff. The dosing pumps in the various dosing systems cannot be adjusted. All adjustments of dosing quantities are done by varying the running time of the dosing pump during the cleaning program. Adjustment is done in the service program.
-
Page 77: Replacing A Hose In The Dosing Pump (6.3)
6.7.3 Replacing a hose in the dosing pump (6.3) Wear and tear in combination with chemicals can accelerate deterioration of the hose. All changes to the hose’s condition can alter the amount of agent added and thereby have a negative impact on the process. -
Page 78: Checking The Empty Container Alarm (6.4)
6.7.4 Checking the empty container alarm (6.4) Lift up the empty container alarm. Warning code U1, U2 or U3 are triggered depending on the dosage options. In the worst case, a missed alarm signal for an empty container can result in the process running without the cleaning and/or descaler being added, with soiled goods as a result. - Page 79 with impaired ventilation capacity as a result. Cut off the straps. Figure 11.
-
Page 80: Checking Fan Function And Connection (8.2)
with impaired ventilation capacity as a result. Lift and remove the cap. Replace the cap. Figure 12. 6.9.3 Checking fan function and connection (8.2) If the fan does not work, the ventilation process can be put out of operation. Check the fan and clean, if needed. Any leakage can lead to impaired performance. -
Page 81: Test Run (Item 10) (At Each Service)
6.11 Test run (Item 10) (At each service) 6.11.1 Function and leakage check (10.1) Note! High-performance equipment is essential for reliable measuring results, because of the relatively rapid temperature changes. To check the components function and for any leakage, a process is run. -
Page 82: Checking The Panel (10.2)
6.11.2 Checking the panel (10.2) Check the panel lights by: • switching off the power with the isolator switch • and switching the power on again. All the lamps on the panel must light up and the acoustic signal must sound. -
Page 83: Repairs And Adjustment
7 REPAIRS AND ADJUSTMENT 7.1 Remove top 7.1.1 Removing FD1800 and FD1810 Remove the top by twisting the two locking screws quarter of a turn. Then pull the top forward and lift it off. Figure 13. Removing the top... -
Page 84: Removing The Bench Top For Fd1805
7.1.2 Removing the bench top for FD1805 Remove the bench top by opening the door to the right and unscrewing the locking screw. Then pull the bench top forward and remove it. Figure 14. Removing the top... -
Page 85: Opening The Door In The Event Of A Power Failure
7.2 Opening the door in the event of a power failure 7.2.1 Opening FD1800 and FD1810 Remove the cover from the machine to access the locking mechanism. Slide the locking mechanism to the side. Then open the door. Figure 15. Opening the door manually 7.2.2 Opening FD1805 panel above the door and then turn the panel outward. -
Page 86: Printer (Option)
7.3 Printer (option) RS232 port Baud rate 9600 Parity None Data bits Stop bits Handshake None Print mode Normal Print format 24CPL Char width Normal Char height Normal Sleep mode 7.4 Draining the machine WARNING! Warm water can be found inside the steam generator and the pump. -
Page 87: Draining The Main Pump
7.4.2 Draining the main pump WARNING! Take care when pulling out the plug. Unscrew the plug on the lower front edge of the pump and drain all the water from the pump. The amount of water in the main pump is about 420 ml. -
Page 88: Replacement Of Rotating Nozzle
7.5 Replacement of rotating nozzle WARNING! Only to be carried out by authorized staff. Figure 18. Components in the nozzle 1. Nozzle head 2. Rotating nozzle • Option 1. between the nozzle and the rotating nozzle. Then unscrew the nozzle by hand. Figure 19. -
Page 89: Replacing A Temperature Sensor
7.6 Replacing a temperature sensor WARNING! Only to be carried out by authorized staff. WARNING! The machine is connected to the electricity supply and some components are live. • Remove the old temperature sensor by pulling it out of the seal. -
Page 90: Overheat Protection
7.8 Overheat protection WARNING! Only to be carried out by authorized staff. WARNING! The machine is connected to the electricity supply and some components are live. Note! overheat protection tripped. The steam generator has an overheat protection which trips if the temperature in the steam generator goes too high. -
Page 91: Component List
8 COMPONENT LIST 8.1 Positioning (FD1800 and FD1810) -U01 -K04 -K03 -X50 -F03 -A10 -K02 -M16 -A01 -F1,-F3 -S03 -M06 -S04 -F01 -S05 -B01 -Y01 -A11 -Y02 -B07 -M17 -B05* -M01 -E01 -Q01 -M03 -M04 -M07 -M18 -S11 -B02, -B04, -B06 -B05* Figure 23. -
Page 92: Positioning (Fd1805)
8.2 Positioning (FD1805) -M06 -B01 -M16, -S03, -B05 -S04, -S05 -A11 -B07 -E01 -Y01, -Y02 -Q01 -M03, -M04, -M07 -M01 -U01 -K03 -A01 -X50 -B02, B04, B06 -K02 -F03 -F01 Figure 24. Components in the machine... -
Page 93: Description
8.3 Description Note! Some components are extra equipment. -A01 Control system, -M03 Motor, process pump processor board -A10 Control card lock motor -M04 Motor, descaler pump -A11 Display keypad -M06 Ventilator fan -B01 Level sensor, tank -M07 Motor, rinse-aid pump -B02 Level sensor, descaling -M16 Locking motor -B04 Level sensor, process... - Page 94 At Arjo, we are committed to improving the everyday lives of people affected by reduced mobility and age-related health challenges. With products and solutions that ensure ergonomic patient handling, personal hygiene, disinfection, diagnostics, and the effective prevention of pressure ulcers and venous thromboembolism, we help professionals across care environments to continually raise...
Need help?
Do you have a question about the Tornado and is the answer not in the manual?
Questions and answers