
Related Manuals for Electrolux Professional Lagoon TD6-6


Summary of Contents for Electrolux Professional Lagoon TD6-6
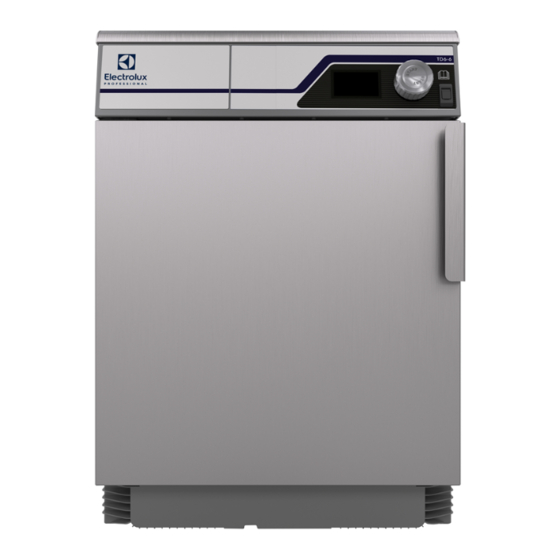
- Page 1 Installation manual Tumble dryer TD6–6 Lagoon Type N1130.. 438917530/EN Original instructions 2022.09.01...
-
Page 3: Table Of Contents
Contents Contents 1 Safety Precautions ..........................5 General safety information......................6 Commercial use only........................6 Ergonomics certification ......................6 Symbols............................7 2 Warranty terms and exclusions......................8 3 Technical data.............................9 Drawing ............................9 Technical data .........................10 Connections ..........................10 4 Setup ............................... 11 Unpacking ..........................11 Recycling instruction for packaging ...................12 Siting ............................13 Mechanical installation ......................13 Stacking frame ........................14... -
Page 5: Safety Precautions
Installation manual 1 Safety Precautions • Servicing shall be carried out only by authorized personnel. • Only authorized spare parts, accessories and consumables shall be used. • The machine is not to be used if industrial chemicals have been used for cleaning. •... -
Page 6: General Safety Information
Installation manual • Oil-affected items can ignite spontaneously, especially when exposed to heat sources such as in a tumble dryer. The items become warm, causing an oxidation reaction in the oil. Oxidation creates heat. If the heat cannot escape, the items can become hot enough to catch fire. -
Page 7: Symbols
Installation manual In case several machines are managed by the same operator the repetitive movements will increase and as a conse- quence of this the related biomechanical risk will increase exponentially. The possible postural risks are the interaction with the door handle in case the machine is placed directly on the floor without a base and with the door handle and the user interface, display and knob, in case the machine is placed on top of a washing machine. -
Page 8: Warranty Terms And Exclusions
Warranty will be applicable where the customer has used only genuine spare parts and has performed maintenance in accordance with Electrolux Professional user and maintenance documentation made available in paper or elec- tronic format. Electrolux Professional strongly recommends using Electrolux Professional approved cleaning, rinse and descaling agents to obtain optimal results and maintain product efficiency over time. -
Page 9: Technical Data
Installation manual 3 Technical data 3.1 Drawing fig.W00648D Operating panel Door opening, ⌀ 370 mm Electrical connection Condense connection (only for condense machines) Exhaust connection (only for exhaust machines) -
Page 10: Technical Data
Installation manual 3.2 Technical data Exhaust Condense Weight, net Drum volume litres Drum diameter Drum depth Drum speed G-factor, max. Rated capacity, filling factor 1:22 (Max. load) Heating: Electricity A-weighted emission sound pressure level at working stations dB(A) Heat emission of installed power, max 3.3 Connections Exhaust Condense... -
Page 11: Setup
Installation manual 4 Setup 4.1 Unpacking Remove the machine from the pallet. Note! When moving the machine, handle it with care. The drum has no transport clamps. Place the machine on its final position. -
Page 12: Recycling Instruction For Packaging
Installation manual 4.2 Recycling instruction for packaging fig.X02403 Fig. Description Code Type Wrapping film LDPE 4 Plastics Corner protection PS 6 Plastics Cardboard packaging PAP 20 Paper Pallet FOR 50 Wood Screw FE 40 Steel Steel Bracket FE 40 Steel Plastic bag PET 1 Plastics... -
Page 13: Siting
Installation manual 4.3 Siting The machine should be positioned so that there is plenty of room for working, both for the user and service personnel. The figure shows minimum distance to a wall and/or other machines. fig.X00959 50 mm 500 mm Note! The machine should be positioned so that there will be enough space for working, both for the user and service personnel. -
Page 14: Stacking Frame
Installation manual 4.5 Stacking frame The machine can be installed on top of a another 130 litre tumble dryer or a 53 litre washer extractor. Make sure that the machine that shall be at the bottom is in level. Also make sure the top panel is clean before starting the installation. Place the stacking frame on top of the machine that shall be at the bottom and fasten the bracket (A) on the stacking frame. -
Page 15: Evacuation System
Installation manual 5 Evacuation system 5.1 Air principle The condensate machine does not have evacuation of air into the open. The air is circulated in a closed system between the machine and the condensing unit. The water in the garments condenses in the condensing unit and is led out to the drain. -
Page 16: Fresh Air
Installation manual 5.2 Fresh air For maximum efficiency and the shortest possible drying time, it is important to ensure that fresh air is able to enter the room from the outside in the same volume as that is blown out of the room. To avoid draught in the room it is important to place the air inlet behind the machine. -
Page 17: Shared Exhaust Duct
Installation manual 5.2.2 Shared exhaust duct It is recommended that each machine is connected to a separate exhaust duct. When several machines shall use the same exhaust duct the exhaust duct must increase after each machine. The recommended diameter increase progression is the one in the table. If several machines are installed on the same exhaust pipe, it is recommended to adjust the airflow on the machines when all machines are started and running a program with no heat. -
Page 18: Electrical Connection
Installation manual 6 Electrical connection 6.1 Electrical installation The electrical installation may only be carried out by qualified personnel. Machines with frequency-controlled motors can be incompatible with certain types of earth leakage circuit break- er. It is important to know that the machines are designed to provide a high level of personal safety, which is why items of external equipment such as earth leakage circuit breakers are not necessary but is recommended. -
Page 19: Single-Phase Connection
Installation manual 6.2 Single-phase connection Demount the cover panel from the supply unit. Connect the earth and other wires as shown. Exhaust model 208–240V 1~ 3.2kW 1.9kW 1.6kW 1.6kW 220–240V 1N~ 3.2kW 1.9kW 1.6kW 1.6kW 220–240V 1N~ 3.5kW 1.9kW 1.6kW 1.6kW Condense model 208–240V 1~ 3.0kW... -
Page 20: Three-Phase Connection
Installation manual 6.3 Three-phase connection Demount the cover panel from the supply unit. Connect the earth and other wires as shown. Exhaust model 380–415V 3N~ 3.2kW 1.9kW 1.6kW 1.6kW 200–240V 3~ 5.1kW 1.9kW 1.6kW 1.6kW 380–440V 3~ 5.1kW 1.9kW 1.6kW 1.6kW 440V 3~ 2.6kW 1.9kW... -
Page 21: Electrical Connections
Installation manual Condense model 380–415V 3N~ 3.0kW BU bu 1000W 2000W 200–240V 3~ 3.0kW 2000W 1000W 380–440V 3N~ 3.0kW BU bu 3000W When the installation is completed remount the cover panel and check: • That the drum is empty. • That the machine operates by connecting the power to the machine and start a program with heat. 6.4 Electrical connections Heating alternative Main voltage... -
Page 22: Reversing The Door
Installation manual 7 Reversing the door Disconnect the power to the machine. Demount the lower hinge and lift off the door. Note! Make sure to hold the door in position when loosening the hinge mounting. Demount the upper hinge. fig.W00180A Demount the cover screws on the other side and mount them where the hinges was. - Page 23 Installation manual Demount the locking panels by loosening the barb with a screwdriver. Press out the locking panels, swap them over and press into position. fig.W00184A Mount the door on the other side. Push the door and the top pivot into the upper hinge and then adjust the lower pivot into the lower hinge.
-
Page 24: At First Power Up
Installation manual 8 At first power up When the installation is complete and the power is connected for the first time you will be forced to make the following settings. When one setting is ready you will automatically enter the next one. •... -
Page 25: Function Check
Installation manual 9 Function check May only be carried out by qualified personnel. A function check must be made when the installation is finished and before the machine can be ready to be used. Whenever a repair has been made, a function check must be performed before the machine can be used again. Check the automatic stop of the machine •... -
Page 26: Disposal Information
Installation manual 10 Disposal information 10.1 Disposal of appliance at end of life Before disposing of the machine, make sure to carefully check its physical condition, and in particular any parts of the structure that can give or break during scrapping. The machine’s parts must be disposed of in a differentiated way, according to their different characteristics (e.g. - Page 28 Electrolux Professional AB 341 80 Ljungby, Sweden www.electroluxprofessional.com...
Need help?
Do you have a question about the Lagoon TD6-6 and is the answer not in the manual?
Questions and answers