
Subscribe to Our Youtube Channel
Related Manuals for Electrolux Professional TD6-20LAC


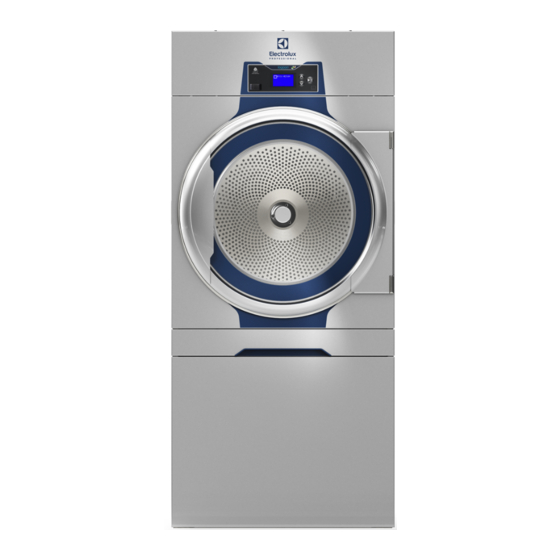
Summary of Contents for Electrolux Professional TD6-20LAC
- Page 1 Installation manual Tumble dryer TD6–20LAC Type N2... 438905920/GB, IE Original instructions 2022.11.30...
-
Page 3: Table Of Contents
Contents Contents 1 Safety Precautions ..........................5 Additional safety precautions for gas heated tumble dryer .............7 General information ........................7 Commercial use only........................7 Ergonomics certification ......................7 Symbols............................8 2 Technical data.............................9 Electric heated machines......................9 2.1.1 Drawing ...........................9 2.1.2 Technical data ........................10 Steam heated machines......................11 2.2.1 Drawing ......................... - Page 4 Contents The manufacturer reserves the right to make changes to design and component specifications.
-
Page 5: Safety Precautions
Installation manual 1 Safety Precautions • Servicing shall be carried out only by authorized personnel. • Only authorized spare parts, accessories and consumables shall be used. • The machine is not to be used if industrial chemicals have been used for cleaning. •... - Page 6 Installation manual • Oil-affected items can ignite spontaneously, especially when exposed to heat sources such as in a tumble dryer. The items become warm, causing an oxidation reaction in the oil. Oxidation creates heat. If the heat cannot escape, the items can become hot enough to catch fire.
-
Page 7: Additional Safety Precautions For Gas Heated Tumble Dryer
Installation manual 1.1 Additional safety precautions for gas heated tumble dryer • Before installation, check that the local distribution conditions, nature of gas and pres- sure and the adjustment of the appliance are compatible. • The machine is not to be installed in rooms containing cleaning machines with per- chloroethylene, TRICHLOROETHYLENE or CHLOROFLUOROCONTAINING HY- DROCARBONS as cleaning agents. -
Page 8: Symbols
Installation manual In case several machines are managed by the same operator the repetitive movements will increase and as a conse- quence of this the related biomechanical risk will increase exponentially. The possible postural risks are the interaction with the user interface, display and buttons. Follow the below recommendations to avoid, as much as possible, operators acquiring bodily injury. -
Page 9: Technical Data
Installation manual 2 Technical data 2.1 Electric heated machines 2.1.1 Drawing fig.X00718 Operating panel Door opening, ⌀ 580 mm Electrical connection Exhaust connection 1200 1770... -
Page 10: Technical Data
Installation manual 2.1.2 Technical data Weight, net Drum volume liters Drum diameter Drum depth Drum speed, medium load Rated capacity, filling factor 1:18 (Max. load) Rated capacity, filling factor 1:22 (Recommended load) 16.4 Heating: Electricity 18.0 Optimum air flow, 18.0 kW** Optimum static back pressure, 18.0 kW** Maximum static back pressure, 18.0 kW** Sound power/pressure level at drying*... -
Page 11: Steam Heated Machines
Installation manual 2.2 Steam heated machines 2.2.1 Drawing B(b) B(a) fig.X00720 Operating panel Door opening, ⌀ 580 mm Electrical connection Steam connection Condensate connection Exhaust connection B (a) B (b) 1200 1340 1770... -
Page 12: Technical Data
Installation manual 2.2.2 Technical data Weight, net Drum volume liters Drum diameter Drum depth Drum speed, medium load Rated capacity, filling factor 1:18 (Max. load) Rated capacity, filling factor 1:22 (Recommended load) 16.4 Heating: Steam at 700 kPa 25.0 Steam pressure 100–1000 Optimum air flow** Optimum static back pressure**... -
Page 13: Gas Heated Machines
Installation manual 2.3 Gas heated machines 2.3.1 Drawing fig.X00719 Operating panel Door opening, ⌀ 580 mm Electrical connection Gas connection Exhaust connection 1200 1770... -
Page 14: Technical Data
Installation manual 2.3.2 Technical data Weight, net Drum volume liters Drum diameter Drum depth Drum speed, medium load Rated capacity, filling factor 1:18 (Max. load) Rated capacity, filling factor 1:22 (Recommended load) 16.4 Heating: Gas 21.0 Optimum air flow** Optimum static back pressure** Maximum static back pressure** Sound power/pressure level at drying* dB(A) -
Page 15: Machines With Heat Pump
Installation manual 2.4 Machines with heat pump 2.4.1 Drawing B(b) B(a) fig.X00721 Operating panel Door opening, ⌀ 580 mm Electrical connection Drain for condense water B (a) B (b) 1200 1230 1770... -
Page 16: Technical Data
Installation manual 2.4.2 Technical data Weight, net Drum volume liters Drum diameter Drum depth Drum speed, medium load Rated capacity, filling factor 1:18 (Max. load) Rated capacity, filling factor 1:22 (Recommended load) 16.4 Optimum air flow** Optimum static back pressure** Maximum static back pressure** Sound power/pressure level at drying* dB(A) -
Page 17: Setup
Installation manual 3 Setup 3.1 Unpacking Note! A minimum of two persons are required for the unpacking of the unit. Remove the filter drawer and demount the lower front panel. Demount the rear panel. fig.X00692 Remove the bolts between the machine and pallet. Remove the machine from the pallet. -
Page 18: Recycling Instruction For Packaging
Installation manual 3.2 Recycling instruction for packaging fig.X02406 Fig. Description Code Type Wrapping film LDPE 4 Plastics Corner protection PS 6 Plastics Cardboard packaging PAP 20 Paper Pallet FOR 50 Wood Screw FE 40 Steel Plastic bag PET 1 Plastics... -
Page 19: Wheels
Installation manual 3.3 Wheels For ergonomic reasons the machine is equipped with wheels. The wheels make it easy to move the machine without lifting it. The wheels can only be used as long as the feet of the machine are not lowered. fig.X00717 3.4 Siting The figure shows recommended distance to walls and/or other machines. -
Page 20: Mechanical Installation
Installation manual Note! The machine should be positioned so that there will be enough space for working, both for the user and service personnel. Respecting the given recommendations will provide easy access for maintenance and service operations. In case of space limitations, it is possible to install machines without respecting to the given recommendations. If so, keep in mind that it might be necessary to disconnect and move other machines to be able to reach and perform service on affected machine. -
Page 21: Evacuation System
Installation manual 4 Evacuation system 4.1 Air principle Note! It is very important that the machine gets enough fresh air in order to get the best drying result. 4.1.1 Electric-, Steam- and Gas heated machines The fan creates low pressure in the machine, drawing air into the drum via the heating unit. The heated air passes through the garments and the drum holes and flows out through the filter positioned below the drum. -
Page 22: Fresh Air
Installation manual 4.2 Fresh air For maximum efficiency and the shortest possible drying time, it is important to ensure that fresh air is able to enter the room from the outside in the same volume as that is blown out of the room. To avoid draught in the room it is important to place the air inlet behind the machine. -
Page 23: Shared Exhaust Duct
Installation manual 4.4 Shared exhaust duct It is recommended that each machine is connected to a separate exhaust duct. When several machines shall use the same exhaust duct the exhaust duct must increase after each machine. The recommended diameter increase progression is the one in the table. If several machines are installed on the same exhaust pipe, it is recommended to adjust the airflow on the machines when all machines are started and running a program with no heat. -
Page 24: Adjusting The Air Flow (Not Valid For Tumble Dryers With Heat Pump)
Installation manual 4.6 Adjusting the air flow (not valid for tumble dryers with heat pump) Adjusting the air flow may only be carried out by authorized personnel. It is important that the machine has the correct air volume compared to each machines effect. If the air flow is below the minimum, the machine will be forced to switch the heating off which will result in longer drying time. - Page 25 Installation manual • Demount the lower side panel. fig.X00979E • Disconnect the NTC-sensor. fig.X01226B...
- Page 26 Installation manual Insert the measuring instrument (manometer) in the hole (A). Make sure the connection is tight to prevent air leakage. Run the tube out on the back of the machine through the gap to the right of the drum motor. fig.X00896A •...
- Page 27 Installation manual The optimum drying performances are achieved when the measured static back pressure correspond to the value listed in the following table. Heating Effect Optimum static back pressure — measured at Resulting: Nominal air flow in a cold empty ma- position A (Pa) in a cold empty machine chine (m Electric...
- Page 28 Installation manual TD6-20 ,GAS/STEAM ,21/25kW ,120V/1/60Hz 1400 1300 1200 1100 1000 1000 1100 1200 1300 1400 fig.X01550 TD6-20 EL ,18kW ,400V/3/60Hz 1300 1200 1100 1000 fig.X01551 TD6-20 EL ,18kW ,400V/3/50Hz 1000 1100 fig.X01552...
- Page 29 Installation manual Alternative measuring method Adjusting the air flow may only be carried out by authorized personnel. Use a home made U tube manometer, a hose (max. outer ⌀ 10 mm and min. outer ⌀ 5 mm), with water. Insert one end of the hose in the hole (A) (after the NTC-sensor has been removed), hold the hose according to the picture so that the water is in level.
-
Page 30: Electrical Connection
Installation manual 5 Electrical connection 5.1 Electrical installation The electrical installation may only be carried out by qualified personnel. Machines with frequency-controlled motors can be incompatible with certain types of earth leakage circuit break- er. It is important to know that the machines are designed to provide a high level of personal safety, which is why items of external equipment such as earth leakage circuit breakers are not necessary but is recommended. -
Page 31: Machine Connection With Ferrite
Installation manual 5.2 Machine connection with ferrite 5.2.1 Machines with AFC or DSC To obtain approved level of EMC, it is mandatory to use the ferrite which is enclosed with machines equipped with AFC (adaptive fan control) or DSC (drum speed control). (Note that this is only valid for those machines). Before connecting to the machine, the protective earth (PE) wire shall be wrapped around the ferrite. -
Page 32: Single-Phase Connection
Installation manual 5.3 Single-phase connection Demount the cover panel from the supply unit. Connect the earth and other wires as shown. 1NAC 1NAC 1NAC When the installation is completed remount the cover panel and check: • That the drum is empty. •... -
Page 33: Three-Phase Connection
Installation manual 5.4 Three-phase connection Demount the cover panel from the supply unit. Connect the earth and other wires as shown. L1 L2 L3 L2 L3 3NAC L1 L2 L3 N 3NAC 3NAC L2 L3... -
Page 34: Electrical Connections
Installation manual When the installation is completed remount the cover panel and check: • That the drum is empty. • That the machine operates by connecting the power to the machine and start a program with heat. 5.5 Electrical connections Heating alternative Main voltage Heating power... - Page 35 Installation manual Attach the pressure hoses to the machines inlet and outlet connecting branches. It is important to support the inlet and the outlet connecting branches in order to prevent deformation. The pressure hoses must not hang down. fig.7195 Condensate return It is important that the branch pipe for condensed water on return to the main condensate pipe has a descending gra- dient and is lower than the outlet connecting branch (6).
-
Page 36: Gas Connection
Installation manual 7 Gas connection 7.1 Fasten the label Before installing the machine fasten the label “Read the user instructions” on the inside of the door in a suitable place and at the front panel. The label must have the correct country code, choose the correct label from the gas kit. Read the technical Read the technica l instructio ns before... -
Page 37: Gas Installation
Installation manual 7.3 Gas installation This gas appliance is build to run on natural gas (group I2H and I2E), commonly identified by GNH. This default gas appliance is built to be installed at not over than 610 m (2001 ft) high altitude otherwise a kit for high altitude must be installed to the machine. -
Page 38: Test Run
Installation manual Natural gas Gas category Inlet pressure Injector pres- Injector size (⌀ Air reducing Label number May be avail- (mbar) sure (mbar) plate (mm) able in follow- ing countries 2H, 2E 4.00 Default AT, BG, CZ, DK, EE, FI, GR, HR, HU, IS, IE, IT, LV, LT, NO, PT, RO, SK, SI,... -
Page 39: Converting Instructions
Installation manual 7.6 Converting instructions • Disconnect the power to the machine. • Demount the back panel. • Demount the air restriction plate (1). • Demount the nozzle (2) and mount the new supplied nozzle. • Re-mount the air restriction plate. fig.X01068 •... -
Page 40: Data Label
INJECTOR:Ø 4.00 NATURAL GAS : G20 (INLET PRESS.: 20-25 MBAR, CAL. VAL. 37780 KJ/M3) For safety reasons use only genuine spare parts. Made in Sweden Electrolux Professional AB 341 80 Ljungby, Sweden WXXXXX 9868XXXXXX Product no.: 09XXX / 99XXXXX Serial no.:... -
Page 41: Reversing The Door
Installation manual 8 Reversing the door Disconnect the power to the machine. Demount the hinges and remove the door. Remove the upper hinge first. fig.X00714 Demount the upper front panel and carefully place it in the area over the front panel (place it with the front facing up- wards). - Page 42 Installation manual Remove the filter drawer from the machine. Remove the screws to the door switch magnet. Demount the front panel. Disconnect the door switch cable. fig.X00689 Remove the upper screw, the cover and the lower screw on the right side. Remove the screws on the left side to release the reed switch bracket holding the door switch cable.
- Page 43 Installation manual On the reed switch bracket, pull out and move the door switch cable from the upper to the lower position according to the figure. Make sure that the cable and the end piece are in position. fig.X01095 Turn the reed switch bracket up side down and mount it on the right side. Pull the door switch cable out through the hole and connect it.
- Page 44 Installation manual Turn the front panel up side down and remount it on the machine. Fasten the screws to the door switch magnet. Ensure that the door switch cable does not get damaged when remounting the front panel. Insert the filter drawer. fig.X00701 Remount the upper front panel.
- Page 45 Installation manual Remount the lower hinge first. Position the door on the lower hinge. Put the upper hinge on the door and then fasten the hinge while it is on the door. fig.X00715 Connect the power to the machine. Test run the machine.
-
Page 46: At First Power Up
Installation manual 9 At first power up When the installation is complete and the power is connected for the first time you will be forced to make the following settings. When one setting is ready you will automatically enter the next one. Follow the instructions on the display. •... -
Page 47: Function Check
Installation manual 10 Function check May only be carried out by qualified personnel. The following function checks shall be made when: • The installation is completed and before the machine can be used for the first time. • Whenever a repair has been made. Check the automatic stop of the machine •... - Page 48 Installation manual • Start a program and check that the direction of the fan motor is correct. The direction shall be counter clock-wise. fig.X00733B If the direction of the fan motor is wrong, swap two of the three phases to the left on the connection terminal. Note! Wrong direction of the fan motor will result in an error code about low air flow.
- Page 49 Installation manual • Remove the filter drawer and remount the panels. • Insert the filter drawer. fig.X00734 Check the heat • Start a program with heat and let the machine work with an empty drum for about five minutes. • Open the door and sense if there is heat in the drum. During a drying cycle, when the square in the lower right corner is fully ticked, it indicates that the heating unit is ac- tive / ON.
-
Page 50: Disposal Information
Installation manual 11 Disposal information 11.1 Disposal of appliance at end of life Before disposing of the machine, make sure to carefully check its physical condition, and in particular any parts of the structure that can give or break during scrapping. The machine’s parts must be disposed of in a differentiated way, according to their different characteristics (e.g. - Page 52 Electrolux Professional AB 341 80 Ljungby, Sweden www.electroluxprofessional.com...
Need help?
Do you have a question about the TD6-20LAC and is the answer not in the manual?
Questions and answers