Table of Contents
Advertisement
Quick Links
Advertisement
Table of Contents

Subscribe to Our Youtube Channel
Related Manuals for Optoma ZU920T


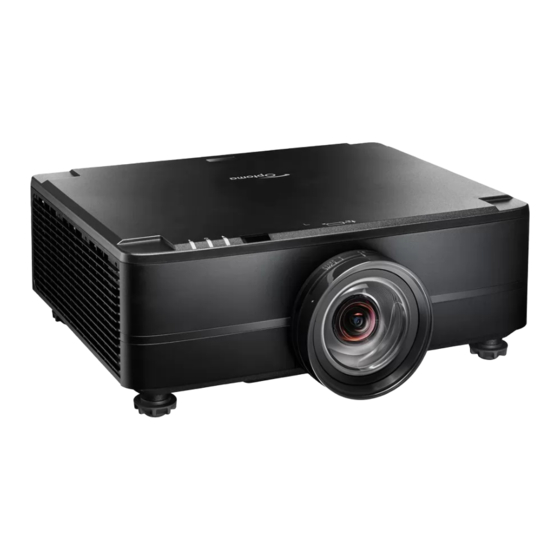
Summary of Contents for Optoma ZU920T
- Page 1 Projector ® User manual...
-
Page 2: Table Of Contents
TABLE OF CONTENTS SAFETY ....................4 Important Safety Instruction....................... 4 Cleaning the Lens........................5 Laser Safety Information ......................6 3D Safety Information ........................ 7 Copyright ........................... 7 Disclaimer ..........................7 Trademark Recognition ......................8 FCC Notice ..........................8 Declaration of Conformity for EU countries ................8 WEEE ............................ - Page 3 Image Size and Projection Distance..................71 Ceiling Mount Installation ......................73 IR remote codes ........................74 Troubleshooting ........................76 LED Indicators and Lightning Messages .................. 77 Specifications ........................... 78 RS232 protocol function list ...................... 79 Optoma global offices ....................... 88 English...
-
Page 4: Safety
SAFETY The lightning flash with arrow head within an equilateral triangle is intended to alert the user to the presence of uninsulated "dangerous voltage" within the product's enclosure that may be of sufficient magnitude to constitute a risk of electric shock to persons. The exclamation point within an equilateral triangle is intended to alert the user to the presence of important operating and maintenance (servicing) instructions in the literature accompanying the appliance. -
Page 5: Cleaning The Lens
‡ Do not attempt to service the unit yourself. Opening or removing covers may expose you to dangerous voltages or other hazards. Please call Optoma before you send the unit for repair. ‡ See projector enclosure for safety related markings. -
Page 6: Laser Safety Information
Laser Safety Information ‡ Complies with 21 CFR 1040.10 and 1040.11 except for conformance as a Risk Group 2 LIP as defined in IEC 62471-5:Ed. 1.0. For more information see Laser Notice No. 57, dated May 8, 2019. IEC 60825- 1:2014: CLASS 1 LASER PRODUCT - RISK GROUP 2 ‡... -
Page 7: 3D Safety Information
3D Safety Information Please follow all warnings and precautions as recommended before you or your child use the 3D function. Warning ‡ Children and teenagers may be more susceptible to health issues associated with viewing in 3D and should be closely supervised when viewing these images. Photosensitive Seizure Warning and Other Health Risks ‡... -
Page 8: Trademark Recognition
Trademark Recognition Kensington is a U.S. registered trademark of ACCO Brand Corporation with issued registrations and pending applications in other countries throughout the world. HDMI, the HDMI Logo, and High-Definition Multimedia Interface are trademarks or registered trademarks of HDMI Licensing LLC in the United States and other countries. ®... -
Page 9: Weee
WEEE Disposal instructions Do not throw this electronic device into the trash when discarding. To minimize pollution and ensure utmost protection of the global environment, please recycle it. CAUTION: This equipment is equipped with a three-pin grounding-type power plug. Do not remove the grounding pin on the power plug. -
Page 10: Introduction
Documentation Note: The actual remote control may vary depending on the region. ‡ (*) For European warranty Information, please visit www.optoma.com. ‡ Please scan the OPAM warranty QR code or visit the following URL: https://www.optoma.com/us/support/warranty-and-return-policy/ Please scan the Asia-Pacific QR code or visit the following URL: https://www.optoma.com/support/download... -
Page 11: Product Overview
INTRODUCTION Product Overview Minimum Minimum Minimum 500mm (19.69”) 500mm (19.69”) 500mm (19.69”) Note: Do not block projector intake and exhaust vents. ‡ When operating the projector in an enclosed space, allow at least 500mm (19.69”) clearance around ‡ the intake and exhaust vents. Item Item IR Receiver... -
Page 12: Connections
INTRODUCTION Connections Item Cable Example Connections 12V Out Connector 12V Trigger Cable Motorized screen, Curtain, etc Remote In Connector Wired Remote Control Cable or IR Receiver Cable (3.5mm TRS type HDBaseT Connector RJ-45 Cable Media Play LAN Connector RJ-45 Cable Local or Company Network HDMI 2 Connector HDMI Cable... -
Page 13: Keypad
INTRODUCTION Keypad Button Function Power Button Turns the projector on or off. Lens Shift Adjust the lens vertical / horizontal position. Enter Confirm the settings. Four Directional Select Keys Navigation keys. Focus Adjust the image focus. Keystone Correction Adjust the keystone correction. Zoom Adjust the image size. -
Page 14: Remote Control
INTRODUCTION Remote control Button Function Power On Turn the projector on. Number Keys Input numbers (0-9). Info Display information on the screen image. Auto Automatically synchronize the projector to an input source. Enter Press to confirm the selection. Arrow Keys Use arrow keys to navigate through the menu or select the appropriate settings. - Page 15 INTRODUCTION Button Function Left Shift (Horizontal) Adjust the image position horizontally. Left Shift (Vertical) Adjust the image position vertically. Keystone (Horizontal) Adjust a horizontally keystone image. Keystone (Vertical) Adjust a vertically keystone image. Shutter Momentarily turn off/on the screen (AV Mute). User 1 Press to assign custom functions.
-
Page 16: Setup And Installation
SETUP AND INSTALLATION Connecting Sources to the Projector Item Item Item 1. 12V DC Jack 6. 3D Sync Cable 11. RS232 Cable 2. Wired Remote Control Cable 7. 3D Emitter Cable 12. VGA Cable or IR Receiver Cable (3.5mm TRS type) 3. -
Page 17: Adjusting The Projector Image
SETUP AND INSTALLATION Adjusting the Projector Image Adjusting the Projector’s Height The projector is equipped with elevator feet for adjusting the image height. Locate the adjustable foot you wish to adjust on the underside of the projector. Rotate the adjustable foot clockwise or counterclockwise to raise or lower the projector. Tilt-Adjustment Feet Tilt-Adjustment Ring English... -
Page 18: Adjusting The Projection Image Shift
SETUP AND INSTALLATION Adjusting the Projection Image Shift The projection lens can be moved up, down, right, and left with the motor-driven lens shift function. This function makes the positioning of images easy on the screen. Lens shift is generally expressed as a percentage of the image height or width, see below illustration. - Page 19 SETUP AND INSTALLATION When the lens is shifted to the leftmost: -480 pixels 1920 pixels 1.6x/1.15x lens models: The display position can be shifted to the left in up to 25% of the width of the display. Fixed lens model: The display position can be shifted to the left in up to 18% of the width of the...
- Page 20 SETUP AND INSTALLATION Lens Shift Range Lens Shift Range (1/2 image) WUXGA ΔH ΔV ΔHo ΔVo 1.6x/1.15x lens models 110% Fixed lens model Note: a) ΔH: The lens shift range in horizontal direction when the lens is at the center. b) ΔV: The lens shift range in vertical direction when the lens is at the center.
-
Page 21: Adjusting The Projector's Zoom And Focus
SETUP AND INSTALLATION Adjusting the Projector’s Zoom and Focus Use the remote control or projector keypad to adjust the zoom and focus of the projected image. To adjust the image focus, press Focus and the pq buttons until the image is sharp and legible. ‡... -
Page 22: Adjusting The Projector Position
SETUP AND INSTALLATION Adjusting the Projector Position When you select a position for the projector, consider the size and shape of your screen, the location of your power outlets, and the distance between the projector and the rest of your equipment. Follow these general guidelines: ‡... -
Page 23: Remote Setup
SETUP AND INSTALLATION Remote Setup Install / Replacing Remote Control Batteries Two AAA size batteries are supplied for the remote control. Remove the battery cover on the back of the remote control. Insert AAA batteries in the battery compartment as illustrated. Replace back cover on remote control. - Page 24 SETUP AND INSTALLATION Remote Control Effective Range Infra-Red (IR) remote control sensor is located on the top and front sides of the projector. Ensure to hold the remote control at an angle within 30 degrees perpendicular to the projector’s IR remote control sensor to function correctly.
-
Page 25: Using The Projector
USING THE PROJECTOR Powering On / Off the Projector Powering On Securely connect the power lead and signal/source cable. When connected, the power LED will turn red. Set the power switch to the “ ” (On) position and wait until the “ ” button on the projector keypad is solid red. - Page 26 USING THE PROJECTOR Powering Off Turn off the projector by pressing the “ ” button on the projector keypad or the button on the remote control. The following message will be displayed: Power Off Press power key again. Press the button again to confirm, otherwise the message will disappear after 15 seconds.
-
Page 27: Menu Navigation And Features
USING THE PROJECTOR Menu navigation and features The projector has multilingual on-screen display (OSD) menus that allow you to make image adjustments and change a variety of settings. To open the OSD menu, press the Menu key on the remote control or projector keypad. buttons to highlight it. -
Page 28: Osd Menu Tree
USING THE PROJECTOR OSD menu tree Main Menu Sub Menu 2 Sub Menu 3 Sub Menu 4 Sub Menu 5 Sub Menu 6 Values Image Picture Mode Presentation Bright [default] Cinema sRGB DICOM SIM. Blending 2D High Speed User Dynamic Range HDR Auto [default] HDR Picture Mode Bright... - Page 29 USING THE PROJECTOR Main Menu Sub Menu 2 Sub Menu 3 Sub Menu 4 Sub Menu 5 Sub Menu 6 Values Image Color Settings Color 0~100 [default: 60] Tint 0~100 [default: 50] Color Temperature Warm Standard [default] Cool Color Wheel Speed 3X [default] White Balance Red Gain...
- Page 30 USING THE PROJECTOR Main Menu Sub Menu 2 Sub Menu 3 Sub Menu 4 Sub Menu 5 Sub Menu 6 Values Image Wall Color Off [default] Blackboard Light Yellow Light Green Light Blue Pink Gray 3D Setup 3D Mode Active 3D [default] 3D Format Auto [default] Frame Packing...
- Page 31 USING THE PROJECTOR Main Menu Sub Menu 2 Sub Menu 3 Sub Menu 4 Sub Menu 5 Sub Menu 6 Values Display Aspect Ratio Auto [default] 16:9 16:10 Native Digital Zoom Proportional Off [default] Horizontal 50%~400% [default: 100] Vertical 50%~400% [default: 100] Horizontal Shift 0~100 [default: 50] Vertical Shift...
- Page 32 USING THE PROJECTOR Main Menu Sub Menu 2 Sub Menu 3 Sub Menu 4 Sub Menu 5 Sub Menu 6 Values Display Geometric Advanced Warp Black Level Area Bottom [default] Correction Enable Off [default] Edit Area Add Point Remove Point Brightness Brightness 0~255 [default: 20]...
- Page 33 USING THE PROJECTOR Main Menu Sub Menu 2 Sub Menu 3 Sub Menu 4 Sub Menu 5 Sub Menu 6 Values Display PIP/PBP Screen Off [default] Main Source HDMI1 HDMI2 HDBaseT Sub Source HDMI1 HDMI2 HDBaseT Swap Swap Size Small [default] Medium Large Location...
- Page 34 USING THE PROJECTOR Main Menu Sub Menu 2 Sub Menu 3 Sub Menu 4 Sub Menu 5 Sub Menu 6 Values Device Language English [default] Setup Deutsch Français Italiano Español Português Polski Nederlands Norsk 繁體中文 簡体中文 日本語 한국어 Русский Magyar ไทย...
- Page 35 USING THE PROJECTOR Main Menu Sub Menu 2 Sub Menu 3 Sub Menu 4 Sub Menu 5 Sub Menu 6 Values Device Schedule Monday / Tuesday Schedule Enable Off [default] Setup / Wednesday / Thursday / Friday / Event 01-08 Time 00:00 ~ 23:59 Saturday / Sunday...
- Page 36 USING THE PROJECTOR Main Menu Sub Menu 2 Sub Menu 3 Sub Menu 4 Sub Menu 5 Sub Menu 6 Values Device Power Settings Power Mode Setup (Standby) Active Communication [default] Signal Power On Off [default] Auto Power Off 0 ~ 180m [default: 0m] Sleep Timer 0 ~ 16h [default: 0h] 12V Trigger...
- Page 37 USING THE PROJECTOR Main Menu Sub Menu 2 Sub Menu 3 Sub Menu 4 Sub Menu 5 Sub Menu 6 Values Device Logo Setup Change Logo Default Logo [default] Setup Neutral User Logo Captured Logo Logo Capture Cancel [default] Delete Logo Captured Logo Cancel [default] User Logo...
- Page 38 USING THE PROJECTOR Main Menu Sub Menu 2 Sub Menu 3 Sub Menu 4 Sub Menu 5 Sub Menu 6 Values Communi- Remote Setup User 1 Freeze Screen [default] cation Blank Screen PIP/PBP Aspect Ratio Information Hide Network setup Projector ID Color Matching Reset Selective Quick Switch Code...
- Page 39 USING THE PROJECTOR Main Menu Sub Menu 2 Sub Menu 3 Sub Menu 4 Sub Menu 5 Sub Menu 6 Values Communi- Email Video Loss Off [default] cation Notification Email Laser Off [default] Email Reset Cancel [default] Control Crestron On [default] IP Address [default: 192.168.0.2] IP ID...
- Page 40 USING THE PROJECTOR Main Menu Sub Menu 2 Sub Menu 3 Sub Menu 4 Sub Menu 5 Sub Menu 6 Values Information Device Regulatory Serial Number Projection Hours System Status Standby Mode Light Source Mode Light Source Hours Total Hours Normal Eco Mode Custom Power...
- Page 41 USING THE PROJECTOR Main Menu Sub Menu 2 Sub Menu 3 Sub Menu 4 Sub Menu 5 Sub Menu 6 Values Information Firmware Main Version Version I-SCALER Version F-MCU Version M-MCU Version A-MCU Version LAN Version Formatter Version HDBaseT Version Camera Version English...
-
Page 42: Image Menu
USING THE PROJECTOR Image menu Learn how to configure image settings. Submenus ‡ Picture Mode ‡ Dynamic Range ‡ Brightness ‡ Contrast ‡ Sharpness ‡ Gamma ‡ Dynamic Contrast ‡ Color Settings ‡ Wall Color ‡ 3D Setup Picture Mode There are many factory presets optimized for various types of images. - Page 43 USING THE PROJECTOR Note: When 3D mode is selected, the Presentation, Bright, Cinema, HDR, sRGB, DICOM SIM., Blending, ‡ and 2D High Speed mode will be unavailable. When 2D High Speed mode is selected, the Presentation, Bright, Cinema, HDR, sRGB, DICOM SIM., ‡...
- Page 44 USING THE PROJECTOR Blackboard Best for projecting on to a blackboard. DICOM SIM. Best for projecting monochrome medical images, such as X-ray diagram. 1.8 / 2.0 / 2.4 / 2.6 For specific PC / Photo source. Note: When Blending mode is selected, only gamma Standard2.2 is supported. Dynamic Contrast Set up the Dynamic Contrast to maximize the contrast for dark content.
- Page 45 USING THE PROJECTOR Red / Green / Blue Gain: Adjust the color of the image’s bright areas. ‡ Red / Green / Blue Offset: Adjust the color of the image’s dark areas. ‡ White Enhancement Adjust the image color brightness while providing more vibrant colors, in increments from 0 to 10. Color Space Select a color space that has been specifically tuned for the input signal.
- Page 46 USING THE PROJECTOR 3D-2D Transform the 3D content to 2D images. 3D: Play the 3D content normally. ‡ L: Play the left images of the 3D content. ‡ R: Play the right image of the 3D content. ‡ 3D Sync Out Set up the transmission of the 3D sync output signal.
-
Page 47: Display Menu
USING THE PROJECTOR Display menu Learn how to configure the settings to properly project images according to your installation circumstances. Submenus ‡ Aspect Ratio ‡ Digital Zoom ‡ Image Shift ‡ Geometric Correction ‡ Edge Mask ‡ Freeze Screen ‡ Test Pattern ‡... - Page 48 USING THE PROJECTOR WUXGA Auto Mapping Rule Input resolution Auto/Scale Auto H-resolution V-resolution 1280 1600 1200 1600 1200 1024 1600 1200 1280 1024 1600 1200 1400 1050 1600 1200 1600 1200 1600 1200 1280 1920 1080 Wide Laptop 1280 1920 1152 1280 1920...
- Page 49 USING THE PROJECTOR Geometric Correction Configure the geometric settings to reshape the image for different projection surfaces. Warp Control Configure the geometric settings to reshape the image for different projection surfaces. Basic: Configure keystone, pincushion, 4-corner settings. ‡ Advanced: Configure grid color, grid background, warp setting, blend setting, and black level. ‡...
- Page 50 USING THE PROJECTOR 4-Corner: Reshape the image by moving the 4 corners of the image to have it fit a specific projection ‡ surface. Advanced Warp Configure advanced warp settings. Note: When Basic or AP of Warp Control is selected, the Advanced Warp will be unavailable. Grid Color: Select a grid color for warp and blend pattern between Green, Magenta, Red, and Cyan.
- Page 51 USING THE PROJECTOR Black Level: When two images overlap, the overlapping area can appear differently from the areas ‡ that do not overlap. You can use the projector’s Black Level setting to make the difference less noticeable. Area: Mark the area that needs adjusting. ±...
- Page 52 USING THE PROJECTOR Swap Swap the main source and sub source. Size Change the display size of the sub source in PIP mode. The available options are Large, Medium, and Small. Location Adjust the location of the sub image. In the layout chart below, the “P” indicates the main image: PBP Layout ‡...
- Page 53 USING THE PROJECTOR Note: PIP/PBP compatibility table as described below. Main Source PIP/PBP HDMI 2.0 HDMI 1.0 HDBaseT v1.4 v1.4 v2.0 — HDMI 2.0 v1.4 — Sub Source v1.4 — — HDMI 1.0 v2.0 — — HDBaseT — Note: a) Flashing lines may occur if the bandwidth of both inputs are too high, please try to reduce the resolution. b) Frame tearing may occur due to a difference in frame rate between the Main and the Sub picture, please try to match the frame rate for each input.
-
Page 54: Input Settings Menu
USING THE PROJECTOR Input Settings menu Learn how to configure the projector input settings. Submenus ‡ Auto Source ‡ Quick Resync ‡ Active Inputs ‡ Latency Adjustment ‡ ‡ HDMI Auto Source When Auto Source is enabled, the projector automatically detects and selects the input signal. Once an input source is selected, press the Input button on the remote control or keypad to switch to other available sources. -
Page 55: Device Setup Menu
USING THE PROJECTOR Device Setup menu Learn how to configure the system settings for the projector. Submenus ‡ Language ‡ Projection ‡ Lens Settings ‡ Schedule ‡ Date and Time ‡ Power Settings ‡ Light Source Settings ‡ Shutter ‡ Audio ‡... - Page 56 USING THE PROJECTOR Note: Process the lens calibration before setup lens shift memory. ‡ Performing a lens calibration will clear the saved lens records. ‡ When the lens calibration is not competed, the lens shift memory will be unavailable. ‡ Lens Calibration Calibrate the lens position to return it to the center.
- Page 57 USING THE PROJECTOR Time Set the time for the projector. Daylight Saving Time Enable or disable the daylight savings function. NTP Server Select a NTP Server for the network clock mode. Time Zone Set a time zone for the network clock mode. Update Interval Set the date and time update interval.
- Page 58 USING THE PROJECTOR Light Source Settings Set up the light source to control the projector brightness. Light Source Mode Select a light source mode depending on the installation requirements. The available options are Normal, Eco Mode, and Custom Power. Custom Brightness When the Light Source Mode is set to Custom Mode, set up the custom brightness level.
- Page 59 USING THE PROJECTOR Note: In the last minute before reaching a specified timer, including Auto Power Off, Sleep Timer, and Security Timer, an on-screen message will pop up warning that the projector shuts down in 60 seconds. Press any button on the remote control or projector keypad to reset the timer and the projector remains on. On Screen Display Set up the on screen display menus.
- Page 60 USING THE PROJECTOR Reset Reset the settings to factory default values. Reset OSD: Reset OSD settings to default values. ‡ Reset to Default: Reset all projector settings to default values. ‡ Reset Selective: Reset the settings of one of the main menus. User can choose from Image, Display, ‡...
-
Page 61: Communication Menu
USING THE PROJECTOR Communication menu Communication menu is used to configure the settings that allow the projector to communicate with other projectors or control devices. Submenus ‡ Projector ID ‡ Remote Setup ‡ Network Setup ‡ Email Notification ‡ Control ‡... - Page 62 USING THE PROJECTOR DHCP Turn on DHCP to automatically acquire IP address, subnet mask, gateway, and DNS. IP Address Assign the projector’s IP address. Subnet Mask Assign the projector’s subnet mask. Gateway Assign the projector’s gateway. Assign the projector’s DNS. Apply Apply the wired network settings.
- Page 63 USING THE PROJECTOR HTTP Control the projector with web browser. (Port: 80) For more information, refer to “Using the web control panel” on page 64. Reset Reset the control functions to default factory values. Projector (Ethernet) Note: Crestron is a registered trademark of Crestron Electronics, Inc. of the United States. ‡...
- Page 64 USING THE PROJECTOR Using the web control panel The web control panel allows the user to configure various projector settings using a web browser from any personal computer or mobile devices. System Requirements To use the web control panel, make sure your devices and software meet the minimum system requirements. ‡...
- Page 65 USING THE PROJECTOR Accessing the web control panel When network is available, connect the projector and the computer to the same network. Use the projector address as the web URL to open the web control panel in a browser. Check the projector address using the OSD menu. On a wired network, select Communication >...
-
Page 66: Info Menu
USING THE PROJECTOR Using RS232 command by Telnet This projector supports using RS232 commands through Telnet connection. Set up a direct connection between the projector and computer. Refer to Directly connect the projector to a computer on page 65. Disable the firewall on the computer. Open the command dialogue on the computer. -
Page 67: Additional Information
ADDITIONAL INFORMATION Compatible Resolutions Digital HDMI 2.0 Established Timing Standard Timing Detail Timing 640 x 480 @ 60Hz 800 x 600 @ 120Hz 640 x 480 @ 60Hz 640 x 480 @ 67Hz 1280 x 768 @ 120Hz 720 x 480 @ 60Hz 640 x 480 @ 72Hz 1280 x 800 @ 75Hz 720 x 576 @ 50Hz... - Page 68 ADDITIONAL INFORMATION HDMI 1.4 Established Timing Standard Timing Detail Timing 640 x 480 @ 60Hz 800 x 600 @ 120Hz 640 x 480 @ 60Hz 640 x 480 @ 67Hz 1280 x 768 @ 120Hz 720 x 480 @ 60Hz 640 x 480 @ 72Hz 1280 x 800 @ 75Hz 720 x 576 @ 50Hz...
- Page 69 ADDITIONAL INFORMATION True 3D video compatibility Input timing 1280 x 720P @ 50Hz Top and Bottom 1280 x 720P @ 60Hz Top and Bottom 1280 x 720P @ 50Hz Frame Packing 1280 x 720P @ 60Hz Frame Packing 1920 x 1080P @ 24Hz Top and Bottom Input Resolutions HDMI 1.4a 3D Input...
-
Page 70: Rs232 Port Setting And Signals Connection
ADDITIONAL INFORMATION RS232 Port Setting and Signals Connection RS232 Port Setting Items Method Communication Method Asynchronous Communication 115200 Baud Rate Data Bits 8 bits Parity None Stop Bits Flow Control None RS232 Signals Connection Computer COM Port Projector COM Port (D-Sub 9-pin connector) (D-Sub 9-pin connector) Note:... -
Page 71: Image Size And Projection Distance
ADDITIONAL INFORMATION Image Size and Projection Distance 1.6x lens model The size of pojected images is 50 ~ 300 inches (1.27 ~ 7.62 m) Screen Size 16:10 (Wx H) Projector Distance Diagonal Length of Width Height Wide Tele Image inch inch inch inch... - Page 72 ADDITIONAL INFORMATION Screen Size 16:10 (Wx H) Projector Distance Diagonal Length of Width Height Wide Tele Image inch inch inch inch inch 20.32 678.4 17.23 424.0 10.77 454.9 11.55 523.4 13.30 22.86 763.2 19.39 477.0 12.12 512.0 13.00 589.0 14.96 1000 25.4 848.0...
-
Page 73: Ceiling Mount Installation
ADDITIONAL INFORMATION Ceiling Mount Installation To prevent damage to your projector, please use the Optoma ceiling mount. If you wish to use a third party ceiling mount kit, please ensure the screws used to attach a mount to the projector meet the following specifications: ‡... -
Page 74: Ir Remote Codes
ADDITIONAL INFORMATION IR remote codes Address Data Repeat Key Legend Description Format Position Byte 1 Byte 2 Byte 3 Byte 4 Press to turn on the projector. ON ( Press to turn off the projector. OFF ( Use as numeric keypad number “1”. Use as numeric keypad number “2”. - Page 75 ADDITIONAL INFORMATION Address Data Repeat Key Legend Description Format Position Byte 1 Byte 2 Byte 3 Byte 4 Use as numeric keypad number “7”. Use as numeric keypad number “8”. Use as numeric keypad number “9”. Press to display source image information. Info ( Use as numeric keypad number “0”.
-
Page 76: Troubleshooting
ADDITIONAL INFORMATION Troubleshooting If you experience a problem with your projector, please refer to the following information. If a problem persists, please contact your local reseller or service center. Image problems No image appears on-screen ‡ Ensure all the cables and power connections are correctly and securely connected as described in the Setup and Installation section. -
Page 77: Led Indicators And Lightning Messages
ADDITIONAL INFORMATION LED Indicators and Lightning Messages Item Temp LED Power LED Light LED Light LED Power LED Temp LED Status Green Standby Steady light Power On Steady light Flashing Warning Up Start (1 sec off / 1 sec on) Flashing Cooling Down Start (0.5 sec off / 0.5 sec... -
Page 78: Specifications
ADDITIONAL INFORMATION Specifications Optical Description Lens type 1.6x 1.15x Fixed Throw ratio 1.25~2.0 0.65~0.75 0.63 Maximum resolution WUXGA WUXGA WUXGA Zoom & focus adjustment Power Power Power Image size (diagonal) 50”~300” 50”~1000” 40”~300” Electrical Description - HDMI 1 v2.0/4K - HDMI 2 v2.0/v1.4a - VGA-IN Inputs - 3D SYNC IN... -
Page 79: Rs232 Protocol Function List
ADDITIONAL INFORMATION RS232 protocol function list Baud Rate : 115200 Data Bits: 8 Parity: None 115200 Stop Bits: 1 None Flow Control : None None UART16550 FIFO: Disable Disable Write Command Projector ID Command Lead Code space variable carriage return Prefix 00~99 0~9999... - Page 80 ADDITIONAL INFORMATION Write Command Read Command Command Command CMD Value Pass Para. Level 1 Level 2 Level 3 Level 4 Level 5 Level 6 n value [None] ~XX123 Presentation ~XX20 ~XX123 Bright ~XX20 ~XX123 Cinema ~XX20 ~XX123 ~XX20 ~XX123 k 21 Picture Mode sRGB ~XX20...
- Page 81 ADDITIONAL INFORMATION Write Command Read Command Command Command CMD Value Pass Para. Level 1 Level 2 Level 3 Level 4 Level 5 Level 6 n value Magenta Saturation 0 ~ 254 ~XX338 0~254 Gain 0 ~ 254 ~XX344 0~254 0 ~ 254 ~XX345 0~254 White...
- Page 82 ADDITIONAL INFORMATION Write Command Read Command Command Command CMD Value Pass Para. Level 1 Level 2 Level 3 Level 4 Level 5 Level 6 n value Green ~XX143 Magenta ~XX143 Grid Color ~XX143 Cyan ~XX143 Black ~XX145 Grid Background Transparent ~XX145 ~XX144 ~XX144...
- Page 83 ADDITIONAL INFORMATION Write Command Read Command Command Command CMD Value Pass Para. Level 1 Level 2 Level 3 Level 4 Level 5 Level 6 n value Small ~XX304 Size Medium ~XX304 Large ~XX304 PBP, Main Left ~XX303 PBP, Main Top ~XX303 PBP, Main Right ~XX303...
- Page 84 ADDITIONAL INFORMATION Write Command Read Command Command Command CMD Value Pass Para. Level 1 Level 2 Level 3 Level 4 Level 5 Level 6 n value Power Settings ~XX471 dhhmmnnaabb Function Input Source ~XX471 dhhmmnnaabb Light Source Mode ~XX471 dhhmmnnaabb Shutter ~XX471 dhhmmnnaabb...
- Page 85 ADDITIONAL INFORMATION Write Command Read Command Command Command CMD Value Pass Para. Level 1 Level 2 Level 3 Level 4 Level 5 Level 6 n value Hourly ~XX483 Update Interval Daily ~XX483 Apply ~XX114 ~XX150 Power Mode(Standby) Active ~XX114 ~XX150 Communication ~XX114 ~XX150...
- Page 86 ~XX159 Fan Status Level Orange/Notice ~XX159 Red/Warning. About to trigger shutdown ~XX159 Device Type Projector ~XX149 Model Name Optoma WUXGA ~XX151 ~XX239 1 ~nnnnnnnn ~XX229 OSD Lock ~XX239 2 ~nnnnnnnn ~XX229 Note: Some commands are not supported, it depends on models.
- Page 87 ADDITIONAL INFORMATION Write Command Read Command Command Command CMD Value Pass Para. Level 1 Level 2 Level 3 Level 4 Level 5 Level 6 n value DAZUKNZT DAZUKNZTST Regulatory Model ~XX151 DAZUBNZT DAZUBNZTST Software Version ~XX122 k nnnnnnn (Software Version) Fan 1 Speed 0000~9999 ~XX351...
-
Page 88: Optoma Global Offices
ADDITIONAL INFORMATION Optoma global offices For service or support, please contact your local office. Taiwan 47697 Westinghouse Drive, 888-289-6786 https://www.optoma.com/tw/ Fremont, CA 94539, USA 510-897-8601 www.optomausa.com services@optoma.com China Room 2001, 20F, Building 4, +86-21-62947376 Canada No. 1398 Kaixuan Road, +86-21-62947375... - Page 89 www.optoma.com...
Need help?
Do you have a question about the ZU920T and is the answer not in the manual?
Questions and answers