Table of Contents
Advertisement
Quick Links
Advertisement
Table of Contents

Related Manuals for Optoma ZU500USTe


Summary of Contents for Optoma ZU500USTe
- Page 1 DLP® Projector User’s Manual...
-
Page 2: Table Of Contents
TABLE OF CONTENTS SAFETY ....................4 Important Safety Instructions ......................4 Cleaning the Lens.........................5 Laser Radiation Safety Information ....................6 Copyright ............................7 Disclaimer .............................7 Trademark Recognition ........................7 FCC ..............................7 Declaration of Conformity for EU countries ..................8 WEEE ............................8 INTRODUCTION ..................9 Product Overview ........................10 Connections.......................... - Page 3 Audio audio settings menu ......................41 Audio mute menu ........................41 Audio mic menu ..........................41 Audio volume menu ........................41 Audio mic volume menu ......................41 Setup projection menu........................42 Setup screen type menu......................42 ......................42 Setup power settings menu ......................43 Setup security menu ........................43 Setup HDMI link settings menu ....................44 Setup test pattern menu ......................44 Setup remote settings menu.......................44 Setup projector ID menu......................45...
-
Page 4: Safety
SAFETY SAFETY Important Safety Instructions • • • • • • • • • – – – – • – – – – – • English... -
Page 5: Cleaning The Lens
SAFETY • • • • • • • • • • • • • • • • Cleaning the Lens • • • • English... -
Page 6: Laser Radiation Safety Information
SAFETY Laser Radiation Safety Information • • • • • • • English... -
Page 7: Copyright
SAFETY Copyright Disclaimer Trademark Recognition ® • • • • Notice: Shielded cables Caution Operation Conditions English... -
Page 8: Declaration Of Conformity For Eu Countries
SAFETY Notice: Canadian users Declaration of Conformity for EU countries • • • WEEE Disposal instructions CAUTION: Warning: English... -
Page 9: Introduction
The remote control is shipped with the battery. • *For European warranty Information, please visit www.optoma.com. Please scan the OPAM warranty QR code or visit the following URL: https://www.optoma.com/us/support/warranty-and-return-policy/ Please scan the Asia-Pacific QR code or visit the following URL: https://www.optoma.com/support/ download English... -
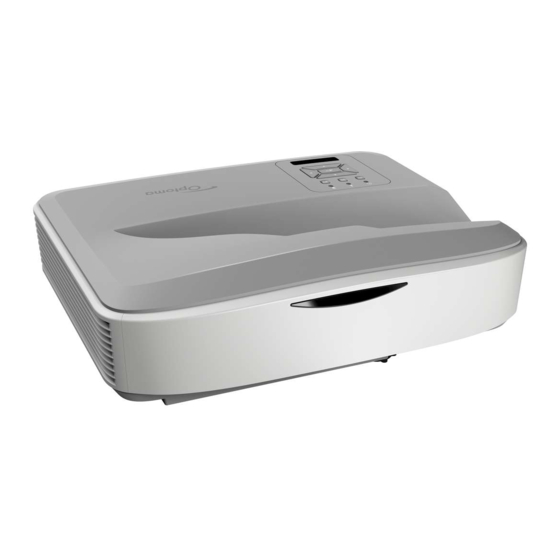
Page 10: Product Overview
INTRODUCTION Product Overview Note: • Do not block projector intake and exhaust vents. • When operating the projector in an enclosed space, allow at least 30 cm clearance around the intake and exhaust vents. English... -
Page 11: Connections
INTRODUCTION Connections English... - Page 12 INTRODUCTION Control Panel English...
-
Page 13: Remote Control
INTRODUCTION Remote Control Geometric Correction PIP/PBP Mode AV Mute ENTER Info. Source Re-Sync Volume D Zoom Menu Format Freeze Remote S-Video HDMI1 HDMI2 HDBaseT Video HDMI3 YPbPr DisplayPort Note: • Some keys may have no function for models that do not support these features. •... -
Page 14: Setup And Installation
SETUP AND INSTALLATION Installing the projector Table mount front Ceiling mount front Table mount rear Ceiling mount rear • • Note: The further away the projector is placed from the screen the projected image size increases and vertical offset also increases proportionally. English... - Page 15 SETUP AND INSTALLATION Projector installation notice Minimum 100mm Minimum 300mm Minimum 300mm (3.94 inches) (11.81 inches) (11.81 inches) Minimum 100mm (3.94 inches) Minimum 100mm Minimum 100mm (3.94 inches) (3.94 inches) • • • Note: • Supports front, ceiling, and downward projection. English...
-
Page 16: Connecting Sources To The Projector
SETUP AND INSTALLATION Connecting sources to the projector English... -
Page 17: Adjusting The Projector Image
SETUP AND INSTALLATION Adjusting the projector image Image height English... -
Page 18: Adjusting The Projector Focus
SETUP AND INSTALLATION Adjusting the projector focus • English... -
Page 19: Remote Setup
SETUP AND INSTALLATION Remote setup Installing / replacing the batteries Note: Replace only with the same or equivalent type batteries. CAUTION • • • • • • English... - Page 20 SETUP AND INSTALLATION Effective range • • • • • • English...
-
Page 21: Using The Projector
USING THE PROJECTOR Powering on / off the projector Geometric Correction PIP/PBP Mode AV Mute ENTER Info. Source Re-Sync Volume D Zoom Menu Format Freeze Remote S-Video HDMI1 HDMI2 HDBaseT Video HDMI3 Powering on Note: The first time the projector is turned on, you will be prompted to select the preferred language, projection orientation, and other settings. -
Page 22: Selecting An Input Source
USING THE PROJECTOR Selecting an input source Info. Source Re-Sync Volume D Zoom Menu Format Freeze Remote S-Video HDMI1 HDMI2 HDBaseT Video HDMI3 YPbPr DisplayPort English... -
Page 23: Menu Navigation And Features
USING THE PROJECTOR Menu navigation and features Menu Enter Enter Enter Menu Display Image Settings Enhanced Gaming Aspect Ratio Edge Mask Zoom Digital Lens Shift Image Shift Select Exit Enter English... -
Page 24: Osd Menu Tree
USING THE PROJECTOR OSD Menu tree Main Sub Menu Sub Menu 2 Sub Menu 3 Sub Menu 4 Values Menu Tint English... - Page 25 USING THE PROJECTOR Main Sub Menu Sub Menu 2 Sub Menu 3 Sub Menu 4 Values Menu English...
- Page 26 USING THE PROJECTOR Main Sub Menu Sub Menu 2 Sub Menu 3 Sub Menu 4 Values Menu English...
- Page 27 USING THE PROJECTOR Main Sub Menu Sub Menu 2 Sub Menu 3 Sub Menu 4 Values Menu English...
- Page 28 USING THE PROJECTOR Main Sub Menu Sub Menu 2 Sub Menu 3 Sub Menu 4 Values Menu White English...
- Page 29 USING THE PROJECTOR Main Sub Menu Sub Menu 2 Sub Menu 3 Sub Menu 4 Values Menu English...
- Page 30 USING THE PROJECTOR Main Sub Menu Sub Menu 2 Sub Menu 3 Sub Menu 4 Values Menu English...
- Page 31 USING THE PROJECTOR Main Sub Menu Sub Menu 2 Sub Menu 3 Sub Menu 4 Values Menu English...
- Page 32 USING THE PROJECTOR Main Sub Menu Sub Menu 2 Sub Menu 3 Sub Menu 4 Values Menu Note: Port 41794 Note: Port 2023 Note: Port 4352 Note: Port 9131 Telnet Note: Port 23 HTTP Note: Port 80 English...
- Page 33 USING THE PROJECTOR Main Sub Menu Sub Menu 2 Sub Menu 3 Sub Menu 4 Values Menu English...
-
Page 34: Display Image Settings Menu
USING THE PROJECTOR Display menu Display image settings menu Display Mode • Presentation • Bright • HDR / HLG Note: When EDID 2.0 is selected, HDMI 1/2 can support HDR / HLG format. • Cinema • sRGB • DICOM SIM. •... - Page 35 USING THE PROJECTOR Contrast Sharpness Color Tint Gamma • Film • Video • Graphics • Standard(2.2) • 1.8 / 2.0 / 2.4 / 2.6 Note: These options are only available if: – the 3D mode function is disabled. – the Wall Color setting is not set to Blackboard. –...
-
Page 36: Display Enhanced Gaming Menu
USING THE PROJECTOR Signal • Automatic • Frequency • Phase • H. Position • V. Position Note: This menu is only available if the input source is RGB/Component. Brightness Mode • DynamicBlack • Eco. • Constant Power • Constant Luminance Reset Display enhanced gaming menu Enhanced Gaming... -
Page 37: Display 3D Menu
USING THE PROJECTOR Display 3D menu Note: • This projector is a 3D ready projector with DLP-Link 3D solution. • Please make sure your 3D glasses are use for DLP-Link 3D before enjoy your video. • • To enable 3D mode, the input frame rate should be set to 60Hz only, lower or higher frame rate is not sup- ported. -
Page 38: Display Aspect Ratio Menu
USING THE PROJECTOR Display aspect ratio menu Aspect Ratio • • 16:9 • 16:10 • • Native • Auto Note: • Detailed informations about LBX mode: – right when displaying image in 16:9 mode. In this situation, please try to use the 4:3 mode to view the –... - Page 39 USING THE PROJECTOR WUXGA auto mapping rule (screen type 16:10): Input resolution Auto/Scale Auto H-resolution V-resolution 1920 1200 WUXGA scaling table (screen type 16:9): 16 : 10 screen 480i/p 576i/p 1080i/p 720p WUXGA auto mapping rule (screen type 16:9): Input resolution Auto/Scale Auto H-resolution...
-
Page 40: Display Edge Mask Menu
USING THE PROJECTOR Display edge mask menu Edge Mask Display zoom menu Zoom Display digital lens shift menu Digital Lens Shift Display image shift menu Image Shift Display geometric correction menu Four Corner Adjustment H Keystone V Keystone Display reset menu Reset English... -
Page 41: Audio Audio Settings Menu
USING THE PROJECTOR Audio menu Audio audio settings menu Audio Settings • Auto • Internal Speaker • Audio Out Audio mute menu Mute • • “Mute” function affects both internal and external speaker volume. Note: Audio mic menu • • Audio volume menu Volume Audio mic volume menu... -
Page 42: Setup Projection Menu
USING THE PROJECTOR Setup menu Setup projection menu Projection Setup screen type menu Screen Type Filter Usage Hours Optional Filter Installed • “Filter Usage Hours / Filter Reminder / Filter Reset” will only appear when “Optional Filter Installed” is Note: “Yes”. -
Page 43: Setup Power Settings Menu
USING THE PROJECTOR Setup power settings menu Direct Power On Signal Power On Note: If the “Signal Power On” option is turned “On”, the power consumption of the projector in standby mode will be over 3W. Auto Power Off (min.) Sleep Timer (min.) •... -
Page 44: Setup Hdmi Link Settings Menu
USING THE PROJECTOR Setup HDMI link settings menu Note: • When you connect HDMI CEC-compatible devices to the projector with HDMI cables, you can control them on the same power on or power off status using the HDMI Link control feature in the projector’s OSD. This lets one device or multiple devices in a group power on or power off via HDMI Link Feature in a typical con- HDMI HDMI... -
Page 45: Setup Projector Id Menu
USING THE PROJECTOR F1/F2/F3 Setup projector ID menu Projector ID Setup options menu Language Menu Settings • Menu Location • Menu Timer Auto Source Input Source Input Name High Altitude Display Mode Lock Keypad Lock Information Hide • • Logo •... - Page 46 USING THE PROJECTOR Note: “Enter” “Power” “Enter” “Power” USB (Type A to B) cable Splash Downloader.exe “Browse” “Flash Image” “Download Complete” Background Color If the background color is set to “None”, then the background color is black. Note: HDMI Settings •...
-
Page 47: Setup Reset Osd Menu
USING THE PROJECTOR Setup reset OSD menu Reset OSD Reset to Default Network menu Network LAN menu Network Status MAC Address DHCP • • Note: Exiting OSD will automatically apply the entered values. IP Address Subnet Mask Gateway How to use web browser to control your projector Note: •... -
Page 48: Network Control Menu
USING THE PROJECTOR Making a direct connection from your computer to the projector* Network and Sharing Center Reset Network control menu Crestron Extron PJ Link AMX Device Discovery Telnet HTTP English... -
Page 49: Setup Network Control Settings Menu
USING THE PROJECTOR Setup network control settings menu LAN_RJ45 function Wired LAN terminal functionalities • • • • ® English... - Page 50 USING THE PROJECTOR LAN RJ45 Start Settings Network & Internet Local Area Connection Property Properties General tab Internet Protocol (TCP / IP) English...
- Page 51 USING THE PROJECTOR – – – – – English...
- Page 52 USING THE PROJECTOR English...
- Page 53 USING THE PROJECTOR RS232 by Telnet Function Quick Start-Guide for “RS232 by Telnet” • • • Start All Programs Accessories Command Prompt – – – English...
-
Page 54: Info Menu
USING THE PROJECTOR – – Note: Please refer to RS232 command protocol list on page 70. Info menu Info menu • • • • • • • • • • • • • • • • English... -
Page 55: Additional Information
ADDITIONAL INFORMATION Compatible resolutions Digital Digital (HDMI 1_2.0) B0 / Established B0 / Standard B0 / Detail Timing B1 / Video Mode B1 / Detail Timing Timing Timing English... - Page 56 ADDITIONAL INFORMATION Digital (HDMI 2_2.0) B0 / Established B0 / Standard B0 / Detail Timing B1 / Video Mode B1 / Detail Timing Timing Timing English...
- Page 57 ADDITIONAL INFORMATION Digital (HDMI 1_1.4) B0 / Established B0 / Standard B0 / Detail Timing B1 / Video Mode B1 / Detail Timing Timing Timing English...
- Page 58 ADDITIONAL INFORMATION Digital (HDMI 2_1.4) B0 / Established B0 / Standard B0 / Detail Timing B1 / Video Mode B1 / Detail Timing Timing Timing Analog Analog B0 / Established B0 / Standard Timing B0 / Detail Timing B1 / Video Mode B1 / Detail Timing Timing English...
- Page 59 ADDITIONAL INFORMATION True 3D video compatibility Input resolutions Note: • If 3D input is 1080p@24Hz, the DMD should replay with integral multiple with 3D mode. • • 1080i@25Hz and 720p@50Hz will run in 100Hz; 1080p@24Hz will run in 144Hz; other 3D timing will run in 120Hz.
-
Page 60: Rs232 Port Setting And Signals Connection
ADDITIONAL INFORMATION RS232 Port Setting and Signals Connection RS232 Port Setting Items Method RS232 Signals Connection Note: RS232 shell is grounded. English... -
Page 61: Adjusting Projection Image Size (Diagonal)
ADDITIONAL INFORMATION Adjusting Projection Image Size (Diagonal) • WUXGA (16:10) Wall mount installation measurement chart Distance Distance Distance from Distance from from top surface of from top Diagonal Diagonal Image Image Offset surface of of image Throw whiteboard of image image size image size Width (W) - Page 62 ADDITIONAL INFORMATION WUXGA (16:10) Table mount installation measurement chart Distance from Distance from surface of bottom of diagonal image diagonal image Image width Image height Trow distance whiteboard image to top size(S) in inch size(S) in mm (W) in mm (H) in mm in mm to back of...
-
Page 63: Projector Dimensions And Ceiling Mount Installation
ADDITIONAL INFORMATION Projector dimensions and ceiling mount installation • • 105.76 128.76 443.74 M4*10 112.5 371.5 TR0.35 Note: Please note that damage resulting from incorrect installation will void the warranty. • • • English... -
Page 64: Ir Remote Codes
ADDITIONAL INFORMATION IR remote codes Geometric Correction PIP/PBP Mode AV Mute ENTER Info. Source Re-Sync Volume D Zoom Menu Format Freeze Remote S-Video HDMI1 HDMI2 HDBaseT Video HDMI3 YPbPr DisplayPort Key code Printing-key BYTE1 BYTE2 BYTE3 BYTE4 Repeat definition customer 0 customer 1 data 0 data 1... - Page 65 ADDITIONAL INFORMATION Key code Printing-key BYTE1 BYTE2 BYTE3 BYTE4 Repeat definition customer 0 customer 1 data 0 data 1 Note: • The remote control will enter sleep mode if no any key press, or more than two keys are pressed at the same time, or one key is pressed for more than 60 seconds.
-
Page 66: Troubleshooting
ADDITIONAL INFORMATION Troubleshooting Image problems No image appears on-screen • • • Image is out of focus • • • • • Image is too small or too large • • Image has slanted sides: • Image is reversed • English... - Page 67 ADDITIONAL INFORMATION Other problems The projector stops responding to all controls • Remote control problems If the remote control does not work • • • • English...
-
Page 68: Warning Indicators
ADDITIONAL INFORMATION Warning indicators • • • LED lightning messages Power LED Temp LED Lamp LED Message (Red) (Blue) (Red) (Red) • Press power key again. • Warning TEMPERATURE TOO HIGH Please: 1. Make sure air in and outlets are not blocked. 2. - Page 69 ADDITIONAL INFORMATION Description Optical Electrical Description • • • • • • • • • • • • Mechanical Description • • Weight Note: All specifications are subject to change without notice. English...
-
Page 70: Rs232 Protocol Function List
ADDITIONAL INFORMATION RS232 protocol function list Note: There is a <CR> after all ASCII commands. 0D is the HEX code for <CR> in ASCII code. English... - Page 71 ADDITIONAL INFORMATION Note: Some commands are not supported, it depends on models. English...
- Page 72 ADDITIONAL INFORMATION Note: Some commands are not supported, it depends on models. English...
- Page 73 ADDITIONAL INFORMATION Note: Some commands are not supported, it depends on models. English...
- Page 74 ADDITIONAL INFORMATION Other Items Remote Control Simulation Note: Some commands are not supported, it depends on models. English...
- Page 75 ADDITIONAL INFORMATION Some commands are not supported, it depends on models. Note: English...
- Page 76 ADDITIONAL INFORMATION Taiwan China Canada Latin America Australia Europe Benelux BV France Spain Deutschland Scandinavia Korea Japan English...
- Page 77 www.optoma.com...
Need help?
Do you have a question about the ZU500USTe and is the answer not in the manual?
Questions and answers