Advertisement
Quick Links
Advertisement

Subscribe to Our Youtube Channel
Related Manuals for Nautilus NS-600


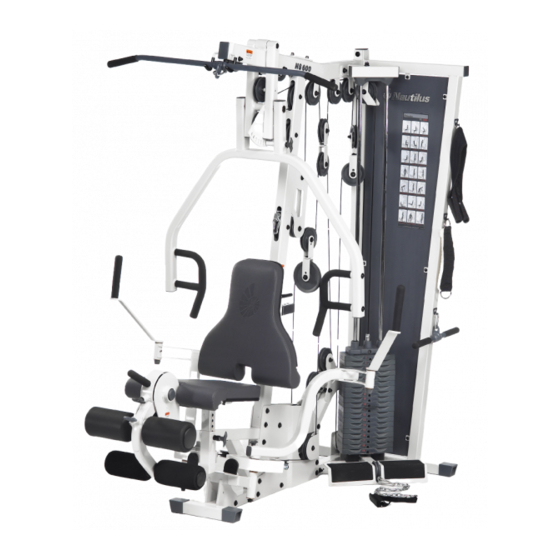
Summary of Contents for Nautilus NS-600
- Page 1 Assembly Instructions NS-600 Rev. B...
- Page 2 Touch Up Paint White 14536 Snap Cap Large 14182 Touch Up Paint Gray 14535 Top Weight Assembly 14679 NS 600 Documentation 14797 Weight Plate 14342 Decal Kit 14789 Weight Stack Bottom Plate 14106 Weight Stack Cushion 14176 Guide Rod 14102 NS-600...
- Page 3 Compare the Bill of Materials to the box contents to insure that all parts are present before installation begins. Unpackage parts and place them near the final assembled location to avoid moving the gym when fully assembled. NS-600...
-
Page 4: Required Tools
Button Head Flat Washer Cap Head Step Spacer Flat Head Self Drilling Cable Clip Required Tools: 9/16” or 14mm Wrench or Socket (Two Required) 3/4” Wrench or Socket Adjustable Wrench 4, 5, 6 and 8mm Allen Wrenches (Included w/ Gym) NS-600... - Page 5 Please allow a minimum of 24” on each side of the gym from the nearest wall or obstruction. The weight stack side of the gym will need a minimum of 48” from any obstruction. If an attachment such as a leg press is used now or in the future, please allow for 48” on the side opposite the weight stack. NS-600...
- Page 6 E. Attach Pulley Mount (6) to Leg Extension Assembly (5) and Rear Frame (2) Hex Bolt 3/8" x 3"L using hardware shown and 2 Inch Backing Plate (10). Tighten all hardware 3/8" Flat Washer used in this step securely. 3/8" Lock Nut NS-600...
- Page 7 NOT wrapped around the cable stop. 3/8" Flat Washer 1/2" Lock Nut F. Attach Calf Raise / Low Pulley (7) to the Main Base and Rear Frame using 3/8" Lock Nut hardware shown. Tighten hardware firmly. NS-600...
- Page 8 1/2" Lock Nut 3/8" Lock Nut F. Install Plastic Cap (42) in the four locations shown. The Plastic Cap (42) should snap into place locking around the Shim Washer (75). NOTE: Rubber Mallet may be needed to install Plastic Cap. NS-600...
- Page 9 Button Head Screw 1"L Threadlock Bar (40). Press the Locking Roller End Cap (37) into the Locking Roller Bar (40). 3/8" Flat Washer Repeat for the opposite side making sure that the Locking Rollers are aligned. Set Screw 5/16" x 1/4"L NS-600...
- Page 10 Back Pad Adjustment Plate (26). Tighten hardware securely making sure the Back 3/8" Flat Washer Pad Adjustment Plate (26) can rotate freely. 1/2" Lock Nut H. Install Back Pad Adjuster (25) in Front Upright in the slot shown. 3/8" Lock Nut NS-600...
- Page 11 D. Slide Guide Rod Holder (32) on the top of the Guide Rods (52) and attach the Guide Rod Holder (32) to the Top Stack Support Frame using the hardware shown. Tighten hardware securely. E. Place Weight Selector Pin (90) in the bottm Weight Plate (49). NS-600...
- Page 12 Proceed by looping the Cable around a 4 1/2" Pulley (44) and attach it to the Top Frame in Location B using the hardware shown. Make sure the cable is seated properly in the Pulleys, and tighten hardware securely. NS-600...
- Page 13 Bracket (30). Continue by routing Cable over the 3 1/2" Pulley in the bracket on the Front Upright and over the 4 1/2" Pulley adjacent to it. F. Re-install the Ball, Washer, and U-Bracket to the end of the cable. Be sure that the rubber o-ring is in its original position. NS-600...
- Page 14 NOTE: Make sure to route Cable through the hole in the Pulley Mount tube. 3/8" Lock Nut Pulley Spacer 1"L NOTE: This Cable termination is used for exercise attachments such as the NS-75. If an attachment is used, do not install Cable Housing (9). Please refer to attachment instructions for installation. NS-600...
- Page 15 Be sure to place the groove in the termination bracket against the cam. Tighten hardware securely. NOTE: If the cable termination does not reach the connection hole on the cam, adjust the Pulleys in the Double Floating Pulley Brackets to increase cable length. NS-600...
-
Page 16: Attach Accessories
The cables may need to be tensioned periodically as they may stretch slightly over time. The assembly of your NS-600 is complete. Should you have any questions or comments regarding your Nautilus gym, please feel free to contact our Customer Service Department. The Nautilus Group... - Page 17 Cap Head Screw 7/16 x 1 1/2"L 14261 Button Head Allen Screw 1/4" x 3/4" 14278 Self Drilling Screw #8 x 5/8"L 14773 Bearing 14271 Hand Grip 6"L 14489 Hand Grip 28 x 190L 14490 Accessory Hook 14772 Nautilus Logo Plate 98780 NS-600...
- Page 18 1/2" Hex Nut 14527 Hex Bolt - 3/8" x 1 1/2"L 14522 Hex Bolt - 3/8" x 3/4"L w/Thread Lock 14525 Spacer 35 x 26 x 2.0t 14432 Spacer 41.5 x 25.6 x 1.1t 14433 4 1/2" Pulley 14185 NS-600...
- Page 19 Leg Extension Cable 62.5"L 14498 6205 Bearing 14508 Button Head Screw 3/8" x 3/4"L w/ TL 14515 Pop Pin - Leg Ext / Swivel Arm 14496 Hex Bolt - 3/8" x 3"L 14245 3/8" Flat Washer 14233 3/8" Lock Nut 14234 NS-600...
Need help?
Do you have a question about the NS-600 and is the answer not in the manual?
Questions and answers