Table of Contents
Advertisement
Quick Links
Advertisement
Table of Contents

Related Manuals for Pyxis LT-635


Summary of Contents for Pyxis LT-635
- Page 1 LT-635 Submersible Self-Cleaning V1.4...
- Page 2 Pyxis Lab, Inc. Standard Limited Warranty Pyxis Lab warrants its products for defects in materials and workmanship. Pyxis Lab will, at its option, repair or replace instrument components that prove to be defective with new or remanufactured components (i.e., equivalent to new).
-
Page 3: Table Of Contents
Table of Contents 1 Introducing the Pyxis LT-635 Sensor ....................3 Features of the Pyxis LT-635 ......................3 Specifications ..........................4 Unpacking the Pyxis LT-635 Series Sensor ..................4 Standard Accessories ........................5 Optional Accessories ........................5 Quick 4-20mA Start ........................6 Installation .......................... -
Page 4: Introducing The Pyxis Lt-635 Sensor
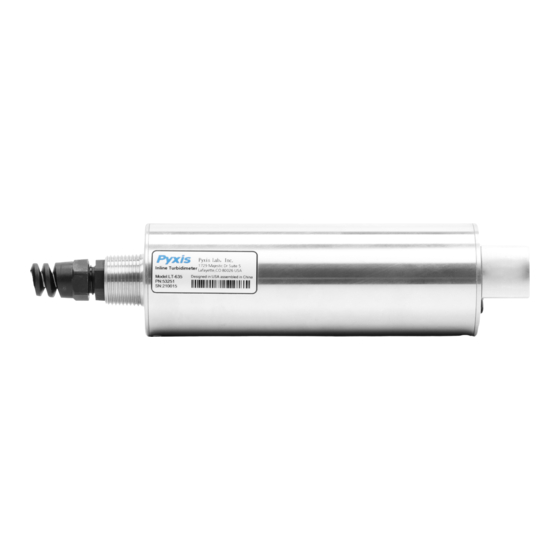
The instrument is virtually maintenance-free, and the self-cleaning capability of the sensor prevents deviations caused by air bubbles and sludge particulate. The LT-635 can be powered by a 24 VDC/6W power supply and offers fully integrated 4-20 mA and RS-485 Modbus output signals for connection to any controller, PLC or DCS network. -
Page 5: Specifications
Remove the instrument and accessories from the shipping container and inspect each item for any damage that may have occurred during shipping. Verify that all items listed on the packing slip are included. If any items are missing or damaged, please contact Pyxis Customer Service at service@pyxis- lab.com... -
Page 6: Standard Accessories
1.4 Standard Accessories The following accessories are included in the LT-635 sensor package (as shown in Error! Reference source not found.): • One LT-635 sensor with bulkhead terminated cable w/8-Pin Female Adapter (33 feet / 10m) • One MA-1.5CR Flying Lead Cable w/8-Pin Male Adapter/Flying Lead (4.9 feet / 1.5m) •... -
Page 7: Quick 4-20Ma Start
2 Quick 4-20mA Start Follow the wiring table below to connect the LT-635 sensor to a controller or PLC. *NOTE* All Pyxis sensors provide a passive 4-20mA output signal, they are NOT LOOP POWERED. 24VDC+ power supply and 4- 20mA+ signal are independent of each other in all Pyxis Lab sensors. -
Page 8: Installation
Figure 2 and 2A. For installation, the MA-120-C bracket should permanently mounted in a fixed position for easy access to the LT-635 sensor and piping. For sensor replacement and maintenance, users only need to lift (vertically/upwards) the sliding block and conduit with the mounted sensor from MA-120-C bracket. - Page 9 This method of installation enables use of the LT-635 in clarifier or thickener sludge bed depth profiling. Users may mark measurement increments on the user provided lifting chain/cable and the LT-635 sensor may be slowly lowered into the clarifier/thickener.
-
Page 10: Calibration And Diagnosis
Be sure to turn on Bluetooth in the mobile device (please do not pair the device Bluetooth to any Pyxis device, the uPyxis APP will do the pairing). Open the uPyxis APP in the mobile device. Finger swipe the screen downward to refresh the screen and scan for the available Pyxis Bluetooth devices. The discovered devices will be listed (see Figure 6). -
Page 11: Calibration By Upyxis Mobile App
Figure 6 Figure 7 Tap the discovered LT-635 series sensor to connect to it via Bluetooth. The uPyxis APP can identify the sensor type if multiple Pyxis sensors are discovered in the scan. As shown in Figure7, when connected via the MA-CR Bluetooth adapter, the uPyxis calibration page will display the current suspended solids concentration value being measured by the LT-635 sensor connected. - Page 12 To continue with the high range calibration after completing Mid- Range calibration, remove and insert the LT-635 sensor into a clean and dry beaker and inject the High Point calibration solution. *NOTE* The high point calibration solution can be process water of the application itself, with a verified Total Suspended Solids (TSS) value in the range of 10,000 to 30,000 mg/L.
-
Page 13: Restore To Factory
Restore To Factory – If user wants to restore the sensor calibration to factory default parameters, as shown in Figure13, click the OK option to confirm. If the restoration is successful, the interface will return a message "Restore Succeed" (Figure 14). Figure 13 Figure 14 service@pyxis-lab.com | +1 (866) 203-8397 Pyxis LT-635 User Manual... -
Page 14: Diagnosis
(tap water or deionized water), in a known Suspended Solids Standard Solution and/or in the sample that the sensor is intended for. This data may be exported from the uPyxis APP via email to service@pyxis-lab.com for technical support. service@pyxis-lab.com | +1 (866) 203-8397 Pyxis LT-635 User Manual... -
Page 15: Cleaning Period Adjustment
4.1.4 Cleaning Period Adjustment Tap Device info in the bottom of the uPyxis APP page to launch the Device info page (Figure 16). You can set the Device Name, Product Name, Modbus Address and Brush Setting for the LT-635 sensor. Press Brush Once to activate the wiper arm manually. -
Page 16: Calibration And Diagnosis By Upyxis Desktop App
Download and install uPyxis Desktop APP on your PC or Laptop from https://upyxis.pyxis-lab.com.cn/release/pc/uPyxis.Setup-latest.zip Connect and power the LT-635 sensor to a display, controller, or PLC. Insert the Pyxis MA-CR Bluetooth adapter (P/N: MA-CR) as shown in the following connection diagram, using the 8-pin adapters on the provided sensor cables. - Page 17 Figure 18 - Connection Options Figure 19 - Select a Comm Port Figure 20 - Connected to a LT-635 sensor and information page service@pyxis-lab.com | +1 (866) 203-8397 Pyxis LT-635 User Manual...
-
Page 18: Calibration
Figure 21 - Calibration Page 4.2.1 Calibration Deionized Water Calibration Process - Remove the LT-635 sensor and rinse it thoroughly with deionized water. Repeat this rinse process three times. Wipe the sensor with a dust-free cloth or paper-towel to confirm that the sensor is free of obvious impurities. Insert the sensor into a beaker. Inject bubble-free deionized water into the beaker and wait for the sensor reading to stabilize. - Page 19 To continue with the high range calibration after completing Mid- Range calibration, remove and insert the LT-635 sensor into a clean and dry beaker and inject the High Point calibration solution. *NOTE* The high point calibration solution can be process water of the application itself, with a verified Total Suspended Solids (TSS) value in the range of 10,000 to 30,000 mg/L.
-
Page 20: Restore To Factory
Restore To Factory – If user wants to restore the sensor calibration to factory default parameters, as shown in Figure 25, click the OK option to confirm. If the restoration is successful, the interface will return a message "Restore Succeed". Figure 25 - Restore to Factory service@pyxis-lab.com | +1 (866) 203-8397 Pyxis LT-635 User Manual... -
Page 21: Diagnosis
Figure 26 - Select Diagnosis Condition 5 Modbus RTU The LT-635 sensor is configured as a Modbus slave device. In addition to the Total Suspended Solids value, other operational parameters, including warning and error messages, are available via a Modbus RTU connection. -
Page 22: Sensor Cleaning And Maintenance
The LT-635 sensor is designed to be easily removed, inspected, and cleaned if required. Aged heavy deposition, especially inorganic deposits such as iron oxide and calcium carbonate, can be removed by submersing and soaking (15 minutes) the LT-635 sensor into the Pyxis Sensor Cleaning Solution Kit available from Pyxis online Estore/Catalog https://www.pyxis-lab.com/product/inline-sensor-... -
Page 23: Sensor Wiper Replacement Instructions
Figure 28 -Set wiper arm to horizontal position Figure 29 - Take out the M2 screw that fixes the nut Figure 30 -Remove the nut Figure 31 Remove the old wiper arm assembly service@pyxis-lab.com | +1 (866) 203-8397 Pyxis LT-635 User Manual... -
Page 24: Contact Us
Figure 33 - Install the new nut on the sensor Figure 34 -Install the new M2 screw into the nut 8 Contact Us Contact us if you have questions about the use or maintenance of the LT-635 sensors: Pyxis Lab, Inc. 1729 Majestic Dr. Suite 5...
Need help?
Do you have a question about the LT-635 and is the answer not in the manual?
Questions and answers