
Related Manuals for DigiTech digiGate


Summary of Contents for DigiTech digiGate
- Page 1 User Manual English V1.5 This guide is for the digiGate control system and should be read extensively before installation and usage of the digiGate system. Please feel free to print this document.
- Page 2 IMPORTANT Read the following to prevent injury or death from using digiGate. 1. You should ONLY operate digiGate when you have clear vision of the automated device you are controlling (Electric Gates, Garage door etc.). 2. digiGate should ONLY be controlled by adults and NOT children.
-
Page 3: Table Of Contents
Table of contents In the box .......................... 5 Technical specification ..................... 6 digiGate system ........................ 7 How it works ........................8 Switch cables ......................8 Electric Gate System ....................8 Electric Garage System ..................... 8 4.3.1 Single Garage ....................8 4.3.2... - Page 4 9.1.1 Connecting to garage controllerS directly ............22 9.1.2 Connecting to push buttons ................23 10 Mounting your digiGate ....................24 11 Network connections ..................... 25 11.1 Ethernet (RJ45) ....................... 25 11.2 WiFi connection ...................... 25 12 GSM Call-To-Open Module ..................... 26 13 digiGate Mobile App .......................
-
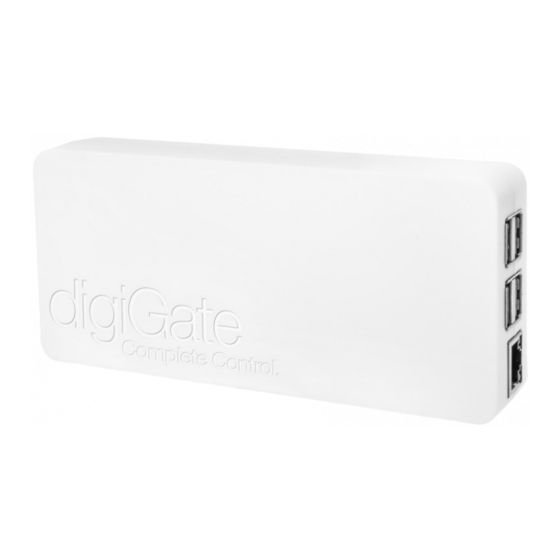
Page 5: In The Box
1 IN THE BOX Standard Components 1 x digiGate control unit 1 x Power supply option Garage systems come with mains plug as standard. 1 x mounting bracket 1 x Standard USB WiFi antenna Standard WiFi antenna can be upgraded to long range waterproof antenna when ordering. -
Page 6: Technical Specification
2 TECHNICAL SPECIFICATION digiGate control unit 15cm 3.3cm Power supply Weight Input: 5v via plug or POE splitter 180g Outputs Gate system: 1 output (NO + COM) Gate system with pedestrian control: 2 outputs (NO + COM x 2) Single Garage system (1 button): 1 output (NO + COM) -
Page 7: Digigate System
The other end connects to your 3 & 4 - unused router, network switch or ethernet-over- 5 - (NC) Normal Closed power device to connect your digiGate to the internet. Output 2 6 - (NO) Normally Open 7 - (COM) Common... -
Page 8: How It Works
4.2 ELECTRIC GATE SYSTEM Your electric gate system will have a control unit which is a circuit board where digiGate connects. This control unit will either be positioned at the gate itself in a waterproof enclosure (most common) or in a nearby building. -
Page 9: Single Garage (2 Buttons)
You will also most likely have a push button which connects to each control unit and controls the doors simultaneously. digiGate has 1 output for each door and connects via 2 switch cables of any length to either the motor, control unit or push button for the respective door. -
Page 10: Located Outside Near Control Unit
Connect digiGate to control board using switch cables by following the steps at section 5.3. 5.2.2 LOCATED INSIDE NEAR SWITCH/PUSH BUTTON If you are installing your digiGate inside a watertight location, you do not need to use a waterproof enclosure. Step 1:... -
Page 11: Switch Cabling
Ensure the cable is stripped with the metal inside exposed and insert the end into the terminal point. Once inside, ensuring no metal from the cable is exposed on the outside of the digiGate, tighten the screw so the cable sits firmly in place without falling out. Instructions continue on the next page... -
Page 12: Connecting Power
Switch on the power to the socket. Your digiGate will boot up. 5.4.2 HARDWIRE KIT (110-240V) Note: The digiGate hardwire kit is not waterproof and should be installed in an IP rated waterproof enclosure. Step 1: Unscrew socket lid Using a screwdriver, unscrew the back lid from the socket to reveal the screw terminal points inside for Live, Neutral and Earth. - Page 13 Mains feed can be 110-240v. Step 4: Insert plug and power on Insert the supplied mains plug into the fully wired socket. Plug the micro-USB connection from the plug into the digiGate. Switch all power on. Your digiGate will boot up. digiGate.co.uk...
-
Page 14: Poe Splitter
6 ELECTRIC GATE INSTALLATION Note: It is recommended that digiGate is installed by a qualified electrician to avoid any incorrect wiring, potentially resulting in malfunction and/or injury. Damaged products due to incorrect installation without following this guide will result in a void warranty. -
Page 15: Connecting Directly To Gate Control Unit
Connect a second switch cable to the COM (earth/ground/negative) terminal on the gate control unit with the other end into digiGate terminal 2. Note: Terminal number 5 on the digiGate is a NC (Normally Closed) contact if required. This terminal is used to open a contact when the internal relay triggers. -
Page 16: Connecting To Override Switch/Push Button
Locate the two terminals connected to the reverse of the open gate button. Connect a switch cable to each of these terminals from digiGate terminals 1 & 2 as shown in the diagram below. It does not matter which cable connects to which terminal as long as they are not both connected to the same. -
Page 17: Single Garage Installation (1 Button)
Note: These are generic instructions and your Garage controller may differ. If you have trouble installing, please contact us at info@digiGate.co.uk with a photo and make/model number of your garage switch and we will get back to you with instructions on how to install your digiGate to your specific device. -
Page 18: Connecting To Push Button
Locate the two terminals connected to the reverse of the garage button. Connect cable 1 and 2 from the digiGate to these as shown in the diagram below. It does not matter which cable connects to which terminal as long as they are not both connected to the same. -
Page 19: Single Garage Installation (2 Buttons)
Note: These are generic instructions and your garage controller may differ. If you have trouble installing, please contact us at info@digiGate.co.uk with a photo and make/model number of your garage switch and we will get back to you with instructions on how to install your digiGate to your specific device. -
Page 20: Connecting To Push Buttons
Locate the NO (Normally Open) and earth/ground (Negative) terminals for both Open and Close on the unit, this is where the digiGate cables will connect to. If you have an override switch, the cables from this will most likely already be plugged into these terminals. -
Page 21: Double Garage Installation
5.4. 9 DOUBLE GARAGE INSTALLATION This section explains how to install your digiGate system to a pair of garage doors which are each individually operated by 1 push button each (1 button both opens and closes the door). -
Page 22: Double Garage Pre-Requisites
Note: These are generic instructions and your Garage controller may differ. If you have trouble installing, please contact us at info@digiGate.co.uk with a photo and make/model number of your garage switch and we will get back to you with instructions on how to install your digiGate to your specific device. -
Page 23: Connecting To Push Buttons
The following steps outline connecting digiGate to a push button switch for door number 1. Connecting to door 2 is the same except with terminals 6 & 7 on digiGate instead of 1 & 2. Step 1: Safely remove the front of the push button switch. -
Page 24: Mounting Your Digigate
Perform the same on the second switch which controls door number 2. The terminals used for this are 6 & 7 on the digiGate. Polarity between the pairs does not matter as long as they are not both connected to the same. -
Page 25: Network Connections
11 NETWORK CONNECTIONS Note: All digiGate systems are shipped on DHCP. Port 8080 will need to be unblocked from your firewall if the connection is being blocked. 11.1 ETHERNET (RJ45) IMPORTANT – Test the Ethernet connection with another device like a laptop before connecting to digiGate to ensure the connection is functioning and stable. -
Page 26: Gsm Call-To-Open Module
Step 2: Download the digiGate app on your phone and go to add new device, then first time setup with WiFi. Step 3: Switch on the digiGate power. After approximately 1 min you will be able to scan for WiFi on your phone and find one called ‘digiGate’. Connect to this using password ‘digiGate’... -
Page 27: Digigate Mobile App
For Android, open the Google Play Store and search ‘digiGate’. 14 DIGIGATE WEB PORTAL Your digiGate system comes with a unique connect code which is a URL used to access the web portal and setup the mobile app. To access your web portal, enter the full connect code into a web browser address bar. -
Page 28: Factory Reset Digigate
A factory reset is performed via the mobile app. If the unit isn’t online, you will need to boot it up, connect to its onboard WiFi hotspot called ‘digiGate’ and use the app while connected. An account is required on the system and your phone before you can factory reset a digiGate unit.
Need help?
Do you have a question about the digiGate and is the answer not in the manual?
Questions and answers