Table of Contents

Related Manuals for SEI Waypoint HO731300TX


Summary of Contents for SEI Waypoint HO731300TX
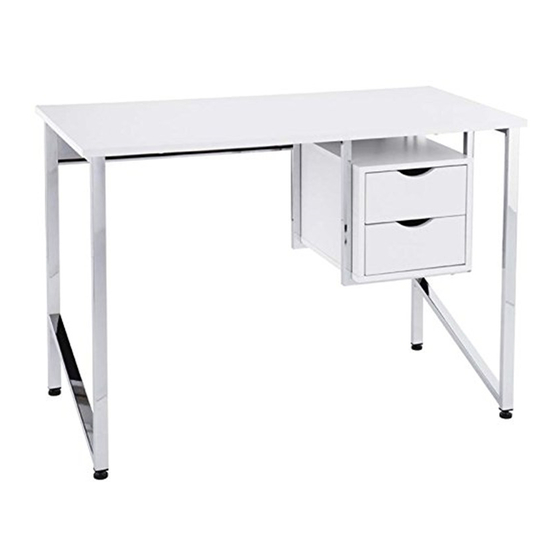
- Page 1 HO731300TX Waypoint Writing Desk For assistance with assembly, contact. Assembly Instructions Southern Enterprises Inc. Customer Service 1-800-633-5096 service@seidal.com www.seifurniturestore.com PO: 13876 Top supports up to 50 lb. Per drawer supports up to 10 lb.
- Page 2 HO731300TX Waypoint Writing Desk Parts List Please review all parts and hardware before disposing of any packaging. Call SEI Customer Service if missing any hardware. Carefully study the diagrams below. You may receive extra hardware with your unit. 2PCS 2PCS...
- Page 3 Allen Wrench Care and Cleaning Instructions: For replacement parts or questions, please Before using, wipe with a clean, dry cloth. call SEI customer service at 1-800-633-5096. Avoid rubbing or scratching the surface with rough or abrasive objects. Assembly Tool Required...
- Page 4 HO731300TX Waypoint Writing Desk Assembly Instructions Step 1: Drawer Assembly Attach Drawer Side Boards (11) to Drawer Back Boards (13) using Screws (I). Insert Drawer Bottom Board (14) along the grooves of Drawer Side Boards (11). Attach Drawer Front Boards (12) to Drawer Side Boards (11) using Screws (I).
- Page 5 Cabinet Assembly Step 2: Attach Cam Bolts and Wood Dowels with Glue to Cabinet Top Board (7). Attach Left Cabinet Side Board Right Cabinet Side Board Cabinet Back Board using Wood Dowels (D). Attach Left Cabinet Side Board (5), Right Cabinet Side Board (6), and Cabinet Back Board to Cabinet Bottom Board...
- Page 6 Step 3: Attach Support Frames to Side Frames using Bolts (E). Attach Back Panel to Side Frames using Bolts (G). Attach Levelers to the bottom of Side Frames (1). Figure 3 Step 4: Attach Top Board (4) to Support Frames (2) using Bolts (F). Figure 4 Step 5: Place the assembled cabinet into...
- Page 7 Parts Replacement Form Customer Information Name Address City/State/Zip Code Phone Number Please indicate where you purchased this item: Store/Website/Catalog Please indicate color/size/style number: Style No Parts Letter Parts Description Quantity Needed Please immediately examine this product carefully. Any request for missing parts or damage replacement must be received within 90 days of your receipt of the product.
Need help?
Do you have a question about the Waypoint HO731300TX and is the answer not in the manual?
Questions and answers